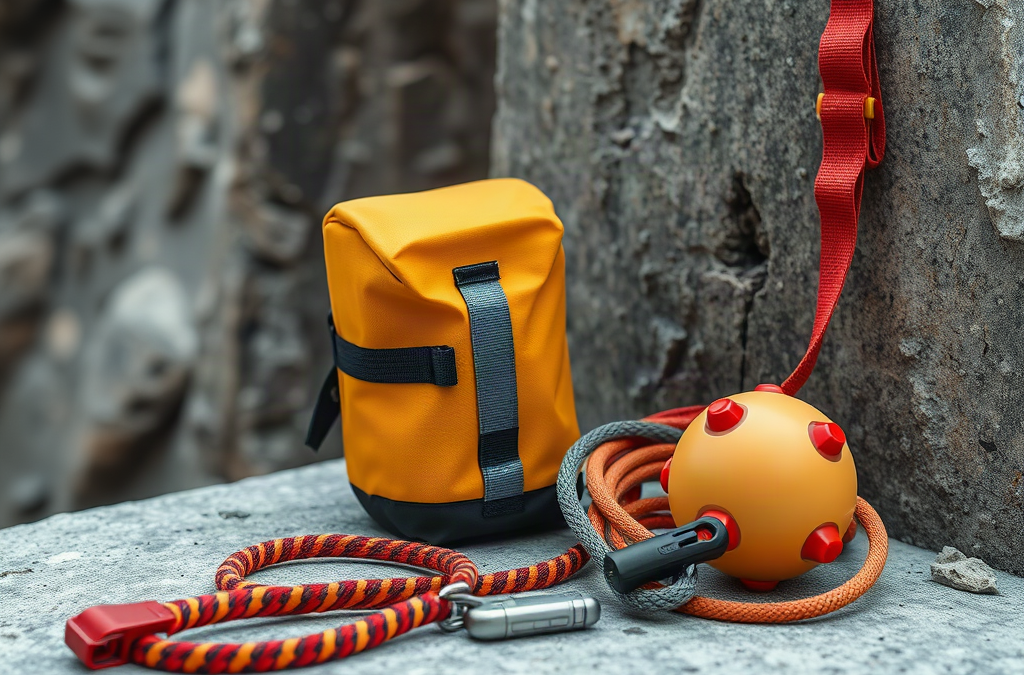
A credible emergency rappel kit is a complete life-safety system rather than a bag of climbing hardware. Its contents must address body support, descent control, attachment, anchoring, head protection, rope management, edge hazards, inspection, and the possibility of a failed or interrupted descent. The exact configuration depends on the location, anticipated load, rope type, route, user competence, and applicable occupational or rescue requirements.
The central components commonly include a purpose-rated harness, an appropriate rope, a descender approved for that rope, compatible locking connectors, anchor materials, a helmet, gloves, and edge protection. A secondary control or backup may be appropriate, but only when the chosen device, rope, and operating method permit it. A poorly configured backup can interfere with the descender, prevent needed movement, or create false confidence. Manufacturers’ instructions and qualified instruction should determine the arrangement.
Small supporting items can decide whether the main equipment remains usable. A rope bag limits contamination and tangling. A light allows inspection of anchors and connectors in poor visibility. A cutting tool may have a role in trained rescue operations, but carrying one near a loaded rope introduces its own hazard. Communication equipment should suit the environment; a phone may be inadequate in a noisy industrial space, remote canyon, or damaged building.
A compact kit creates a genuine tradeoff. Reducing bulk may make the kit easier to store and carry, yet removing edge protection, a helmet, or anchor options can leave the user unable to manage the actual route. Conversely, adding unfamiliar devices increases complexity and the chance of incorrect rigging under stress. Equipment should have a defined function, known operating method, and documented compatibility with the rest of the system.
A practical inventory review should confirm the following:
Life-safety rating: Each load-bearing item is intended for the anticipated application rather than for cargo, decoration, or general utility.
System fit: Rope diameter, connector shape, descender specifications, harness attachment points, and anchor components work together.
Environmental suitability: The materials can be protected from sharp edges, heat, chemicals, water, grit, and other site hazards.
Operational readiness: Instructions, inspection records, communication tools, and necessary protective equipment are present.
The common failure is selecting recognizable gear without defining the descent environment. A kit intended for a planned evacuation from a known structure differs from equipment for technical rope rescue or recreational canyon travel. Before buying components, identify who may use them, where the anchor will be, how the rope reaches the ground, what can damage it, and how a stranded person would be recovered.
How Does Equipment Compatibility Affect Safety?
Compatibility determines whether separately rated components behave safely when loaded together. Ratings alone do not establish that a rope will feed correctly through a descender, a connector will remain aligned, or an anchor sling will tolerate contact with a particular surface. The assembled system must match each component manufacturer’s permitted uses, limitations, and loading orientation.
Rope diameter is an immediate example. A descender designed for a stated rope range may provide inadequate friction on a thinner rope or feed poorly on a thicker, swollen, dirty, or icy rope. Rope construction matters as well: static or low-stretch rope, dynamic rope, and specialized escape line do not produce identical handling or elongation. Substituting whatever rope is available can change stopping distance, heat generation, and control.
Connectors present another subtle risk. A carabiner may be strong along its major axis but vulnerable when cross-loaded, pressed against an edge, or forced open by another component. A connector that is technically large enough may still interact badly with a descender or harness attachment point. Gates should close and lock without obstruction, and every connection should remain correctly oriented throughout the expected movement—not only while the system lies neatly on the floor.
Anchors require system-level judgment. A structural feature that appears substantial may have unknown construction, hidden corrosion, sharp edges, or a loading direction it was never intended to resist. Portable anchor hardware does not make an unverified attachment point safe. Assessment of structural anchors may require a competent person with site-specific knowledge, particularly in workplaces, damaged buildings, or rescue operations.
Environmental exposure can create incompatibility after the kit has been assembled. Petroleum products, cleaners, battery chemicals, paint, excessive heat, ultraviolet exposure, and fine grit may affect textiles or operating surfaces. Rope running over an unprotected parapet can suffer sheath damage even when the rope and descender are otherwise matched. Edge rollers, pads, or other appropriate protection must stay positioned under load and should not be treated as a substitute for route selection.
A useful compatibility check follows the load path: anchor, anchor connector, rope or line, descender and backup, harness connection, and user. At each transition, verify permitted materials, dimensions, orientation, movement, and foreseeable contact points. The system should then be evaluated in a controlled, supervised setting. If braking is inconsistent, connectors rotate into poor positions, the backup fails to engage predictably, or the rope approaches an edge, use should stop until the configuration is corrected.
Inspection, Storage, and Retirement Requirements
Inspection must occur before use and after any event that could have damaged the kit. Periodic documented examination may also be required by the manufacturer, organization, employer, or governing authority. The inspection schedule should follow the strictest applicable instruction rather than an invented universal interval, because materials, use frequency, environmental exposure, and regulatory context vary.
For textiles, check the full accessible length and surface. Rope should be examined by sight and touch for cuts, glazing, flat areas, stiffness, soft spots, sheath slippage, contamination, and unusual changes in diameter. Harness webbing and anchor slings require attention at stitching, buckles, attachment points, and areas hidden by labels or protectors. Discoloration alone may not prove chemical damage, but unexplained contamination is a reason to quarantine an item until its status can be resolved.
Metal components need more than a quick glance. Connectors should be inspected for cracks, deformation, corrosion, sharp burrs, gate alignment, and reliable locking action. Descenders and pulleys may develop wear grooves or damaged moving parts that alter rope handling. Lubrication should never be improvised because an unsuitable product may migrate onto textile equipment or attract grit. Cleaning and maintenance should follow the product instructions.
Post-use inspection is especially important after a hard loading, uncontrolled descent, significant heat exposure, impact, or contact with a sharp edge. Damage is not always visible, and an item involved in a severe event may need manufacturer evaluation or retirement. Equipment with an unknown history should not be returned to service merely because it looks clean. Missing labels, unreadable identification, or absent records can make it impossible to confirm model, age, or inspection status.
Storage should keep the kit dry, ventilated, secured, and separated from chemicals, direct sunlight, pests, abrasive tools, and extreme temperatures. A sealed vehicle compartment may be convenient for deployment but can expose equipment to heat, moisture, fuel vapors, and unnoticed crushing. After wet use, appropriate drying is generally preferable to packing damp textiles, but heating devices or direct high heat may cause damage. Follow the maker’s drying directions.
A simple readiness record should identify each critical component, its model or unique marking, acquisition or first-use information when available, inspection history, unusual incidents, and retirement decision. Service-life limits are product-specific; usage, damage, contamination, or unknown history may require earlier removal. Cutting or clearly marking retired textile gear helps prevent accidental reuse. Signs the inspection program is failing include unrecorded component swaps, mixed equipment with no compatibility review, unreadable labels, overdue examinations, and a packed kit nobody is authorized to release for service.
Why Training, Anchors, and Rescue Planning Matter
Possessing a rappel kit does not establish the ability to use it safely during an emergency. Stress, smoke, darkness, gloves, noise, injury, and time pressure can disrupt tasks that seemed simple during casual practice. Competence requires supervised instruction on the actual equipment, followed by realistic practice in conditions that preserve safety while reflecting the intended deployment.
Training should cover harness fit, connector checks, anchor access, rope deployment, descent control, edge transitions, backup operation, communication, and stopping during a problem. The edge transition often deserves special attention because the user may need to move from a stable surface into a loaded position while keeping the rope protected and connectors aligned. Practicing only a straightforward descent from a comfortable platform leaves this critical movement untested.
Anchors and route planning should be established before an emergency whenever possible. Consider a workplace that stores a descent kit near an elevated room but has never designated a load-capable attachment point. During an evacuation, occupants may choose a railing, pipe, or furniture based on appearance. The kit cannot compensate for that uncertainty. A planned installation should have appropriately evaluated anchors, a clear route, controlled access, protected edges, and enough rope for the intended termination point without relying on guesses.
A rescue plan must address suspension, entanglement, jammed equipment, an injured user, a line that does not reach the intended landing area, and conditions below the descent path. Calling emergency services can be part of the plan, but it should not be assumed that responders can immediately reach or lower someone already hanging on the system. Technical rescue should be performed by capable personnel using methods and equipment appropriate to the incident.
Solo ownership is not the same as operational readiness. A recreational climber with substantial experience may understand descent devices yet lack knowledge of a building’s anchors or workplace rules. An employee familiar with an evacuation route may never have managed a rope system. Specialized escape devices can simplify certain actions, but they do not remove the need to understand their limitations, inspect them, and rehearse the designated procedure.
Practice should begin in a controlled environment close to the ground, with independent safeguards and qualified supervision. Higher or more complex scenarios should be introduced only when the required skills are demonstrated consistently. Warning signs include skipped partner checks, uncontrolled speed, repeated connector misalignment, confusion over braking technique, inability to stop and hold position, or uncertainty about the backup. Those are reasons to pause deployment and obtain further instruction—not problems to solve for the first time during an evacuation.
Frequently Asked Questions
Can a preassembled rappel kit be used without training?
No preassembled kit should be assumed safe for an untrained user. Correct use still depends on harness fit, anchor selection, rope routing, braking technique, edge management, equipment checks, and a response to foreseeable malfunctions.
How often should an emergency rappel kit be inspected?
Inspect it before use, after use, and after suspected damage or adverse exposure. Any periodic examination schedule should follow manufacturer instructions and applicable organizational or regulatory requirements rather than a universal interval.
Can climbing gear from different brands be combined?
Brand mixing is not automatically safe or unsafe. Confirm that every manufacturer permits the intended combination, including rope diameter, connector geometry, loading direction, device function, and environmental conditions.
Is a fire-escape rope the same as a technical rappel rope?
Not necessarily. Escape lines and technical ropes may differ in construction, diameter, elongation, heat resistance, intended devices, and permitted uses. Treat the product documentation as controlling and do not substitute one based on appearance.
When should rappel equipment be retired?
Remove equipment when it reaches the manufacturer’s limit, fails inspection, has unknown history, suffers a serious loading or damaging exposure, or cannot be positively identified. If its condition is uncertain, quarantine it pending qualified evaluation.
Further Reading
Authoritative Sources
American Red Cross Emergency Preparedness redcross.org
Practical emergency preparation, safety, and supply guidance for households
Conclusion
A dependable rappel kit begins with a defined use case: a known user, route, anchor, descent distance, environment, and recovery method. Select life-safety components as an integrated system, verify the permitted rope and device combinations, and protect textiles from edges, heat, chemicals, moisture, and unknown storage conditions. Inspection records and clear retirement decisions are as necessary as the hardware itself.
The next step should be a site-specific review with a qualified rope-access, climbing, rescue, or occupational-safety professional appropriate to the intended setting. Confirm anchors and applicable requirements, document the equipment configuration, then practice under controlled conditions with independent safeguards. If users cannot complete checks, control the descent, manage the edge, or respond to a stopped or injured person consistently, the kit is not ready for emergency deployment.
A useful response reference covers the hazards its owner is reasonably likely to face and separates immediate protective actions from later recovery tasks. A household near wildfire-prone land may need evacuation, smoke, utility shutoff, communications, and animal-handling material. A coastal household may place greater weight on storm warnings, shelter decisions, flooding, sanitation, and prolonged outages. Broad coverage has little value if the relevant procedure is buried beneath unrelated material.
Look for instructions organized around recognizable situations rather than long chapters that assume uninterrupted reading. During a stressful event, a user may need to find a gas-leak warning, severe-bleeding response, or shelter-in-place procedure within seconds. Strong organization uses a detailed index, descriptive tabs, cross-references, clear warning language, and action sequences that distinguish urgent steps from optional preparation. Illustrations should clarify a physical task rather than decorate the page.
Scope also determines whether one volume is enough. A general disaster handbook can address warning reception, evacuation choices, family communication, water, sanitation, and short-term shelter. It is unlikely to provide enough depth for advanced first aid, hazardous-material operations, technical rescue, or incident command. Those subjects involve training, equipment, and role-specific procedures that should not be reduced to a consumer reference. A better library may pair one general manual with a recognized first-aid book and locally issued hazard information.
Use a compact content check before comparing design or price:
Likely hazards: Does the book address local weather, geological, fire, infrastructure, and public-safety threats?
Immediate decisions: Can readers distinguish evacuation, sheltering, isolation, and emergency-call triggers?
Basic needs: Are communications, water, sanitation, lighting, food safety, medications, and power loss covered?
Household realities: Does it account for children, older adults, disabilities, pets, or language needs relevant to the users?
A common mistake is choosing the book with the greatest page count. More pages can provide depth, but they also create retrieval friction and may blend preparedness projects with time-critical instructions. Prioritize the material that must be found quickly, then treat comprehensive background reading as a separate function. A book is working when an unfamiliar reader can identify the correct section and its limits without already knowing the terminology.
How Do You Evaluate Authority and Accuracy?
Authority comes from traceable authorship, appropriate subject competence, transparent sources, and alignment with current official guidance—not from an alarming title or a long equipment list. Examine the title page, copyright page, contributor biographies, revision notes, and bibliography. Identify who wrote the medical, fire, weather, communications, or public-health material and whether the publisher explains how technical content was reviewed.
Publication date matters most where recommendations, warning systems, communication methods, or terminology can change. A recent date alone does not prove quality, while an older book is not automatically useless. Stable concepts such as keeping exits accessible may remain sound, but outdated phone assumptions, obsolete alert channels, superseded first-aid practices, and old agency instructions can create dangerous confusion. Check the edition date and then compare several high-consequence sections with current material from relevant authorities.
For example, suppose a manual tells readers how to respond to a weather warning but uses terminology that differs from the current National Weather Service descriptions. Even if the physical safety advice seems plausible, the mismatch could affect when someone acts. Likewise, medical instructions should clearly state their intended level, identify situations requiring emergency services, and avoid presenting a book as a substitute for hands-on training or professional care.
Evaluate claims selectively rather than attempting to audit every sentence. Start with topics where an error would have the greatest consequence: evacuation timing, carbon monoxide, fire, severe bleeding, poisoning, electrical hazards, contaminated water, and medication continuity. Compare those pages with current government agencies, recognized emergency organizations, local emergency management offices, or the instructions issued by the relevant equipment manufacturer. Local authorities remain the proper source for evacuation zones, shelter locations, alert enrollment, and community-specific procedures.
Weak references often reveal themselves through missing dates, anonymous authorship, absolute promises, improvised medical remedies, or advice that ignores professional help. Another warning sign is a single procedure presented as correct for every building, climate, or household. Credible books explain boundaries: when to leave, when not to enter, when a task requires training, and when local instructions override general text. The goal is not to find a flawless volume; it is to avoid relying on untraceable guidance where mistakes carry serious consequences.
Which Format Fits the Use Location?
Format should follow the book’s assigned location and the conditions under which it will be opened. A home reference can be larger, more detailed, and stored near household plans and supplies. An evacuation-bag handbook needs lower weight, compact dimensions, durable binding, and legible pages. A workplace copy may need content aligned with the site’s emergency action procedures, responsible roles, building systems, and applicable organizational requirements.
Printed books remain available through power failures, network congestion, dead batteries, and device damage. Their limitations include weight, slower updating, poor low-light visibility, and physical vulnerability to water or fire. Digital books are searchable, portable, and easier to update, but access depends on a charged working device and a file that has actually been downloaded. A web bookmark is not an offline reference. Where practical, use print for essential field access and a locally stored digital copy for search and duplication.
Construction quality deserves closer inspection than cover design. A glued pocket book may be light but difficult to hold open during a task. Spiral binding can lie flat, although exposed coils may snag or deform. Waterproof or water-resistant pages suit vehicles, boats, field kits, and damp storage, but often cost more and provide less room for detailed discussion. Standard paper is reasonable for a protected home shelf if the book is kept in a labeled, moisture-resistant container.
Use Location
Useful Format
Primary Tradeoff
Home command area
Detailed print manual with tabs
More depth, less portability
Evacuation bag
Compact, durable handbook
Fast access, limited explanation
Vehicle
Weather-protected quick reference
Heat and moisture can damage materials
Phone or tablet
Downloaded, searchable file
Dependent on device power and access
Workplace station
Site-specific binder plus reference
Requires controlled updates
Legibility is a safety feature. Inspect font size, contrast, diagram labels, page density, and whether color is required to understand warnings. A highly compressed pocket guide may fail readers with limited vision or in dim conditions. A digital edition should permit useful zooming and straightforward navigation without forcing repeated logins.
The usual failure is buying one attractive book and assigning it to every context. Instead, decide who will use each copy, where it will live, and what problem it must solve. Label storage locations and protect the copies from their expected environment. Success means the reference is present, readable, and navigable when normal infrastructure is unavailable.
How Should You Test a Book Before Relying on It?
A timed retrieval exercise exposes weaknesses that casual reading misses. Give a household member a realistic prompt without telling them the chapter name: the power is out and a carbon monoxide alarm sounds; officials issue an evacuation notice; tap water may be unsafe; or someone has a serious injury. Ask the person to locate the applicable page, identify the first action, find the point at which professional help is needed, and explain any warning that changes the response.
The exercise tests information architecture rather than memory. Record where the reader hesitates, which index terms fail, whether diagrams are understandable, and whether the text assumes unavailable tools or prior training. A useful reference produces a clear, bounded next step. Failure signs include contradictory entries, undefined abbreviations, crucial warnings placed after lengthy background text, and instructions that cannot be performed safely by the intended user.
Test the book under its expected constraints. Open a vehicle copy while wearing gloves. Read the evacuation section in low light. Confirm that a digital edition opens in airplane mode and that its search function recognizes ordinary phrases. Ask a person who did not purchase the book to use it; buyers often know its structure well enough to overlook navigation problems. Do not simulate hazardous actions, operate utilities unnecessarily, or practice medical procedures beyond the limits of safe training.
After testing, customize access without rewriting authoritative instructions. Add removable tabs for local hazards, place emergency contacts and meeting information in a separate clearly marked sheet, and note where utility instructions supplied by the utility provider are stored. Avoid covering printed warnings or inserting unverified procedures into the book. Workplace copies should follow the organization’s document-control process rather than accumulating handwritten changes that conflict with approved procedures.
Review the reference when a new edition appears, the household moves, contact information changes, local alert systems change, or a drill reveals a gap. Replacing a book on an arbitrary annual schedule is less useful than checking whether its consequential content remains current. Keep the old copy out of active circulation once it has been superseded so two versions do not compete during an incident.
A frequent misconception is that owning the reference creates readiness. Books support recall and decision-making, but they do not build physical skills or establish a household plan. Pair the selected material with appropriate first-aid instruction, local alert enrollment, evacuation practice, and equipment-specific directions. The book passes its test when intended users can retrieve sound guidance quickly and recognize where the printed guidance ends.
Conclusion
Choose the reference only after defining its user, location, likely hazards, and required level of detail. Check authorship and revision information, verify consequential pages against current authoritative guidance, and reject material that hides limitations or promises a universal response. Format decisions should account for power loss, moisture, portability, legibility, and the ability to find instructions under stress.
Before putting a book into active use, run several retrieval exercises with someone who did not select it. Add tabs and separate local contact information where appropriate, then pair the reference with alerts, household procedures, drills, and relevant skills training. Review it after a move, a procedural change, or a failed exercise. A modest, well-tested reference in the correct location is more dependable than a comprehensive volume nobody can navigate.
Frequently Asked Questions
Is one emergency response book enough for a household?
One general manual may cover common decisions, but many households benefit from a separate current first-aid reference and local hazard information. Specialized technical tasks require suitable training rather than another consumer book.
Is a printed book better than an emergency app?
Print works without batteries or connectivity, while a downloaded digital reference offers search and easy duplication. Using both provides stronger access than depending exclusively on either format.
Where should emergency books be stored?
Keep copies where they will be used: a detailed manual in the home's response area, a compact copy in an evacuation bag, and an appropriate protected reference in a vehicle or workplace station.
Can an emergency book replace first-aid training?
No. A book can prompt recall and identify limits, but it cannot provide supervised practice, feedback, or role-specific competence. Use recognized training for skills that must be performed safely.
Further Reading
Authoritative Sources
Ready.gov ready.gov
Federal preparedness material can help readers compare a book's general disaster guidance with current hazard and planning information
National Weather Service Safety Information weather.gov
Current weather-hazard terminology and protective guidance are useful when checking a book's storm, flood, heat, and cold sections
American Red Cross Emergency Preparedness redcross.org
Preparedness and first-aid resources provide a practical comparison point for household response topics and training needs
CDC Emergency Preparedness and Response cdc.gov
Public-health emergency information can help readers review health-related claims and identify subjects that require current official guidance
A useful training picture connects a visible workplace cue to a specific employee decision. Instead of showing a generic exit sign, show the sign as employees encounter it from a workstation, corridor, break room, receiving area, or other occupied space. The image should answer a practical question: What has happened, what action applies here, and where does the person go next?
The required content depends on the scenario. An evacuation sequence may show the alarm cue, nearest usable route, an alternate path, the exterior discharge point, and the designated assembly area. A shelter sequence may show the notification, the correct interior location, doors or ventilation controls identified in the site plan, and the method used to account for people. A medical-response sequence might identify how staff summon help, where essential response equipment is located, and which employees perform assigned duties within their training.
Pictures should distinguish ordinary landmarks from decision-critical details. A wide photograph may establish location, but a closer view may be needed to show a stairwell designation, door label, manual alarm device, emergency communication point, or assembly marker. Adding one clear arrow or a short caption is usually more effective than covering the photograph with competing icons. Color can reinforce meaning, but the action should not depend on color alone because viewing conditions, printing, and color-vision differences can change what employees perceive.
Consider a staff member leaving a windowless stockroom. A floor plan may show the route accurately, yet the employee may not immediately know which direction the diagram represents. A paired image works better: the first photograph shows the view from the stockroom doorway, and the second identifies the turn toward the protected route. The floor plan can then provide the larger spatial relationship. That combination preserves accuracy without assuming strong map-reading skills.
A common mistake is illustrating only the ideal path. Doors may be blocked by smoke, construction, severe weather, or the incident itself. Training material should identify the authorized alternate route where the written plan provides one, while avoiding improvised shortcuts through restricted or hazardous areas. Images must not suggest that employees investigate a threat, operate unfamiliar equipment, or take on response duties they have not been assigned and trained to perform.
Before approving a visual, check whether it shows the cue, location, action, destination, and stopping point. The stopping point matters: an evacuation picture that ends at an exterior door leaves out assembly and accountability, while a shelter image that ends at entering a room omits what occupants do after arrival. The picture set is working when employees can describe the next action without the trainer supplying missing context.
When Should You Use Photographs, Diagrams, or Symbols?
Choose the visual format according to the decision employees must make. Photographs are strongest for recognizing a real door, corridor, control, hazard boundary, or outdoor meeting place. Diagrams are stronger for understanding route relationships that cannot be captured in one camera view. Symbols communicate familiar actions quickly, but only when their meaning has been established and their placement is unambiguous.
Facility photographs reduce the mental translation required during training. Staff can compare the image directly with what they see at work, which is especially useful for infrequently visited areas, alternate exits, and assembly points. Their limitation is rapid obsolescence. A changed partition, relocated shelving unit, new tenant sign, seasonal display, or construction barrier can make an otherwise accurate photograph misleading. Tight close-ups can create another problem by removing the landmarks needed to identify where the object is located.
Maps and simplified diagrams show the whole route, adjacent spaces, and alternatives more efficiently. They are appropriate for orientation and route comparison, but a crowded plan can overwhelm someone unfamiliar with architectural drawings. Remove layers that do not support the training decision, preserve labels needed to identify rooms or levels, and include an orientation marker such as a clearly placed “You are here” point when the diagram represents a posted location. Do not decorate a map so heavily that route lines hide doors, stairs, or boundaries.
Visual Format
Best Use
Main Limitation
Practical Check
Workplace photograph
Recognizing a location or device
Becomes outdated after physical changes
Can staff identify where the camera stood?
Route diagram
Showing spatial relationships and alternatives
Requires orientation and map interpretation
Are start, direction, destination, and level clear?
Symbol or pictogram
Reinforcing a familiar action
May be interpreted differently without context
Can employees explain the symbol without guessing?
Sequenced panels
Teaching actions in order
May imply every incident unfolds identically
Are decision points and exceptions identified?
A blended format often provides the strongest training value. For example, pair a simplified level diagram with numbered photographs of the stair enclosure, exterior exit, and assembly marker. Employees first understand the route as a whole, then learn what its critical points look like. For a distributed workforce, photographs can also clarify which assembly area belongs to each building or shift.
Generic stock photography is a weak substitute when the objective is site recognition. It may still help illustrate a broad behavior, such as keeping an exit path unobstructed, but it should be labeled as an example rather than presented as the employee’s actual environment. Likewise, artistic realism is less important than accuracy. A plain, current photograph with one precise annotation is preferable to an attractive illustration that shows the wrong door hardware, alarm device, or room arrangement.
How to Build a Scenario-Based Picture Sequence
Build each sequence around one incident type and the decisions assigned to staff in the organization’s written procedure. Mixing evacuation, shelter, lockdown, and medical-response actions on the same slide invites employees to combine instructions that may not belong together. A clear sequence establishes the initiating cue, shows the immediate protective action, traces movement or sheltering, and ends with communication and accountability.
Start by walking the procedure from the perspective of different occupants. A receptionist may need to direct visitors, a supervisor may check a roster at the assembly area, and an employee in a remote workroom may need a different route than someone near the main entrance. Photograph the view each person actually has. Include night-shift lighting, secured doors, noisy work areas, or outdoor approaches if those conditions materially change recognition. Do not stage an unsafe act merely to create a dramatic image.
A compact production checklist keeps the image set tied to operations:
Select one scenario: define the alarm, warning, or observed condition that starts the sequence.
Identify the audience: separate general employee actions from duties assigned to wardens, supervisors, or designated responders.
Capture decision points: photograph locations where staff must turn, choose a route, enter a protective space, or report status.
Add minimal annotation: use concise labels, consistent arrows, and numbering that matches the spoken training.
Verify the ending: include assembly, shelter accountability, handoff, or the point at which employees await further instructions.
Imagine a small office with two exterior exits and an assembly area behind a neighboring building. A weak slide shows a red arrow across a floor plan. A better sequence begins with the alarm cue, shows the primary route from the staff area, identifies the alternate exit without implying that employees should cross the hazard, and ends with the assembly sign and the person receiving status reports. A separate visitor panel shows where the front-desk employee directs guests. The pictures teach roles and transitions, not merely geography.
The narration must leave room for conditions that override the pictured route. An arrow can look like an unconditional command even when smoke, structural damage, security concerns, or official instructions make that route inappropriate. Captions should align with the written plan and acknowledge authorized alternatives without encouraging improvisation. Where actions differ by event, use separate panels with unmistakable scenario labels rather than expecting color alone to carry the distinction.
End production with a field check. Stand where the trainee would stand and compare every image with the current view. Confirm that arrows point in the direction a viewer would naturally interpret, captions remain legible on the smallest training screen or printed handout, and role labels match actual assignments. Signs that the sequence is failing include trainees debating which building is pictured, selecting the wrong route because of camera angle, or remembering the graphic but not the required reporting step.
How Do You Test and Maintain Training Visuals?
Test pictures by asking employees to make decisions from them, not by asking whether the slides look clear. Recognition and action are different outcomes. A person may recognize an exit photograph yet misunderstand which incident calls for evacuation, where to assemble, or who confirms their status. Short scenario prompts expose those gaps before a real event.
Show a panel without coaching and ask three concrete questions: Where is this location, what cue led to this action, and what happens immediately afterward? Use employees from different shifts, work areas, language backgrounds, and levels of site familiarity. Record the specific point of confusion. If several people misidentify the same doorway, changing the crop or adding a landmark may solve the problem. If they understand the picture but choose the wrong action, the issue may lie in the procedure, caption, or training explanation rather than image quality.
Discussion testing should be followed by an appropriate exercise or drill consistent with site conditions and organizational requirements. Compare what employees do with what the picture sequence taught. Watch for hesitation at intersections, movement toward familiar entrances instead of designated exits, uncertainty at the assembly point, and missed accountability steps. A visually polished deck is failing if behavior repeatedly diverges at the same location.
Maintenance should be triggered by change rather than left only to a calendar reminder. Review affected visuals after remodeling, department moves, access-control changes, route closures, assembly-area changes, alarm modifications, or revisions to assigned roles. Temporary construction deserves particular attention because a route can become inaccurate while the permanent training package still appears current. Date or version the picture set so trainers can identify superseded files, but do not place revision text where it obscures the action.
Accessibility also requires operational testing. Captions should carry information conveyed by arrows or color, text must remain readable when projected, and verbal instruction should describe the critical content for people who cannot rely on the image alone. Employees with mobility, sensory, cognitive, or communication needs may require individualized planning or alternate presentation formats. A visual aid supports training; it does not replace accessible instruction, hands-on orientation, or assistance arrangements established for the workplace.
A common failure mode is treating one successful training session as permanent validation. Staff composition, room use, signage, and familiarity change. Keep a correction log noting the image, observed misunderstanding, revision, and retest result. Effective visuals produce consistent location recognition, correct scenario selection, and completion of the final accountability action. Persistent guessing, conflicting interpretations, or dependence on trainer hints indicates that the material needs revision rather than more repetition.
Conclusion
Strong visual training material is built from the workplace outward. Photograph the views employees will actually encounter, use diagrams for relationships that a camera cannot show, and reserve symbols for meanings the audience already understands. Keep incident types separate, distinguish general staff actions from assigned roles, and carry every sequence through its final reporting or accountability step.
The next practical move is to select one high-priority scenario and walk it from several employee positions. Compare the resulting pictures with the written procedure, remove ambiguous annotations, and test the sequence without coaching. Confusion is useful evidence: it identifies a camera angle, label, route explanation, or procedural handoff that needs correction. Maintain the finished set whenever the site or plan changes, and use exercises to confirm that visual recognition translates into the intended workplace action.
Frequently Asked Questions
Should training pictures use the actual workplace?
Use current facility photographs when employees must recognize specific routes, doors, equipment, or assembly areas. Generic images are better limited to broad behaviors and should not be presented as site-specific instructions.
How much text should appear on each picture?
Use only enough text to identify the cue, action, or location. If a caption becomes a paragraph, divide the content into additional panels or move supporting explanation into the trainer’s notes.
Can pictures replace an emergency drill?
No. Pictures can prepare employees to recognize locations and decisions, but an appropriate drill or exercise reveals movement, communication, access, and accountability problems that slides cannot reproduce.
How often should emergency training pictures be updated?
Review them whenever routes, room layouts, access controls, alarms, assembly areas, procedures, or assigned roles change. Periodic review is useful, but change-triggered review prevents known inaccuracies from remaining in circulation.
What makes an evacuation picture misleading?
Common causes include reversed camera perspective, unclear starting points, outdated landmarks, arrows crossing walls, missing alternate routes, and sequences that stop at the exit instead of showing assembly and accountability.
Further Reading
Authoritative Sources
OSHA Emergency Preparedness: Getting Started osha.gov
Provides official workplace emergency-preparedness information that can help organizations align visual training with their actual plans and hazards
OSHA Evacuation Plans and Procedures eTool osha.gov
Offers practical material on evacuation planning, routes, employee responsibilities, and related training topics
Ready.gov Business Emergency Plans ready.gov
Outlines business planning considerations that can inform the scenarios and actions represented in staff training pictures
ADA.gov Emergency Planning Resources ada.gov
Helps planners consider disability access and communication needs when developing emergency procedures and training materials
What Does Travel Emergency Assistance Actually Do?
Assistance and insurance perform related but different jobs. An assistance provider may locate an appropriate clinic, arrange an interpreter, communicate with relatives, replace a prescription where legally possible, coordinate transport, or help a traveler navigate lost documents. Insurance determines whether eligible expenses will be reimbursed or paid under the policy. Treating the assistance telephone number as a promise that every expense is covered is a costly misunderstanding.
The distinction becomes especially important during a medical event. A traveler with a serious injury may need three separate functions: clinical decisions from qualified medical personnel, logistical coordination from an assistance company, and a coverage decision from an insurer. The assistance team might identify a suitable facility and communicate with the treating hospital, but the traveler could still face a deductible, an excluded service, or a request for payment before care. Emergency medical treatment should not be delayed solely to seek administrative approval when delay would create additional danger; contact local emergency services first when immediate help is needed.
Service quality also depends on location and communications. A provider may have extensive contacts in a capital city but limited options on an island, aboard a ship, or in a remote mountain region. Weather, airfield access, local medical capacity, border rules, and aircraft availability can constrain evacuation. “Evacuation” may mean transport to the nearest facility considered capable of providing care, not a flight to the traveler’s preferred hospital or home country.
Consider a traveler who breaks an ankle in a rural area. Local responders may transport the person to a nearby clinic, while the assistance provider identifies a larger hospital and evaluates ground transport. The insurer then reviews whether the transfer meets policy terms. Calling the provider can improve coordination, but expecting an immediate private aircraft would be unrealistic unless the medical need, policy language, and operational conditions support it.
Before buying or relying on a service, decide which failure would be hardest to manage alone. A domestic road trip may place greater value on roadside help and medical-network information. International travel may make translation, hospital coordination, passport support, and medical transport more consequential. Remote travel raises the value of specialized evacuation capability, while also increasing the chance that communications and weather will limit the response.
How Do You Verify Coverage and Response Capability?
Verification requires reading the actual terms and testing the contact route, not relying on a benefit summary or a credit-card logo. Start by identifying the organization that handles emergencies. The insurer, assistance operator, tour company, card issuer, employer, and medical transport membership may be separate entities with different telephone numbers and responsibilities.
Ask the provider how a case is opened and what must happen before major arrangements are made. Some services expect notification as soon as reasonably possible; some expenses require advance authorization when circumstances permit. Confirm whether the contact center operates continuously, accepts collect calls, offers messaging or app access, and can work in the languages relevant to the destination. A successful test means reaching the correct channel and learning the procedure without opening a false claim—not merely adding a number to a phone.
Policy wording deserves close attention in areas where assumptions commonly fail. Review the trip dates and geographic area, emergency medical expense limits, evacuation destination, deductibles, direct-payment procedures, reimbursement documentation, and exclusions. Examine how the contract addresses pre-existing medical conditions, pregnancy, mental health events, intoxication, high-risk activities, civil unrest, epidemics, and travel against official warnings. Definitions control the benefit; familiar words such as “emergency,” “reasonable,” and “necessary” may have specific contractual meanings.
A compact comparison can keep different services from blurring together:
Service
Primary role
Question to verify
Travel assistance
Coordinates information and logistics
Who answers, and what can they arrange?
Travel insurance
Applies policy terms to eligible losses
Which expenses, limits, and exclusions apply?
Medical transport membership
Provides specified transport benefits
Who decides when and where transport occurs?
Credit-card benefit
Offers defined protections tied to card use
Must the trip have been paid with the card?
For example, a card may advertise travel support while providing referrals rather than paying medical bills. Conversely, a separate policy may reimburse eligible treatment but require records and receipts. Compare both documents before deciding that one makes the other unnecessary. If an answer affects a large financial risk, request clarification from the provider in writing and retain it with the policy. Verbal explanations may be useful, but they should not be assumed to alter contractual terms.
Build an Offline Assistance File
An offline assistance file keeps critical details usable when a phone is lost, its battery is depleted, or mobile data is unavailable. Store a concise paper copy in carry-on baggage and an encrypted digital copy that can be reached from another device. Avoid placing every identity and financial record in one unprotected folder; convenience should not create an avoidable identity-theft risk.
The file should contain information needed to identify the traveler, open a case, explain relevant health concerns, and reach the right people. Include the assistance provider’s international and domestic numbers, policy or membership number, travel dates, itinerary, emergency contact, passport identification page, and visa details where applicable. Add a medication list using generic names when known, allergies, significant medical conditions, and the contact information for a treating clinician. Prescription rules vary by jurisdiction, so a copy of a prescription or physician letter may support a request but does not guarantee that a medication can be replaced locally.
Use this departure check for the highest-priority items:
Contact access: Save numbers in the phone, on paper, and with a trusted person at home.
Identity recovery: Keep a passport copy separate from the original and record the nearest relevant embassy or consulate.
Health details: Carry necessary medicines in labeled packaging, plus an accurate allergy and medication record.
Payment resilience: Bring more than one usable payment method and keep them separately.
Case documentation: Know how to preserve receipts, medical reports, police reports, and provider correspondence.
A couple traveling together should not keep both copies, cards, and phones in the same bag. A solo traveler should give a trusted contact enough information to assist without sending sensitive records through an exposed group message. Set clear boundaries: the contact may hold an encrypted document, for example, while receiving the password through a separate channel.
The file is working if another person can identify the provider, quote the correct reference number, and locate the itinerary within a few minutes. It is failing if access depends on one locked phone, a forgotten password, an email account protected by a code sent to the missing device, or documents stored in checked luggage. Test access before departure, then remove outdated copies after the trip to reduce unnecessary exposure.
Who Calls Whom When Travel Plans Fail?
A communication sequence prevents family, providers, and local responders from working from different assumptions. For an immediate threat to life or safety, contact local emergency services or nearby authorities first. Once the traveler is in a safer position, open a case with the assistance provider and record the case number, representative’s name, time of contact, and next promised action.
Not every disruption belongs on the emergency line. A delayed flight is normally handled first by the carrier, while a stolen passport should be reported through local police procedures when appropriate and then to the traveler’s embassy or consulate. A medical emergency belongs with local clinicians and the assistance team. A security incident may require instructions from local authorities, the accommodation provider, the tour operator, and official government travel advisories. Choosing the correct first contact reduces delay and preserves the records an insurer may later request.
Assign a home contact before leaving. That person should know the itinerary, expected check-in rhythm, provider details, and circumstances that justify escalation. “Call someone if I disappear” is too vague. A better arrangement specifies that one missed casual message is not an emergency, but failure to make contact after a defined travel leg—combined with an airline, weather, or security disruption—triggers checks with the carrier, lodging, or assistance provider. The timing should reflect the destination and activity rather than a universal rule.
Imagine a traveler loses a passport and phone during a train transfer. The immediate tasks are to secure funds and lodging, report the loss through the appropriate local channel, and contact the relevant embassy or consulate. The home contact can provide document copies and cancel exposed accounts. The assistance provider may supply directions, translation, or referral support, but it cannot issue a new passport. Clear role boundaries keep the traveler from waiting on an organization that lacks the required authority.
Record facts rather than guesses during an active case: symptoms reported, facility name, incident location, booking reference, and instructions received. Signs that coordination is working include a case number, named next step, confirmed callback method, and agreement on who is arranging transport or payment. Repeated transfers, contradictory instructions, no documented case, or requests to wait despite a worsening safety condition signal the need to escalate within the provider while continuing to use appropriate local emergency channels.
Conclusion
Useful travel emergency preparation connects coverage, contacts, documents, and decision authority before anyone needs them. Confirm which organization handles each type of incident, read the controlling terms, and test how you would reach assistance from the destination. Keep essential details available without relying on one device, while protecting passport, medical, and financial records from unnecessary exposure.
Before leaving, run a short scenario using the trip’s most credible complication: an illness, lost passport, missed connection, vehicle breakdown, or remote-area injury. Identify the first local contact, the assistance channel, the records to preserve, and the person at home who can help. Any unanswered question—especially about medical transport, exclusions, or advance authorization—should go to the provider before departure. The goal is not to predict every disruption, but to remove avoidable confusion when time, connectivity, and judgment are under pressure.
Frequently Asked Questions
Is travel assistance the same as travel insurance?
No. Assistance usually coordinates services and information, while insurance applies contract terms to eligible expenses. A company may provide both, but the functions and limits remain distinct.
Should I call the assistance provider before going to a hospital?
Call local emergency services first when immediate care is needed. If the situation allows, contact the assistance provider promptly so it can open a case and explain coordination or authorization procedures.
What travel assistance information should I keep on paper?
Carry the provider’s telephone numbers, policy or membership number, emergency contact, itinerary, key health information, and case-opening instructions. Keep the sheet separate from your passport and primary phone.
Does medical evacuation mean transport home?
Not necessarily. Coverage may provide transport to the nearest facility judged capable of treatment. The destination, medical necessity, authorization rules, and operational conditions depend on the applicable terms.
Can credit-card travel benefits replace separate coverage?
Only if the card’s actual benefit terms match the trip’s risks. Check payment requirements, covered travelers, expense limits, exclusions, claim procedures, and whether the benefit pays costs or merely provides referrals.
Further Reading
Authoritative Sources
U.S. Department of State: Before You Go travel.state.gov
Provides official preparation information for international travelers, including documents, destination conditions, and emergency planning
CDC: Getting Health Care During Travel wwwnc.cdc.gov
cdc.govExplains practical considerations for locating and paying for health care outside the United States
Federal Trade Commission: Travel Tips consumer.ftc.gov
Offers consumer-focused guidance on protecting travel documents, money, accounts, and bookings
Government of Canada: Health and Safety Outside Canada travel.gc.ca
Provides official information about health preparation, travel insurance, destination risks, and obtaining help abroad
The best storage point is the place likely to remain reachable during the hazards that affect the property. Convenience during an ordinary day is not enough. A basement shelf may offer stable temperatures, for example, but it is a poor sole location where flooding or a collapsed stairway could cut off access. An attached garage may support a quick evacuation, yet temperature extremes can shorten the useful life of food, batteries, adhesive products, and some medical supplies.
Start by identifying whether the kit is meant for evacuation, sheltering in place, or both. An evacuation kit belongs near the route people would actually use to leave, without sitting in plain view or obstructing the exit. Shelter supplies should be close to the safest usable part of the building. In a tornado-prone area, that might mean an interior room on the lowest practical level. In a flood-prone property, supplies placed above expected water intrusion are generally more useful than supplies stored on the basement floor.
Fire creates a different constraint because residents may have only one safe exit route and should not delay leaving to retrieve gear. A kit beside the front door offers little value if smoke or flames block that door. A modest secondary cache near another normal exit can preserve options, but it should never encourage anyone to move toward danger. Life safety and immediate evacuation take priority over retrieving supplies.
Use a simple location test before committing to a shelf or closet:
Reachability: Can household members reach it without keys, ladders, heavy lifting, or moving furniture?
Hazard exposure: Could water, heat, smoke, falling objects, or structural damage affect it early?
Exit compatibility: Is it near a realistic departure route without narrowing that route?
Environmental stability: Is the area reasonably cool, dry, and protected from pests?
Household access: Can capable family members find and open it under stress?
A common mistake is choosing a single location because it appears tidy and spacious. Storage efficiency does not equal emergency reliability. Compare the chosen spot against at least one plausible shelter scenario and one evacuation scenario. If either event could isolate the entire supply, move part of the kit or establish a smaller backup elsewhere.
Where Should You Store a Primary Home Kit?
A primary home kit usually works best in a ground-level closet, utility area, or sturdy cabinet positioned near a commonly used exit and within the conditioned part of the home. The location should be familiar, quickly opened, and large enough for organized containers. A hall closet near an exterior door often performs better than an attic, detached shed, or deep storage room because it combines routine visibility with faster departure access.
No room is automatically suitable. A laundry area may be convenient but can expose supplies to leaks, humidity, detergents, or heat-producing appliances. A kitchen pantry offers climate control and regular visibility, although emergency supplies can become mixed with ordinary groceries and consumed without replacement. A bedroom closet may be accessible at night but poorly positioned if household members must cross the building to retrieve the kit before leaving.
Storage should reflect who needs to use the equipment. Heavy water containers belong low enough to lift safely, but not directly on a floor that may become wet. Frequently needed evacuation items—flashlights, footwear, copies of key contacts, protective gloves, and a compact first-aid kit—should sit where adults can reach them quickly. Hazardous tools, ignition sources, and medications require storage appropriate to children, pets, and manufacturer instructions. Accessibility does not mean unrestricted access to every item.
Consider a family awakened by a nighttime power outage followed by an evacuation notice. A labeled container on a reachable closet shelf can be collected while someone checks on children or pets. The same supplies packed in several unmarked boxes behind holiday decorations will take longer to find and may be abandoned. The difference is not the quality of the equipment; it is whether the storage arrangement supports action under limited light and time pressure.
Attics and outdoor sheds are generally better for durable, non-sensitive equipment than for the entire kit. Blankets sealed against pests, an empty water carrier, or basic cleanup tools may tolerate those spaces better than batteries, food, medication, or electronic devices. Garages can hold a departure bag if temperatures remain suitable for its contents, but consumables should be inspected more often or kept indoors until needed.
The arrangement is working when household members can identify the location, remove the kit without shifting other possessions, and carry the evacuation portion through the intended exit. It is failing when the area becomes crowded, the label is hidden, the container is too heavy, or supplies migrate into unrelated household storage.
When Should You Split Supplies Across Locations?
Supplies should be divided when household members spend substantial time apart, when one hazard could block the primary cache, or when a full kit is too heavy to move quickly. Distribution reduces dependence on one room, vehicle, or person. It does not mean buying several identical collections; each location should support the likely needs and constraints of that setting.
A practical arrangement uses one substantial home supply, one portable evacuation bag, and smaller location-specific kits. The home supply can hold bulk water, food, sanitation materials, lighting, and shelter equipment. The evacuation bag should emphasize portability, immediate necessities, contact information, and items that are difficult to replace. A vehicle kit may include weather protection, visibility equipment, water appropriate for current conditions, and basic tools. Workplace supplies should fit under a desk or in a designated area permitted by the employer.
Location
Primary purpose
Main constraint
What to review
Home interior
Shelter and household support
Blocked rooms or utility leaks
Access, moisture, container weight
Evacuation bag
Rapid departure
Limited carrying capacity
Weight, fit, essential documents
Vehicle
Travel disruption
Heat, cold, theft, vibration
Seasonal contents and expiration dates
Workplace
Delayed travel or local evacuation
Space and workplace rules
Personal needs and permitted items
Duplication should focus on items whose absence creates an immediate problem. Lighting, basic communication, necessary personal care items, sturdy footwear, and copies of essential information may justify placement in more than one kit. Bulky cookware or extensive tools usually do not. Prescription medication requires special judgment because storage conditions, refill timing, security, and legal limits may apply; follow pharmacy and clinician guidance rather than leaving medication indefinitely in a hot vehicle.
People who commute with household members in different vehicles should not assume the family vehicle will always be nearby. Likewise, a child’s school bag is not an appropriate substitute for understanding the school’s emergency procedures. Location-specific kits supplement institutional plans and household communication; they do not override evacuation instructions or site rules.
The main failure mode is uncontrolled scattering. Supplies placed in many locations without an inventory become difficult to inspect and easy to forget. Keep a short record listing each cache, its purpose, and the date it was checked. The aim is resilient distribution, not random duplication.
How Do You Protect and Maintain Stored Supplies?
Storage conditions determine whether packed supplies remain dependable. Use durable containers that match the location: a portable backpack for evacuation, a lidded bin for organized indoor storage, and weather-resistant containment where dust or incidental moisture is possible. A sealed container can limit exposure, but it does not make heat-sensitive products safe in an attic or stop floodwater from carrying the entire bin away.
Place containers off bare concrete and away from water heaters, plumbing connections, floor drains, solvents, fuels, and pest activity. Shelving should be stable and suited to the load. Heavy water belongs on a low, reinforced level rather than overhead, where a falling container could injure someone. Electronics and paper records benefit from inner moisture-resistant pouches even when stored inside a larger bin.
Labels should identify purpose without advertising valuable contents to anyone who can see the storage area. Inside the container, group items by function so they can be retrieved without emptying everything onto the floor. Keep a flashlight or headlamp where it can be reached before opening the main kit. If the container uses latches, straps, or combination locks, every intended adult user should be able to operate them in darkness or while wearing gloves.
Review the storage arrangement on a recurring household schedule and after a leak, pest problem, move, major temperature event, or change in family needs. Inspection should cover more than printed expiration dates. Look for battery corrosion, swollen packaging, rust, damaged seals, unusual odors, damp fabric, outdated documents, clothing that no longer fits, and equipment that household members no longer know how to use. Follow product labels for storage limits and replacement instructions.
A useful check is a timed retrieval without treating it as a race. Ask a household member who did not pack the kit to locate it, switch on the light, identify the evacuation bag, and find the contact information. Confusion reveals labeling and organization problems that a visual inspection misses. If the bin cannot be lifted safely, divide the load rather than assuming two people will always be available.
Maintenance fails when a kit becomes a sealed time capsule. Food is consumed and not replaced, spare clothing becomes unsuitable, phone cables no longer match devices, and batteries age unnoticed. Integrating selected consumables into normal household rotation can reduce waste, while a dated inventory keeps specialized items visible. The storage location remains suitable only while its access, environment, and contents continue to match the household’s actual risks.
Conclusion
Choose storage locations by testing them against the events most likely to block access, damage contents, or force a quick departure. A reachable indoor area near a normal exit is a strong primary option, provided it stays dry, reasonably temperature-stable, and free of obstructions. Then place smaller, purpose-built supplies in a vehicle, workplace, alternate exit area, or shelter location where they address a distinct gap.
Walk through the arrangement rather than judging it by appearance. Confirm that the containers can be found in darkness, lifted safely, opened by intended users, and removed without rearranging stored belongings. Check environmental damage, labels, personal needs, and product storage instructions on a regular schedule. If one hazard could eliminate every supply at once, redistribute the most important items before adding more equipment.
Frequently Asked Questions
Is the garage a good place for an emergency kit?
A garage can hold durable gear or a portable departure bag, but heat, freezing temperatures, moisture, pests, and vehicle fumes may damage some contents. Keep sensitive food, batteries, electronics, and medication indoors unless their labels support those conditions.
Should an emergency kit be stored by the front door?
Near a normal exit is useful when the kit does not block the route or attract unwanted attention. Maintain another small cache if fire, debris, or another hazard could make that doorway inaccessible.
Can emergency supplies be kept in a basement?
A dry basement may suit some bulk supplies, but it should not be the only location where flooding, utility leaks, or damaged stairs are plausible. Elevate containers and keep portable essentials on an accessible level.
How often should stored kits be checked?
Use a recurring schedule that fits the contents, and inspect the kit after leaks, pest activity, severe temperature exposure, or household changes. Product labels and expiration dates should determine replacement timing.
Should everyone in the household have a separate kit?
Separate portable bags may help when people travel independently or have different medical, mobility, clothing, or caregiving needs. Bulk shelter supplies can remain shared if everyone knows where they are and can reach them.
Further Reading
Authoritative Sources
Build A Kit ready.gov
Ready.gov outlines core emergency supplies and addresses maintaining kits at home, work, and in vehicles
Survival Kit Supplies redcross.org
The American Red Cross provides a practical supply list that can help readers decide what belongs in portable and home-based storage
Emergency Kit Checklist for Kids and Families cdc.gov
The CDC checklist highlights family-specific supplies that may affect container size, accessibility, and placement
Emergency Supplies Checklist fema.gov
FEMA’s checklist supports a detailed inventory review when organizing supplies across home and portable kits
A useful kit is organized around the problems a driver can reasonably face, not around an impressive item count. The main functions are making the stopped vehicle visible, contacting assistance, protecting occupants from exposure, handling minor injuries, and addressing a limited set of vehicle problems without creating additional danger. A 100-piece package may contain dozens of bandages and cable ties while lacking a dependable warning light or warm layer.
Begin with the consequences of stopping where traffic, darkness, heat, cold, or poor mobile coverage can turn a routine breakdown into a serious situation. Reflective triangles or another stable warning device help approaching drivers detect a stationary vehicle. A flashlight lets the driver inspect from a safer position without relying on a phone battery. A charged power bank preserves communication when the vehicle cannot provide power. Water and suitable clothing address the possibility that assistance takes longer than expected.
The safest choice is not necessarily the kit that enables the most repairs. Working beside moving traffic can be more hazardous than waiting inside the vehicle with a seat belt fastened, depending on the location and circumstances. A driver should not attempt a tire change on an unstable shoulder, enter a traffic lane to place equipment, touch leaking fluids, or work near smoke or fire. If the vehicle is exposed to traffic or occupants face immediate danger, moving to a safer location when possible and contacting emergency services may take priority over using any tool.
Build the kit in functional layers so one missing item does not undermine the entire plan:
Visibility: reflective vest, stable warning devices, and a flashlight with spare or rechargeable power.
Communication: charging cable, power bank, written contact information, and relevant roadside-assistance details.
Occupant protection: drinking water, gloves, rain protection, blankets or warm layers, and passenger-specific supplies.
Minor care: a clearly organized first-aid kit appropriate for basic, nonprofessional use.
Vehicle support: only compatible, serviceable tools the driver can use safely.
For example, a commuter who travels on well-served urban roads may emphasize visibility, phone power, and weather protection. A family crossing remote areas needs more water, redundant light, extra charging capacity, and a plan for delayed assistance. The common mistake is preparing for mechanical inconvenience while overlooking the hours occupants might spend waiting. Treat people, location, and exposure as the first selection filters; repairs come after those needs.
How Should You Evaluate Tools and Supplies?
Every tool should pass four tests: compatibility, capability, durability, and usability. Compatibility asks whether the item actually fits the vehicle. Capability asks whether it can perform under the expected load. Durability covers storage in a car exposed to vibration and temperature swings. Usability means the intended driver can locate, understand, and operate it under poor light or stressful conditions.
Jumper cables illustrate why labels and appearance are insufficient. Cable length affects whether two vehicles can be positioned safely, while conductor size, clamp quality, insulation, and flexibility influence practical performance. Thin, short cables with weak clamps may be difficult to connect and may not suit a demanding start. A portable jump starter avoids the need for a second vehicle, but its rated application should match the engine, its charge must be maintained, and its instructions must be followed. Neither option should be used around a visibly damaged, leaking, frozen, or otherwise unsafe battery; the vehicle manual remains the primary source for connection points and precautions.
Tire equipment needs the same scrutiny. Confirm that the lug wrench fits the fasteners, the jack is approved for the vehicle, and the spare tire is present and properly maintained. Some vehicles use mobility kits rather than spare tires, and sealant has limitations and an expiration date. A tire inflator may address a slow pressure loss long enough to reach service, but it cannot make a severely damaged tire safe. A pressure gauge provides information; it does not substitute for inspecting the tire or following the pressure specification on the vehicle placard.
Item
Selection Check
Common Failure
Warning device
Stable, bright, and visible in poor conditions
Lightweight equipment tips over or cannot be seen
Flashlight
Simple controls and independently stored power
Corroded, depleted, or leaking batteries
Jump equipment
Suitable for the vehicle and supported by clear instructions
Wrong connection method or an uncharged jump pack
Tire tools
Correct fit and approved lifting capacity
Missing adapter, flat spare, or incompatible wrench
First-aid supplies
Organized, intact, and within marked dates
Heat-damaged adhesive or expired contents
Open a preassembled kit before trusting it. Inspect seams, clamps, handles, battery compartments, printed instructions, and expiration dates. Remove novelty tools that have no realistic purpose and replace weak components individually. A smaller collection of compatible equipment is preferable to a crowded case that delays access or creates false confidence. Signs of a sound selection include being able to identify each item in the dark, explain its intended use, and verify that it works without improvisation.
Matching the Kit to Your Vehicle, Climate, and Route
Vehicle design and travel conditions determine what belongs beyond the universal safety layer. Start by reading the owner’s manual sections covering towing, jump-starting, tire service, fuses, and emergency equipment. The manual can identify designated connection locations, lifting points, tool storage, and restrictions that a generic kit cannot anticipate. Record unusual requirements, such as a locking-wheel key or a specific tow-eye location, and keep necessary adapters where they remain accessible.
A compact city car, pickup used on rural roads, and electric vehicle do not present identical needs. Larger tires and heavier vehicles require appropriately rated equipment. Vehicles with limited cargo space benefit from a compact, secured modular kit. Electric and hybrid vehicles have high-voltage components that occupants should not attempt to service; roadside preparation should emphasize visibility, communication, manufacturer procedures, and professional assistance. A generic jump-start assumption can be especially misleading because low-voltage access and procedures vary by model.
Climate changes the waiting problem. In freezing conditions, insulated clothing, hats, gloves, blankets, and a snow brush may matter more than additional repair tools. A compact shovel can be useful where snow is common, but traction products should be selected and used with attention to local rules, vehicle instructions, and environmental concerns. In hot regions, carry drinking water in containers suitable for storage and rotate it regularly. Shade and sun protection may be practical additions, yet drivers should never remain in a dangerously hot enclosed vehicle or assume stored food, medicine, batteries, and adhesives tolerate extreme cabin temperatures.
Route risk is equally important. Daily travel through populated areas generally offers faster access to fuel, towing, and shelter. Remote highways, mountain passes, or long rural routes can involve weak reception, sparse services, changing weather, and longer waits. Before such travel, supplement the normal kit with more water, warm layers, offline route information, an additional charging option, and supplies for every passenger. Tell a reliable person the route and expected arrival when the trip warrants it.
Passenger needs deserve explicit planning. Children may need suitable clothing, food, and comfort items; older adults or passengers with disabilities may need mobility equipment and a more conservative plan for weather exposure. Essential medications require careful handling because vehicle temperatures may exceed approved storage conditions. Ask a pharmacist or other qualified professional how to transport temperature-sensitive medicine rather than leaving it permanently in the kit.
The failure mode here is copying someone else’s packing list without testing it against the actual trip. Review three scenarios—a nighttime flat, a dead low-voltage battery, and a weather-delayed tow—and ask what each occupant would need while waiting. If the kit solves only the mechanical part, it is not yet matched to the journey.
How Should a Roadside Kit Be Stored and Maintained?
A roadside kit must remain reachable after the vehicle is loaded and stable during sudden braking. Store it in a durable container secured in the cargo area rather than loose in the passenger compartment. Frequently needed safety items, such as a reflective vest, flashlight, and window-breaking or belt-cutting tool if carried, should be reachable without unloading luggage. Placement must not obstruct airbags, pedals, seat movement, emergency exits, or access to the spare tire.
Divide the equipment into labeled modules instead of creating one deep bin. A visibility pouch can hold the vest, light, and warning devices. A vehicle pouch can contain the pressure gauge, compatible tools, work gloves, and printed procedures. A separate occupant-care module can hold first-aid supplies, water, and weather protection. This arrangement reduces searching in rain or darkness and makes inspection faster. Transparent or high-contrast pouches are often more practical than identical black bags.
Inspect the kit at least twice a year and before demanding trips. Seasonal clock changes can serve as reminders, but climate and product instructions may justify more frequent checks. Test lights, recharge power banks and jump starters, look for corrosion or swelling in batteries, inspect cables and fabric, rotate water and food, and replace expired first-aid or tire-sealant products. Check the spare tire’s pressure according to the vehicle information because an unused spare can lose pressure unnoticed.
Maintenance should include a short hands-on rehearsal. Locate the jack points without lifting the vehicle, confirm the lug wrench and locking key fit, operate the flashlight, unfold warning equipment, and review jump-start instructions. Practice in a safe driveway during daylight rather than learning beside traffic. Do not crawl under a vehicle supported only by its emergency jack, and do not rehearse procedures that conflict with the manual.
Signs the system is working are simple: all critical items are accessible, charged, compatible, unexpired, and familiar to the drivers who may need them. Warning signs include a buried container, loose heavy tools, leaking batteries, heat-damaged supplies, an uncharged jump pack, or equipment no one can explain. The common misconception is that purchasing the kit completes the task. Vehicle-based supplies degrade quietly, so a modest kit with a recurring inspection schedule is more dependable than an elaborate package left untouched for years.
Conclusion
Choose roadside equipment by tracing what happens from the moment the vehicle stops: occupants need to be seen, communicate, remain protected from weather, and wait safely before any minor vehicle task is considered. Verify each tool against the owner’s manual, especially tire, lifting, towing, and battery-related equipment. Then adjust the contents for passenger needs, seasonal exposure, route remoteness, and realistic assistance times.
Open any packaged kit, remove low-value clutter, and replace questionable components with durable items you can operate confidently. Secure the container, label functional modules, and keep immediate visibility equipment within reach. Finish by scheduling two inspections each year and a check before demanding travel. If an item is incompatible, expired, uncharged, buried, or unfamiliar, it should not be counted as dependable emergency equipment.
Frequently Asked Questions
Is a preassembled roadside emergency kit worth buying?
It can provide a convenient base, but inspect every component for durability, compatibility, expiration dates, and practical value. Expect to replace weak tools and add climate-, vehicle-, and passenger-specific supplies.
What is the most important item in a roadside kit?
No single item covers every breakdown. Visibility equipment, a reliable light, communication power, and weather protection usually deserve priority because they protect occupants while assistance is arranged.
How often should a vehicle emergency kit be checked?
Check it at least twice a year and before long or remote trips. Recharge electronic devices, test lights, inspect the spare tire, and replace expired or heat-damaged contents.
Should jumper cables or a portable jump starter be included?
Either may be useful when compatible with the vehicle. Cables require another suitable vehicle; a jump starter works independently but needs periodic charging and must be used according to its instructions and the vehicle manual.
Where should a roadside kit be stored?
Secure the main container in the cargo area while keeping immediate safety items readily accessible. Do not leave heavy tools loose or place equipment where it can obstruct airbags, controls, exits, or spare-tire access.
Further Reading
Authoritative Sources
Winter Driving Tips nhtsa.gov
The National Highway Traffic Safety Administration outlines vehicle preparation, winter supplies, and precautions for cold-weather travel
Car Safety ready.gov
Ready.gov provides practical vehicle emergency-kit and travel-preparation guidance for delays and hazardous conditions
Survival Kit Supplies redcross.org
The American Red Cross lists baseline emergency supplies that can inform occupant-care and first-aid choices for a vehicle kit