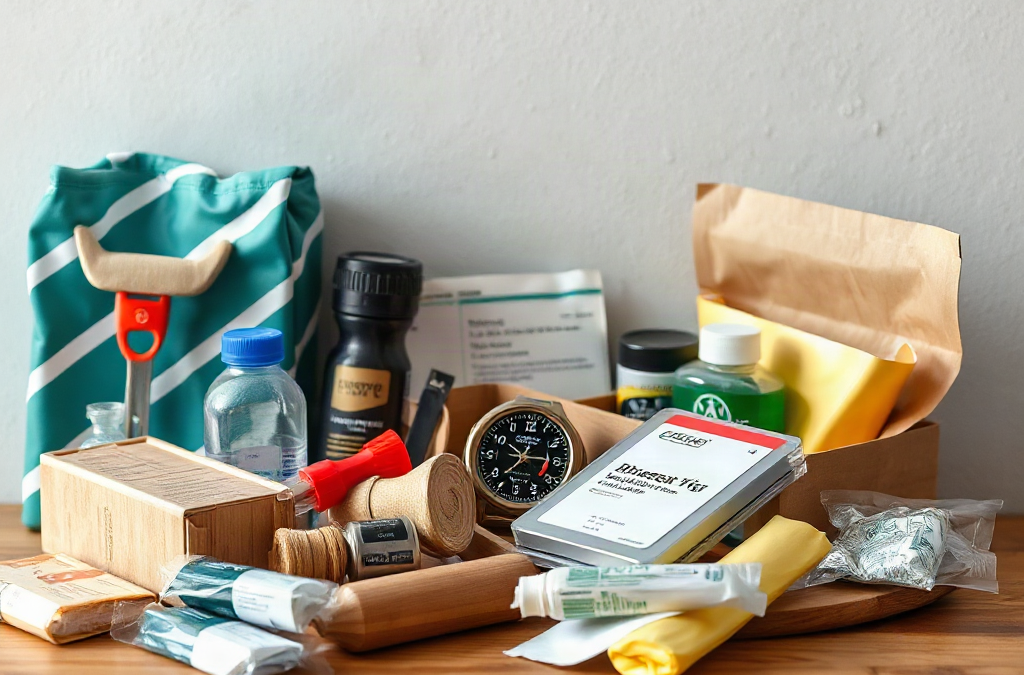
A useful event kit is built around the problems staff can reasonably correct on site: loose décor, damaged clothing, dead devices, unclear instructions, small spills, uncomfortable guests, and interrupted access to ordinary supplies. It should not become an unstructured collection of objects or a substitute for the venue’s life-safety equipment, trained medical personnel, security procedures, or emergency action plan.
Start with repair and installation supplies. Gaffer tape is often preferable for temporary floor and cable work because it is strong and generally removes more cleanly than duct tape, although every adhesive should be tested on an inconspicuous area and used only with venue approval. Add painter’s tape, clear tape, double-sided tape, hook-and-loop fasteners, zip ties, safety pins, binder clips, floral wire, removable hooks, scissors, a utility knife, measuring tape, a multitool, screwdrivers, pliers, and a compact sewing kit. Cutting tools should remain under staff control rather than on an unattended public table.
Guest and wardrobe care calls for a separate pouch containing lint rollers, stain-removal wipes, fashion tape, a static-control product, tissues, unscented wet wipes, menstrual products, blister bandages, mints, and disposable ponchos when weather exposure is plausible. A portable steamer may be useful for formal events, but only where electrical capacity, fire rules, and fabric care allow it. Strong fragrances and unlabelled decanted products create avoidable allergy and identification problems.
Communications and operational supplies deserve equal priority. Include fully charged power banks, common charging cables, spare batteries in protected packaging, flashlights, pens, permanent markers, blank labels, a clipboard, notepaper, and printed copies of the schedule, floor plan, vendor contacts, venue contacts, and escalation chain. Paper records remain available when a phone is lost, a shared file will not load, or cellular service is poor.
Carry a commercially prepared first-aid kit appropriate to the setting, then confirm who is authorized and trained to use it. Avoid creating an improvised medicine cabinet for guests. Medication sharing introduces allergy, interaction, dosing, and liability concerns that an event planner is not positioned to evaluate. The common mistake is packing dozens of low-value comfort items while omitting a flashlight, printed contact sheet, or reliable means to recharge the lead coordinator’s phone.
How Should Supplies Be Prioritized?
Prioritize items by consequence, likelihood, response time, and whether the venue already provides them. A missing place card can usually wait several minutes; a dark exit route, serious injury, fire alarm, or threatening behavior requires immediate escalation to venue personnel or emergency services. The kit should help staff manage ordinary disruptions while preserving a clear boundary around incidents that require trained responders.
A compact priority system prevents the packing list from expanding without limit:
Priority
Typical Contents
Decision Test
Immediate operations
Phone power, flashlights, contacts, schedule, keys or access credentials
Would its absence interrupt coordination or access?
Frequent corrections
Tape, fasteners, markers, scissors, stain care, sewing supplies
Is the problem likely and safely fixable by staff?
Guest comfort
Tissues, wipes, menstrual products, ponchos, blister care
Does it address a predictable need without medical judgment?
Is there a single point of failure unique to this program?
Use the event run sheet to identify single points of failure. If the keynote presentation depends on one laptop connection, bring a compatible adapter and keep a local copy of the approved file, subject to the client’s information-security rules. If escort cards control seating for hundreds of guests, pack blank matching cards, the final seating file, and writing tools. A backup that cannot connect to the installed system or match the event workflow is only apparent redundancy.
Quantities should follow exposure rather than a universal formula. A small indoor meeting may need one repair pouch and several power banks, while a multi-room conference may require duplicate kits stationed with separate floor leads. Duplicate the items that must travel quickly; centralize expensive tools and supplies that require controlled access. Overpacking adds weight, complicates inventory, and makes urgent items harder to find.
Signs of sound prioritization include quick retrieval, few unopened novelty items, and replenishment concentrated in predictable categories. The system is failing when team members buy the same supplies during load-in, cannot identify who holds the kit, or empty an entire case to find one cable. Review those failures after each event and revise the inventory based on actual use rather than hypothetical scenarios.
How Do Venue and Event Type Change the List?
The venue survey should determine the final contents because access, weather, power, dress, security, and supplier distance change what is useful. Before packing, ask the venue about prohibited adhesives, open-flame rules, available ladders and tools, electrical restrictions, first-aid and automated external defibrillator locations, severe-weather procedures, loading access, and the staff member who handles facility problems. Bringing an item does not establish permission to use it.
Outdoor events require weather and terrain additions: ponchos, waterproof document sleeves, towels, weights approved for signs or lightweight décor, insect repellent in original packaging, sunscreen, headlamps, and protected power connections selected by qualified production personnel. A household extension cord is not an acceptable answer to wet-ground electrical needs. Wind also changes the risk profile; tape may hold a paper sign indoors but fail on a dusty tent surface or create a trip hazard outside.
Weddings and formal celebrations place greater demand on garment care and discreet repairs. Add thread in likely attire colors, spare earring backs, corsage pins, shoe grips suitable for the surface, and supplies for replacing a loose button. Corporate conferences shift the emphasis toward presentation adapters, clicker batteries, cable labels, printed speaker contacts, and backup signage. Festivals and public events usually need distributed radios, hearing protection for authorized crew working near amplified sound, weather protection, and tighter control of tools across a larger footprint.
Guest profile matters as much as format. A family event may benefit from child-safe comfort supplies, but sharp tools and small objects must stay secured. An event serving older adults may require more seating coordination and highly visible directional information. Accessibility needs should be addressed through planned accommodations and venue coordination, not guessed at through a generic kit. For example, spare printed programs may help when a digital schedule is inaccessible, but they do not replace accessible routes, communication support, or other arrangements agreed with attendees.
Remote venues justify broader redundancy because replacement purchases may be slow or impossible. Urban hotels usually provide faster access to maintenance, business services, and pharmacies, allowing the planner to carry less. The mistake is assuming an upscale venue supplies every small operational item. Confirm resources and response ownership in writing, then pack around verified gaps rather than the venue’s reputation.
How Should the Kit Be Organized and Maintained?
Organization determines whether packed supplies are usable when the schedule is slipping. Divide the case into labeled modules such as repairs, wardrobe, guest care, power, office supplies, and documents. Use transparent zip pouches or rigid containers that can be removed individually. Place the flashlight, contact sheet, primary charger, and access credentials in an exterior compartment rather than beneath less urgent stock.
Assign custody to a named staff member for each operational period. That person does not need to perform every repair, but should know where the kit is, which tools require sign-out, and when an issue must be escalated. For a large event, a master case can stay in the production office while floor leads carry smaller satellite pouches. This arrangement is faster than moving one heavy case across a ballroom complex, yet it avoids purchasing complete duplicates of rarely used equipment.
Inspect the kit at three points: before departure, after load-in, and after breakdown. Before departure, charge batteries and power banks; test flashlights, presentation remotes, and adapters; replace expired or damaged packaged goods; check liquids for leaks; and verify that documents match the current event version. After load-in, note any supplies consumed during setup. After breakdown, clean tools, record losses, quarantine damaged electrical items, and restock while the event is still fresh.
A simple inventory should list the item, target quantity, current quantity, storage module, and inspection date. Do not force false precision: frequently consumed supplies can use minimum stock levels, while unique adapters and tools should be checked individually. Colored seals or numbered pouches make it obvious when a module has been opened, but they should not delay access.
Storage conditions affect reliability. Heat can damage batteries, adhesives, wipes, cosmetics, and some first-aid components, so a kit left permanently in a vehicle may be compromised. Keep products in original packaging when instructions, ingredients, or expiration dates matter. Remove client records, access codes, and personal attendee information after the assignment; operational convenience does not justify retaining sensitive documents.
A kit is working when staff can name its location, retrieve a requested item quickly, and explain the escalation boundary. It is failing when expired goods accumulate, cables are untested, sharp tools disappear, or no one documents consumption. A short post-event review—what was used, what was missing, and what should never have been packed—produces a leaner and more dependable resource than adding supplies after every imagined mishap.
Conclusion
A dependable event kit reflects the actual venue, program, guest profile, and response structure rather than the longest possible shopping list. Secure communications and operational documents first, then cover frequent repairs, wardrobe problems, guest comfort, and event-specific technical failures. Confirm what the venue supplies and prohibits before adding tools, adhesives, electrical equipment, or safety-related products.
Build labeled modules, assign custody, and test anything powered or connection-dependent before departure. After the event, record what was used, remove confidential paperwork, inspect damaged items, and replenish consumables promptly. The next practical step is to review the run sheet and venue agreement together, identify the few failures that would interrupt the program, and pack verified backups for those gaps.
Frequently Asked Questions
Should an event planner carry over-the-counter medicine?
Medication distribution can involve allergies, interactions, dosage questions, venue rules, and liability. A planner should generally avoid offering loose or shared medication and instead follow the venue’s first-aid procedure or direct guests to an appropriate medical resource.
What type of tape is most useful at an event?
Gaffer tape is useful for many temporary production tasks, while painter’s, clear, and double-sided tape serve different surfaces and visibility needs. Obtain venue approval, test delicate finishes, and never use tape where it creates a trip, fire, or equipment hazard.
How often should the emergency kit be checked?
Inspect it before each event and again during post-event restocking. Charged devices, expiring products, event documents, liquids, and event-specific adapters need direct checks rather than an occasional visual glance.
Should every event staff member carry a separate kit?
Small events usually need one accessible central kit. Large or multi-room programs benefit from compact satellite pouches for floor leads, while costly tools, sensitive documents, and less-used supplies remain in a controlled master case.
What should never be kept in an unattended event kit?
Secure cutting tools, access credentials, sensitive attendee information, medications, valuable electronics, and any item restricted by the venue. Storage should reflect who can reach the case, including children and members of the public.
Further Reading
Authoritative Sources
Ready Business ready.gov
Federal preparedness information that can help planners distinguish event supplies from broader organizational emergency planning
Anatomy of a First Aid Kit redcross.org
A practical reference for reviewing basic first-aid kit components without improvising medical supplies
Emergency Preparedness and Response osha.gov
Workplace-focused material that provides context for emergency roles, planning, and response responsibilities
National Weather Service Safety weather.gov
Official hazard guidance useful when adapting outdoor event preparations to heat, lightning, flooding, or severe weather
What Does Travel Emergency Assistance Actually Do?
Assistance and insurance perform related but different jobs. An assistance provider may locate an appropriate clinic, arrange an interpreter, communicate with relatives, replace a prescription where legally possible, coordinate transport, or help a traveler navigate lost documents. Insurance determines whether eligible expenses will be reimbursed or paid under the policy. Treating the assistance telephone number as a promise that every expense is covered is a costly misunderstanding.
The distinction becomes especially important during a medical event. A traveler with a serious injury may need three separate functions: clinical decisions from qualified medical personnel, logistical coordination from an assistance company, and a coverage decision from an insurer. The assistance team might identify a suitable facility and communicate with the treating hospital, but the traveler could still face a deductible, an excluded service, or a request for payment before care. Emergency medical treatment should not be delayed solely to seek administrative approval when delay would create additional danger; contact local emergency services first when immediate help is needed.
Service quality also depends on location and communications. A provider may have extensive contacts in a capital city but limited options on an island, aboard a ship, or in a remote mountain region. Weather, airfield access, local medical capacity, border rules, and aircraft availability can constrain evacuation. “Evacuation” may mean transport to the nearest facility considered capable of providing care, not a flight to the traveler’s preferred hospital or home country.
Consider a traveler who breaks an ankle in a rural area. Local responders may transport the person to a nearby clinic, while the assistance provider identifies a larger hospital and evaluates ground transport. The insurer then reviews whether the transfer meets policy terms. Calling the provider can improve coordination, but expecting an immediate private aircraft would be unrealistic unless the medical need, policy language, and operational conditions support it.
Before buying or relying on a service, decide which failure would be hardest to manage alone. A domestic road trip may place greater value on roadside help and medical-network information. International travel may make translation, hospital coordination, passport support, and medical transport more consequential. Remote travel raises the value of specialized evacuation capability, while also increasing the chance that communications and weather will limit the response.
How Do You Verify Coverage and Response Capability?
Verification requires reading the actual terms and testing the contact route, not relying on a benefit summary or a credit-card logo. Start by identifying the organization that handles emergencies. The insurer, assistance operator, tour company, card issuer, employer, and medical transport membership may be separate entities with different telephone numbers and responsibilities.
Ask the provider how a case is opened and what must happen before major arrangements are made. Some services expect notification as soon as reasonably possible; some expenses require advance authorization when circumstances permit. Confirm whether the contact center operates continuously, accepts collect calls, offers messaging or app access, and can work in the languages relevant to the destination. A successful test means reaching the correct channel and learning the procedure without opening a false claim—not merely adding a number to a phone.
Policy wording deserves close attention in areas where assumptions commonly fail. Review the trip dates and geographic area, emergency medical expense limits, evacuation destination, deductibles, direct-payment procedures, reimbursement documentation, and exclusions. Examine how the contract addresses pre-existing medical conditions, pregnancy, mental health events, intoxication, high-risk activities, civil unrest, epidemics, and travel against official warnings. Definitions control the benefit; familiar words such as “emergency,” “reasonable,” and “necessary” may have specific contractual meanings.
A compact comparison can keep different services from blurring together:
Service
Primary role
Question to verify
Travel assistance
Coordinates information and logistics
Who answers, and what can they arrange?
Travel insurance
Applies policy terms to eligible losses
Which expenses, limits, and exclusions apply?
Medical transport membership
Provides specified transport benefits
Who decides when and where transport occurs?
Credit-card benefit
Offers defined protections tied to card use
Must the trip have been paid with the card?
For example, a card may advertise travel support while providing referrals rather than paying medical bills. Conversely, a separate policy may reimburse eligible treatment but require records and receipts. Compare both documents before deciding that one makes the other unnecessary. If an answer affects a large financial risk, request clarification from the provider in writing and retain it with the policy. Verbal explanations may be useful, but they should not be assumed to alter contractual terms.
Build an Offline Assistance File
An offline assistance file keeps critical details usable when a phone is lost, its battery is depleted, or mobile data is unavailable. Store a concise paper copy in carry-on baggage and an encrypted digital copy that can be reached from another device. Avoid placing every identity and financial record in one unprotected folder; convenience should not create an avoidable identity-theft risk.
The file should contain information needed to identify the traveler, open a case, explain relevant health concerns, and reach the right people. Include the assistance provider’s international and domestic numbers, policy or membership number, travel dates, itinerary, emergency contact, passport identification page, and visa details where applicable. Add a medication list using generic names when known, allergies, significant medical conditions, and the contact information for a treating clinician. Prescription rules vary by jurisdiction, so a copy of a prescription or physician letter may support a request but does not guarantee that a medication can be replaced locally.
Use this departure check for the highest-priority items:
Contact access: Save numbers in the phone, on paper, and with a trusted person at home.
Identity recovery: Keep a passport copy separate from the original and record the nearest relevant embassy or consulate.
Health details: Carry necessary medicines in labeled packaging, plus an accurate allergy and medication record.
Payment resilience: Bring more than one usable payment method and keep them separately.
Case documentation: Know how to preserve receipts, medical reports, police reports, and provider correspondence.
A couple traveling together should not keep both copies, cards, and phones in the same bag. A solo traveler should give a trusted contact enough information to assist without sending sensitive records through an exposed group message. Set clear boundaries: the contact may hold an encrypted document, for example, while receiving the password through a separate channel.
The file is working if another person can identify the provider, quote the correct reference number, and locate the itinerary within a few minutes. It is failing if access depends on one locked phone, a forgotten password, an email account protected by a code sent to the missing device, or documents stored in checked luggage. Test access before departure, then remove outdated copies after the trip to reduce unnecessary exposure.
Who Calls Whom When Travel Plans Fail?
A communication sequence prevents family, providers, and local responders from working from different assumptions. For an immediate threat to life or safety, contact local emergency services or nearby authorities first. Once the traveler is in a safer position, open a case with the assistance provider and record the case number, representative’s name, time of contact, and next promised action.
Not every disruption belongs on the emergency line. A delayed flight is normally handled first by the carrier, while a stolen passport should be reported through local police procedures when appropriate and then to the traveler’s embassy or consulate. A medical emergency belongs with local clinicians and the assistance team. A security incident may require instructions from local authorities, the accommodation provider, the tour operator, and official government travel advisories. Choosing the correct first contact reduces delay and preserves the records an insurer may later request.
Assign a home contact before leaving. That person should know the itinerary, expected check-in rhythm, provider details, and circumstances that justify escalation. “Call someone if I disappear” is too vague. A better arrangement specifies that one missed casual message is not an emergency, but failure to make contact after a defined travel leg—combined with an airline, weather, or security disruption—triggers checks with the carrier, lodging, or assistance provider. The timing should reflect the destination and activity rather than a universal rule.
Imagine a traveler loses a passport and phone during a train transfer. The immediate tasks are to secure funds and lodging, report the loss through the appropriate local channel, and contact the relevant embassy or consulate. The home contact can provide document copies and cancel exposed accounts. The assistance provider may supply directions, translation, or referral support, but it cannot issue a new passport. Clear role boundaries keep the traveler from waiting on an organization that lacks the required authority.
Record facts rather than guesses during an active case: symptoms reported, facility name, incident location, booking reference, and instructions received. Signs that coordination is working include a case number, named next step, confirmed callback method, and agreement on who is arranging transport or payment. Repeated transfers, contradictory instructions, no documented case, or requests to wait despite a worsening safety condition signal the need to escalate within the provider while continuing to use appropriate local emergency channels.
Conclusion
Useful travel emergency preparation connects coverage, contacts, documents, and decision authority before anyone needs them. Confirm which organization handles each type of incident, read the controlling terms, and test how you would reach assistance from the destination. Keep essential details available without relying on one device, while protecting passport, medical, and financial records from unnecessary exposure.
Before leaving, run a short scenario using the trip’s most credible complication: an illness, lost passport, missed connection, vehicle breakdown, or remote-area injury. Identify the first local contact, the assistance channel, the records to preserve, and the person at home who can help. Any unanswered question—especially about medical transport, exclusions, or advance authorization—should go to the provider before departure. The goal is not to predict every disruption, but to remove avoidable confusion when time, connectivity, and judgment are under pressure.
Frequently Asked Questions
Is travel assistance the same as travel insurance?
No. Assistance usually coordinates services and information, while insurance applies contract terms to eligible expenses. A company may provide both, but the functions and limits remain distinct.
Should I call the assistance provider before going to a hospital?
Call local emergency services first when immediate care is needed. If the situation allows, contact the assistance provider promptly so it can open a case and explain coordination or authorization procedures.
What travel assistance information should I keep on paper?
Carry the provider’s telephone numbers, policy or membership number, emergency contact, itinerary, key health information, and case-opening instructions. Keep the sheet separate from your passport and primary phone.
Does medical evacuation mean transport home?
Not necessarily. Coverage may provide transport to the nearest facility judged capable of treatment. The destination, medical necessity, authorization rules, and operational conditions depend on the applicable terms.
Can credit-card travel benefits replace separate coverage?
Only if the card’s actual benefit terms match the trip’s risks. Check payment requirements, covered travelers, expense limits, exclusions, claim procedures, and whether the benefit pays costs or merely provides referrals.
Further Reading
Authoritative Sources
U.S. Department of State: Before You Go travel.state.gov
Provides official preparation information for international travelers, including documents, destination conditions, and emergency planning
CDC: Getting Health Care During Travel wwwnc.cdc.gov
cdc.govExplains practical considerations for locating and paying for health care outside the United States
Federal Trade Commission: Travel Tips consumer.ftc.gov
Offers consumer-focused guidance on protecting travel documents, money, accounts, and bookings
Government of Canada: Health and Safety Outside Canada travel.gc.ca
Provides official information about health preparation, travel insurance, destination risks, and obtaining help abroad
A useful toolkit is an operating system for coordinated decisions, not a binder assembled solely for compliance or storage. Its contents must connect authority, information, assignments, resources, and records from activation through demobilization. If those connections are absent, responders may possess detailed procedures yet still disagree about who is leading, what has been approved, or which task has priority.
The governance layer includes the incident management policy, activation criteria, delegation of authority, role descriptions, and escalation thresholds. Policy states the organization’s expectations and boundaries; the plan explains the common coordination structure; procedures describe recurring work; and scenario playbooks apply that structure to a defined disruption. Treating these documents as interchangeable creates gaps. A policy rarely gives an operations lead enough detail to run a briefing, while a playbook should not quietly create authority that the governing policy never granted.
The operational layer should contain current contact information, role checklists, briefing formats, meeting schedules, action and decision logs, situation reports, resource request records, maps or system diagrams, and recovery handoff criteria. Access instructions belong here as well, but passwords and other sensitive credentials should be managed through an approved secure method rather than exposed in an ordinary response file. Paper copies of critical contacts and blank forms may be justified where power, connectivity, or device access could fail.
A compact baseline package can be evaluated with five checks:
Authority: Can responders identify who may activate the structure and approve consequential actions?
Awareness: Is there one recognized source for current status, impacts, objectives, and unresolved issues?
Accountability: Does every assigned action have an owner, deadline, status, and closure record?
Continuity: Can an incoming shift reconstruct decisions without relying on verbal memory?
Resilience: Are essential forms and contact paths usable during technology or facility disruption?
Consider a workplace that loses access to its primary building. A generic evacuation procedure may move people outside, but coordination soon requires more: verified accountability, a decision on alternate workspace, communication with affected personnel, restoration priorities, vendor contacts, and a record of who authorized expenditures. The toolkit should bridge those activities instead of leaving each department to invent its own process.
The common mistake is collecting too much material without defining what responders must use. A smaller controlled set of current forms usually has more operational value than hundreds of pages that cannot be searched under pressure. Start with the decisions and information exchanges that must occur, then include only the documents and tools that make those exchanges reliable.
How Should Command and Communications Tools Connect?
Command and communications components must show both who decides and how each decision reaches the people expected to act. An organizational chart alone does not provide that connection. The toolkit should define the incident lead, functional leads, record keeper, communications lead, technical advisers, and liaison contacts, together with deputies and transfer-of-command procedures.
Decision rights deserve more detail than job titles. The person coordinating an incident may be authorized to set operational objectives but lack authority to close a facility, release public statements, notify regulators, or approve major spending. An authority matrix should identify those boundaries and the escalation path when an approver is unavailable. Without it, teams either delay urgent work while seeking unnecessary permission or take actions that exceed their mandate.
Communications planning should separate operational coordination from stakeholder messaging. Responders may use a conference bridge, radio channel, secure collaboration space, or face-to-face briefing to manage work. Employees, families, customers, partners, public agencies, and media contacts may require different channels, approval rules, and message timing. A communications matrix can name the audience, message owner, approver, channel, backup channel, and required record. Prewritten message templates are helpful, but they should contain clearly marked fields for verified facts rather than assumptions.
For example, a severe storm may disable the primary messaging platform while managers are dispersed. A resilient toolkit provides an alternate call-in method, offline contact roster, scheduled reporting times, and a rule for acknowledging assignments. If the team merely adds more chat applications, it creates competing versions of events. Channel redundancy works only when responders know which channel is authoritative and when to switch.
Briefing discipline keeps those channels from becoming noise. A short operational briefing should cover current impacts, safety concerns, objectives, completed work, open decisions, assigned actions, resource constraints, and the next reporting time. Between briefings, urgent information should follow a defined escalation route rather than waiting for the next meeting. Routine updates can be consolidated by the record keeper or planning function.
Signs of a healthy arrangement include rapid acknowledgment, consistent status language, documented approvals, and clean shift handoffs. Warning signs include repeated requests for the same facts, leaders issuing conflicting instructions, decisions buried in private messages, or teams learning about changed priorities indirectly. When those symptoms appear, reduce the number of active channels, identify the authoritative record, and restate roles before adding another tool.
Which Operational Records Create a Shared Picture?
A shared operating picture is built from a small set of synchronized records, each serving a distinct purpose. The situation report explains conditions and consequences. The action tracker shows assigned work. The decision log records choices and rationale. The resource tracker follows requested, approved, deployed, and released assets. Combining all four into an unstructured running note may feel efficient initially, but it becomes difficult to verify ownership and history as activity increases.
Record
Primary Question
Minimum Useful Fields
Situation report
What is happening now?
Time, impacts, verified facts, uncertainties, objectives
Action log
Who is doing what?
Task, owner, due time, status, completion evidence
Decision log
What was authorized and why?
Decision, decision-maker, time, basis, affected teams
Resource tracker
What capability is needed or deployed?
Requestor, quantity or capability, approval, location, status
Handoff record
What must the next shift know?
Open actions, risks, pending decisions, contacts, next milestones
Information quality depends on time, source, and confidence. An unverified report should not silently become a confirmed fact when copied into a status board. Teams can mark entries as confirmed, provisional, or disputed and record when they were last updated. That distinction matters during fast-changing incidents, when an old but accurate observation can be less useful than a current qualified estimate.
Suppose a regional outage affects several facilities. One manager reports that backup power is operating; another says fuel will soon be constrained; a vendor gives an uncertain restoration estimate. The situation report should preserve those differences instead of reducing them to “facilities operational.” The action log might assign fuel verification, while the decision log records any choice to relocate critical work. Each record contributes a different part of the operational picture.
Resource requests need particular discipline. Asking for “more support” gives approvers little basis for action. A usable request names the capability, amount or performance requirement, delivery location, needed-by time, requesting owner, and operational consequence of delay. Tracking should continue after approval so the team knows whether the resource arrived, was reassigned, or is ready for release.
The failure mode to avoid is parallel recordkeeping without reconciliation. Department spreadsheets, chat threads, and handwritten notes can coexist, but one designated record must govern each information type. Assign a custodian, establish update intervals, and display the last revision time. If leaders cannot tell whether a dashboard reflects the current operational period, the apparent shared picture is creating false confidence.
How Do Playbooks, Exercises, and Maintenance Fit Together?
Playbooks turn the common incident structure into scenario-specific starting actions, while exercises test whether those actions work with actual people, systems, and constraints. A playbook should accelerate recognition and coordination without pretending to predict every condition. It can define triggers, initial objectives, safety considerations, required specialists, likely stakeholders, critical information, and transition points.
Organizations should build playbooks around consequential, plausible disruptions rather than every imaginable event. A cyber incident playbook may address isolation decisions, evidence preservation, service priorities, internal notification, and coordination with technical specialists. A facility-loss playbook may emphasize accountability, alternate locations, access control, continuity dependencies, and damage assessment. Both should use the same role names, action logs, and briefing rhythm as the central incident plan; otherwise responders must learn a new coordination model for each hazard.
Exercises reveal whether the toolkit functions beyond the page. A discussion-based tabletop can test authority, escalation, information flow, and decision records without interrupting live operations. A functional exercise can place greater pressure on communications, staffing, and tool access. The more realistic format is not automatically better. If role holders have never used the forms, a focused walkthrough often produces more useful learning than a complex simulation that overwhelms them.
During an exercise, observe behavior rather than asking only whether participants liked the documents. Check how long it takes to activate roles, whether participants locate current contacts, whether assignments receive owners and deadlines, and whether a replacement leader can understand the record. A toolkit is working when it reduces clarification traffic, keeps decisions traceable, and supports an orderly handoff. It is failing when facilitators must repeatedly explain where information belongs or participants abandon the approved tools for improvised notes.
Maintenance closes the loop. Assign an owner to every controlled component, identify its version and review trigger, and remove obsolete copies from active locations. Contact and access changes may require immediate updates; policy revisions, reorganizations, new systems, incidents, and exercises can trigger broader review. Revision should be selective: correct the cause of the observed problem instead of adding pages after every comment.
A practical improvement cycle is to capture an observation, identify its operational consequence, determine whether the cause involves policy, training, staffing, technology, or document design, assign a corrective action, and verify the change in a later test. Confusing instructions are not always a writing problem. If no one has authority to make the required decision, editing the checklist will not fix the underlying gap.
Frequently Asked Questions
What is the most important component in an incident coordination toolkit?
No single document is sufficient, but the role and authority structure is foundational. It should identify who leads, who approves consequential actions, who maintains records, and how responsibility transfers when personnel change.
Should a toolkit be digital or paper-based?
Use both when practical. Digital tools speed collaboration and searching, while controlled paper copies preserve core contacts, forms, and procedures when devices, networks, power, or user access fail.
How often should toolkit components be reviewed?
Review contacts and access permissions whenever personnel change, test the toolkit during scheduled exercises, and revise affected materials after incidents, exercises, system changes, or major organizational changes.
What is the difference between an incident plan and a playbook?
The incident plan defines the overall coordination structure, authorities, and common process. A playbook applies that structure to a specific scenario, such as a communications outage, facility disruption, or cyber incident.
How can a small organization keep its toolkit manageable?
Begin with a short authority matrix, contact roster, activation checklist, situation report, action log, resource request form, and two or three high-priority playbooks. Add complexity only when exercises reveal a genuine coordination need.
Conclusion
Effective coordination depends less on the volume of documentation than on whether each component supports a live operational need. Establish decision authority first, then connect it to dependable communications, controlled records, resource requests, scenario playbooks, and handoff procedures. Keep one recognized source for status, assignments, and decisions while preserving backup access for foreseeable technology failures.
The next practical step is to test a realistic disruption using the people who would actually respond. Watch where approvals pause, facts diverge, tasks lose owners, or records become inaccessible. Correct those operational gaps, assign owners to the revised materials, and verify the changes in another exercise. A toolkit should remain compact enough to use under pressure and structured enough to preserve accountability from activation through recovery.
Awareness is the first element because civilians usually have the greatest advantage before a confrontation becomes physical. It means noticing people, exits, obstacles, lighting, crowd movement, and changes in behavior without treating every stranger as a threat. A person who repeatedly closes distance, ignores a polite request for space, follows a change in direction, or positions themselves between you and an exit deserves more attention than someone who is simply nearby.
Good awareness is active but not paranoid. In a parking garage, glance around before unlocking the vehicle, keep one hand free, and avoid becoming absorbed in a phone while walking between cars. In a restaurant or public building, casually identify two ways out and note which areas are staffed. These habits do not predict an assault, but they reduce the chance of being surprised or funneled into a less favorable position.
The practical mechanism is time. Early recognition gives a civilian additional choices: change direction, enter a store, join a group, call someone, or leave an item behind. Waiting for certainty can remove those options. A common mistake is assuming that a person must make an explicit threat before action is justified. You do not need to accuse someone or prove their intent to move toward a safer location.
Awareness also requires distinguishing discomfort from immediate danger. An unusual interaction may have an innocent explanation, while a cluster of behaviors can justify a cautious response. Trusting a feeling does not mean confronting the person. It means increasing distance, seeking witnesses, and choosing an exit. The Five elements of self-defense for civilians work best when awareness leads to a decision before physical contact.
Distance and Positioning
Distance is a protective resource because it creates time to move, speak, observe, and call for help. A person who is several steps away may be easier to avoid than someone standing within grabbing range. Civilians should pay attention to how quickly another person could reach them, whether an object blocks movement, and whether their own position provides a clear path toward safety.
Positioning matters as much as the number of feet between people. Stand at an angle rather than squarely facing a stranger who is acting aggressively, keep your hands visible and available, and avoid allowing yourself to be pressed against a wall, vehicle, counter, or doorway. In an elevator, a lobby, or a narrow sidewalk, moving toward other people may be more useful than trying to maintain a perfect stance.
Consider a transit platform where someone is shouting and walking toward you. Moving behind a barrier, toward a staffed booth, or beside a group can improve your position. Remaining still to appear calm may actually reduce your options if the person continues forward. Conversely, moving abruptly toward someone who is merely upset can escalate the encounter. The goal is not to dominate space; it is to preserve an exit while avoiding unnecessary provocation.
Distance is not a guarantee. A determined person may close it quickly, and crowded settings can make movement difficult. That is why distance should be paired with an early exit and clear communication. A common failure is focusing on a stance or technique while ignoring the open doorway behind you. For most civilians, leaving a dangerous area is a better tradeoff than staying to test physical skill. Use the civilian self-defense elements as connected choices rather than isolated techniques.
Escape, Communication, and Assistance
Escape is the central objective when a situation becomes unsafe. It may mean walking into a business, crossing a street, moving behind a locked door, joining a group, or leaving an event. Escape does not have to look dramatic. A calm explanation such as “I need to go” is often unnecessary; a civilian can simply move toward safety when an interaction feels wrong.
Communication supports escape by making boundaries and needs understandable. Use a firm, brief command such as “Stop,” “Back up,” or “I do not want contact.” Avoid long arguments, insults, or attempts to persuade an agitated person that they are behaving badly. Specific requests to bystanders are more effective than a general cry for help: “You in the blue jacket, call emergency services,” or “Staff member, please come here.” Naming a task gives observers a clear role.
Communication has limits. A person may ignore a boundary, be intoxicated, be unable to hear, or become more aggressive. A verbal response should never be treated as a required script or a test of courage. If speaking increases risk, silence and movement may be wiser. If immediate danger exists, contact local emergency services as soon as it is safe, provide your location, describe the person and behavior, and follow the dispatcher’s instructions.
Consider a confrontation outside a store. Rather than standing in the parking lot to explain yourself, enter the store, tell an employee that someone is following or threatening you, and ask to remain near staff while assistance is contacted. The common mistake is waiting for a perfect moment to leave or assuming witnesses will automatically intervene. Some people may not understand what is happening, so direct communication can convert a passive crowd into useful support without requiring a physical confrontation.
Tools such as alarms, flashlights, or phones may support these actions, but they do not replace awareness and movement. A device that is buried in a bag may be less useful than a practiced plan for reaching a staffed location. Review the five elements with household members so they understand where to go and whom to contact, while avoiding complicated instructions that are difficult to remember under stress.
Recovery, Practice, and Responsible Decisions
Recovery begins after the immediate danger has ended. Move to a secure location, check for injuries, contact emergency services when needed, and preserve relevant information while events are still fresh. If a physical encounter occurred, medical attention may be appropriate even when injuries initially seem minor. Emotional effects can also appear later, and seeking support from a trusted person or qualified professional is a reasonable part of recovery.
Documentation may help with follow-up. Write down the time, location, sequence of events, descriptions, witnesses, messages, and property damage without embellishing uncertain details. Local laws differ regarding self-defense, recording, carrying defensive tools, and the use of force. Legal outcomes depend on facts and jurisdiction, so general internet advice should not be treated as legal counsel. When a serious incident occurs, ask a qualified local professional about next steps.
Practice should make safer decisions more automatic. Walk through ordinary scenarios rather than rehearsing dramatic fights: noticing someone following you, leaving a crowded venue, finding a staffed location, using a clear command, or calling for help while giving an address. Practice with realistic clothing and lighting, but avoid drills that encourage unsafe contact or create false confidence. A martial arts class or defensive skills course can be useful when it emphasizes control, escape, judgment, and instructor-supervised safety.
A compact priority order is useful under pressure:
Notice: identify behavior, exits, and changing distance.
Move: create space and head toward people, light, or a secure location.
Speak: set a brief boundary or direct a specific request for help.
Leave: avoid returning to argue, retrieve property, or prove a point.
Recover: address injuries, contact appropriate authorities, and record facts.
The sequence is not rigid. A person facing immediate physical danger may need to move before speaking, while someone noticing a troubling pattern may have time to call a friend or change plans. The common misconception is that civilian self-defense is mainly about winning a fight. Physical ability can matter, but it is only one part of a larger decision process. The safer outcome is usually the one that ends contact quickly, limits injury, and avoids unnecessary escalation.
For additional preparation, consult local emergency services, community safety programs, and reputable defensive-skills instructors who emphasize avoidance, escape, legal awareness, and supervised practice. Guidance should be adapted to local conditions, personal mobility, household needs, and the specific risks of places you regularly visit.
Frequently Asked Questions
What are the five elements of self-defense for civilians?
The five elements are awareness, distance, escape, communication, and recovery. Together they emphasize recognizing risk early, preserving options, leaving danger, obtaining help, and handling the aftermath responsibly.
Is physical fighting required for civilian self-defense?
No. Avoidance, movement, verbal boundaries, and contacting help are often more appropriate than physical engagement. Physical training should support escape rather than encourage unnecessary confrontation.
How can someone improve situational awareness without becoming paranoid?
Use brief, ordinary checks of exits, people, lighting, and changing behavior. Focus on observable actions and create distance when several warning signs appear instead of assuming every unfamiliar person is dangerous.
What should someone say during a threatening encounter?
Use short, firm language such as “Stop,” “Back up,” or “I do not want contact.” If help is needed, identify a specific person and assign a clear task, such as calling emergency services or notifying staff.
What should happen after a self-defense incident?
Reach a secure location, address urgent injuries, contact appropriate authorities, and record factual details and witnesses. Because laws differ, seek advice from a qualified local professional after a serious incident.
Conclusion
Effective civilian self-defense is a sequence of practical choices rather than a promise to win a physical contest. Notice behavior and exits before a situation closes in, preserve distance, move toward safety, communicate briefly when that helps, and involve other people or emergency services when danger is immediate. Afterward, treat injuries, record facts, and recognize that recovery can include emotional support as well as physical care. Practice these decisions in familiar settings such as parking areas, transit stops, workplaces, and public venues. Choose training that builds judgment and escape skills, not confidence based on unrealistic demonstrations. The most useful preparation is the kind that gives you more options early and makes leaving an unsafe situation easier.
Pressure points are commonly presented as small locations where a precise touch can instantly disable a larger or stronger attacker. That claim is too broad for real-world self-defense. A person may react to pain, but a pain response is not the same as loss of balance, loss of consciousness, or a reliable release from a grip. The result depends on movement, adrenaline, clothing, body angle, access, and whether the other person is committed to violence.
A demonstration can make a technique appear dependable because the participant knows what is coming, controls the pace, and may unconsciously assist the movement. A surprise assault removes those conditions. Hands may be trapped, vision may be obstructed, and the defender may be trying to protect a child, maintain footing, or reach a doorway. A technique requiring a fingertip-sized target is therefore less forgiving than a movement that creates distance with the whole body.
Consider someone grabbing a wrist in a crowded parking area. Searching for a specific point on the forearm may take attention away from the person’s hips, balance, and escape route. A simpler response may be to protect the head, turn toward the opening, use a loud boundary, and move away as soon as contact breaks. That does not make pressure-point knowledge useless; it places it below awareness, movement, barriers, and exit decisions.
Readers comparing online claims with grounded instruction can use pressure points self-defense claims and safety limits as a reminder to test promises against realistic constraints. The useful question is not whether a spot can hurt. It is whether a person can access it safely, under pressure, without increasing the danger.
The Body, Stress, and Unreliable Pain Responses
Pain compliance works only when the other person notices pain and chooses to change behavior. Stress can alter that response. Adrenaline, anger, intoxication, mental distress, medication effects, and commitment to an attack may reduce attention to discomfort. Even without those factors, people differ widely in sensitivity and tolerance. A method that causes a visible reaction in a cooperative classmate may produce little interruption during a fast assault.
Access is another major limitation. The target may be moving, covered by a jacket, protected by the attacker’s arms, or positioned against a wall. Fine motor control also deteriorates when a person is frightened. Trying to pinch, press, or strike a narrow anatomical location can become a contest of precision when the defender needs a quick, gross-motor movement instead.
A practical example is a two-handed push. The defender may be told to press a point near the attacker’s hand or neck, but the pushing person is already using forward force. If the defender remains planted and reaches for a small target, balance may deteriorate. A better training goal is to recognize the force, keep breathing, protect the head, angle away from the line of pressure, and move toward people or an exit. The priority is interruption and escape, not proving that a particular point works.
There is also a difference between a technique that causes discomfort and one that changes structure or position. Pain may fade quickly; a barrier, locked door, vehicle, table, or open distance continues to affect access. That comparison explains why pressure-point information should be treated as supplemental awareness rather than a guaranteed control system.
Warning signs of weak instruction include claims that one point works on everyone, guarantees a knockout, defeats any size difference, or requires no practice. Stronger instruction acknowledges failed attempts, encourages safe partner feedback, and teaches what to do immediately when the first action does not work.
Safety and Legal Limits Around Vulnerable Areas
Some commonly advertised targets are medically fragile areas, including the eyes, throat, front of the neck, head, and certain joints. Contact there can cause serious injury, permanent impairment, or a medical emergency. That risk makes casual experimentation inappropriate. A person should not practice forceful attacks on a partner’s neck, eyes, spine, or head, even when a video describes the action as a harmless pressure technique.
Training also has a legal and ethical dimension. Self-defense law varies by location, but the central practical issue is usually whether the response was reasonable in relation to the perceived threat. A technique marketed as a secret disabling move can lead a learner to use more force than necessary or continue after an opportunity to escape appears. No article can determine how a specific incident would be judged, so local legal advice is more reliable than a broad internet rule.
Suppose an argument outside a store becomes threatening but the other person has not touched anyone. Pressing a sensitive area or striking first may escalate the encounter and create consequences that could have been avoided by leaving, contacting staff, or calling emergency services. If an assault is already underway, the objective remains breaking contact and reaching safety. Once the threat ends, continuing to apply force is unlikely to improve safety.
Medical factors matter as well. Children, older adults, pregnant people, individuals with disabilities, and people with known health conditions may face different risks from falls, joint manipulation, compression, or impact. A technique that seems minor in a demonstration can produce a fracture, airway problem, or head injury when someone falls onto concrete.
Do not test painful techniques on a person’s neck, eyes, spine, or head.
Do not assume a pain response means the threat has stopped.
Stop using force when safe separation has been achieved.
Seek medical help after significant impact, breathing difficulty, confusion, severe pain, or loss of consciousness.
These limits do not require passivity. They require matching the response to the danger and keeping escape, witnesses, communication, and emergency assistance in view.
A Safer Priority Order for Personal Protection
Personal protection is more dependable when it is organized around priorities rather than a catalog of vulnerable points. Awareness can provide early warning, verbal boundaries can clarify intent, movement can prevent a person from being cornered, and barriers can reduce access. Physical action may become necessary, but it should serve the immediate goal of creating an opportunity to leave.
Position: Keep space, avoid being trapped against a wall, and move toward light, staff, companions, or public activity.
Communicate: Use a clear voice such as “Back up” or “Do not touch me,” without relying on a long explanation.
Disengage: If contact occurs, protect vital areas, move toward an opening, and use only the action needed to break contact.
Report and recover: Contact emergency services when appropriate, preserve relevant information, and obtain medical care for injuries.
This sequence is not a promise that every encounter can be controlled. Its value is that it reduces dependence on a tiny target and gives the defender several options before a physical struggle becomes close and chaotic. A person with limited mobility may prioritize a chair, counter, vehicle, or door as a barrier. Someone responsible for a child may need a movement plan that keeps the child on the protected side rather than attempting a complex technique.
A common mistake is practicing only the final physical move. Training should include recognizing when to leave, speaking under stress, moving while looking for help, and recovering after a failed attempt. Signs that training is becoming more realistic include the ability to keep breathing, identify an exit, avoid tunnel vision, and stop when separation is achieved. Signs it is failing include freezing whenever a partner changes angle, relying on a memorized target, or treating compliance as proof of effectiveness.
For broader preparation, pressure-point safety limits belong alongside emergency contacts, charged communication devices, safe transportation choices, and knowledge of nearby public places. Those measures may appear less dramatic than a disabling technique, but they often improve the number of available escape options.
How to Evaluate Training and Online Demonstrations
Evaluate a self-defense claim by asking what must be true for it to work. Does the defender need a clear view of a small target? Must the attacker remain still? Is the response based on pain compliance? Does the technique leave the defender close to the person or facing a second threat? Each requirement is a possible failure point.
Credible instruction should explain limits instead of promising certainty. It should include prevention, de-escalation, balance, escape routes, safe practice methods, and appropriate force. The instructor should be able to describe what happens when the target is missed or the attacker does not cooperate. A demonstration that ends immediately after a perfect application says little about performance under pressure.
Use particular caution with claims involving secret anatomy, effortless control of much larger people, guaranteed unconsciousness, or pressure applied to the neck. Such claims can encourage dangerous testing and unrealistic confidence. A responsible class uses protective equipment and controlled intensity, avoids harmful targets, and makes clear that training partners can be injured even when the technique is performed correctly.
Before enrolling, ask whether the course teaches exit movement, verbal skills, scenario awareness, and first aid. Ask how instructors manage injuries and whether participants can decline unsafe drills. A class focused solely on painful compliance may be less suitable for a beginner than one that develops footing, distance management, awareness, and decision-making.
Online material can be a starting point for questions, not a substitute for qualified supervision. Compare several sources, look for transparent limitations, and avoid treating views, dramatic reactions, or testimonials as evidence that a technique is dependable. The strongest takeaway is modest but useful: knowing that certain areas are vulnerable may help a person recognize danger, yet safe preparation depends more on positioning, escape, judgment, and practiced movement.
Frequently Asked Questions
Can pressure points stop an attacker instantly?
No. Pain responses vary, and a person may continue moving because of stress, intoxication, anger, clothing, or limited access to the target.
Which pressure points are safest to practice?
Do not practice forceful contact with the eyes, throat, neck, spine, or head. Use qualified instruction and controlled, non-injurious drills instead.
Should beginners learn pressure-point techniques?
They may study the claims critically, but beginners should prioritize awareness, verbal boundaries, balance, distance, escape routes, and supervised practice.
What should I do if a pressure-point technique fails?
Protect yourself, create distance, move toward an exit or other people, and call for help. Do not remain close trying repeated fine-motor applications.
Can using a pressure point create legal problems?
It can, especially if force is excessive, used after the threat ends, or applied in a situation where leaving or seeking help was reasonably available. Local law controls.
Further Reading
Authoritative Sources
American Red Cross First Aid redcross.org
Provides recognized first-aid guidance relevant to responding after injuries or medical emergencies
CDC Violence Prevention cdc.gov
Offers evidence-informed information about violence prevention and factors that influence injury risk
Conclusion
Pressure points may produce discomfort, but discomfort is not a dependable substitute for escape, distance, or emergency help. Treat dramatic demonstrations and instant-disable claims cautiously, particularly when they involve the neck, eyes, head, or joints. The practical priority is to recognize escalation early, keep an exit available, use clear boundaries, and move toward safety when contact occurs. If physical action becomes unavoidable, the objective should be to break contact rather than dominate or punish the other person. Choose instruction that tests assumptions, explains failure conditions, protects training partners, and includes communication and recovery skills. That approach builds judgment without encouraging dangerous confidence in a precise target or a guaranteed result.
Build Self-Defense Around Mobility and Exit Options
Effective self-defense for an older adult begins with an honest assessment of movement rather than an idealized fitness level. Consider walking speed, turning ability, stair use, vision, hearing, hand strength, pain, fatigue, and whether standing from a chair is difficult. These details determine which actions are realistic. Someone who can walk steadily on level ground but cannot pivot quickly should not rely on spinning away, chasing an attacker, or recovering from a fall.
The first objective is usually to create time and reach a safer place. A well-lit shop, staffed reception desk, neighbor’s doorway, vehicle with locked doors, or busy waiting area may provide more protection than attempting to overpower someone. Distance matters because a person with limited mobility may need extra seconds to turn, unlock a door, summon assistance, or move around furniture. Keeping a phone accessible and knowing which nearby locations are normally staffed can make an exit strategy more practical.
A useful personal assessment separates capabilities into three groups: movements that are comfortable, movements that are possible but slow, and movements that are unsafe. Comfortable actions might include raising both hands, turning the torso, speaking loudly, or pressing an emergency button. Slow actions might include standing from a low chair or stepping backward. Unsafe actions might include kneeling, running over uneven ground, or striking with a painful shoulder. Training should emphasize the first group, cautiously rehearse the second, and avoid depending on the third.
For example, a resident who uses a rollator may be able to move toward an elevator but not quickly reverse direction. The safer response to a suspicious approach could be turning toward a staffed lobby, placing the rollator between people, and calling a trusted contact before the person gets close. That approach differs from a fitness class built around rapid footwork, but it better matches the actual constraint. The common failure is practicing impressive movements that disappear under stress. A modest action that can be repeated while tired or frightened is more valuable than a complex technique that requires perfect balance.
Use the mobility-focused self-defense checklist to identify one reliable exit route at home, one at a regular destination, and one response for a public encounter. Reassess after surgery, a medication change, a new assistive device, or any fall that affects confidence or balance.
Use Positioning, Verbal Boundaries, and Environmental Barriers
Positioning can reduce the need for physical force. Keep enough space to see a person’s hands and maintain access to an exit rather than allowing yourself to be boxed into a corner, narrow hallway, or vehicle doorway. If someone approaches aggressively, angle your body toward an open path, keep both hands visible at chest height, and use a firm phrase such as “Stop. Stay back.” The purpose is not to win an argument; it is to signal a boundary, attract attention, and buy time.
Furniture and ordinary objects can serve as barriers without becoming weapons. A counter, table, shopping cart, closed door, parked vehicle, or reception desk may slow an approach and give you a route to assistance. Barriers are most useful when placed between you and the person before contact occurs. Trying to retrieve an object after someone has grabbed you may worsen the situation, especially for a person with reduced grip strength or limited reach.
Voice and attention should be specific. Instead of quietly saying “help,” direct the request to a particular person: “You in the blue shirt, call emergency services,” or “Staff member, please come here.” A clear command can help bystanders understand that assistance is needed. It may also discourage a person who is relying on confusion or social politeness. Do not assume that every observer will interpret a tense interaction correctly; concise words and movement toward a populated area reduce ambiguity.
A scenario illustrates the tradeoff. In a parking lot, a senior using a cane may be unable to move backward quickly while holding bags. Dropping the bags, turning toward the nearest open business, raising the free hand, and speaking loudly may be safer than trying to hold the cane in a striking position. The cane may help with balance and distance, but using it aggressively can cause loss of stability, damage, or escalation. Its most dependable role is the one that preserves mobility and supports an exit.
Watch for warning signs that a positioning strategy is failing: the person keeps closing distance despite a clear command, blocks the route, reaches toward you, or follows you after you change direction. At that point, stop negotiating, increase volume, move toward people, and contact emergency services when appropriate. De-escalation is not the same as staying compliant with an unsafe demand. The senior self-defense response plan should include a specific point at which conversation ends and escape or emergency assistance begins.
Adapt Responses for Canes, Walkers, Wheelchairs, and Limited Balance
Assistive devices change the geometry of self-defense. A walker needs turning room, a wheelchair may have limited access through thresholds, and a cane user may depend on one hand for stability. Any response that requires dropping, throwing, or abandoning the device could create a second emergency. Practice should therefore include the device in its normal position rather than treating it as an inconvenience to be removed.
For a wheelchair user, the safest route may depend on door width, ramp access, surface condition, and whether a person can reach the brake controls. Locking the brakes while speaking to a stranger can prevent unwanted rolling, but remaining stationary is not always wise if the person is approaching. The user may need to unlock, turn toward an accessible exit, and call for help before the threat is close. A companion should know whether to move the chair, open a door, or contact emergency services; improvisation can cause injury.
A walker or rollator can provide a stable visual boundary, but it should not be treated as a guaranteed shield. A person who grabs the frame may destabilize the user, and pulling against that force can cause a fall. Releasing a bag, stepping toward a clear route, using a loud command, and asking a specific bystander for assistance may be preferable to a tugging contest. If a fall occurs, protecting the head, creating distance with the voice, and calling for help may be more realistic than attempting to stand immediately.
Balance limitations also affect training intensity. Begin seated or beside a secure support, use a slow pace, and stop when pain, dizziness, breathlessness, or confusion appears. Do not practice grabbing or falling drills with an untrained partner. A physical therapist, occupational therapist, or qualified instructor familiar with older adults may help adapt movements, but instruction should remain focused on escape and personal capability rather than promises of combat effectiveness.
Common assumptions need correction. A stronger device is not automatically safer, and a concealed defensive product may create legal, handling, or access problems that are difficult under stress. The best option depends on local rules, hand function, sensory ability, and whether the user can deploy it without losing balance. Review door locks, lighting, phone placement, and accessible routes alongside any physical technique. Often, improving the environment delivers more usable protection than adding equipment.
Practice a Low-Impact Routine and Review Common Mistakes
Practice should turn a few decisions into familiar actions. A short routine can be performed at home without simulated violence: notice an approach, orient toward an exit, raise the hands, say a boundary phrase, move behind a barrier, and contact help. Rehearse from a chair, beside a walker, or while holding the cane, depending on daily reality. The goal is not speed for its own sake; it is reducing hesitation while preserving balance.
Use several ordinary settings. At home, practice reaching the phone, moving through the main doorway, and identifying a room that can be locked. At a store, identify staffed counters and wide aisles. In a parking area, note lighting, cameras, open businesses, and the safest direction of travel. At a medical appointment or community center, ask about accessible exits before an emergency occurs. These rehearsals expose practical problems, such as a phone placed too low, a door that requires two hands, or a route blocked by a delivery cart.
A compact review can ask:
Can I recognize a concern early enough to change direction?
Can I state a boundary without moving into reach?
Can I reach an exit, phone, alarm, or staffed location with my usual device?
What happens if I drop a bag, lose balance, or cannot use one hand?
Who knows how to assist me, and what exact help should they provide?
Practice should be adjusted when the answer to any question is no. Move the phone, remove a trip hazard, change the meeting point, or choose a different route before adding a complicated technique. A trusted partner can approach slowly from a known distance while the older adult practices speaking and moving away, but the exercise should stop immediately if fear, pain, or instability rises. Realistic practice is controlled and repeatable, not startling or humiliating.
Several mistakes appear repeatedly: waiting for proof before leaving, assuming politeness will calm someone who is already pursuing, backing toward an unseen obstacle, and relying on a tool that has never been handled. Another mistake is copying a standing technique while seated or using a wheelchair without adapting the movement. A better standard is simple: can the response be performed from the person’s normal position, under mild stress, without risking a fall? The mobility-limited safety practice should be reviewed every few months and after any change in health, equipment, or routine.
For individualized mobility questions, readers can consult a licensed physical or occupational therapist and ask local emergency services about accessible communication options. Community senior centers, disability organizations, and recognized personal-safety instructors may also offer low-impact classes; verify that instruction emphasizes consent, escape, balance protection, and realistic use of assistive devices rather than compulsory contact drills.
Frequently Asked Questions
Should older adults learn striking techniques?
Striking should not be the starting point when mobility is limited. Awareness, distance, barriers, verbal boundaries, and escape are usually easier to adapt and less likely to threaten balance; any physical technique should be taught safely by a qualified instructor.
Can a cane or walker be used for self-defense?
An assistive device is primarily for balance and movement. It may create space or act as a visual barrier, but forceful use can cause loss of stability, damage, or escalation. Practice preserving access to the device and moving toward help.
What should someone do if they cannot run?
Move toward people, light, staff, or a lockable location; use a loud, specific command; place a barrier between yourself and the person; and call emergency services or a trusted contact. Dropping bags may make movement easier.
How can wheelchair users practice safely?
Rehearse from the chair with brakes, controls, doors, thresholds, and accessible routes included. Practice turning toward an exit, calling for assistance, and explaining exactly how a helper should move or protect the chair.
How often should mobility-focused self-defense be reviewed?
Review it every few months and whenever balance, vision, strength, medication, living arrangements, or assistive equipment changes. A response that worked before may become unsafe after a fall or new limitation.
Conclusion
Mobility limits do not eliminate self-defense options, but they change the priorities. Build around early recognition, a clear exit, protected balance, firm verbal boundaries, accessible communication, and barriers that create time. Keep a cane, walker, or wheelchair part of practice rather than assuming it can be discarded during danger. Review routes in familiar places, test phones and doors, and rehearse from the positions used in daily life.
Avoid training that depends on running, floor recovery, complicated holds, or physical strength that is not consistently available. The most useful response is one that remains possible when pain, fear, fatigue, or limited reach is present. Update the routine after health or equipment changes, and seek qualified assistance when a physical limitation makes practice uncertain.