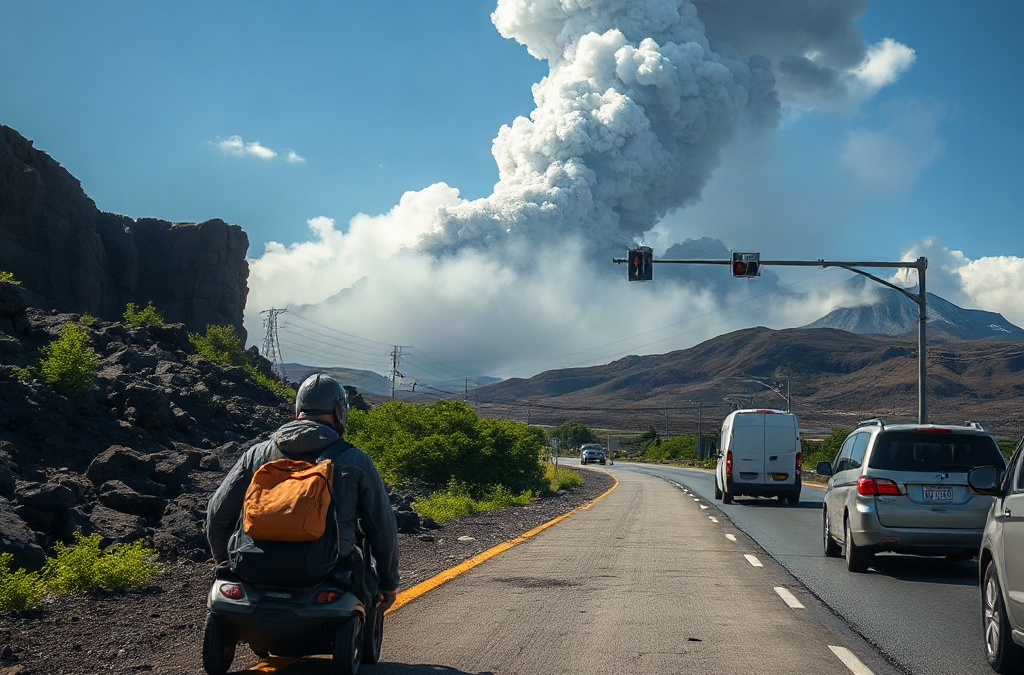
Temporary travel disruption during an eclipse is driven by concentrated demand rather than by the celestial event itself. Visitors may arrive in the same small communities, seek roadside viewing locations, leave at similar times, and compete for fuel, food, parking, and lodging. A route that normally takes an hour can become difficult when shoulders are occupied, intersections are managed differently, or a minor collision blocks a key road.
The timing of disruption matters. Congestion can build before the eclipse, remain severe during the viewing period, and intensify afterward when large groups try to depart simultaneously. Rural destinations may have fewer alternate roads, limited cellular capacity, and long distances between service stations. A navigation application may show a delay but still fail to identify a closed entrance, a full parking area, or a road restricted by local officials.
Consider the difference between a local outing and a destination trip. Someone traveling from home with a full tank and a nearby backup location has more flexibility than a family driving several hours to a reserved campsite. The second traveler must account for check-in times, children’s needs, medication schedules, weather changes, and a safe place to wait if the return route becomes impractical. A successful outing is not necessarily the one with the shortest drive; it is the one with enough margin to absorb an unexpected hold.
Use Eclipse preparedness for temporary travel disruptions as a planning lens: identify what could become scarce, what information could disappear, and which decision you will make if the original itinerary no longer works. That approach is more reliable than assuming a published event schedule predicts local road conditions.
Build a Route That Still Works When Traffic Stops
A resilient eclipse route has a primary destination, a realistic alternate viewing area, and a clear point at which you will turn around. Mark fuel stations, restrooms, food sources, medical facilities, and safe stopping locations before leaving. Download maps for the entire route and keep a paper map or written directions available. Offline navigation does not replace current road information, but it remains useful when data service is overloaded or a phone battery fails.
Do not treat every apparent shortcut as a valid contingency. A narrow rural road may lack shoulders, have poor visibility, or pass through private land. Parking on a highway shoulder can expose travelers to moving traffic and may obstruct emergency vehicles. Choose alternatives that are legal, publicly accessible, and suitable for your vehicle. If an event organizer or local authority provides designated access points, verify opening times and capacity rather than relying on an old social-media post.
Departure timing deserves more attention than route length. Leaving very early may reduce congestion but can create fatigue, cold exposure, or a long wait without services. Leaving immediately after totality or another major viewing moment may place you in the heaviest outbound wave. A later departure can be more comfortable if you have water, food, shade, and a safe place to wait. The best option depends on lodging, road restrictions, weather, and the needs of everyone in the vehicle.
Before departure, write down three triggers:
Continue: traffic is moving, fuel is adequate, and the destination remains accessible.
Pause: the route is slowing, services are crowded, or weather and fatigue are becoming concerns.
Abort or reroute: officials close access, fuel becomes uncertain, a passenger needs care, or the route creates an unsafe exposure.
This simple threshold system prevents a common failure mode: continuing toward a full destination because time and money have already been spent. Reversing early is usually easier than attempting to leave a packed viewing area after roads have reached their worst conditions. For additional planning context, review Eclipse preparedness for temporary travel disruptions alongside the official transportation notices for the counties you will enter.
Pack for Delays, Service Gaps, and Changing Conditions
Travel supplies should cover a longer day than the itinerary suggests. Pack drinking water, shelf-stable food, required medications, a first-aid kit, hand sanitizer, toilet paper, sun protection, weather-appropriate layers, and a charged power bank. Bring enough food for passengers who cannot easily eat whatever is available at a crowded fuel station. People with dietary restrictions should be especially cautious about assuming that a remote event site will have suitable options.
Vehicle preparation is equally practical. Check fuel, tire condition, fluids, lights, and windshield visibility before entering a congested area. A full tank is not a guarantee of uninterrupted travel, but it reduces dependence on the next open station. Keep the vehicle’s emergency supplies accessible rather than buried under luggage. If you use an electric vehicle, confirm charging locations, connector compatibility, and whether the planned chargers are near the actual route rather than merely within the same region.
Viewing equipment requires its own safety check. Use eclipse viewers that meet recognized safety requirements and follow the manufacturer’s instructions. Ordinary sunglasses, camera filters not designed for solar viewing, and improvised materials are not substitutes. Keep children close enough to supervise, and do not let the excitement of finding a roadside stopping place override safe parking or visibility. During a partial phase, unfiltered direct viewing remains hazardous; darkness alone does not make ordinary eyewear safe.
Pack for communication failure, not just poor reception. Write down lodging details, reservation numbers, emergency contacts, and the vehicle description. Carry a physical payment option where appropriate, since a crowded network or dead phone can make digital access unreliable. A compact travel kit might include:
Water and food for the expected trip plus a substantial delay
Medications and personal care supplies that cannot be replaced easily
Phone chargers, a power bank, and printed directions
Sun, heat, cold, rain, and visibility protection suited to the forecast
Basic vehicle and roadside safety items
The tradeoff is weight and space. Carrying every possible item can obstruct the driver’s view or complicate evacuation from the vehicle. Prioritize items tied to time, health, hydration, communication, and safe transport. A large entertainment kit is less useful than water, medication, and a working way to contact the person waiting for you.
Coordinate People, Information, and the Return Trip
Group coordination should not depend on continuous phone service. Agree on a meeting point, a departure window, and a message that means “I am safe but delayed.” Share the itinerary with someone who is not traveling, including the planned route, lodging address, vehicle details, and a reasonable check-in time. If the group separates at a crowded location, each person should know the fallback meeting place and who is responsible for children or vulnerable travelers.
Use several information channels. Check official state or local transportation agencies, public-safety alerts, event-organizer notices, weather information, and lodging updates. Social media can reveal local conditions quickly, but it may mix old posts, speculation, and reports from another access point. Confirm a claim before changing route or entering an unfamiliar area. Printed information matters when a phone is lost, a battery is empty, or networks are overloaded.
The return trip deserves a separate plan. Identify whether you will leave immediately, wait for traffic to thin, or stay overnight. Waiting is not automatically safer if you lack water, shelter, medication, or a lawful place to remain. Leaving immediately is not automatically efficient if the access road is gridlocked. Ask what the vehicle, passengers, and destination can tolerate rather than copying the choice of nearby drivers.
One realistic scenario is a family whose reserved lodging is 40 minutes from the viewing site. If the road home becomes stationary, the family may choose to return to lodging, remain at an approved location, or leave after a meal and rest period. That decision is easier when the reservation, route, fuel level, and meeting plan are known in advance. It becomes harder when everyone is tired and the only information source is a phone showing an uncertain arrival time.
Include Eclipse preparedness for temporary travel disruptions in your final household or group briefing, but make the briefing specific: who checks alerts, who carries the documents, where the group meets, and which conditions cancel the next leg of travel.
A Practical Eclipse-Day Decision Sequence
A short decision sequence keeps preparation usable under pressure. The evening before travel, confirm access rules, weather, lodging, fuel or charging options, and the latest transportation notices. On departure morning, check the vehicle, load supplies where they can be reached, and send the itinerary to your contact. At each major stop, reassess time, fuel, weather, passenger condition, and the next reliable service point.
Do not measure success solely by reaching the original viewing site. If the site is full, the road is unsafe, or a passenger becomes unwell, a controlled change of plan is a sound outcome. An alternate location may offer a less complete experience but a safer parking arrangement and a simpler exit. The eclipse is temporary; a rushed driving decision can have consequences long after traffic clears.
Use this priority order when conditions deteriorate:
Protect people: address medical needs, fatigue, heat, cold, and unsafe roadside exposure.
Preserve mobility: maintain fuel or charge and avoid parking where departure is blocked.
Verify information: use official updates and confirm that an alternate route is accessible.
Communicate: send a concise status message and use the agreed meeting plan.
Choose the least complicated safe option: wait, reroute, return, or stay overnight.
A frequent mistake is making a new decision every few minutes while following a crowd. Set review points instead, unless an immediate hazard requires action. Signs the plan is working include adequate supplies, a known exit, functioning communication alternatives, and passengers who remain comfortable enough to make decisions. Signs it is failing include dwindling fuel, missed medication timing, worsening weather, blocked access, rising fatigue, or uncertainty about where the vehicle can legally stop. Those signals justify changing course before the situation becomes urgent.
Frequently Asked Questions
How early should I leave for an eclipse viewing location?
Use the event’s access guidance, lodging location, and local transportation alerts rather than a universal hour estimate. Build extra time for parking, walking, rest stops, and a delayed departure.
Should I leave immediately after the eclipse?
Not necessarily. Immediate departure may place you in the largest outbound traffic wave. If you have a safe, legal place to wait with water and supplies, delaying may be more manageable.
What should I do if mobile service becomes unreliable?
Use downloaded maps, printed directions, written contacts, and a prearranged meeting point. Send short status messages when service returns instead of relying on continuous location sharing.
Are regular sunglasses safe for watching an eclipse?
No. Regular sunglasses are not designed for direct solar viewing. Use appropriate eclipse-viewing equipment according to its instructions and supervise children closely.
What is the most important vehicle preparation?
Confirm fuel or charge, tire condition, fluids, lights, and a clear windshield before entering a crowded area. Keep emergency supplies accessible and avoid relying on a single service stop.
Conclusion
A well-managed eclipse trip accounts for the hours around the viewing event, when traffic, parking, fuel access, communications, and local services may be under unusual pressure. Check official updates, preserve vehicle range, carry food and water, protect medications and viewing safety, and give every traveler a clear fallback arrangement. The most useful safeguard is decision margin: enough time and supplies to pause rather than force a bad route, enough information to recognize when access has changed, and enough communication planning to find one another without a live signal. Review the route the day before, brief the group, and decide in advance when waiting, rerouting, or returning is the safer choice.
Evacuation readiness begins with location-specific information, not a generic emergency kit. A volcano may produce ashfall, lava flows, pyroclastic flows, debris avalanches, volcanic gases, or lahars—mudflows that can travel along river channels and drainages, sometimes well beyond the visible eruption area. Local emergency managers and geological agencies map these hazards differently, so a home that is outside a lava-flow zone may still be exposed to ash or a lahar route.
Find the official volcano hazard map for your community and mark your home, workplace, school, childcare location, regular travel routes, and the places where family members spend evenings. Note whether each location sits near a stream, canyon, bridge, coastline, or low-lying valley. A route that looks short on a phone may cross a channel that authorities could close first. Save an offline copy because cellular data and electricity may be unreliable during an evacuation.
Two routes are more useful than a single favorite route, but they should not simply be two versions of the same road. Choose alternatives that separate from one another early and lead away from designated hazard zones. If a bridge is the only crossing, identify a safe meeting location on both sides rather than assuming everyone can travel together.
Record the official evacuation zones and the agency that issues orders.
Identify routes that avoid river channels, narrow valleys, and known closures.
Choose an out-of-area meeting place and a contact outside the immediate region.
Ask schools, employers, and care providers how they release or relocate people.
A common mistake is treating a familiar road as automatically safe. During ashfall, visibility can drop, road surfaces may become slippery, and traffic can stop at bottlenecks. A second mistake is relying on a map without checking its date or the instructions attached to it. Review official maps and alert subscriptions periodically, especially after moving, changing jobs, or adding a new school or care obligation. The Volcano eruption preparedness for evacuation readiness process becomes much more workable when the geography is understood before an alert creates pressure.
Turn Alerts Into an Evacuation Decision
Official alerts should determine when you act; personal observation should not. Volcanic activity may escalate before residents see a dramatic plume, and hazards such as lahars can arrive with little useful warning in areas downstream. Subscribe to local emergency notifications, understand the difference between an advisory and an evacuation order, and keep a battery-powered or hand-crank way to receive information if internet service fails.
Write down the action associated with each alert level used by your local authorities. For one household, an advisory may mean checking fuel, medications, and animal transport. A warning may mean loading the vehicle and moving vulnerable people early. An evacuation order means leaving by the designated route rather than waiting to see whether conditions appear dangerous. Follow local instructions if they conflict with a preselected route, because authorities may close roads or redirect traffic based on changing conditions.
Timing involves a real tradeoff. Leaving too early may mean waiting elsewhere, missing work, or using fuel and lodging resources sooner than expected. Leaving too late can place a family in traffic, expose people to ash, and make it harder to assist someone who needs extra time. People who use oxygen, powered medical equipment, wheelchairs, or regular refrigerated medicines should build more time into the decision because their departure has additional steps.
Use a short departure sequence rather than improvising:
Confirm the instruction through an official source, not an unverified social-media post.
Contact household members and the designated out-of-area contact.
Collect the ready bag, medicines, documents, protective gear, and pet supplies.
Turn off utilities only if local authorities advise it and doing so is safe.
Leave using the assigned route, avoiding closed roads and restricted zones.
Do not create a plan that depends on every family member returning home first. A parent may be at work, a teenager may be at school, and a caregiver may be responsible for another person. Agree on who has authority to leave, where people reunite, and what happens if communication is unavailable. The evacuation readiness plan should make the safest decision obvious when the household is separated.
Pack for Ash, Displacement, and Special Needs
A volcanic evacuation kit should support movement and several days away from home, while remaining light enough to carry. Ash is abrasive rather than ordinary dust; it can irritate eyes and airways, contaminate exposed water, and enter vehicles and buildings. Pack sealed eye protection, suitable respiratory protection recommended by local authorities, durable clothing, closed shoes, gloves, water, shelf-stable food, a flashlight, spare batteries, a first-aid kit, and chargers or battery packs.
Prescription medicines deserve special attention because evacuation delays may outlast a normal daily routine. Keep a current medication list, copies of prescriptions, identification, insurance information, and essential medical instructions in a waterproof pouch. Store supplies for infants, older adults, and people with disabilities in the same grab location, but do not assume a single bag will meet every need. A child may need comfort items; a person with hearing loss may need written alerts; a service animal may require food, identification, and equipment.
Vehicle preparation has limits. A full tank can improve flexibility, but vehicles should not be treated as sealed shelters during heavy ashfall. Ash can reduce visibility, clog filters, and damage engines and moving parts. If authorities direct people to shelter temporarily, keep windows closed and ventilation set to recirculate when appropriate; if they order evacuation, follow the route and driving instructions rather than attempting to outrun visible ash.
Keep household supplies in more than one form. Bottled water is convenient for departure, while stored water at a destination may be useful if evacuation lasts longer. Digital documents are easy to access but fail when batteries or networks fail, so retain paper copies. A compact priority list is more reliable than a huge kit:
Water, ready-to-eat food, medications, and personal hygiene items.
Eye and respiratory protection, sturdy clothing, and footwear.
Identification, cash, keys, chargers, flashlight, and paper contacts.
Pet or livestock instructions, carriers, food, and vaccination records.
The failure mode to avoid is buying protective equipment without learning how to use or fit it. Poorly fitting gear may offer less protection, and improvised coverings are not equivalent to purpose-designed equipment. Check expiration dates, replace consumed medicines and food, and practice collecting the kit in darkness. For more detail, connect these supplies to the broader volcano evacuation checklist rather than storing disconnected items with no assigned purpose.
Rehearse Routes, Transport, and Communication
A plan becomes usable when people can perform it under interruption. Conduct a short household drill: receive a mock alert, collect the bags, secure pets, check the vehicle, and travel to the meeting point without entering a restricted area. The goal is not speed for its own sake. The goal is to expose missing keys, dead batteries, unclear responsibilities, inaccessible carriers, and routes that fail for someone using a wheelchair or walking aid.
Test the plan under different conditions. One rehearsal can begin with everyone at home; another can assume a child is at school and an adult is at work. Ask each person to explain where they would go and whom they would contact. If the household has only one driver, arrange a backup with a neighbor, relative, community service, or local transportation resource before an emergency. Do not assume ride-sharing services, public transit, or fuel stations will operate normally.
Communication plans should use more than one channel. A text message may succeed when voice calls are congested, but it still depends on a charged device and network access. A printed contact card, a designated out-of-area contact, and a rule to avoid unnecessary calls can reduce confusion. Establish a simple message format that states location, condition, destination, and next check-in time.
Rehearsal also reveals competing priorities. Closing windows, protecting equipment, or photographing damage may feel urgent, but none should delay an evacuation order. Property actions are secondary and should occur only when authorities permit time and conditions are safe. If ash is falling, avoid unnecessary driving and protect air-handling systems only when doing so does not interfere with departure.
After each drill, revise one or two specific weaknesses rather than adding endless equipment. A successful plan has a known trigger, two viable routes, a transport solution for every person and animal, accessible supplies, and a fallback communication method. Repeat the exercise after a move, a medical change, a new pet, or a change in school and workplace arrangements.
Frequently Asked Questions
How early should a household leave during a volcanic eruption?
Leave when local authorities issue an evacuation instruction, or earlier if your household needs extra time for medical equipment, children, animals, or limited mobility. Do not wait for visible lava or ash.
What should go in a volcanic evacuation bag?
Pack water, food, medicines, identification, cash, chargers, a flashlight, first-aid supplies, sturdy clothing, eye protection, respiratory protection recommended by authorities, and needs for pets or dependents.
Why are two evacuation routes useful?
A second route provides an alternative if ash, traffic, flooding, road damage, or an official closure blocks the first. Choose routes that separate early and do not share the same vulnerable bridge or valley.
Should people drive during ashfall?
Follow official instructions. Driving in heavy ash can reduce visibility and damage engines, filters, and moving parts. If evacuation is ordered, leave as directed; otherwise avoid unnecessary travel and wait for guidance.
How can families prepare pets for evacuation?
Keep carriers, leashes, food, water, medicines, identification, and vaccination records ready. Confirm which shelters or accommodations accept animals and arrange a backup driver if the primary driver is unavailable.
Further Reading
Authoritative Sources
USGS Volcano Hazards Program usgs.gov
Provides volcano monitoring, hazard information, and links to regional geological resources
Volcanoes ready.gov
Explains common volcanic hazards and household actions before, during, and after an eruption
Volcanoes and Your Health cdc.gov
Offers health-focused information about ash exposure and protective measures
Conclusion
Effective volcano evacuation readiness is built around decisions made before the alert: know the hazard zones, understand official messages, select independent routes, and assign responsibility for every person, pet, and essential item. A compact kit should protect against ash exposure while supporting medication, communication, and several days away from home. Rehearsals matter because they uncover practical failures that maps and shopping lists cannot reveal, including inaccessible transport, missing keys, and unclear meeting points. Review the plan whenever household circumstances change, and give official evacuation instructions priority over property protection or personal estimates of danger. The next useful step is to download the local hazard map, write down two routes and a meeting place, then test the departure sequence with the people who may need help leaving.
What Scripture Says About Foresight and Preparation
Scripture generally treats thoughtful preparation as compatible with wisdom, responsibility, and care for others. Proverbs 22:3 says that a prudent person sees danger and takes refuge, while the simple continue and suffer the consequences. The verse does not provide a specific supply list; it establishes a decision principle. Recognizing a credible risk and taking proportionate action can be an expression of good judgment rather than a sign of weak faith.
Proverbs 6:6-8 offers a related image through the ant, which gathers provisions in season without needing constant supervision. The practical lesson is consistency. A person who waits until a shortage, storm, illness, or financial setback is already underway has fewer choices and may pay more for rushed solutions. Small, orderly actions taken during stable periods usually create more resilience than dramatic purchases made under pressure.
That principle has limits. Biblical prudence is not the same as trying to eliminate every uncertainty. A modest reserve of water, food, medication, cash, or lighting may address a foreseeable interruption; buying far beyond a household’s ability to rotate, maintain, or share can create waste and anxiety. The useful question is not whether someone has prepared for every imaginable event, but whether their response is proportionate to likely risks and actual responsibilities.
Readers often use Bible verses about preparedness and responsible planning to settle a spiritual concern: does preparing show distrust? The surrounding biblical themes point toward a balanced answer. Trust in God and responsible action are not presented as automatic opposites. Preparation becomes spiritually distorted when fear controls every decision, possessions become a source of identity, or concern for personal security replaces compassion for people in need.
Bible Passages That Connect Planning With Stewardship
Several passages provide distinct angles on responsible planning. Genesis 41 describes Joseph interpreting Pharaoh’s dream and organizing storage during years of abundance so Egypt could face later famine. The account includes forecasting, administration, measurement, labor, and distribution. Its practical value is not a prediction that every reader should build large warehouses. It shows how recognizing a future constraint can lead to an organized response before the constraint becomes acute.
Luke 14:28-30 uses the image of someone calculating the cost of a tower before construction begins. Jesus’ point concerns the seriousness of discipleship, but the example assumes that responsible action includes estimating resources before committing to a project. Applied to ordinary life, that means checking budget, storage space, skill, time, and maintenance requirements before adopting a preparedness goal. A plan that cannot be funded or maintained is only an intention.
Nehemiah 4:9 combines prayer with practical security measures: the people pray and set a guard because of a threat. The passage is useful because it resists two weak assumptions. Prayer is not portrayed as a reason to ignore an identifiable danger, and practical measures are not portrayed as a substitute for dependence on God. A modern parallel might involve praying about a family decision while also confirming emergency contacts, securing important documents, and learning how to shut off utilities.
First Timothy 5:8 emphasizes responsibility toward one’s household, while Acts 2:44-45 and Acts 4:32-35 describe believers sharing resources with people who have need. Read together, these themes complicate an individualistic version of readiness. Caring for dependents requires planning, but surplus is not automatically a private treasure. A household may reasonably prepare for its own needs while reserving capacity to help an elderly neighbor, a church member, or a relative who lacks storage or income.
These passages differ in setting and purpose, so they should not be treated as technical emergency manuals. Their combined guidance is stronger when applied as principles: foresee credible problems, count the cost, organize resources, protect vulnerable people, and keep generosity within the plan.
How to Apply Biblical Wisdom to Household Readiness
Biblical planning becomes useful when it moves from quotation to accountable action. Begin by identifying responsibilities rather than shopping. Who depends on the household? Which medicines, dietary needs, mobility limitations, pets, or communication requirements would make an interruption harder? A plan built around those facts is more valuable than a collection of impressive but unrelated gear.
A simple priority order can prevent scattered spending:
Immediate needs: safe water, ordinary food, essential medication, sanitation, warmth, and a way to receive information.
Continuity needs: copies of key documents, transportation options, charging methods, contact information, and cash access.
People and skills: first-aid knowledge, cooking without normal utilities, neighborhood communication, and agreed responsibilities.
Shared capacity: a realistic way to assist someone who cannot prepare independently.
This order reflects stewardship because it directs limited money and space toward consequences that matter first. For example, a family with a small budget may gain more from rotating familiar shelf-stable foods and keeping prescriptions managed than from purchasing specialized equipment it has never practiced using. The advanced option may be appropriate later, but only after basic needs and operating knowledge are covered.
Planning also needs a review mechanism. Write down what is stored, expiration dates, refill points, and who checks each category. Use ordinary meals to rotate food instead of creating a separate stock that is forgotten. Test flashlights, chargers, cooking methods, and communication plans under safe conditions. Signs that the approach is working include fewer duplicate purchases, clear responsibilities, and supplies that remain usable. Signs of failure include expired items, inaccessible storage, unclear medication arrangements, or a plan known only to one person.
Responsible planning should remain connected to the wider community. The biblical view of preparedness is not limited to private accumulation. Ask whether a church, apartment building, or neighborhood already has resources that can be coordinated. Shared tools, check-in agreements, and knowledge exchange may provide more value than every household buying the same costly item. Coordination also exposes a tradeoff: relying entirely on others is fragile, but refusing cooperation wastes capacity.
Avoiding Fear, Hoarding, and Overconfidence
The main spiritual and practical danger is not preparation itself but disordered preparation. Jesus’ warning in Luke 12:16-21 about the rich fool challenges the assumption that larger reserves guarantee security. The man builds bigger barns and speaks as if stored goods can settle every question of life. The passage does not praise neglect; it questions self-centered accumulation and confidence in possessions.
That distinction matters when preparedness content encourages constant purchasing. Fear can make uncertain scenarios feel inevitable, narrow attention to worst-case images, and turn every sale into an obligation. Hoarding also reduces usefulness: crowded storage makes rotation difficult, poor labeling hides shortages, and excess may spoil before it can help anyone. A smaller, documented reserve that fits the household’s budget can be wiser than a larger stock acquired through debt or panic.
Overconfidence creates a different failure. Someone may own food and equipment yet lack a communication plan, sanitation supplies, medication continuity, or the ability to use the tools. Another person may assume that faith guarantees a particular outcome and therefore reject evacuation advice, medical care, or help from others. Scripture’s emphasis on humility and wise counsel supports checking assumptions rather than treating confidence as evidence.
A practical test is to examine each purchase or decision with four questions: What foreseeable problem does this address? How long will it remain usable? Who knows how to use it? What will we do if another person has a greater need? These questions make preparation measurable without turning it into an obsession. They also help distinguish a useful reserve from symbolic buying that mainly relieves short-term anxiety.
Responsible planning includes accepting uncertainty. A household cannot guarantee safety, predict every event, or control other people’s choices. It can improve its options, reduce avoidable confusion, and respond with greater generosity. For readers comparing Scriptural guidance on planning, the recurring pattern is disciplined action held together with humility, compassion, and trust rather than fear-driven control.
For careful study, read the cited passages in their surrounding chapters and compare several reputable Bible translations. Context matters: Genesis 41, Proverbs 6:6-8, Proverbs 22:3, Luke 12:13-21, Luke 14:28-30, Nehemiah 4:9, First Timothy 5:8, and Acts 2:44-45 address different circumstances. A study Bible or recognized biblical commentary can help distinguish a passage’s original purpose from a modern application.
Frequently Asked Questions
Which Bible verse is most directly associated with preparedness?
Proverbs 22:3 is often cited because it contrasts prudent recognition of danger with careless continuation. Proverbs 6:6-8 and Genesis 41 add examples of gathering resources before scarcity.
Does preparing for emergencies show a lack of faith?
Not necessarily. Scripture can be read as supporting both trust in God and responsible action. Preparation becomes unhealthy when fear, hoarding, or confidence in possessions replaces compassion and humility.
What does Joseph’s example teach about planning?
Joseph’s administration in Genesis 41 illustrates recognizing a future shortage, storing resources during abundance, organizing work, and planning distribution rather than waiting for crisis conditions.
How can Christians prepare without becoming materialistic?
Set reasonable limits based on household needs, budget, storage, and rotation. Include generosity in the plan, and measure success by useful capacity and wise service rather than the size of an inventory.
What should a family do first?
Identify dependents and essential needs, then document contacts, medications, water, food, sanitation, lighting, and communication arrangements. Assign responsibilities and test the plan before adding specialized supplies.
Conclusion
Scripture presents preparedness as a matter of foresight, stewardship, and love expressed through responsible action. Proverbs encourages noticing danger, Joseph demonstrates organized provision before scarcity, and Jesus warns that possessions cannot provide ultimate security. Together, these passages support a measured approach: identify genuine responsibilities, cover basic needs, count the cost, maintain what you store, and include room to help others. Begin with a written household assessment rather than an impulse purchase. Read the relevant passages in context, discuss priorities with the people affected, and review the plan as circumstances change. The goal is not control over an unpredictable future. It is fewer avoidable failures, clearer decisions under pressure, and resources used with humility and care.
Volcanic ash is made of tiny fragments of rock, minerals, and volcanic glass rather than soft household dust. Its effects depend on particle size, wind, moisture, the eruption material, and how long ash remains airborne. A light coating can still irritate the eyes and throat, while heavier deposits may clog ventilation equipment, overload roofs, interfere with vehicles, and reduce visibility on roads.
The first priority is information. Monitor local emergency management, the volcano observatory, weather alerts, and official evacuation notices instead of relying on a single social-media post. Ash may arrive before residents understand its density or direction, and conditions can change when wind shifts. Save alerts on a battery-powered radio or charged phone, and identify at least one contact outside the affected area.
A useful Volcano preparedness checklist for ashfall conditions separates immediate sheltering from later cleanup. During active fallout, the goal is to limit inhalation and prevent ash from entering the building. After the plume clears, the concerns shift toward roof loads, blocked drainage, contaminated surfaces, engine damage, and safe disposal.
Weak assumptions create avoidable problems. Ordinary cloth masks may reduce some larger particles but may not seal well or provide the protection of a properly fitted particulate respirator. A rainstorm does not automatically solve ash buildup; wet ash can become dense and difficult to remove. Likewise, opening windows to “clear the air” may worsen indoor exposure when outdoor ash concentrations remain high.
Respiratory, Eye, and Indoor-Air Protection
Respiratory protection works best when it is available before the plume arrives and worn correctly during exposure. Keep particulate respirators appropriate for fine particles, spare masks, sealed eye protection, and any prescribed respiratory medication in a location that can be reached without searching through contaminated rooms. People with asthma, chronic lung disease, young children, older adults, and anyone with mobility limitations may need a more deliberate sheltering arrangement.
Close windows, doors, fireplace dampers, and other openings when ash is falling. Turn off systems that bring outside air indoors unless the equipment is specifically designed and filtered for the conditions. If a heating or cooling system must operate, inspect its filter instructions and replace filters as directed; a filter loaded with ash can restrict airflow and push particles through gaps. Portable air cleaners may reduce indoor particles in a closed room, but they do not make outdoor exposure safe and require a suitable filter and electricity.
Eye protection deserves separate attention. Contact lenses can trap irritating particles against the eye, so people who wear them should have glasses available. Do not rub ash-covered eyes. Move indoors, rinse with clean water, and seek medical advice for persistent pain, vision changes, or breathing difficulty. Emergency symptoms should not be managed by waiting for the ash to settle.
A practical shelter room is one with few exterior openings, enough space for household members, and access to water, medication, a radio, chargers, and waste bags. Place masks and goggles near the entrance, but avoid leaving them exposed where ash can settle on their inner surfaces. A common mistake is to use a fan that simply redistributes contaminated air; air movement is useful only when it passes through appropriate filtration or safely exhausts air according to official guidance.
Water, Food, Medication, and Power Priorities
Protecting supplies means preventing ash from entering containers rather than trying to clean every exposed item later. Store drinking water in closed, food-safe containers and keep extra water for eye rinsing, basic cleaning, and medication needs. Cover wells, rain-catchment equipment, outdoor taps, and water-treatment components if local authorities advise doing so. Do not assume clear-looking water is suitable for drinking after ash exposure; follow local water utility instructions.
Food in sealed cans, unopened packages, and closed cupboards is generally easier to protect than food kept in open bins or outdoor storage. Wipe the outside of containers before opening them so ash does not fall onto food or utensils. Discard items whose packaging is torn, heavily contaminated, or impossible to clean safely. Ready-to-eat foods are especially useful when ash makes cooking, ventilation, or power uncertain, but a stockpile should still reflect household allergies, infant needs, and medical diets.
Medication planning should account for both supply and access. Refill prescriptions when reasonably possible, keep medicines in closed containers, and include inhalers, glasses, hearing-aid batteries, and other daily-use items. If a pharmacy, clinic, or evacuation route may be inaccessible, ask the relevant clinician or pharmacist about a lawful, safe supply plan rather than changing doses independently.
Power interruptions may follow ashfall because equipment, substations, or access routes become difficult to operate. Charge phones, battery banks, radios, lighting, and medical devices before conditions worsen. Fuel generators only outdoors and well away from doors, windows, and air intakes; ashfall does not remove carbon-monoxide risk. Keep food preparation simple and avoid burning debris or using indoor combustion appliances, since poor ventilation can compound respiratory irritation.
Use a compact priority check before shopping or packing:
Air: particulate masks, goggles, prescribed respiratory supplies, and replacement filters.
Water and food: sealed drinking water, covered supplies, and foods requiring little ventilation or cooking.
Communication: charged devices, a battery radio, spare batteries, and written contacts.
Access: medications, identification, cash or payment alternatives, and supplies for children, pets, and disability-related needs.
The common failure mode is buying cleanup tools while overlooking consumables and prescriptions. A shovel cannot replace water, and a generator cannot compensate for an empty medication container or an unfiltered air intake.
Vehicle Travel, Cleanup, and Recovery Decisions
Driving during ashfall should be treated as a last resort unless officials direct travel or an urgent need requires it. Ash reduces visibility, can make pavement slippery, and may impair engines when drawn through air-intake systems. Vehicles may also become stranded by road closures, fallen debris, or fuel shortages. If travel is unavoidable, follow official route information, use headlights as required, leave more stopping distance, and avoid unnecessary exposure with windows and outside-air ventilation closed.
Vehicle protection is a tradeoff between mobility and damage. Parking under cover can limit deposits, but a garage must not be used for an idling vehicle. If ash enters the engine system, repeated driving may pull abrasive material farther into filters and components. Check the owner’s manual or obtain qualified service advice about air filters, oil, brakes, and other inspection points before resuming normal use. Do not blast ash from surfaces with compressed air near people or open building entrances.
Cleanup should wait for official advice about roof safety, air quality, and waste handling. Dry ash can become airborne when swept, brushed, or blown, while wet ash can be heavy enough to stress roofs and clog gutters. Use appropriate respiratory and eye protection, limit the number of people in the work area, and dampen surfaces lightly when that reduces dust without sending large quantities into drains. Remove ash in manageable amounts rather than creating unstable piles on roofs or balconies.
Prioritize locations where ash creates immediate hazards: entrances and walkways, gutters and drains, air intakes, vehicle ventilation systems, and surfaces used for food or drinking water. Keep children and pets away from ash piles, and clean paws or fur before they track particles indoors. Separate ash from ordinary household waste if local authorities provide special instructions; disposal rules vary by community and by the volume involved.
Do not climb onto a roof simply because it looks coated. A professional assessment may be safer where deposits are deep, wet, uneven, or near damaged structures. The same judgment applies to trees, power lines, and blocked roads. Review the checklist again after each official update, because the appropriate action may change from sheltering to evacuation, inspection, or restricted cleanup.
A Household Ashfall Plan That Can Be Used Under Pressure
A written plan turns scattered supplies into decisions people can follow when visibility, noise, and communication are poor. Assign one person to monitor official alerts, another to check vulnerable household members, and another to secure water, food, and ventilation if staffing permits. Write down meeting places, medication details, pet arrangements, and transport options. Keep a paper copy because phones may lose power or service.
Practice the first ten minutes rather than staging a theatrical drill. Close openings, move to the selected room, put on respiratory and eye protection, bring medication and communication equipment, and account for everyone. If someone cannot use a standard mask because of age, disability, or a medical concern, obtain individualized advice in advance and identify a lower-exposure room or alternate relocation option.
Review the plan for conflicting instructions. A household may need to shelter from ash while remaining ready to evacuate because of lava, lahars, gas, wildfire, or other hazards. Do not delay an official evacuation order to protect possessions or finish sealing windows. Place shoes, outer layers, keys, documents, and pet carriers where they can be reached without crossing heavily contaminated areas.
After the event, note what failed: a mask size, an empty battery, a clogged filter, an inaccessible water container, or an unclear responsibility. Correct that specific weakness rather than buying unrelated equipment. A precise checklist is most valuable when it is tested against the actual rooms, people, vehicles, and local alerts it must serve.
For current ash advisories, evacuation zones, air-quality guidance, water notices, and cleanup instructions, consult the local emergency-management agency, public-health department, volcano observatory, and utility providers serving the affected area. Official instructions should take priority over general preparedness advice because ash characteristics and associated hazards differ by eruption.
Frequently Asked Questions
Should I stay indoors during ashfall?
Usually, yes, when local authorities advise sheltering. Close openings, limit outside-air intake, and leave only for urgent needs or an official evacuation order.
Are cloth masks enough for volcanic ash?
Cloth masks may reduce some larger particles but often provide a poor seal. Use an appropriate, well-fitting particulate respirator when available, and seek medical advice for breathing problems.
Can volcanic ash contaminate drinking water?
It can enter uncovered containers, catchment systems, and some water equipment. Keep supplies covered and follow local utility or health-department instructions before drinking questionable water.
Is it safe to drive while ash is falling?
Avoid driving unless necessary or directed. Reduced visibility, slippery roads, closures, and engine air-filter problems make travel riskier than normal.
How should ash be cleaned from a roof?
Follow local guidance and avoid climbing onto a roof that is wet, heavily coated, damaged, or structurally uncertain. Ash can become heavy when wet, so professional help may be safer.
Conclusion
Ashfall preparation is mainly an exercise in controlling exposure and preserving basic services. Put respiratory and eye protection, sealed water, medications, communication equipment, and replacement filters where they can be reached quickly. During fallout, protect indoor air and avoid unnecessary travel; afterward, treat roof loads, drains, engines, and contaminated surfaces as separate safety problems rather than one large cleanup task. Official alerts matter because ash may arrive alongside evacuation hazards that a household checklist cannot resolve. Test the plan with the people who will actually use it, including children, older adults, pets, and anyone with respiratory or mobility needs. Replace missing supplies, record local contacts, and revise the checklist after each drill or advisory.
The most valuable earthquake poster information is action-based rather than descriptive. Someone reading it during a sudden jolt may have only seconds to respond, so the central instruction should be large, familiar, and visually ordered: Drop, Cover, and Hold On. “Drop” means getting low before the shaking knocks a person down. “Cover” means protecting the head and neck under a sturdy table or desk when one is nearby. “Hold On” means keeping the shelter in place as it moves and staying protected until the shaking stops.
A strong poster explains the sequence without crowding it with paragraphs. Three numbered panels can show a person lowering to the floor, positioning beneath a desk, and gripping a leg while shielding the head. A nearby note should clarify that if no sturdy shelter is close, the person should stay low, move away from windows and falling objects if possible, and cover the head and neck with the arms. The instruction is different for a person already in bed: remain there and protect the head with a pillow unless a clearly safer location is immediately reachable.
Posters often fail when they present “evacuate” as the first response. Running during shaking exposes people to falling ceiling material, glass, furniture, and collisions. Likewise, standing in a doorway is not a universal safety rule; modern doorways may not offer special protection, and the surrounding space may contain falling hazards. The poster should discourage running outside, using elevators, or moving toward windows while the ground is moving.
Keep a related reference such as Earthquake preparedness poster information to include available when reviewing wording, but make the displayed version room-specific and quick to scan. The test is simple: can a visitor identify the first action without reading the entire page?
Room-Specific Hazards and Safe Locations
A poster becomes more useful when it identifies the safest available position in the room instead of relying only on general earthquake slogans. The best location is usually away from windows, mirrors, tall unsecured furniture, hanging objects, and shelves that can spill contents. A sturdy desk or table may provide cover, but a lightweight folding table, glass table, or overloaded surface should not be presented as dependable protection.
Use a small “look around this room” panel beside the main action sequence. It can point to the nearest sturdy table, mark a safer interior area, and identify hazards that should be secured rather than approached. In a bedroom, the illustration may show staying in bed and covering the head, while a kitchen poster should emphasize moving away from cabinets, glass, and appliances when movement allows. In a classroom or office, the design can indicate desks that offer cover and warn against clustering near exit doors.
The tradeoff is between completeness and speed. A detailed floor plan may help staff, but it becomes unreadable if placed on a small public poster. Use one clear room diagram for immediate action and place more detailed furniture-securing or evacuation information in a separate handout. Readers should not mistake a marked “safe spot” for a guarantee: furniture can shift, ceiling components can fall, and conditions vary by building construction.
Include special considerations without turning the poster into a technical manual. A person using a wheelchair or mobility device may need to lock the wheels, remain seated if possible, protect the head and neck, and position away from hazards. Children need pictures and plain verbs. Visitors who do not read English may benefit from universally recognizable illustrations and translated versions. A useful companion link is the earthquake poster checklist, particularly when several rooms need different hazard notes.
What to Add for the Minutes After Shaking
Post-shaking instructions belong on the poster, but they should remain visually secondary to the immediate protective action. After the movement stops, people should expect aftershocks and check themselves and nearby people for injuries when it is safe. The poster can direct readers to put on sturdy footwear, watch for broken glass, and leave damaged areas cautiously if evacuation is required by building conditions or officials.
Specific warnings prevent common secondary injuries. Do not use elevators, touch fallen power lines, or enter visibly damaged structures. If gas is suspected, avoid flames, switches, and other ignition sources and follow local emergency guidance. A poster should not tell untrained occupants to shut off utilities automatically; valve locations, damage, and local procedures differ. A better instruction is to report hazards and follow official or building-manager directions.
Communication guidance also needs restraint. Add the facility address, emergency numbers appropriate to the location, assembly instructions, and the method for receiving official alerts. Avoid printing a long contact tree that becomes obsolete. A short line such as “Text rather than call when networks are congested, if safe and available” may be useful, but it should not distract from injury checks and hazard avoidance.
For example, an apartment poster might direct occupants to check the hallway for damage before leaving and to use the designated assembly area, while a workplace poster may name the floor warden process. Neither should promise that an assembly area is safe under every condition. Conditions must be reassessed after shaking, especially if there are fires, structural damage, chemical spills, or blocked routes. The poster should point people toward official updates rather than encourage rumor sharing.
Design, Placement, and Practice
Readable design is a safety feature. Put the three immediate actions at the top or center, use high contrast, and leave enough empty space around each instruction. Large verbs, numbered steps, and simple figures usually outperform dense prose. Avoid illustrations that show a person crouching beside a table without covering the head and neck, because viewers may copy the incomplete posture.
Place posters where people make decisions: beside desks, in classrooms, near beds or common areas, and close to emergency information boards. Do not hide one behind a cabinet or place it so low that furniture blocks the main message. Outdoor placement can introduce glare and weather damage, while glossy surfaces may be difficult to read under bright lights. Check the poster periodically for faded text, outdated phone numbers, changed room layouts, or procedures that no longer match the building.
Practice exposes weaknesses that printing cannot fix. During a drill, ask participants to identify cover without running, protect their heads, and remain in position until the signal ends. Afterward, note whether desks can actually be reached, whether mobility devices have enough clearance, and whether staff understand what happens next. A poster that says “evacuate” without naming the route or decision-maker creates uncertainty; a poster that omits aftershock behavior leaves people unprepared for the next movement.
Use this compact review before approving a design:
Are Drop, Cover, and Hold On the dominant message?
Does the illustration show head and neck protection?
Are windows, falling objects, elevators, and damaged structures addressed?
Does each location identify a realistic nearby shelter or safer position?
Are post-shaking contacts and alert sources current?
Can children, visitors, and people with mobility limitations understand the instructions?
The final decision should favor a poster people can act on instantly over one that attempts to contain an entire emergency manual. Pair the visual with drills, secured furniture, accessible routes, and official local guidance. For wording comparisons, Earthquake preparedness poster information to include can help teams check whether the design covers both immediate protection and realistic follow-up actions.
Frequently Asked Questions
What should be the largest message on an earthquake poster?
Make “Drop, Cover, and Hold On” the dominant message, supported by an illustration that shows head and neck protection under sturdy furniture.
Should an earthquake poster tell people to stand in a doorway?
No. Doorways are not universally safer in modern buildings. Direct people away from falling hazards and toward a sturdy nearby shelter when available.
What should someone do if no table is nearby?
Stay low, move away from windows and objects that may fall if movement allows, and cover the head and neck with the arms until shaking stops.
Should post-earthquake evacuation instructions appear on the same poster?
Yes, but keep them secondary. Include damaged-building, elevator, fire, utility, aftershock, and assembly-area guidance without obscuring the immediate protective action.
How often should earthquake posters be reviewed?
Review them whenever rooms, furniture, contacts, evacuation procedures, or local instructions change, and inspect them periodically for fading or damage.
Conclusion
An effective earthquake poster is a rapid decision tool, not a miniature emergency handbook. Give visual priority to Drop, Cover, and Hold On, then add room-specific hazards, realistic shelter locations, accessibility guidance, and concise post-shaking warnings. Avoid doorway myths, automatic utility instructions, crowded diagrams, and evacuation messages that could send people into danger while the ground is moving. Test the design in the actual space: have people locate cover, read the text from a normal distance, and explain what they would do after an aftershock. Update contacts and procedures whenever the building changes. The next step is to draft one version for each distinct room type, review it against local official guidance, and use a drill to expose gaps before an earthquake does.
Find the gaps most families don’t notice until something goes wrong.
Free. Practical. No fear-mongering.
By requesting this resource, you agree to receive practical PREPARE Magazine guides, tools, and email updates. You can unsubscribe anytime. Privacy Policy