Professional instruction is warranted when a household’s emergency decisions depend on guesswork, conflicting assumptions, or skills that have never been observed by a qualified instructor. Reading a checklist can identify supplies and telephone numbers, but it cannot show whether everyone knows who moves a child, who retrieves medication, how an evacuation route works at night, or when an injury exceeds home care.
A useful test is to run a short, unannounced exercise without opening a binder or searching online. Ask a household member to describe the first action after smoke is detected, loss of power, a severe weather alert, or a suspected medical emergency. If answers differ, people freeze, or the designated action depends on one highly trained person being present, the household has a training gap rather than a documentation problem.
Outside instruction is particularly valuable when the consequences of a mistake are immediate. Fire behavior, bleeding control, cardiopulmonary resuscitation, emergency medication procedures, and evacuation from a mobility-limited home all involve details that are difficult to learn accurately from text alone. A trainer can correct hand position, communication habits, route selection, and unsafe improvisation before a real incident exposes them.
Self-study still has a place. It is efficient for learning local alert systems, reviewing family contacts, labeling shutoffs, and keeping plans current. The common mistake is treating information acquisition as performance. A household that owns a first-aid kit but cannot locate it in darkness, or has an evacuation map that ignores a blocked stairway, has invested in objects without validating the process. When a household needs professional emergency training is therefore a performance question, not a measure of how many supplies are stored.
Situations That Change a Household’s Training Needs
Professional training becomes more appropriate when the people, hazards, or physical conditions in a home change. A household may have managed adequately with informal knowledge for years, then face a new risk after an older relative moves in, a baby arrives, someone develops a disability, or a family member begins using oxygen, insulin, seizure medication, or another medically significant device. The change is not merely demographic; it alters timing, movement, communication, and supervision.
Recent incidents are another strong signal. A kitchen fire that was contained, a missed evacuation warning, a fall during a storm, or a prolonged outage can reveal weaknesses that seemed theoretical. Review what actually happened: who noticed the problem, who made the decision, which equipment was available, and where confusion occurred. If the same failure could recur under worse conditions, targeted instruction may be more useful than purchasing additional gear.
Local exposure should shape the choice of course. A coastal household may need storm evacuation and generator safety instruction, while a rural home may need wildfire behavior, remote communication, and extended access planning. A city apartment presents different constraints, including shared exits, elevators that may be unavailable, smoke movement, and limited storage. National guidance from Ready.gov and local emergency management offices can identify hazards, but an instructor can help translate them into actions for a particular building and household.
Specialized circumstances deserve more than a generic family seminar. A person who uses a wheelchair may need a realistic exit and transfer discussion; a caregiver may need supervised practice with a child-specific emergency routine; a household with pets must account for carriers, leashes, medication, and transport timing. The mistake is assuming that one adult’s competence covers everyone. If that person is injured, away, asleep, or overwhelmed, the plan may fail at its most important moment.
Choosing Instruction That Fits the Actual Risk
The strongest course is not necessarily the longest or most expensive. It should match the household’s likely hazards and teach observable actions rather than only presenting slides. Before enrolling, ask whether the class includes hands-on practice, instructor feedback, scenario work, accessibility adaptations, and clear boundaries about when to call emergency services. A course designed for workplace compliance may not address children, pets, apartment exits, or household communication.
Credentials and subject expertise matter, but they should be connected to the lesson being purchased. A first-aid or CPR class is different from wildfire evacuation training, defensive driving, amateur radio instruction, or home fire-safety education. A medically focused course may not teach building evacuation, and a disaster-planning seminar may not provide clinical skills. Selecting a provider by reputation alone can leave a major gap between the advertised subject and the household’s actual need.
Compare instruction by asking practical questions:
Will participants practice the skill with appropriate equipment rather than only watch a demonstration?
Can the instructor adapt scenarios for children, older adults, disabilities, language needs, or pets?
Does the class explain what an untrained person should not attempt?
Will participants leave with a way to test the skill at home?
Are course materials consistent with current guidance from recognized emergency, medical, or public-safety organizations?
Budget and scheduling create real tradeoffs. A private household session may expose layout problems that a public class cannot, but a group course may offer broader scenario practice at a lower cost. Online learning can work for communication plans and hazard awareness; it is weaker for skills requiring physical positioning, timing, equipment handling, or instructor correction. A sensible approach may combine formats: use official online resources for background, then pay for hands-on teaching where a mistake could cause serious harm.
Be cautious of providers who promise mastery in a single short session, sell unnecessary equipment as the centerpiece, or blur the line between preparedness education and licensed medical or rescue work. A trustworthy instructor explains uncertainty, encourages emergency calls when appropriate, and does not claim that household training replaces firefighters, paramedics, clinicians, or public authorities.
Turning a Course Into Reliable Household Capability
Training has value only when the household can reproduce the action after the class ends. Within a few days, convert the lesson into a brief household exercise using the actual rooms, exits, communication devices, medications, and transport options. Practice at the time and conditions that expose weaknesses: low light, a sleeping adult, a dead phone battery, a blocked front door, or a family member who communicates differently under stress.
Assign responsibilities by function rather than by vague promises. One person may call for help, another may guide children, and another may bring a go-bag or unlock an exterior gate. Every essential task needs a backup. Write the assignments in plain language and place them where people will see them, but avoid creating a plan so detailed that nobody can remember the first three actions.
A compact household drill can follow this sequence:
Announce one realistic scenario and identify the immediate danger.
Have each person state or perform the first safe action.
Check whether exits, contacts, supplies, and mobility needs are actually accessible.
Stop the exercise if anyone is placed at risk, then record confusion or delay.
Repeat only the weak portion after correcting the plan or seeking further instruction.
For example, a family may discover that its designated meeting place is across a road that becomes unsafe during evacuation, or that a caregiver cannot carry both a child and a medical bag. Those findings are more useful than a drill that simply ends with everyone standing outside. The goal is not theatrical realism; it is finding a manageable correction before an emergency.
Use different review methods for different skills. A contact plan can be read aloud quarterly, while CPR or bleeding-control skills may require periodic supervised refreshers because physical technique and confidence can fade. A household should not assume that a completion card proves lasting ability. Look for signs that training is working: people use the same terminology, identify limits quickly, locate equipment without searching, and can explain what happens if the primary person is unavailable.
Limits, Safety Boundaries, and Review Timing
Professional emergency training reduces uncertainty; it does not make a household self-sufficient in every crisis. Home responders still face smoke, structural damage, contaminated water, severe weather, emotional stress, and incomplete information. The safest training emphasizes early warning, rapid communication, evacuation when directed, and appropriate handoff to emergency professionals rather than encouraging risky rescues.
Households should define stop points before practicing or responding. Do not re-enter a burning or damaged structure, delay an emergency call while attempting a complicated intervention, or use equipment without understanding its hazards. Generator placement, medication changes, structural repairs, and treatment decisions may require qualified professionals. Training can improve recognition and first actions, but it should not be interpreted as permission to exceed a person’s competence.
Review timing should follow change and exposure, not a convenient calendar alone. Reassess after moving, remodeling, acquiring a vehicle, changing caregivers, adding medical equipment, adopting a pet, or experiencing a local incident. Seasonal reviews are useful for weather-specific risks, while skills that depend on hands-on technique deserve refreshers based on the provider’s guidance and the household’s confidence.
One weak assumption is that the most dramatic hazard deserves all the attention. A household may spend heavily on rare-event equipment while failing to teach how to unlock an exit, share an address with dispatch, or respond to a fall. Prioritize the events that are plausible, time-sensitive, and difficult to improvise safely. A focused class followed by repeated short drills usually offers more practical value than an impressive but unused collection of supplies.
For households comparing options, the decision can be framed simply: use self-study for information, choose hands-on professional instruction for skills that require correction, and seek specialized providers when a disability, medical condition, building feature, or local hazard changes the response. That distinction keeps training proportionate without minimizing genuine risk.
Frequently Asked Questions
Can a household learn emergency skills without paying for a course?
Yes, official guides can support planning, contacts, alerts, and evacuation information. Hands-on instruction is more appropriate when technique, timing, equipment handling, or accessibility needs affect safety.
Which household members should attend professional training?
Every adult and capable older child who may be present during an emergency should learn the relevant first actions. Include caregivers and backup adults when they share responsibility for children, older adults, or people with disabilities.
Is CPR training enough for household emergency readiness?
No. CPR addresses one medical response. A household may also need fire evacuation, emergency communication, severe-weather sheltering, medication continuity, and safe utility or generator practices.
How can a household tell whether training worked?
Run a short drill without notes and observe whether people identify the hazard, choose a safe first action, locate equipment, communicate clearly, and know when to contact emergency services.
When should emergency training be repeated?
Repeat or refresh it after household changes, a move, a new hazard, a failed drill, or a long gap since hands-on practice. Review seasonal risks before the period when they are most likely.
Further Reading
Authoritative Sources
Academy of Nutrition and Dietetics eatright.org
Professional nutrition guidance, healthy eating resources, and practical dietitian-reviewed advice.
U.S. Department of Agriculture usda.gov
Official food, nutrition, agriculture, and consumer guidance from the USDA.
NIH Office of Dietary Supplements ods.od.nih.gov
Research-based fact sheets on nutrients, supplements, dietary intake, and safety considerations.
International Society of Sports Nutrition sportsnutritionsociety.org
Evidence-informed sports nutrition resources and position stands for active people and athletes.
Conclusion
Professional emergency training makes sense when a household must perform time-sensitive actions that reading and equipment ownership cannot validate. The clearest triggers are a failed drill, a recent incident, a change in mobility or medical needs, a new home or vehicle, and exposure to hazards that require specialized decisions. Match instruction to the actual risk, favor supervised practice for physical skills, and ask providers to explain both capabilities and limits. After the course, test the plan in the real home with backup assignments and accessible equipment. Review what caused delay or confusion, correct one weakness at a time, and involve every person who may need to act. A modest, rehearsed response is more dependable than an elaborate plan that only one household member understands.
Emergency insurance records should let you identify the policy, contact the insurer, begin a claim, and prove what was insured without searching through scattered documents. A declarations page is useful, but it may not answer every question that arises after a fire, storm, theft, vehicle collision, or evacuation. Assemble the information around the decisions you may need to make when normal communication, transportation, or access to your home is disrupted.
For each policy, record the insurer’s name, policy number, customer-service and claims phone numbers, website, agent information, renewal date, covered people or property, deductibles, and major exclusions or limits. Include health, homeowners or renters, auto, life, disability, flood, or other policies that apply to your household. A claims contact may differ from the general customer-service number, so copy both when available. Do not assume that an insurance card alone contains enough information for property or liability claims.
Property documentation deserves separate attention. Keep dated photographs or video of rooms, vehicles, valuable items, serial numbers, receipts, appraisals, and warranties when those records exist. A simple inventory can be more useful than a large folder of unorganized receipts because it connects an item to its location and approximate value. For a rental household, document personal belongings even though the building itself may be insured by the landlord.
Policy declarations pages and insurance cards
Claims reporting instructions and agent contacts
Deductibles, limits, endorsements, and renewal dates
Household member identification and relevant medical coverage details
Photos, inventories, receipts, and vehicle information
A common failure is confusing proof of insurance with proof of loss. An insurance card may establish that a policy exists, but photographs and an inventory help establish what was damaged or missing. The records should also identify which documents are merely reference copies and which originals must be preserved. Link this record set to your broader How to maintain insurance information for emergencies routine so it is maintained alongside other household preparedness records.
How to Build Paper and Digital Backups
A two-format system is usually more dependable than relying exclusively on paper or cloud storage. Paper works when phones are damaged, batteries are depleted, or internet service is unavailable. Digital files are easier to update, search, duplicate, and share with an authorized person. Neither format is sufficient by itself: paper can be lost in a disaster, while a digital account may be inaccessible if the only sign-in method depends on a missing phone.
Put a compact paper packet in a waterproof and, where practical, fire-resistant container. Keep a second copy outside the home with a trusted relative, attorney, or secure location. The packet should contain current contact details and policy summaries rather than every document you have ever received. Avoid placing irreplaceable originals in an emergency grab folder unless you can protect them; a readable copy is often more useful during the initial response.
Scan documents into clearly named files such as “Auto Policy 2026,” “Renters Declarations,” or “Home Inventory.” Use a secure cloud account and an encrypted local drive or USB device stored separately from the primary packet. A password-protected archive can reduce casual exposure, but make sure an authorized household member knows how to access it. If two-factor authentication is enabled, record an appropriate recovery method rather than leaving access dependent on one person’s device.
Consider the tradeoff between convenience and exposure. Emailing unprotected policy files to several people creates more copies that could be misused. Storing everything only on a phone creates a single point of failure. A better arrangement is a minimal emergency file for rapid access, a fuller encrypted archive for claims work, and a designated backup person who can retrieve information without receiving unnecessary financial or identity data.
Test the system twice a year. Open the digital files from a device that is not normally used, confirm that the paper copy is legible, and check whether the backup contact can locate the records. A backup that has never been tested may fail precisely when a claim requires prompt documentation.
How to Keep Policy Details Current
Insurance information becomes unreliable when household changes are not reflected in the policy file. A new address, vehicle, driver, room addition, valuable purchase, business activity, marriage, divorce, birth, death, or change in medical needs may affect which documents belong in the emergency packet. The record system should therefore have a defined update trigger rather than depending on memory.
Review policies at renewal, but do not wait for renewal when a material change occurs. Compare the declarations page with the information in your packet and note the effective date of each change. Ask the insurer or agent to clarify uncertain limits, endorsements, replacement-cost language, temporary living expenses, roadside assistance, or claim-reporting procedures. Keep written confirmation of conversations when the answer affects a coverage decision, while recognizing that a personal record does not amend the policy itself.
Home inventories need a practical maintenance method. Add major purchases when they enter the household, photograph them in place, and retain receipts or model numbers where available. A yearly room-by-room video can capture ordinary possessions that are easy to overlook in a stressful claim. For vehicles, update photographs, registration information, lender details, and any equipment that changes the vehicle’s value or use.
The strongest system separates “current facts” from “questions to verify.” Current facts might include the policy number and insurer phone number. Questions might include whether flood damage, sewer backup, a detached structure, or temporary accommodation is covered under the specific policy. Treating assumptions as confirmed coverage is a frequent mistake, especially when a policy name sounds broader than its actual terms.
Update the record after any household, property, vehicle, or contact change.
Compare the emergency packet with the latest declarations page.
Mark unresolved coverage questions and contact the insurer directly.
Replace outdated paper copies and delete obsolete digital versions from ordinary folders.
For households with limited time, prioritize contact numbers, policy identifiers, deductibles, and claim instructions first. A complete inventory can be expanded gradually, but an outdated claims number can delay the first essential call.
Using Insurance Information After a Disaster
After a disaster, insurance records support a sequence of actions: establish safety, preserve evidence when safe, notify the insurer, document damage, and track expenses. The records do not replace emergency services or professional advice, and they do not guarantee payment. Their value is reducing avoidable confusion while the household is dealing with displacement, damaged property, or interrupted work.
Do not enter an unsafe structure simply to retrieve a policy folder or photograph damage. Once authorities or qualified professionals say it is safe, record wide views and close details before discarding damaged items, unless disposal is necessary for health or safety. Keep receipts for temporary lodging, meals, transportation, emergency repairs, and replacement necessities, and write down the date, reason, and payment method. Coverage for these expenses depends on the policy, so confirm before assuming reimbursement.
When reporting a claim, have the policy number, loss location, date and approximate time, damage description, and a reliable callback number available. Ask for the claim number, adjuster contact, document-submission method, deadlines, and instructions for emergency repairs. A written log prevents details from being lost across multiple calls. Record who was contacted and what was requested, but distinguish a representative’s procedural guidance from a final coverage determination.
One weak assumption is that the insurer’s adjuster will create the entire inventory. An adjuster may inspect and evaluate the loss, but the policyholder still needs to supply accurate information and preserve supporting records. Another mistake is making extensive permanent repairs before the insurer has had a reasonable opportunity to inspect, unless immediate action is needed to prevent further damage. Photograph the condition, keep removed materials when safe, and ask how to proceed.
A useful emergency packet can also help when the policyholder is away from home. A trusted contact may provide policy details to the household, but authorization rules vary. Give that person clear limits on what they may share and confirm whether the insurer requires consent before discussing a claim.
Privacy, Access, and Review Controls
Insurance files often contain addresses, birth dates, vehicle identifiers, financial details, medical information, and photographs of valuable property. Easy access should not mean unrestricted access. Divide the records by need: a basic contact sheet for immediate calls, a fuller policy file for authorized household members, and sensitive identity or medical documents in a protected archive.
Use unique passwords for storage accounts, enable available security controls, and avoid leaving files on shared or public computers. A printed packet should not be labeled with unnecessary personal details on the outside. If a backup is kept with someone else, choose a person who is dependable, geographically separate, and capable of protecting confidential information. Revisit that choice if the relationship, location, or household circumstances change.
Review access after replacing a phone, changing an email address, ending a relationship, moving, or adding a caregiver. Remove outdated permissions and confirm that the backup contact still has the correct instructions. A common failure is updating the policy while forgetting to update the copy held by a relative or stored on a drive; conflicting versions can cause hesitation when time matters.
Set a recurring calendar reminder for a short review rather than waiting for a major disaster drill. Check the paper packet, open the digital archive, verify contacts, and confirm that the property inventory reflects major changes. If the system works, a household member who did not create it should be able to find the claims number and identify the latest policy version. If that test fails, simplify the folder structure and revise the instructions.
Insurance records fit best within a wider household emergency information system that includes identity documents, medication information, evacuation contacts, and financial access instructions. Keep those categories linked by a common review date, but do not combine every sensitive document into one easily exposed file.
For policy-specific questions, use the insurer’s current policy documents and claims department rather than relying on general summaries. State insurance department websites can also explain consumer complaint processes and general claims guidance, but the policy contract controls the coverage available in a particular loss.
Frequently Asked Questions
Should insurance records be kept on paper or digitally?
Keep both. Paper provides access during outages or device loss, while encrypted digital copies are easier to update and duplicate. Store the formats separately.
What insurance details are most useful during an evacuation?
Carry policy numbers, insurer and claims phone numbers, agent details, deductibles, covered household members or property, and instructions for reporting a loss.
How often should an emergency insurance file be reviewed?
Review it at least at each renewal and after any move, major purchase, vehicle change, household change, or policy amendment. A twice-yearly access test is also useful.
Should receipts and property photographs be stored with the policy?
Keep them linked to the policy but organized as a separate inventory file. This makes the policy easy to find while preserving detailed evidence for a potential claim.
What should happen if coverage is unclear?
Contact the insurer or agent and ask for clarification tied to the specific policy and situation. Do not treat a verbal assumption or a policy label as proof of coverage.
Further Reading
Authoritative Sources
Academy of Nutrition and Dietetics eatright.org
Professional nutrition guidance, healthy eating resources, and practical dietitian-reviewed advice.
U.S. Department of Agriculture usda.gov
Official food, nutrition, agriculture, and consumer guidance from the USDA.
NIH Office of Dietary Supplements ods.od.nih.gov
Research-based fact sheets on nutrients, supplements, dietary intake, and safety considerations.
International Society of Sports Nutrition sportsnutritionsociety.org
Evidence-informed sports nutrition resources and position stands for active people and athletes.
Conclusion
A useful insurance emergency file is current, duplicated, protected, and easy for an authorized person to use. Give priority to policy identifiers, claims contacts, deductibles, coverage questions, and evidence of insured property; then add receipts, photographs, and expense records in an organized archive. Keep paper away from the primary risk area, maintain an encrypted digital copy, and avoid making one phone or online account the only access route. Review the system after household or policy changes and test it by asking someone else to locate the latest documents. When a loss occurs, safety comes first, followed by prompt notification, careful documentation, and direct confirmation of the insurer’s procedures.
Match Supplies to High-Rise Risks and Movement Limits
High-rise preparation begins with the building, not a generic shopping list. A tower resident may face a power failure, fire alarm, smoke, water interruption, severe weather, elevator shutdown, or an order to leave by stairs. Each situation changes what is useful. A large stockpile in a basement is less helpful if smoke blocks access, while a compact bag beside the apartment door can support a quick departure.
Walk through the likely decisions before buying equipment. Identify at least two stairwell routes, the location of fire extinguishers and manual doors, the building’s designated assembly area, and a safe place to wait if officials advise sheltering. Never use an elevator during a fire or when building personnel or emergency officials prohibit it. Your supplies should support movement without obstructing a stairwell or hallway.
Weight is a safety issue. Water, canned food, tools, and extra clothing become difficult to carry down many floors, especially for children, older adults, or anyone with a medical condition. Divide supplies between a primary evacuation bag and small household reserves rather than forcing one person to carry everything. A household with pets, an infant, or mobility equipment needs a different allocation than a single adult.
A common mistake is preparing only for a long stay inside the apartment. Fire, structural damage, contamination, or a building-wide instruction may make staying impossible. The opposite mistake is buying an oversized tactical pack that slows stair travel. Use a simple priority order: immediate safety and identification, communication and light, medication and basic first aid, water and food, then comfort items.
For building-specific details, ask management about alarm procedures, generator coverage, water shutoffs, accessible evacuation arrangements, and rules affecting grills, fuel, or battery storage. Link those details to How to prepare supplies for high-rise emergencies so household members can find the same instructions quickly.
Build a Lightweight Emergency Kit That Works on Stairs
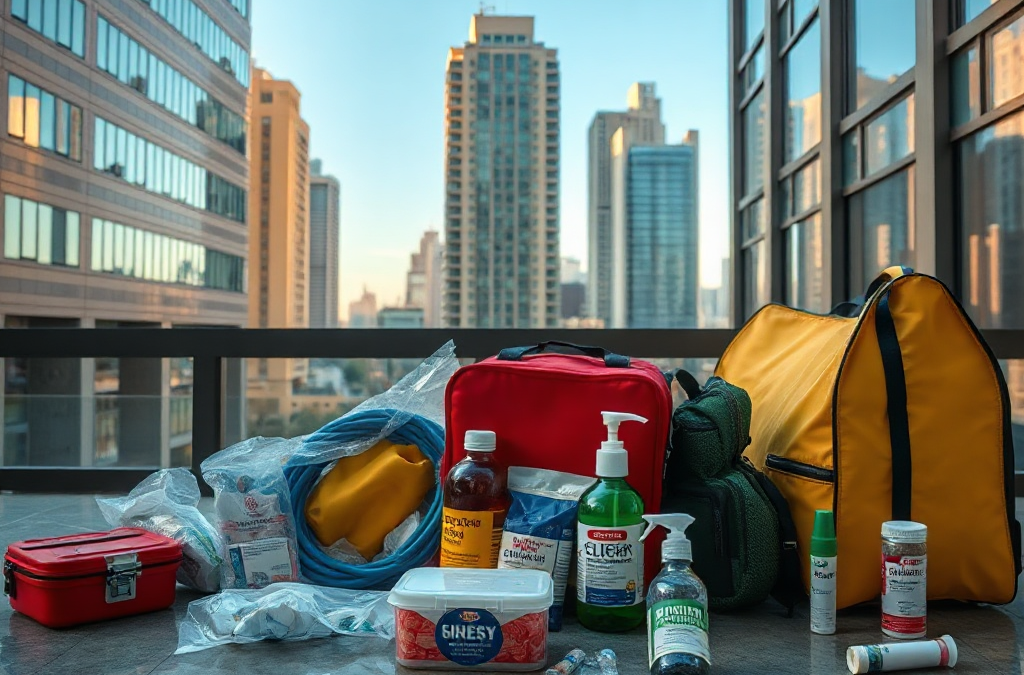
A high-rise emergency kit should be wearable, reachable, and usable in low light. Choose a small backpack with comfortable shoulder straps and keep it near the apartment exit, not buried in a closet. The bag should contain items that solve immediate problems without requiring a table, wall outlet, or elevator.
Begin with a flashlight or headlamp and spare batteries stored separately to reduce accidental drain. Add a phone charging cable matched to household devices and a power bank that is maintained according to its instructions. Include a whistle, basic first-aid supplies, hand sanitizer, tissues, dust masks, work gloves, and a small amount of cash. Sturdy shoes and a long-sleeved layer may matter more than a second multitool if broken glass, wet stairs, or debris is possible.
Identification and information deserve their own waterproof pouch. Include copies of identification, emergency contacts, medication details, insurance information, building contact numbers, and a written meeting location. Do not rely solely on a phone; a damaged device, dead battery, or overloaded network can remove access to information. Mark the pouch with the household member’s name, but avoid placing unnecessary personal data on the outside.
Pack for the people who will actually use the kit. A child may need comfort items and hearing protection, while a person with asthma may need prescribed medication and a mask that does not interfere with their treatment routine. Someone using a cane, walker, or wheelchair may need a communication card, backup batteries, or a prearranged helper. Supplies should complement, not replace, an individualized evacuation arrangement.
Test the bag in the conditions it is meant for. Carry it up and down several flights if medically safe, check whether zippers open in darkness, and confirm that the flashlight can be operated with one hand. If the pack shifts, causes pain, or prevents someone from holding a railing, remove low-priority items. A common failure is treating preparedness gear as a collection rather than a load that must move with a person.
Exit pouch: identification, keys, phone, glasses, and medication.
Light and communication: flashlight, batteries, power bank, whistle, and written contacts.
Protection: shoes, gloves, mask, eye protection, and a simple first-aid kit.
Short-duration support: water, shelf-stable food, and a light layer.
Store Water, Food, Medicines, and Power Safely
High-rise storage works best when supplies are distributed across usable locations. Keep a portable amount in the exit bag, a modest reserve inside the apartment, and specialized items where they can be reached without moving heavy boxes. Do not place emergency supplies in a locked storage room, parking area, or basement if a fire or flood could cut off access.
Water is heavy, so storage requires a tradeoff between quantity and portability. Keep sealed drinking water in a cool, clean location and rotate it according to the manufacturer’s guidance. Avoid storing containers where heat, sunlight, leaks, or freezing could damage them. A countertop filter may be useful for some water interruptions, but it should not be treated as a substitute for stored drinking water when authorities issue a boil-water or do-not-use notice.
Choose foods that require little or no cooking: shelf-stable meals, nut or seed products, crackers, dried fruit, canned items with pull tabs, and foods that household members already tolerate. Cans are durable but heavy and may require an opener, so balance them with lighter packages. Keep allergies, religious restrictions, infant feeding, and medical diets in the selection. Test one item before buying a large quantity; an emergency is a poor time to discover that the food is unusable.
Medication planning needs more care than simply placing bottles in a bag. Keep prescriptions in their original labeled containers when possible, maintain a record of doses, and ask a pharmacist or clinician how to manage supply interruptions. Temperature-sensitive medicines may need an insulated solution, but improvised cooling methods can damage them. Include glasses, hearing-aid supplies, inhaler accessories, glucose-monitoring materials, or other routinely used items where relevant.
Battery devices should be checked for compatibility and storage conditions. A power bank that has not been charged, a radio with the wrong batteries, or a flashlight with corroded contacts creates false confidence. Inspect food seals, water containers, medications, batteries, and charging equipment twice each year. The common misconception is that buying supplies completes the task; rotation and functional testing determine whether the stock is dependable.
A useful household arrangement is to place the lightest frequently needed items in the exit bag, heavier reserves low and stable inside the apartment, and fragile or temperature-sensitive products in a protected cabinet. Label expiration dates on the shelf rather than relying on memory. For additional storage decisions, use How to prepare supplies for high-rise emergencies as a household reference point.
Organize Evacuation, Communication, and Replenishment
Supplies only work when residents know when to take them and where to go. Write a short household procedure for three conditions: leave immediately, shelter inside while monitoring instructions, and reunite after separation. Include a person outside the building who can relay information if local phone service is congested. Agree on a primary meeting place and a backup location outside the immediate property.
Do not assume the closest exit is always available. Smoke, water, blocked doors, or emergency operations can change the safe route. Household members should know how to follow posted exit signs and should never prop open fire doors. During an alarm, take the prepared bag only if it is immediately accessible and doing so does not delay leaving. A kit is secondary to evacuation instructions and immediate life safety.
Communication supplies should work without internet access. Keep a battery-powered or hand-crank radio if it suits the household, but verify that someone knows how to operate it. Write down building management, utility, school, workplace, and emergency contact details. Text messages may work when voice calls do not, although no communication method is guaranteed.
Rehearse the plan with realistic constraints. Time a calm stairwell walk, identify who assists a child or neighbor, and check whether pets can be moved in a carrier. Do not conduct a drill in an active alarm or obstruct residents. If one person cannot descend safely, discuss the building’s accessible evacuation process with management and local emergency services in advance rather than improvising during smoke or darkness.
Replenishment should be attached to ordinary routines. Replace used first-aid items, recharge the power bank after an outage, and move food nearing its date into regular meals. Seasonal changes may require different clothing, water protection, or cooling supplies. A common failure is leaving the kit untouched for years; another is storing it so securely that no one can reach it quickly.
Review the arrangement after a move, renovation, household change, new prescription, or building policy update. The best sign that the system works is not a full bag but a clear, practiced path from warning to action. Keep a current inventory on paper and digitally, and let trusted household members know where it is. The related checklist at How to prepare supplies for high-rise emergencies can support that review.
Frequently Asked Questions
Where should a high-rise emergency kit be stored?
Keep the primary bag near the apartment exit in a location that every household member can reach. Avoid basements, balconies exposed to weather, locked storage areas, and places that could be blocked by falling objects.
How much water should be kept in a high-rise apartment?
Store as much safe drinking water as your space, budget, and carrying limits allow, while keeping a portable amount in the evacuation bag. Rotate containers and follow local instructions if water service is interrupted.
Should emergency supplies include canned food?
Canned food can provide durable calories, but it is heavy and may require an opener. Combine selected cans with lighter, ready-to-eat foods and choose products household members already eat.
What should residents do if elevators stop working?
Follow building and emergency-official instructions, use designated stairs when evacuation is ordered, and do not use elevators during a fire unless directed by authorized responders. Residents with mobility limitations should use their prearranged assistance procedure.
How often should high-rise emergency supplies be checked?
Inspect the kit at least twice a year and after every use. Check medication dates, food seals, water containers, flashlight operation, battery condition, clothing fit, contact information, and any building-specific changes.
Further Reading
Authoritative Sources
Academy of Nutrition and Dietetics eatright.org
Professional nutrition guidance, healthy eating resources, and practical dietitian-reviewed advice.
U.S. Department of Agriculture usda.gov
Official food, nutrition, agriculture, and consumer guidance from the USDA.
NIH Office of Dietary Supplements ods.od.nih.gov
Research-based fact sheets on nutrients, supplements, dietary intake, and safety considerations.
International Society of Sports Nutrition sportsnutritionsociety.org
Evidence-informed sports nutrition resources and position stands for active people and athletes.
Conclusion
A high-rise supply system should make the next safe decision easier, whether that means leaving by stairs, waiting for instructions, or managing a short interruption inside the apartment. Build around a portable backpack, then add carefully placed water, food, medicines, light, communication tools, and personal equipment. Weight, heat, access, mobility, and building rules matter as much as the item list. Walk the exits, confirm how assistance will work, and write down contacts instead of depending on a charged phone. Test the bag on a calm day and review it twice a year. Replace what expires, remove what cannot be carried, and update the arrangement whenever the household or building changes.
Small-apartment storage works best when the available space is treated as a set of measured zones rather than a collection of empty corners. Record the height, width, and depth of closets, the clearance beneath beds, the usable area above cabinets, and the gap between furniture and walls. Include door swings, baseboards, vents, radiators, and access panels in the measurement. A container that fits its width but prevents a closet door from opening is not useful storage.
Begin by separating supplies into three groups: items used regularly, items needed quickly, and longer-term backups. Batteries, flashlights, masks, first-aid materials, and sanitation products should be reachable without moving several boxes. Canned food and spare household goods can occupy deeper shelving, while rarely used equipment may fit under a bed or on a high shelf. This arrangement reduces the common failure of storing the most urgent item in the least accessible location.
Weight matters as much as volume. Water containers, canned goods, and dense tools create a greater load than blankets or paper products. Place heavy items low and distribute them across shelves instead of stacking a tall column in one spot. Check the furniture manufacturer’s capacity when available, especially for bookcases and over-door racks. A narrow, tall unit may save floor area, but it becomes a poor choice if it wobbles or requires unsafe climbing.
Do not buy organizers until the inventory has been reduced to what the apartment can realistically hold. A smaller supply of versatile items may serve better than several specialized products with overlapping functions. For example, a compact lantern, spare batteries, and rechargeable lighting may occupy less space than multiple lamps with different battery types. The goal is not maximum quantity; it is dependable access without turning the room into a warehouse.
Use Vertical, Hidden, and Divided Space
Vertical storage, under-bed compartments, and the unused backs of doors usually provide the largest gains in a compact home. A freestanding shelf can hold labeled bins upward, while a shallow over-door organizer can keep small sanitation or repair items visible. Under-bed boxes are particularly useful for low-profile goods such as blankets, sealed clothing layers, paper products, and backup filters, provided the area is dry and the containers can be pulled out without lifting heavy stacks.
Use a different storage method for different shapes. Clear bins work well for small mixed supplies because their contents can be checked without opening every box. Opaque bins protect light-sensitive goods and create a tidier appearance, but they require large labels on two sides. Slim magazine files or narrow baskets can hold manuals, maps, packets, and rolled materials. Shelf risers create a second level for short cans or bottles, although they should not be used to overload a shelf that was already near its limit.
Furniture can contribute storage without sacrificing every seating or sleeping surface. A bench with a closed compartment, a bed frame with drawers, or a coffee table with a shelf can hold backup goods. The tradeoff is access: storage built into daily furniture is convenient, but it may be disturbed frequently. Keep an item list on the inside of a lid or drawer so supplies do not disappear into ordinary household clutter.
Unused space should not become unsafe space. Do not store goods in front of an exit, beneath a sink where leaks are likely, beside a heat source, or inside a utility cabinet that must remain accessible. Avoid putting heavy boxes on top of unstable furniture. An apartment that appears organized but has blocked egress or overloaded shelving has exchanged clutter for a different risk.
Protect Supplies and Rotate Them Reliably
Storage conditions determine whether supplies remain usable. Food, paper, batteries, medicines, cleaning products, and electronics respond differently to heat, moisture, light, and crushing. Keep food and paper away from damp floors and plumbing leaks; keep batteries in their original packaging or a suitable dry container; and follow the label directions for medicines, chemicals, and any product with special handling instructions. Original packaging also preserves expiration, lot, and usage information.
Plastic bins are useful, but they are not automatically airtight or waterproof. A loose-lid tote may reduce dust while doing little against humidity or a leak. For sensitive contents, use sealed inner bags or containers and place them inside a larger bin. Do not mix cleaning chemicals with food, medicine, or personal-care products. Strong odors can transfer, and a spill can damage several categories at once.
Rotation is easier when new purchases go behind older ones and labels face outward. Mark the month and year of purchase on backup goods, then review the inventory whenever you restock. Foods should be used according to their printed instructions and stored under the conditions stated by the manufacturer; a date is not a substitute for checking damaged packaging, unusual odor, swelling, rust, or exposure to heat.
A common mistake is treating long shelf life as permanent shelf life. Batteries can corrode, adhesives can dry, elastic materials can weaken, and rechargeable devices can lose charge while sitting untouched. Test flashlights and lanterns periodically, inspect cords, and replace damaged containers. The best storage system includes a small maintenance routine because an item that cannot be found, powered, or safely used is not an effective reserve.
Build a Compact Inventory That Stays Usable
A written inventory prevents both overbuying and false confidence. Record the category, quantity, location, purchase date, and any replacement or inspection date. Keep one copy inside the main storage area and another in a phone note or other accessible format. The inventory does not need to be elaborate; it needs to answer what is available, where it is, and whether it still works.
Prioritize supplies by consequence and access rather than by popularity. Water, basic food, sanitation, lighting, communication, first aid, and necessary personal items may deserve attention before duplicate tools or bulky specialty equipment. Apartment residents should account for building-specific constraints, including elevator dependence, limited cooking options, shared laundry, pets, mobility needs, and the possibility that a storage room may be inaccessible.
Use a simple three-level arrangement:
Immediate access: lighting, communication items, first aid, sanitation basics, and essential personal supplies.
Routine rotation: food, batteries, toiletries, and household consumables used during normal life.
Deep storage: spare bedding, less frequently used tools, replacement parts, and seasonal items.
Test the system with a timed retrieval exercise. Ask whether another household member could find a flashlight, water container, or sanitation item without instructions. If opening a bin requires moving furniture, climbing, or searching through unlabeled bags, revise the layout. A compact apartment does not need a dedicated storage room; it needs visible categories, stable containers, and a clear path to the supplies that matter first.
Link the inventory to ordinary household use through How to store supplies in a small apartment as a recurring reference, especially when changing furniture or moving into a new unit. Recheck the arrangement after seasonal temperature changes, a renovation, or a major purchase. Storage should adapt to the apartment rather than forcing the apartment to accommodate an unchanging stockpile.
Avoid the Storage Mistakes That Waste Space
The most expensive mistake is storing supplies that cannot be reached or used. A large quantity of heavy cans may look reassuring, but it can consume valuable floor space and become difficult to inspect. Smaller quantities that are regularly rotated may be more practical, particularly when the household has limited shelving. Compare the space cost of each item with its frequency of use, replacement difficulty, and importance to daily function.
Another mistake is grouping items only by product type. A box labeled “miscellaneous” forces a search when time is limited. Group by task when that is more useful: lighting, sanitation, communication, cooking, or first aid. Keep related accessories together, but avoid packing so tightly that one missing item requires emptying the entire container.
Do not rely on a storage strategy that depends on one fragile feature. A plan based entirely on a basement locker may fail if the building restricts access or flooding occurs. A plan based entirely on a high shelf may fail for someone with limited reach. Divide important supplies among sensible locations and keep at least a basic set where it can be reached quickly.
For additional household context, connect this arrangement with How to store supplies in a small apartment when reviewing food storage, water placement, and daily-use items. The strongest setup is modest enough to maintain, organized enough to explain, and flexible enough to survive a change in furniture, roommates, mobility, or budget.
For food dates, safe storage conditions, and handling questions, consult current guidance from government food-safety agencies and the product manufacturer. Local fire departments or building authorities can also clarify clearance requirements for exits, heating equipment, and shared corridors before storage is installed.
Frequently Asked Questions
Where should supplies go in a small apartment?
Keep frequently used and urgent items in an accessible closet, drawer, or low shelf. Use under-bed and high storage for lighter, less frequently needed goods.
Are plastic storage bins suitable for food?
Use containers intended for food contact when storing unpackaged food, and keep packaged goods in clean, dry bins. A plastic tote may reduce dust but should not be assumed to be airtight or waterproof.
How can renters add storage without drilling?
Consider freestanding shelves, under-bed boxes, removable door organizers, furniture with compartments, and stackable bins. Check weight limits and lease rules before using adhesive or tension-mounted products.
What should not be stored near heat?
Keep food, batteries, aerosols, medicines, electronics, paper goods, and cleaning products away from heaters, ovens, direct sunlight, and hot utility equipment unless the label specifically allows that environment.
How often should an apartment supply inventory be checked?
Review it whenever supplies are used or replaced, and perform a fuller check at least seasonally. Test lighting, inspect packaging, rotate dated goods, and remove damaged items.
Further Reading
Authoritative Sources
Academy of Nutrition and Dietetics eatright.org
Professional nutrition guidance, healthy eating resources, and practical dietitian-reviewed advice.
U.S. Department of Agriculture usda.gov
Official food, nutrition, agriculture, and consumer guidance from the USDA.
NIH Office of Dietary Supplements ods.od.nih.gov
Research-based fact sheets on nutrients, supplements, dietary intake, and safety considerations.
International Society of Sports Nutrition sportsnutritionsociety.org
Evidence-informed sports nutrition resources and position stands for active people and athletes.
Conclusion
Effective apartment storage comes from assigning every supply a location, access level, and maintenance expectation. Measure first, reduce duplicates, and use vertical or hidden areas without blocking exits, utilities, or ventilation. Keep heavy goods low, sensitive items dry and protected, and daily-use equipment where it can be reached without unpacking a stack of boxes. A labeled inventory and simple rotation routine prevent supplies from becoming forgotten clutter. Test the arrangement with a real retrieval exercise, then adjust it for the people who will actually use it. The most resilient setup is not the largest stockpile; it is a compact, safe collection that remains visible, usable, and suited to the apartment’s physical limits.
Stored supplies become harder to manage when packaging is separated from its instructions, several similar containers are stacked together, or a household forgets why an item was purchased. A useful label restores the information needed to identify, use, inspect, and replace that item. The priority is not decorative organization; it is preventing a person from making a wrong decision when time, lighting, or attention is limited.
For most supplies, the label should answer four questions: What is it? Who is it for? When should it be checked or replaced? What restriction or instruction affects safe use? “Emergency supplies” is too broad to answer those questions. “Water purification tablets—20 tablets—follow package dosage—check by March 2027” is much more useful, provided it agrees with the original manufacturer label.
Keep the manufacturer’s label whenever possible. It may contain batch information, warnings, ingredients, dosage, compatibility notes, or storage limits that a homemade sticker cannot reproduce. An added label should supplement—not obscure—the original package. If an item is moved into a secondary container, record the product name, strength or concentration, quantity, original lot or date information when available, and any use restriction.
A common failure is labeling only the outside of a tote. The tote may identify “medical supplies,” but individual bottles can still be confused. Another failure is using abbreviations that only the person who packed the box understands. Write for a tired neighbor or family member who has never handled the supply. The labeling details that matter most are the ones another person can interpret correctly without a verbal explanation.
Dates, Rotation, and Changing Product Condition
Date information deserves separate attention because not every date means the same thing. A manufacturer’s expiration date may relate to safety, potency, quality, or warranty performance, depending on the product. A “best by” date generally concerns expected quality rather than serving as a universal safety deadline, but it should not be ignored. A purchase date, opening date, or next inspection date is a different record with a different purpose.
Write dates in an unambiguous format, such as “2027-03-15” or “15 Mar 2027.” Avoid a bare number like “3/15,” which can become meaningless after a few months. For food, record the package date and use a rotation note. For opened disinfectant, adhesive, fuel-related products, or personal-care items, add the opening date if the instructions indicate that use after opening may differ from unopened storage. For rechargeable batteries, note the last charge or inspection date when that information helps maintain readiness.
Temperature, moisture, sunlight, and repeated handling can change a supply even before its printed date. Cans with swelling, leaking, severe rust, or broken seals should be isolated rather than treated as usable because the date looks acceptable. Damp labels can conceal damage, and heat can affect products that appear visually normal. Storage conditions therefore belong on the container or shelf when they are not obvious: “keep dry,” “protect from freezing,” or “store away from direct sunlight.”
Rotation works better when it is tied to a physical arrangement. Put older, sound items in front and newly purchased items behind them. During a quarterly inspection, compare the label with the actual contents, look for damaged seals, and update the next review date. A calendar reminder is useful, but it does not replace checking the package. The weak assumption to avoid is that a printed date automatically proves condition; it does not account for improper storage or contamination.
Food, Water, Medicine, and Chemical Labels
Different supply categories require different label priorities. Food labels should preserve the product name, ingredients, allergens, preparation method, added water requirement, and date information. A pouch marked only “dinner” may be unsuitable for someone with a food allergy or impossible to prepare when fuel is scarce. Keep instructions that specify whether water must be boiled, whether the package can be heated, and how much food it contains.
Water containers need an identity and an inspection record. Mark the fill date, source or treatment method when relevant, and the next review date used by your household. Never assume that a clean-looking container proves the water is safe. The container material, seal, treatment instructions, and storage environment all matter. If water is transferred, retain any treatment directions and identify whether it is for drinking, sanitation, or another purpose.
Medicine labels require the strongest resistance to guesswork. Preserve the exact product name, active ingredient, strength, dosage directions, expiration date, and warnings. Children’s and adult formulations may use different concentrations, and two products may share an active ingredient even when their brand names differ. A household list can note allergies and regular prescriptions, but it should not replace the package directions or advice from a pharmacist. Do not repackage pills into an unidentified bag for convenience.
Cleaning products, fuel-related items, water-treatment chemicals, and other hazardous supplies need labels that communicate hazards as well as identity. Record dilution ratios, ventilation requirements, incompatibilities, and protective equipment specified by the product documentation. Never combine cleaners because a homemade label suggests they are interchangeable. A mislabeled bottle can turn a routine sanitation task into a hazardous exposure, particularly during a power outage when ventilation and visibility may be poor.
A practical comparison is speed versus completeness. A large category label helps someone find a tote quickly; a full product label helps someone use one item safely. Use both: broad location labels on shelves, detailed identity and instruction labels on individual packages. That layered approach is more reliable than either a crowded inventory sheet or a box marked with a single vague word.
A Labeling System That Works Under Stress
Build labels around the decisions a person will make, not around the way the supplies were purchased. A box may contain food, a can opener, water, and a small stove because those items support one task, while another box may hold personal medications and copies of instructions. Grouping by use can shorten retrieval time, but every item still needs its own identity and date information.
Use durable, high-contrast labels and place a second copy where the primary label is likely to be hidden. For a sealed bin, put the category and review date on the lid and one side. For small items, use a label large enough to read without opening the container. Waterproof marker, printed labels covered with clear protection, or purpose-made storage tags may work better than ordinary paper in a damp basement. Test the label after storage, not only when it is applied.
A compact inspection sequence prevents the system from becoming paperwork:
Match the item to its name, quantity, and intended use.
Read the printed date and compare it with the household rotation record.
Check seals, leaks, swelling, corrosion, odor, moisture, and legibility.
Confirm that instructions, warnings, allergens, and dosage information remain visible.
Replace, relabel, or relocate anything that another person could misidentify.
Test the system with someone who did not pack the supplies. Ask that person to find a water-treatment product, identify its directions, and locate food suitable for a specified allergy. If the answer depends on opening several boxes or remembering an abbreviation, the labeling system is failing even if the inventory is technically complete. This simple test exposes a common misconception: organization is not the same as usability.
Digital inventories can support the physical labels by recording quantities, purchases, and review dates. They should remain optional rather than essential. A dead phone, lost password, or weak signal should not prevent safe identification of a stored item. Keep a printed household inventory in a known location, but treat it as a supplement because the container itself must still carry the information needed at the point of use.
Prioritize labels according to consequence. Items with dosing, chemical, allergy, treatment, or contamination risks deserve detailed individual markings first. Next label foods and water by date and preparation requirements. General tools and comfort items can use simpler descriptions unless a specialized operating instruction is easy to forget. The related stored-supply review process should focus attention where a mistaken choice could cause harm, waste scarce resources, or delay care.
Common Labeling Mistakes and Better Corrections
The most frequent mistake is recording only when an item was bought. Purchase date helps with household records, but it does not tell you whether a product was opened, rotated, damaged, or used beyond its labeled life. Add the date that answers the actual management question. A second mistake is copying a date without recording what it refers to; write “expiration,” “opened,” “filled,” or “inspect by” beside the date.
Another problem occurs when labels promise more than the product documentation supports. Do not write “safe indefinitely,” “purifies all water,” or “works for everyone.” Such wording can hide limits involving source water, dosage, temperature, age, allergies, or equipment. Use the manufacturer’s language where possible and preserve the instructions with the product. If the package is missing critical information, replacement is usually safer than confident improvisation.
Labels also fail when they are technically present but physically unusable. Tiny print, low contrast, glossy surfaces, fading ink, and labels placed under a stack all create access problems. A simple correction is to make the primary identity large and reserve a smaller section for dates and warnings. Use consistent placement, such as the upper right corner for review dates, so inspection becomes faster without turning the system into a rigid code.
Review labels after a household change. A new medication, allergy, infant, pet, mobility limitation, or change in storage location can alter what information matters. A product that was obvious to one adult may become confusing to a child, guest, or relief worker. Rechecking after repacking, moving, or opening a package keeps the label connected to actual use rather than to the original shopping trip.
Frequently Asked Questions
Should every stored item have an individual label?
High-risk items, transferred products, medicines, food, water, and chemicals should have individual labels. Simple tools may only need a clear container or shelf description.
Which date should be written on emergency food?
Record the manufacturer’s printed date and identify what it means. Add a household rotation or inspection date rather than treating the purchase date as a substitute.
Is a “best by” date the same as an expiration date?
No. Date terminology varies by product and may refer to quality, safety, or expected performance. Follow the package wording and inspect storage condition before deciding whether to retain an item.
What should be included on a transferred chemical label?
Include the exact product identity, concentration or dilution information, hazards, handling instructions, and storage warnings from the original documentation. Never use an unmarked container.
Can a digital inventory replace physical labels?
No. A digital list can track quantities and review dates, but the item itself needs enough information for safe identification if power, connectivity, or device access is unavailable.
Further Reading
Authoritative Sources
Academy of Nutrition and Dietetics eatright.org
Professional nutrition guidance, healthy eating resources, and practical dietitian-reviewed advice.
U.S. Department of Agriculture usda.gov
Official food, nutrition, agriculture, and consumer guidance from the USDA.
NIH Office of Dietary Supplements ods.od.nih.gov
Research-based fact sheets on nutrients, supplements, dietary intake, and safety considerations.
International Society of Sports Nutrition sportsnutritionsociety.org
Evidence-informed sports nutrition resources and position stands for active people and athletes.
Conclusion
Good labels turn a pile of stored supplies into resources that can be found and used correctly. Preserve the original product identity, printed dates, ingredients or active ingredients, warnings, preparation or dosage directions, and storage limits. Add opening, filling, or inspection dates when they change how the item should be managed. Give the most detailed labels to medicines, chemicals, treated water, allergen-sensitive food, and anything transferred from its original packaging.
Inspect the physical condition as well as the date, because heat, moisture, broken seals, and fading can make a dated product unreliable. Then test the system with someone unfamiliar with the packing process. If that person can identify the contents, restrictions, and next action without guessing, the labels are doing their job.
Find the gaps most families don’t notice until something goes wrong.
Free. Practical. No fear-mongering.
By requesting this resource, you agree to receive practical PREPARE Magazine guides, tools, and email updates. You can unsubscribe anytime. Privacy Policy