Mitigation changes the conditions that turn a hazard into a loss. Preparedness supplies and response plans help people act during an emergency, while mitigation reduces the amount of damage that emergency action must address. A household that stores water may remain functional during a short outage, but a household that also protects its electrical panel from likely floodwater has reduced the chance of a dangerous and expensive interruption in the first place.
The most useful way to think about mitigation is as a chain: hazard, exposure, vulnerability, consequence. A storm may be unavoidable, but the location of a generator, the condition of a roof, the height of a furnace, and the availability of drainage all influence what happens next. Removing one weak link can lower the final loss. The same logic applies to wildfire embers, earthquakes, winter weather, extreme heat, and utility failures, although the appropriate action differs by location.
Risk maps, local emergency management information, insurance documentation, building records, and observations from previous events can reveal the hazards worth addressing first. Avoid treating a general national hazard list as a local diagnosis. A coastal property may need to focus on surge and saltwater corrosion, while an inland home may face basement flooding, falling trees, or extended power loss. Mitigation preparedness actions that reduce future losses become more effective when they are tied to a specific exposure rather than purchased as a generic package.
A common failure is confusing visible preparation with risk reduction. Buying sandbags without identifying where water enters, or taping windows while leaving a deteriorated roof untreated, may create a sense of action without addressing the dominant pathway to damage. The practical test is simple: can you describe the hazard pathway, the proposed intervention, and the condition that would show the intervention is working? If not, investigate before spending money.
Prioritizing Property Improvements by Hazard and Consequence
Priority should go to measures that address severe consequences, repeated exposure, or a known structural weakness. A useful assessment begins with a room-by-room and system-by-system review: roof, doors, windows, drainage, electrical equipment, heating and cooling, water lines, vehicles, outbuildings, and access routes. Record the likely hazard, the vulnerable item, the possible consequence, and the action that could reduce exposure.
Cost alone should not determine the order. A modest repair that prevents a major secondary problem can outrank a more visible upgrade. For example, clearing blocked drainage and directing downspouts away from foundations may be more valuable for a flood-prone house than purchasing a portable barrier that requires frequent deployment. In another setting, trimming branches away from the roof may reduce outage and impact risk more efficiently than replacing undamaged windows.
Use a practical ranking method based on four questions:
Could failure threaten life safety or prevent evacuation?
Does the problem affect a critical system such as electricity, heat, water, communication, or access?
Is the exposure frequent, foreseeable, or already documented?
Can the action be completed safely, maintained, and verified?
This approach also exposes tradeoffs. A major retrofit may provide stronger protection but require permits, engineering review, financing, or temporary relocation. A smaller interim measure may be sensible while a larger project is arranged, but it should not be described as equivalent. A generator placed outdoors and operated according to its instructions may support continuity; a generator used in an enclosed garage creates a serious hazard. Mitigation improves resilience only when the intervention does not introduce a new danger.
People commonly prioritize what is easy to buy rather than what is difficult to repair. The better sequence is to address life-safety hazards, prevent predictable structural or utility damage, preserve access and communication, and then improve convenience. Reassess after renovations, changes in household needs, new construction nearby, or a serious weather event. An old priority list can become inaccurate when the building, occupants, or surrounding drainage changes.
Protecting Buildings, Utilities, and Essential Records
Building mitigation works by reducing the pathways through which wind, water, fire, cold, heat, or shaking reaches people and critical equipment. The right action depends on construction and hazard conditions, so structural changes should follow applicable local requirements and qualified professional advice where necessary. Improvised work can weaken a building, void coverage, or make later repairs harder to document.
For flood exposure, inspect the lowest level first. Identify the elevation of electrical components, heating equipment, water heaters, fuel systems, and stored chemicals. Keeping valuable materials off the floor may reduce loss, but it does not substitute for properly designed elevation, barriers, backflow protection, drainage improvements, or relocation of equipment. A homeowner should also understand where water can enter: floor drains, window wells, foundation cracks, doors, and damaged grading each require a different response.
Wind mitigation often involves roof condition, roof-to-wall connections, openings, exterior attachments, and nearby trees. Replacing loose shingles is not the same as addressing a broader roof-system weakness. Patio furniture, propane cylinders, signs, and unsecured sheds can become projectiles, so an inspection should include items outside the main structure. During a storm warning, there may be no safe time or access to complete repairs; mitigation must be done during ordinary conditions.
Wildfire-related measures may include managing combustible material near structures, keeping vents and openings appropriately protected, maintaining roof and gutter condition, and selecting exterior materials suited to local guidance. These actions can reduce exposure to embers, but no household measure guarantees survival under every fire behavior or evacuation condition. Leaving early when authorities direct evacuation remains separate from property hardening.
Utility and information protection deserve equal attention. Label shutoffs, keep access clear, use approved protective devices, and photograph major systems for insurance and repair documentation. Store identity records, medication information, property inventories, and contact details in a secure location that remains reachable if the home is inaccessible. Digital copies need more than a cloud account: maintain current access credentials, a backup method, and a way to retrieve essential information during an internet or power outage.
A frequent mistake is focusing on the building envelope while ignoring the contents that make recovery difficult. A low-cost inventory, labeled photographs, and a list of serial numbers may not prevent damage, but they can reduce delays and disputes afterward. Reviewing those details alongside physical improvements creates a more complete loss-reduction system.
Community Measures, Maintenance, and Review
Individual improvements cannot remove every source of risk because roads, drainage networks, power systems, land-use decisions, and public warnings shape household outcomes. Community-level mitigation includes maintaining clear access routes, improving stormwater systems, enforcing sound construction standards, managing vegetation, protecting critical facilities, and using hazard information in development decisions. Residents can support these measures by reporting blocked drainage, participating in local planning, and asking how proposed changes may affect runoff, access, or emergency operations.
Coordination is particularly valuable when one property’s solution affects another. A wall that redirects water toward a neighboring lot may protect one structure while increasing losses elsewhere. Clearing a private driveway does not solve a blocked public road. A neighborhood discussion can identify shared needs such as vulnerable residents, alternate routes, equipment access, or locations where floodwater repeatedly concentrates.
Maintenance determines whether a mitigation action remains dependable. Gutters fill, seals deteriorate, batteries age, trees grow, pumps seize, records become outdated, and stored materials shift back onto the floor. Create a recurring inspection schedule tied to seasons and known hazards rather than waiting for an alert. After each review, record what was checked, what failed, who is responsible, and when the correction will be completed.
Signs that a measure is working include water being directed away from the structure, equipment remaining above the expected exposure level, access routes staying usable, and household members knowing how to operate or avoid the protected system. Signs of failure include repeated moisture, unexplained corrosion, blocked shutoffs, unclear responsibilities, or a measure that depends on a person who may not be present. Testing should be safe and should follow manufacturer instructions; do not activate fuel-burning equipment indoors or experiment with electrical systems.
Keep a short improvement plan with three time horizons: actions to complete this month, projects requiring funding or professional review, and community issues requiring outside coordination. This prevents an expensive long-term project from crowding out a simple repair that can be completed now. It also makes progress visible without treating a checklist as proof that risk has disappeared.
The strongest approach combines mitigation with response readiness. Seal or elevate vulnerable systems, but still know how to shut off utilities, receive warnings, leave safely, and account for household members. Use the mitigation review as part of the wider preparedness plan, then revisit it after every significant change in the property or local hazard picture.
Frequently Asked Questions
What is the first mitigation action a household should take?
Identify the most likely local hazard and the building system whose failure would create the greatest safety or recovery problem. Confirm that priority through local hazard information before buying equipment.
How is mitigation different from emergency preparedness?
Mitigation reduces likely damage before an event, such as elevating equipment or improving drainage. Preparedness also includes supplies, warnings, communication, evacuation, and actions taken during an emergency.
Are inexpensive measures still worthwhile?
They may be worthwhile when they address a known exposure, such as securing outdoor objects or moving records above a flood-prone floor. Their limits should be clear, especially when they cannot replace structural work.
When should a professional inspect a property?
Seek qualified help for structural changes, electrical modifications, major roof work, fuel systems, foundation concerns, and projects affected by permits or local construction requirements.
How often should mitigation measures be reviewed?
Review them seasonally and after severe weather, renovations, changes in occupancy, landscaping growth, or changes to nearby roads and drainage. Repair deterioration rather than assuming the original installation remains effective.
Further Reading
Authoritative Sources
FEMA Hazard Mitigation fema.gov
Explains how mitigation reduces hazard exposure and supports safer buildings, infrastructure, and communities
Ready.gov Emergency Planning ready.gov
Provides official planning considerations that complement property and community mitigation work
National Flood Insurance Program nfip.gov
Offers flood-risk and flood-mitigation information for property owners evaluating water exposure
Conclusion
Loss reduction begins with a clear connection between a local hazard and a specific vulnerability. Inspect the roof, drainage, openings, utilities, outdoor equipment, records, and access routes; then rank corrections by life-safety consequence, critical-system impact, recurrence, cost, and feasibility. A drainage repair, secured utility, elevated appliance, or documented inventory may be more valuable than another general supply purchase when it addresses the actual damage pathway. Larger retrofits deserve professional review, while temporary measures should be labeled as limited protection rather than complete solutions. Schedule maintenance, record unresolved risks, and coordinate issues that cross property boundaries. Mitigation does not replace evacuation or emergency communication, but it can reduce the damage those response actions must overcome and shorten the path toward recovery.
The Practical Difference Between Preparedness And Mitigation
Preparedness and mitigation address different points in the disaster cycle. Preparedness gives people the supplies, information, skills, and arrangements needed to act when a threat is imminent or already unfolding. Mitigation changes the home, community, infrastructure, or behavior in advance so the hazard produces less damage or disruption.
A household preparing for a hurricane might store water, identify a shelter, charge battery packs, and establish an out-of-area contact. Those actions improve response capacity. Installing storm shutters, elevating vulnerable equipment, securing the roof, and improving drainage are mitigation measures because they reduce likely losses before the storm arrives. Neither category replaces the other: shutters do not tell family members where to go after an evacuation order, and an evacuation kit does not reduce wind exposure.
The distinction matters when money, time, or attention is limited. A low-cost preparedness action may be sensible immediately, while a larger mitigation project may offer greater long-term risk reduction but require permits, contractors, insurance review, or coordination with a landlord. A renter may be able to secure furniture, request smoke-alarm repairs, and keep a go-bag ready, but may not be able to reinforce walls or alter drainage.
Use the difference as a planning test. If an action helps you function after warning, injury, displacement, or service failure, it is mainly preparedness. If it lowers the chance or severity of damage before response begins, it is mainly mitigation. Some measures overlap: a backup generator can support response, while a permanently installed safe electrical system may reduce certain hazards. Labeling the purpose prevents a common error—treating a well-stocked closet as proof that the property itself is resilient.
How Timing Changes The Planning Decision
Timing separates the two approaches most clearly. Preparedness is activated or tested around a possible event; mitigation is designed to work continuously, often without anyone taking action during the emergency. A family may need to remember evacuation routes, move vehicles, and collect medications during a warning. A defensible-space project, anchored water heater, or flood-resistant utility placement can reduce exposure before anyone receives an alert.
Preparedness is especially valuable for hazards with short notice or fast-moving effects. Tornadoes, earthquakes, flash floods, and utility failures may leave little time for purchases or elaborate decisions. In those cases, functional steps include keeping essential medications accessible, knowing which rooms provide better protection, maintaining multiple alert channels, and practicing how household members will reconnect if separated. The test is not whether the plan sounds thorough; it is whether a tired person can follow it under noise, darkness, poor communications, or incomplete information.
Mitigation usually rewards earlier investment. Replacing a vulnerable roof, relocating a furnace above a likely flood level, or improving slope drainage may reduce damage across multiple seasons. The tradeoff is that mitigation can be expensive and hazard-specific. A flood barrier may be poorly suited to a wildfire-prone property, while vegetation removal may do little for an earthquake. A project should be assessed against the actual exposure, not against a general desire to feel safer.
Review timing in three layers: what can be done this week, what can be improved before the next hazard season, and what belongs in a longer property or community project. A useful sign that preparedness is working is reduced hesitation during a drill or warning. A useful sign that mitigation is working is that vulnerable components have been identified and physically improved. If the plan depends on buying critical items after an alert, or if a mitigation project has no clear hazard connection, the sequence needs revision.
Matching Measures To Specific Hazards
Disaster planning becomes more accurate when each measure is tied to a hazard mechanism. Earthquake preparedness may include securing a communication plan, storing water, learning how to shut off utilities when appropriate, and identifying safer locations away from falling objects. Earthquake mitigation may include anchoring heavy furniture, bracing vulnerable equipment, and addressing structural weaknesses through qualified local guidance. A shelf anchor is not a substitute for structural assessment, but it can address a distinct household injury risk.
Flood planning shows the contrast between response and exposure reduction. Preparedness involves monitoring official warnings, knowing higher-ground routes, protecting documents, arranging transportation, and keeping waterproof medication or identification containers available. Mitigation may involve backflow protection where appropriate, elevating appliances, improving grading, or using flood-resistant materials in vulnerable areas. Moving valuables upstairs during a warning is a preparedness action; permanently relocating the electrical panel away from expected water is mitigation.
Wildfire creates another useful comparison. Preparedness includes evacuation triggers, vehicle readiness, pet arrangements, respirator considerations, and a method for receiving changing instructions. Mitigation can include reducing combustible material near structures, maintaining defensible space according to local guidance, using more resistant exterior materials, and closing openings that allow embers to enter. Clearing vegetation may reduce exposure but cannot guarantee a structure will survive extreme conditions, so evacuation readiness remains necessary.
Do not copy a measure from one hazard into another without checking its mechanism. A portable air cleaner may be useful during smoke intrusion but does not address evacuation logistics. Sandbags may redirect limited water in some circumstances but are not a universal flood solution. For each major threat, write one sentence describing the hazard, one mitigation action that changes the exposure, and one preparedness action that improves response. That simple pairing exposes gaps more reliably than a generic Preparedness and mitigation differences in disaster planning checklist.
Building Both Into One Workable Plan
A strong disaster plan connects physical risk reduction with human action. Begin by listing the hazards that are plausible for the location, then identify the people, property features, and services most vulnerable to each one. The result should not be an abstract catalog. It should show what could fail, which intervention changes that failure, and what the household will do if the intervention is insufficient.
Use a compact priority sequence:
Protect life first: identify shelter locations, evacuation routes, warning sources, and medical or mobility needs.
Reduce recurring exposure: address the property feature most likely to worsen harm, such as unsecured contents, combustible material, or flood-prone equipment.
Maintain essential functions: plan for water, medications, communications, lighting, sanitation, and transportation.
Test the connection: run a short scenario that requires both a mitigation feature and a preparedness action.
For example, a household may install seismic latches and then practice moving through the home after a simulated nighttime earthquake. The exercise may reveal that the latches work but that shoes, flashlights, or a communication method are inaccessible. Conversely, an evacuation drill may run smoothly while exposing a blocked driveway or a stored generator that cannot be safely operated. Testing turns assumptions into observable findings.
Tradeoffs should be recorded rather than hidden. A mitigation project may consume funds needed for medications or transportation; an evacuation plan may protect life while creating costs for lodging and animal care. Prioritize actions that address severe consequences, affect several household members, and remain useful across more than one scenario. Revisit the plan after renovations, changes in health, new vehicles, altered work schedules, or changes in local warnings. A plan that worked for a two-person household may fail when children, older adults, or dependent neighbors are included.
Common Planning Mistakes And Better Priorities
The most persistent mistake is treating preparedness as a purchase and mitigation as a large construction project. Preparedness is more than supplies: it includes decisions, practiced communication, transportation, and knowledge of official instructions. Mitigation is more than expensive retrofits: securing contents, correcting a trip hazard, maintaining drainage, and reducing combustible storage may be meaningful steps when they match a documented exposure.
Another error is prioritizing visible equipment over hidden dependencies. A generator may be useless if fuel storage, ventilation, transfer equipment, maintenance, or safe operating knowledge has not been addressed. A radio does not solve a communication plan if nobody knows which contact or channel to use. Likewise, a new roof may reduce one vulnerability while unaddressed drainage continues to send water toward the foundation.
Review each proposed action with four questions: What hazard does it address? What failure does it interrupt? Who must act, and under what conditions? What limitation remains after the action? The answers help distinguish a real improvement from a symbolic purchase. They also make it easier to choose between a low-cost immediate measure and a longer project.
Keep documentation accessible in both digital and offline forms, but do not assume technology will remain available. Include property shutoffs, insurance contacts, medication information, meeting locations, pet arrangements, and copies of essential records as appropriate. Official emergency-management agencies, building professionals, and local utility guidance can help with hazard-specific decisions; generalized internet advice may not reflect local terrain, construction, or warning systems.
Use Preparedness and mitigation differences in disaster planning as a review lens, not as two isolated categories. The goal is a chain: reduce exposure where feasible, recognize the warning, take the right action, and continue functioning if services are interrupted.
Frequently Asked Questions
What is the simplest difference between preparedness and mitigation?
Preparedness improves the ability to respond when danger is possible or occurring. Mitigation reduces the expected damage or exposure before the event.
Can one action count as both preparedness and mitigation?
Yes. A measure such as backup power may support response, while permanent electrical improvements may reduce certain equipment risks. Its category depends on the function being evaluated.
Which should a household do first?
Address life safety, warnings, evacuation or shelter decisions, medications, and communication first. Then target the property vulnerability most likely to worsen the relevant hazard.
Is storing emergency supplies considered mitigation?
Usually no. Supplies improve preparedness by helping people function during disruption; mitigation changes the conditions that create or amplify damage.
How can I tell whether a disaster plan is working?
Test it with a realistic short scenario. Look for quick access to warnings and essentials, clear responsibilities, workable routes, and property measures that address a specific exposure.
Further Reading
Authoritative Sources
FEMA Risk Management fema.gov
Provides federal emergency-management material on identifying hazards, reducing risk, and strengthening community resilience
Make a Plan ready.gov
Offers practical preparedness considerations for communications, alerts, evacuation, and household needs
FEMA Building Science fema.gov
Explains hazard-resistant building and retrofit concepts that support mitigation decisions
Conclusion
Preparedness and mitigation work best as linked decisions rather than competing labels. Preparedness covers the actions and resources needed when warnings, damage, or service interruptions demand a response. Mitigation reduces the exposure that makes that response harder, whether through safer storage, property improvements, hazard-resistant construction, or changes to the surrounding landscape. Start by identifying the hazards that genuinely affect your location, then pair one feasible risk-reduction action with one tested response action for each. Check the remaining limitations, including cost, rental restrictions, transportation, health needs, and the possibility that warnings or utilities may fail. Revisit the pairings after major household or property changes. That process produces a plan grounded in actual consequences instead of a supply list that may not match the threat.
A preparedness measurement is only useful when it is tied to a specific disruption. A household may be well equipped for a short power outage yet poorly positioned for an evacuation, a water interruption, or several days without access to local stores. Define the event, its expected duration, the season, and whether the household stays home or leaves. Those boundaries prevent an inflated score based on supplies that do not match the actual problem.
Choose scenarios that reflect the household’s location and vulnerabilities. A winter outage tests heat, lighting, cooking, and cold-weather clothing; a wildfire evacuation tests transportation, documents, pet arrangements, and departure speed. A regional storm may affect water, fuel, communications, and payment systems at the same time. The purpose is not to predict one exact disaster but to expose which capabilities fail when normal services become unreliable.
Use a defined time window, such as 24 hours, 72 hours, or one week, and write down the assumptions. Does the household have running water? Can adults leave work? Is a dependent person at home during the day? Are prescription refills available? A household with an infant, disability, livestock, or a member who relies on powered medical equipment needs a different measurement than a two-adult household with few dependencies.
A common mistake is assigning a high rating because a storage area looks full. Inventory volume does not show whether food is usable, water is safely stored, batteries fit essential devices, or everyone knows where items are kept. A scenario-based baseline makes the assessment more honest and gives the household a meaningful way to compare progress. For broader context, review How to measure a household’s level of preparedness alongside the scenario that matters most locally.
Score Resources, Skills, and Access
Measure preparedness across separate capability areas rather than combining everything into one impression. A simple scorecard can rate each area from zero to four: absent, partly available, functional with limits, tested, and reliable under the chosen scenario. The scale is less important than applying the same standard to every category and recording the evidence behind each rating.
Assess water, food, medications, sanitation, lighting, power, communication, first aid, transportation, documents, and shelter conditions. Then assess skills such as turning off utilities, using a fire extinguisher, preparing food without normal cooking equipment, receiving emergency information, and caring for a dependent person. A household that owns a radio but cannot power it or identify reliable local information has equipment, not a dependable communication capability.
Access deserves its own rating because stored resources may be unreachable. Supplies in a locked shed may be useless during a nighttime evacuation; a vehicle may be available but nearly empty; important records may exist digitally but be inaccessible during an internet or power failure. Score the item according to the outcome it supports. For example, medication is not fully covered if the quantity is limited, the storage conditions are unsuitable, or no one has considered what happens when pharmacies close.
Use evidence rather than optimism. A category can qualify as functional when the needed item is present, suitable for the household, in working condition, and understood by the people who may need it. A tested category requires a demonstration, such as preparing a meal with the backup stove or locating emergency contacts without a phone’s saved address book.
Do not let abundant low-consequence items compensate for one critical gap. Extra snacks should not offset no drinking water, and camping equipment should not offset an absent evacuation route for a person with limited mobility. A weighted approach is more realistic: assign greater importance to water, medication, sanitation, safe shelter, communication, and transportation than to convenience items. That reflects how a single failure can undermine several other capabilities.
Test the Household Under Realistic Constraints
Testing converts a paper score into evidence about performance. Run a short, safe exercise that removes one normal convenience without creating danger. Turn off selected lights for an evening, prepare a meal without the usual appliance, practice receiving an alert, or pack for departure using only the designated bags. Observe time, confusion, missing items, and tasks that depend on one person.
A useful exercise includes people who might actually be present during an incident. Children may need to know how to contact a relative, older adults may need an accessible route, and guests or caregivers may not know the household’s system. A plan that works only when the most experienced adult is home should receive a lower score for resilience. The test should reveal dependency, not reward a rehearsed performance by one person.
Record measurable observations. How long did it take to find flashlights? Could the household produce safe drinking water without relying on a single appliance? Did everyone know where to meet if phone service failed? Could pets, medications, identification, and mobility aids leave with the family? These observations show whether a weakness comes from missing equipment, poor placement, unclear instructions, or a skill that has never been practiced.
Compare a tabletop discussion with a physical drill. Discussion is faster and useful for identifying decisions, contacts, and alternate routes. A drill exposes friction that conversation misses, including jammed containers, dead batteries, overloaded bags, inaccessible storage, and unrealistic departure times. Neither method replaces the other. Use discussion for complex choices and a small practical exercise for actions that must happen quickly.
Safety limits matter. Do not create a real fire, intentionally consume essential medication, shut down medically necessary equipment, or block exits. Simulate those conditions and document the response instead. A test is successful when it identifies a correction and produces a clearer next action, not when it makes the household feel confident. Revisit How to measure a household’s level of preparedness after each exercise so the score reflects observed performance rather than memory.
Turn the Score Into a Priority List
The measurement becomes valuable when it determines what to fix first. Rank weaknesses by consequence, likelihood within the chosen scenario, time required to correct them, and whether one improvement supports several needs. Water storage, sanitation, medication continuity, and a safe way to receive information often deserve attention before specialized gear because they affect ordinary daily functioning during a disruption.
Separate urgent corrections from gradual upgrades. An urgent correction might be moving supplies away from flood exposure, replacing expired batteries, documenting medication information, or identifying an accessible exit. A gradual upgrade might be adding longer-duration food variety, improving insulation, or purchasing a secondary charging method. This distinction prevents a limited budget from being consumed by impressive but low-impact purchases.
Use a compact action record for every weak category:
Gap: State the failed capability, not merely the missing item.
Consequence: Describe what becomes difficult or unsafe if the gap remains.
Correction: Name the smallest credible action that improves the outcome.
Verification: Set a date or test that proves the correction works.
For example, “no backup power” is too broad. A more useful finding might be “the household cannot keep phones charged during a 48-hour outage.” The correction could involve a charged power bank, compatible cables stored together, and a recharging method that does not depend on the same failed service. Verification means using the setup during a planned test and confirming that everyone knows where it is.
Scores should be reviewed after household changes, seasonal shifts, relocation, new prescriptions, vehicle changes, or a change in local hazards. A high number can mislead if it is not current, while a lower score with documented improvements may represent stronger readiness than an older, untested rating. Track both the category score and the date of its last verification.
Measurement should guide spending and practice, not become a competition. The strongest result is a household that knows its limits, has addressed high-consequence failures, and can demonstrate essential actions without relying on one fragile assumption. A focused reassessment every few months is usually more useful than a large inventory review performed only once.
Frequently Asked Questions
What is the simplest way to measure household readiness?
Choose one realistic scenario, set a duration, score essential capabilities from absent to tested, and verify the lowest-scoring areas with a safe exercise.
Should preparedness be measured by the number of supplies owned?
No. Supplies count only when they are suitable, accessible, maintained, and usable by the people who may depend on them.
Which preparedness categories should receive the highest priority?
Prioritize safe water, sanitation, medications, shelter, communication, transportation, and needs created by disability, age, pets, or medical equipment.
How often should a household reassess its preparedness?
Review the score after major household or seasonal changes and repeat practical checks periodically so batteries, documents, medications, and skills remain current.
What makes a preparedness score unreliable?
Unclear scenarios, untested equipment, inaccessible storage, dependence on one person, and allowing surplus convenience items to hide a critical gap can all distort the result.
Conclusion
A household’s readiness is best measured by demonstrated capability, not by the size of its storage area. Define the disruption and duration first, then examine resources, skills, access, dependencies, and communication as separate categories. Give greater weight to failures that could affect water, medication, sanitation, shelter, or safe movement, and test assumptions with small, controlled exercises. Record what failed, correct the highest-consequence gap, and verify the change rather than treating a purchase as proof of readiness. Reassess when the household, season, vehicle, health needs, or local risks change. The resulting score will be less dramatic than a simple inventory count, but it will provide a far more useful picture of what the household can actually do when ordinary services are interrupted.
The Readiness Ladder: From Awareness to Reliable Action
Household readiness improves in stages because capability develops more slowly than purchasing. A useful progression begins with awareness, advances through basic continuity, adds resilience, and reaches dependable operation when the household can perform under pressure. The stages are not rigid certifications; they are a way to identify the next practical gap without treating preparedness as an all-or-nothing project.
At the awareness level, residents know which disruptions are plausible in their area and which needs are most urgent. They may have noticed flood risk, winter outages, wildfire smoke, transportation interruptions, or extended utility failures, but they have not yet organized a response. The next level appears when the household can remain functional for a short period with drinking water, simple food, lighting, sanitation supplies, basic first aid, and a way to receive information. The supplies matter because they reduce forced travel and rushed decisions during the first hours of an incident.
Higher readiness depends on redundancy and coordination. A family that owns a flashlight but has no spare batteries has less capability than a family with modest lighting stored where everyone can find it. A household that has a written contact plan, backup charging, and an agreed meeting location can coordinate more reliably than one that owns expensive equipment but has never discussed who checks on children, pets, or relatives.
Weak assumptions often distort the ladder. A full pantry is not the same as usable food if nobody knows how to prepare it without normal cooking equipment. A generator is not a complete solution if its fuel, ventilation, transfer method, and operating instructions have not been addressed. The most meaningful sign of progress is reduced dependence on improvisation. Use Preparedness levels that show improving household readiness as a review lens: ask what the household can actually do, not what it owns.
Household Capabilities That Mark Each Level
Readiness levels are best measured by capabilities that remain useful during a specific disruption. Basic capability means the household can meet immediate needs when stores, taps, internet service, or transportation are temporarily unavailable. That usually includes stored water, foods that household members will eat, a manual can opener, sanitation materials, prescription planning, lighting, and a way to obtain reliable alerts. These are practical foundations because they address predictable dependencies rather than dramatic but less likely scenarios.
Intermediate readiness adds household-specific planning. Residents identify who may need extra help, how medications are managed, where utility shutoffs are located, and how important records can be reached if a phone or computer is unavailable. A renter may prioritize evacuation instructions and portable supplies, while a homeowner may also address water shutoffs, fire extinguishers, backup heat, or sump-pump contingencies. The better choice is not the most elaborate one; it is the set of measures that matches the building, climate, health needs, and likely warning time.
Advanced readiness shows up as flexibility. The household can shelter in place for a longer interruption, leave with essential items, communicate through more than one channel, and adapt when the original plan fails. That may involve a small go-bag for each person, alternate routes, cash in appropriate denominations, spare eyeglasses, pet carriers, and a paper list of contacts. These additions are valuable when a disruption changes faster than expected, but they also create maintenance work and storage demands.
A compact assessment can separate ownership from performance:
Access: Can every adult locate critical supplies in darkness or during a hurried departure?
Usability: Can someone operate the lighting, water treatment, cooking, or communication equipment safely?
Coverage: Do the arrangements account for infants, older adults, disabilities, pets, and prescription needs?
Recovery: Can the household document damage, replace essentials, and resume routine responsibilities?
For example, a household may move from basic to intermediate readiness by testing a no-power dinner, locating the water shutoff, and writing down two out-of-area contacts. That may deliver more real-world value than buying another specialized device. The relevant comparison is not beginner versus expert identity; it is untested capacity versus demonstrated capacity.
Testing Supplies, Skills, and Communication
Testing is the clearest evidence that readiness is improving because it exposes friction before an actual disruption does. A household can conduct a short, controlled exercise without creating danger: turn off selected conveniences for an evening, prepare food without the usual appliance, use stored lighting, and practice receiving information from a backup source. The purpose is not to simulate catastrophe. It is to discover missing adapters, dead batteries, inaccessible supplies, confusing instructions, or disagreements about responsibilities.
Supplies should be checked for condition and fit. Rotate foods according to normal household use rather than buying unfamiliar products that may be rejected or wasted. Inspect water containers for leaks, confirm that first-aid items have not been depleted, and verify that batteries match the equipment stored with them. Medications require individual attention; a general stockpile cannot replace advice from a pharmacist or clinician about refills, storage, or travel needs.
Communication deserves its own test because phones can fail for several different reasons. A household may lose power, cellular service, internet access, or simply the ability to charge devices. Write down key numbers, agree on a meeting location, and decide how a person will report status if separated. Children and guests should receive simple instructions rather than being expected to infer the plan. If a message depends on one person remembering every detail, the system is fragile.
Consider a winter outage lasting through one night. A low-readiness household searches for candles, discovers that food requires an electric stove, and debates whether to drive in unsafe conditions. A better-prepared household retrieves headlamps, uses shelf-stable food, protects pipes according to the property’s needs, checks on vulnerable neighbors where appropriate, and monitors official information. Neither household can control the outage, but the second has reduced exposure to preventable mistakes.
After each exercise, record what failed and fix the smallest high-consequence problem first. Do not treat an elaborate drill as automatically superior to a simple one. A five-minute test that reveals inaccessible water may be more useful than a long scenario that nobody repeats. The working sign is not perfect execution; it is a shorter path from problem discovery to correction.
Turning Weak Points Into the Next Readiness Gain
The next level should be chosen by consequence, frequency, and time available for correction. Start with failures that could threaten health or prevent safe movement: inadequate drinking water, no essential medication plan, unsafe heating or cooking, missing evacuation information, and inability to contact household members. Financial limits do not make progress impossible. They make sequencing more important. A modest collection of usable essentials, maintained consistently, is generally more dependable than a large assortment of neglected equipment.
Use a simple improvement cycle. First, list likely disruptions and the household’s first three actions for each. Second, compare those actions with current supplies, knowledge, and physical limitations. Third, correct one gap and test it. Fourth, record an owner and review date. This process turns a broad ambition into observable milestones. A family might first secure drinking water and lighting, then address food preparation, then add communication redundancy, rather than attempting every category in one weekend.
Common failure modes include buying for an imagined scenario while ignoring ordinary outages, storing supplies where heat or moisture damages them, and assigning all knowledge to the most enthusiastic household member. Another mistake is copying a generic list without considering allergies, mobility, pets, work schedules, or apartment rules. A plan that works only when everyone is together is incomplete; include instructions for separation and delayed communication.
Review readiness after moves, new medical needs, seasonal weather changes, vehicle changes, and major household additions. Label storage clearly, keep a paper inventory, and replace what was consumed after a test. If a tool is unsafe, confusing, or legally restricted in the place where it will be used, choose a safer alternative or obtain qualified instruction rather than forcing it into the plan.
Readers comparing Preparedness levels that show improving household readiness should look for evidence of improvement: fewer unanswered questions, faster access to essentials, more people able to perform basic tasks, and better recovery after a disruption. Readiness is not measured by confidence alone. It is demonstrated when ordinary people can carry out the next sensible action with limited power, information, time, or outside assistance.
For location-specific hazards, alert systems, evacuation instructions, and public-health guidance, consult your local emergency management office and relevant government agencies. Their information should take precedence over generalized household lists, especially when an incident creates changing instructions.
Frequently Asked Questions
What is the first sign that a household is becoming more prepared?
The first clear sign is that residents can meet immediate needs without searching or making rushed purchases. Supplies are accessible, responsibilities are discussed, and basic actions have been tested.
Are preparedness levels based on the amount of equipment a family owns?
No. Capability, access, maintenance, and safe use matter more than equipment volume. A smaller set of familiar, maintained items may outperform a larger untested collection.
How often should household readiness be reviewed?
Review it after major household or seasonal changes and after every exercise or real disruption. A brief quarterly check can catch expired food, depleted batteries, changed contacts, and new access needs.
What should a household prioritize with a limited budget?
Prioritize drinking water, ordinary shelf-stable food, lighting, sanitation, essential medications, reliable information, and a communication plan. Add specialized equipment only after these basics are usable and maintained.
Can apartment residents reach advanced readiness?
Yes, although the approach differs. Portable water and food, compact lighting, evacuation information, neighbor coordination, document access, and building-specific fire and utility knowledge may matter more than large fuel-powered equipment.
Conclusion
Improving household readiness is visible in capability, not in the size of a storage area. A household advances when it can identify likely disruptions, cover immediate needs, share responsibilities, communicate through interruptions, and recover from a test or real event with fewer surprises. Prioritize the gaps with the highest consequence: water, essential health needs, safe light and food preparation, information, and movement. Then test one improvement under ordinary conditions and correct what fails. Keep supplies familiar, accessible, and appropriate for the people who will use them. Over time, repeated small reviews create a stronger result than occasional large purchases because they turn preparedness from a collection of objects into a functioning household system.
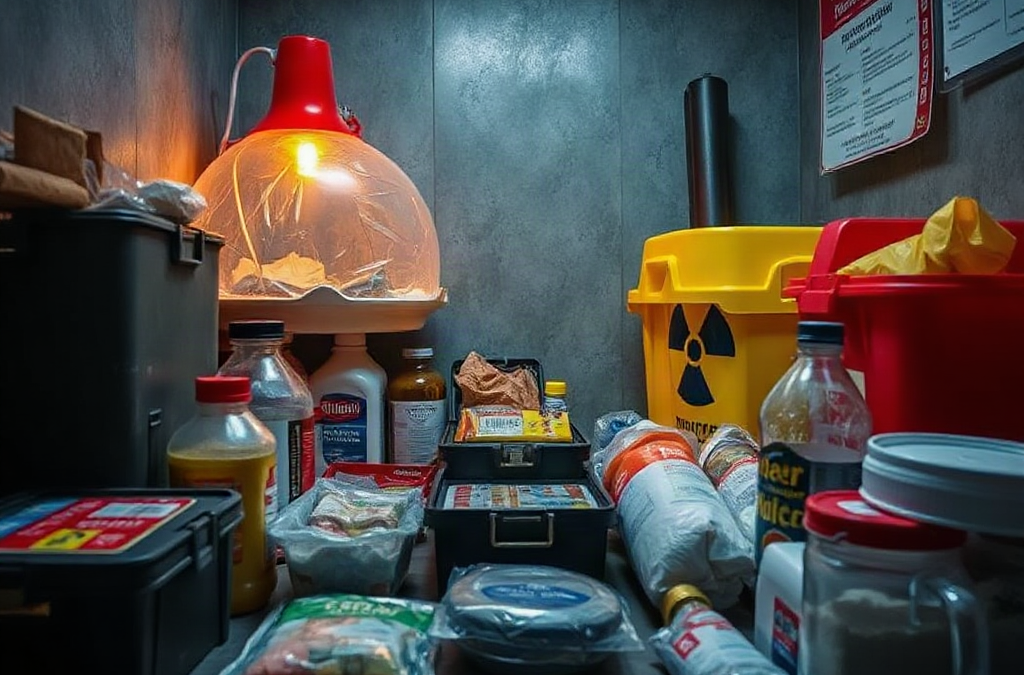
A useful fallout shelter kit supports three immediate needs: staying inside a well-shielded location, meeting basic bodily needs, and receiving reliable instructions. The supplies matter because people may need to remain sheltered while outdoor radiation levels decline and authorities assess roads, buildings, utilities, and food or water safety. A kit is not a substitute for a suitable shelter. A basement, underground area, or central room with substantial walls and few windows generally offers better protection than a vehicle, porch, or room beside exterior glass.
Radiation protection depends on time, distance, and shielding. A kit improves the first factor by reducing the urge to leave for water, food, medication, or information. Dense materials such as concrete, brick, and earth provide more shielding than thin interior partitions. A central basement corner may therefore be preferable to a finished room above ground, although flooding, structural damage, fire, and access to ventilation must be considered.
The most common planning error is buying specialized equipment before solving ordinary logistical problems. A radiation meter may provide information, but it does not create shielding or replace official instructions. Similarly, a disposable mask may limit inhalation of some dust during a brief movement, yet it cannot make an unsafe outdoor trip safe. Prioritize items that remain useful during a power outage and that household members can operate without extensive training.
Use the Nuclear preparedness kit items for fallout sheltering as a household inventory, then adapt quantities to residents, pets, disabilities, climate, and available shelter space. Store the kit where it can be reached quickly, but avoid placing it in a garage or shed if the intended shelter is elsewhere.
Water, Food, and Sanitation Supplies
Water deserves the first storage decision because thirst, medication needs, food preparation, and hygiene quickly compete for the same supply. Keep commercially bottled water or filled, food-safe containers in the shelter area when possible. Containers should be sealed, protected from heat and chemicals, and labeled with storage or replacement dates. A filter can be useful for later water treatment, but it should not be treated as proof that an unknown source is safe from radioactive contamination; filtration capabilities vary, and some contaminants require different treatment.
Choose foods that are shelf-stable, familiar, and ready to eat or simple to prepare. Canned fish, meat, beans, fruit, vegetables, nut butters, crackers, cereal, shelf-stable milk, and energy-dense snack foods can work when rotated through normal meals. Include a manual can opener, disposable or washable utensils, and a small cooking option only if its use is safe and permitted in the shelter. Never burn fuel, charcoal, or candles in an enclosed room because carbon monoxide and fire can create a faster danger than hunger.
Sanitation supplies often determine whether a shelter remains usable. Pack toilet paper, heavy-duty bags, smaller waste bags, absorbent material, soap, hand sanitizer, disinfecting wipes, menstrual products, diapers, gloves, and a sealable container for contaminated or unpleasant waste. A lined bucket with a secure lid can serve as an emergency toilet, but it should be placed away from food and drinking water. Do not assume a functioning toilet, running water, or working sewage system will be available.
A compact priority list is more useful than an oversized shopping cart:
Sealed drinking water and a method for measuring household use.
Foods that require no refrigeration, plus a manual opener.
Toilet and hand-cleaning supplies, including bags and gloves.
Special foods, infant supplies, pet food, and prescription needs.
Food variety is a worthwhile tradeoff, but extra packaging can consume shelter space. Choose items residents already tolerate, especially if stress or limited ventilation may make strong odors, cooking smoke, or unfamiliar textures difficult.
Medical, Light, and Communication Equipment
Medical supplies should keep routine conditions from forcing an unnecessary trip outside. Store prescription medicines according to pharmacy guidance, along with a written medication list, basic first-aid materials, spare eyeglasses, hearing-aid batteries, and commonly used personal-care products. Include bandages, gauze, adhesive tape, antiseptic supplies, tweezers, disposable gloves, and any medically necessary devices. A first-aid kit will not treat radiation injury, but it can address ordinary cuts, blisters, headaches, or minor burns while professional help is limited.
Lighting must be dependable without creating combustion hazards. Battery lanterns and flashlights are preferable to open flames in a crowded enclosed shelter. Pack spare batteries in their original packaging or another way that prevents contact between terminals. Headlamps can free both hands for sanitation or medical tasks, while a small lantern provides shared room lighting. Test switches and batteries periodically; an untested flashlight is a container, not a working tool.
Information is another practical supply. A battery-powered or hand-crank radio can receive public instructions when internet and cellular service are unavailable. Add charging cables, a backup power bank kept charged, paper, pencils, and a battery-operated clock. Write down household contacts, emergency meeting information, medication details, and local authorities’ contact channels. Do not rely exclusively on social media posts or forwarded messages, which may omit shelter orders, water advisories, or changing access restrictions.
Consider a smoke alarm, fire extinguisher, and carbon-monoxide alarm if the shelter space and building layout make them appropriate. These tools address hazards created by damaged utilities or improvised heating. The failure mode to avoid is confusing measurement with protection: a dosimeter or radiation detector may help interpret official information, but an inexpensive unverified device can create false confidence. Choose one only if you understand its limits, battery requirements, and reading units.
The kit inventory should be checked against real household conditions. Someone who uses refrigerated medicine, mobility equipment, oxygen, or powered communication devices needs a power and care plan, not merely extra canned food.
Shelter Placement, Clothing, and Contamination Control
Fallout sheltering works best when supplies are already near the most protected part of the building. Moving through a contaminated outdoor area to retrieve a kit defeats part of its purpose. Place water, food, sanitation materials, and medical supplies inside or immediately beside the selected shelter room, while keeping exits accessible. Avoid blocking doors, vents, stairways, or equipment needed for safe building evacuation if fire or structural damage occurs.
Clothing and cleaning items are intended for limited contamination control, not radiation blocking. Keep sturdy shoes, work gloves, spare clothing, a washable outer layer, soap, towels, and sealable bags available. If someone has been outdoors after fallout arrived, official public-health guidance should determine whether and how to remove an outer layer, bag it, and wash exposed skin. Vigorous scrubbing can irritate skin, and bleach or household chemicals should not be applied to the body.
Plastic sheeting and duct tape are frequently overinterpreted. They may help reduce drafts or keep dust away from selected surfaces, but sealing every opening can interfere with safe ventilation and produce heat or indoor-air problems. Do not cover vents or operate fuel-burning devices in an attempt to create a sealed room. A structurally sound, shielded interior location is usually more valuable than an improvised plastic enclosure.
A realistic scenario illustrates the tradeoff: a family living in a two-story house may choose the basement, but only after checking flood risk, stair access, stored chemicals, and the ability to hear a radio. A household in an apartment may have no basement and instead use an interior room or designated building shelter, adding water containers and sanitation supplies because the building’s facilities could be inaccessible. The best location is not the one with the largest kit; it is the one that combines shielding, safe access, ventilation, and enough room for occupants.
Building and Maintaining a Practical Kit
Build the kit in layers rather than attempting to purchase everything at once. The first layer covers water, ready-to-eat food, medicines, sanitation, lighting, and official information. The second adds comfort and continuity items such as blankets, spare clothing, books or quiet activities, pet supplies, and hygiene products. A third layer can address specialized equipment, but only after the basic supplies are usable and stored in the right location.
Quantity decisions should reflect the number of people and the likely duration of sheltering instructions, not an arbitrary container size. Keep a written inventory showing expiration dates, battery types, medicine replacement dates, and the location of backup items. Rotate foods into ordinary meals and replace them with fresh stock. Check water containers for leaks, inspect bags and gloves for deterioration, and test radios and lights on a schedule that fits household routines.
Practice the movement that matters: reaching the shelter room, bringing only nearby essentials, accounting for children and pets, and turning on the radio. A short household drill may reveal that the kit is too heavy, the flashlight batteries are missing, or the chosen room cannot accommodate a wheelchair. Those findings are more valuable than adding another specialty product. Keep printed instructions simple enough for a guest or older child to follow.
Do not leave the shelter because rumors suggest the danger has passed. Follow instructions from local emergency management, public-health agencies, and other official channels. If authorities direct evacuation, use the route and timing they provide rather than improvising. Conversely, do not remain in a damaged, burning, flooding, or carbon-monoxide-threatened space merely because it offers shielding; immediate building hazards can override the shelter plan.
Review fallout sheltering supplies whenever the household changes, the shelter room changes, or seasonal conditions alter heating, cooling, and water needs. A modest, maintained kit in a reachable location is more dependable than a large collection stored somewhere inaccessible.
Frequently Asked Questions
How much water should a fallout shelter kit contain?
Store as much sealed drinking water as the household can safely maintain, with additional consideration for medicines, children, pets, and sanitation. Official instructions should guide longer-term use.
Do I need a radiation suit or gas mask?
These items are not substitutes for indoor shielding. Ordinary clothing, careful decontamination, and official directions are generally more practical for household planning than relying on unverified protective gear.
What foods work best inside a fallout shelter?
Use familiar shelf-stable foods that need little or no cooking, such as canned meals, beans, fruit, crackers, nut butter, and shelf-stable milk, alongside a manual can opener.
Should windows and vents be sealed with plastic?
Plastic may limit dust on selected surfaces, but fully sealing a room can create ventilation and indoor-air hazards. Do not block required vents or use fuel-burning equipment indoors.
When can people leave the shelter?
Leave when official authorities provide instructions, or immediately if the building has an urgent threat such as fire, collapse, flooding, or carbon monoxide. Do not rely on rumor or visual conditions alone.
Further Reading
Authoritative Sources
Nuclear Explosion ready.gov
Provides federal guidance on getting inside, staying inside, and following official information after a nuclear explosion
Radiation Emergencies cdc.gov
Explains public-health actions, contamination concerns, and protective steps during radiation emergencies
Radiation Protection epa.gov
Offers background on radiation protection and environmental response information
National Household Preparedness Guidance fema.gov
Helps households organize supplies, communication plans, and preparedness actions across hazards
Conclusion
A fallout shelter kit should reduce the reasons to leave a protected location, not encourage risky improvisation. Put sealed water, simple food, sanitation supplies, medicines, lighting, and a reliable radio where occupants can reach them quickly. Then improve the plan with clothing, waste containment, pet or infant supplies, and household-specific medical or power needs. The shelter itself remains the primary protective measure: choose the most shielded safe area available, keep it accessible, and avoid creating fire or ventilation hazards while trying to seal it. Rotate consumables, test equipment, and rehearse the move indoors. After an incident, follow official instructions and treat urgent structural or air-quality dangers seriously. A maintained, location-specific kit gives the household practical staying power while better information becomes available.
The most valuable feature of a home shelter is the material between people and outdoor fallout. Fallout consists of radioactive particles that may settle on roofs, streets, vehicles, clothing, and exposed surfaces after a nuclear detonation. A basement, underground area, or central room surrounded by several walls generally offers more shielding than a perimeter room, vehicle, garage, or lightweight shed.
Concrete, brick, earth, and dense building materials reduce radiation reaching occupants. Distance from exterior walls and the roof also matters because deposited particles outside the building are a major source of exposure. A basement is often useful, but it is not automatically safe if it floods, contains a fuel-burning appliance, or has poor access for a person with mobility limitations. A windowless interior room on a lower floor may be the better option in a particular building.
Before an emergency, inspect two possible shelter locations rather than choosing one based only on convenience. Note stair access, ventilation controls, plumbing hazards, sleeping space, and whether everyone can reach the area quickly. Store a few supplies there, but avoid blocking exits or placing fuel, propane cylinders, or chemicals in the shelter.
A common mistake is treating a car as a dependable radiation shelter. A vehicle can provide temporary protection while someone is traveling, but its thin metal and windows offer limited shielding compared with a substantial building. Another weak assumption is that opening a window for comfort is harmless. During official shelter guidance, outdoor air and settled particles should be managed according to instructions from emergency authorities.
For a household that lives in a high-rise, the best location may be an interior corridor or central room away from windows, often on a lower or middle floor rather than directly beneath the roof. Residents should identify stair routes and avoid elevators if power or building systems become unreliable. The goal is not to create a perfect bunker; it is to reach the strongest practical protection quickly and remain there.
Supplies That Keep A Household Indoors
Home supplies should support sheltering, not encourage unnecessary movement. Water, ready-to-eat food, prescription medicines, sanitation items, lighting, communications equipment, and basic first aid address the problems that make people leave too soon. A stockpile is useful only if it is accessible, rotated, and matched to the household’s actual needs.
Store drinking water in sealed, food-grade containers and include water for medicines, simple hygiene, and pets where applicable. Shelf-stable foods should require little or no cooking: canned meals, nut butters, crackers, dried fruit, cereal, and commercially packaged foods can be easier to use than items that depend on refrigeration or a working stove. Include a manual can opener. Fuel-burning stoves, grills, and generators must never be operated indoors because carbon monoxide can accumulate without an obvious warning.
Medicines deserve a separate review. Keep an up-to-date list of prescriptions, doses, allergies, and essential medical equipment. A person who relies on powered oxygen, refrigerated medication, a CPAP device, or mobility equipment needs a specific continuity plan. Batteries, charging options, backup power, and safe operating instructions may matter more than adding another general-purpose gadget.
Useful shelter supplies include:
Battery-powered or hand-crank radio, spare batteries, and a phone charging method.
Flashlights, glow sticks, work gloves, masks for nuisance dust, and closed-toe footwear.
Toilet bags, absorbent material, soap, disinfecting supplies, and personal hygiene products.
Infant supplies, pet food, eyeglasses, hearing-aid batteries, and comfort items.
Paper copies of contact information, medications, identification, and local emergency instructions.
Food storage is not a substitute for shelter quality. A large pantry in a room with windows may be less useful during the first phase than a modest kit already placed in an interior space. Review the setup every few months: replace expired medicines, test radios and lights, inspect water containers, and confirm that stored items have not been moved behind furniture.
Readers comparing this topic with broader Nuclear preparedness priorities for sheltering at home should separate immediate shelter supplies from long-duration household preparedness. The first supports hours or days of indoor protection; the second may include financial records, repairs, transportation, and rebuilding needs.
Information, Timing, And Household Decisions
Reliable information determines whether a household shelters correctly, relocates later, or exposes itself through unnecessary travel. Keep at least one communication method that does not depend entirely on local cellular service. A battery radio, official alert system, and written contact plan provide different paths to instructions if one channel fails.
Authorities may issue changing guidance about sheltering, evacuation, road restrictions, water safety, schools, and medical services. A rumor shared by text or social media should not override official emergency management, public health, or law-enforcement instructions. Assign one person to monitor updates while another manages children, pets, or medical needs. That division reduces the chance that everyone leaves the shelter to look for information.
Timing creates a difficult tradeoff. Getting indoors immediately is usually more valuable than stopping to collect extra possessions. Once inside, people should move away from windows and exterior walls, close openings, and follow instructions about ventilation systems. Leaving later may be appropriate if authorities order evacuation, the building is unsafe, or a medical emergency cannot be managed indoors. The decision should be based on official direction and the actual condition of the building, not on impatience with the wait.
A household decision card can reduce arguments under stress. Write down the primary shelter, alternate shelter, meeting method, medication needs, pet plan, and the conditions that would trigger a call to emergency services. Include instructions for guests who may not know the building layout. A short, readable plan is more useful than a long document nobody can find.
Consider a family separated at work and school. The safest plan may be for each person to shelter at the location they can reach most quickly rather than attempting a cross-town reunion. Trying to drive across a contaminated area can create traffic exposure and interfere with emergency operations. Families can reconnect when officials indicate that movement is permitted. This principle also applies to Nuclear preparedness priorities for sheltering at home: communication and prearranged choices often outperform improvised travel.
Decontamination, Health Needs, And Common Errors
Fallout on clothing or skin should be handled calmly and according to official instructions. If someone has been outdoors and can safely remove an outer layer, placing contaminated clothing in a sealed bag away from living areas may reduce the spread of particles. Washing exposed skin and hair with soap and water can help remove material; harsh scrubbing, bleach on skin, or abrasive products may cause injury and should be avoided.
Do not confuse contamination with radiation exposure. Removing particles from the body addresses contamination on surfaces, while time, distance, and shielding reduce exposure from external radiation. A person who was near a detonation or has serious injuries needs emergency medical guidance even if washing is possible. Radiation emergencies can involve burns, trauma, and ordinary medical crises at the same time.
Potassium iodide is another area where weak assumptions cause harm. It is not a general anti-radiation medicine and does not protect the whole body from fallout. It may be recommended by public health authorities in specific circumstances involving radioactive iodine, but taking it without appropriate direction can create medical risks and should not replace sheltering.
Food and water decisions also require restraint. Keep containers closed, avoid visibly contaminated outdoor food, and wait for local instructions about tap water, wells, gardens, and animals. Boiling water does not remove radioactive materials, so it should not be treated as a universal solution. Use stored water until officials explain whether the local supply is safe.
Common failures include opening doors repeatedly, shaking dusty clothing indoors, ventilating with outdoor air without guidance, using a generator in a garage, and leaving because the first few hours feel uneventful. A practical check is to ask whether each action reduces exposure, preserves breathable air, protects health, or follows verified instructions. If it does none of those things, postpone it.
A Practical Home Priorities Sequence
Priorities work best as a sequence because the first minutes are different from the following hours. The sequence below is not a substitute for local emergency instructions, but it gives a household a sensible order for preparation and response.
Choose protection. Identify the strongest reachable room, an alternate location, and safe access routes. Keep windows, doors, and vents in mind.
Stage indoor necessities. Place water, food, medicine information, lighting, radio, sanitation supplies, and chargers where they can be reached without crossing the home repeatedly.
Set communication rules. Select official information sources and decide who monitors updates. Write down when family members should shelter separately rather than travel.
Manage exposure. Move indoors promptly, increase distance from exterior surfaces, and avoid bringing outdoor dust into the shelter.
Reassess only with evidence. Check the building for fire, structural damage, carbon monoxide, flooding, or medical danger. Follow evacuation or water-safety orders when issued.
The right balance depends on the home. Someone in a detached house may improve protection by moving from an upstairs bedroom to a basement or central room. Someone in a studio apartment may have fewer options and should prioritize the room farthest from windows, while keeping ventilation and fire safety in view. A rural household may need more stored water and a plan for a private well; an urban household may need stronger communication and stair-access planning.
Test the plan with a quiet household drill: locate the shelter, retrieve the radio and light, account for every person and pet, and identify the source of official updates. Notice what fails. If a child cannot open the supply container, the radio has dead batteries, or a wheelchair route is blocked, the plan needs adjustment. Practical readiness is shown by fast access and clear choices, not by the size of a shopping list.
Frequently Asked Questions
Is a basement always the safest place?
No. A basement often provides strong shielding, but flooding, fire, structural damage, fuel appliances, or difficult access can change the choice. Use the safest intact area with substantial material between occupants and outside fallout.
How long should people stay indoors?
Follow official instructions because conditions vary by location and event. Do not leave simply because the initial noise or alert has passed; wait for verified guidance unless the building itself becomes dangerous.
Does boiling remove radioactive material from water?
Boiling disinfects water but does not reliably remove radioactive materials. Use stored water and wait for public health or emergency officials to provide local water guidance.
Should potassium iodide be stored at home?
It may be useful in limited circumstances if public health authorities recommend it, but it does not protect against all radiation exposure. Do not take it as a replacement for sheltering or on unsupervised assumptions.
What should renters do if their building has no basement?
Identify an interior room or corridor away from windows and the roof, learn stair routes, and keep a compact shelter kit accessible. Ask building management about ventilation controls and emergency communication procedures.
Further Reading
Authoritative Sources
Nuclear Explosion ready.gov
Provides U.S. government guidance on getting inside, staying inside, and receiving official information after a nuclear explosion
Radiation Emergencies cdc.gov
Explains protective actions, contamination concerns, and health information for radiation emergencies
Radiation Emergencies epa.gov
Offers federal information about radiation protection and emergency response considerations
Conclusion
Effective home readiness for a nuclear emergency depends less on collecting unusual equipment than on improving protection, access, and judgment. Select the strongest practical shelter, place water and essential supplies inside or nearby, preserve medicines and communications, and decide in advance how separated household members will respond. During an event, enter a substantial building quickly, move away from exterior surfaces, limit outdoor air and dust according to official guidance, and avoid unnecessary travel. Treat potassium iodide, boiling, vehicles, and improvised decontamination as limited tools rather than universal answers. Walk through the plan once, correct the obstacles you find, and keep official emergency information available. Those steps give a household a clearer path through the uncertain period when sheltering decisions matter most.