by PREPARE Magazine Editorial Team | Apr 5, 2025 | Blog, Guest Bloggers
Prepping for Winter – The Shelter on Your Back
By Mike Douglas – The Maine Primitive Skills School
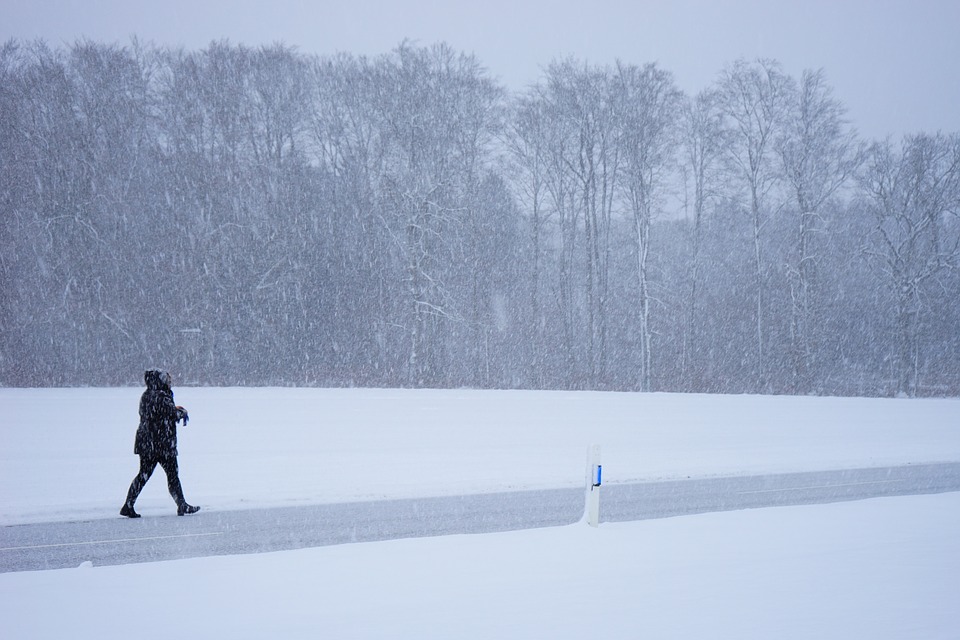
Each season brings unique beauty, great bounty and a special set of challenges. Between the time of the maple sap and ice out in Spring, to the insect hatches and movement of fish through our waterways in Summer, to the legendary hunting of Autumn, the three friendlier seasons offer sportsmen the bounty and beauty of the outdoors with risks that are worthy of respect, but often more forgiving than the harsh, often life threatening conditions that come wrapped in the beauty and solitude of our Maine Winter.
 In 1998 my young family enjoyed a rare vacation together due to an ice storm. The beauty of bent and popping trees laden with ice and enshrouded in bitter cold created a magical landscape. The lack of power was a blessing, insulating us from the noise of the world and allowing us to enjoy in each other’s company. We explored the trails, ate meals around the wood stove under the light of candle and oil lamp, split wood, and thawed snow in to drinking water. It was a dream come true . . . until the fourth day. That was when my wife decided to start the car and check the radio. The sudden realization that people were in trouble, lives were being lost, and community was coming together over the air waves to assist those in need remains one of the most sobering moments of my life.
Here are some techniques that might help you enjoy the rugged and pristine beauty that our winter landscape provides and to do so in a fashion that will improve your comfort and minimize your chances of running into real trouble.
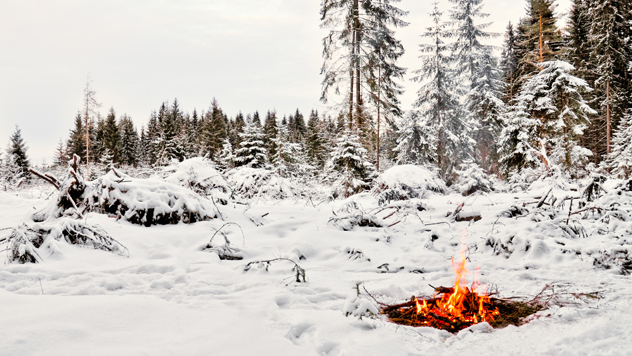
Dressing in layers is good advice. There is one thing to remember with this advice. In cold weather survival one of the rules is to remain “comfortably cool and dry”. Anyone who has spent a winter day in the North Woods knows that this can be a tricky, and sometimes near impossible, proposition. Unlike Alaska and other regions of the far north, our snow is rarely dry and powdery. If it is, it won’t be for long. In a twelve-hour period we can have rain, freezing rain, wet snow, and clearing skies at night where the temperatures can plummet well below zero. For this reason, personal shelter and the ability to make a warm fire are a priority when venturing out. This article will focus on clothing as our primary shelter.
Adequate shelter begins with the clothing on your back. As with any effective shelter, you should start with good materials and a solid foundation. The layer that makes contact with your skin should be hydrophobic. This means that it will not hold your body’s sweat or any other moisture close to your skin. Essentially, your radiant body heat acts to drive away the dampness keeping you dry and warm. Nylon, polypropylene, and silk are great materials for this first layer. It is called the “wicking layer” because it wicks moisture away from your body. The next layer is the insulation layer. This layer traps radiant body heat in a bubble of “dead air space” around you to keep you warm. Fiber pile is popular and effective. Goose down is available, but not only is it expensive, it is useless at creating a dead air space once it gets wet. My all-time favorite for insulation, as well as wicking layer, is wool. Merino wool close to the body and a heavy wool insulation layer have been my preferred cold weather choice since 1979. The reason is quite simply that wool will retain your body heat even when wet. The last layer is the protective shell that repels weather. A good shell is either breathable or has ventilation in the form of a main zipper and “pit zips”. Really good ones have both.

To prevent conduction, pay special attention to your feet. Thick liners or insulated inserts and socks nestled in a weather tight shell will not only keep your feet protected and dry from cold wet snow, it will also protect you from losing your core temperature through the active transfer of your body heat into the frozen ground. A good technique to remember is to keep a pair of wool socks on your feet and one tucked into the waistband of your pants. When your feet get wet or cold, you always have a warm and dry pair of socks to switch to. Even if you already switched into your dry pair, while your wrung out pair is drying in your waistband, the other pair is keeping your feet warm and dry. An inexpensive trick that helps keep your feet dry is to put on a pair of nylon dress socks before your wool socks. The nylon makes an inexpensive and effective wicking layer.
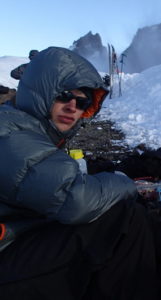
Outer garments and how you use them is important as well. A good thick cap beneath a hood adds extra protection and versatility to match our ever-changing weather. Having overmitts and two pairs of glove “liners” (one to go one your hands inside the mittens and the other tucked in your waist line next to your extra socks) is also a great combination that affords you protection from the cold as well as the ability to use your fingers.
The old saying, “If your feet are cold , put on a hat” has some truth to it. Any time your blood flow is near the surface, such is in the arteries in your neck, or near the surface and away from your heart, like the capillaries in your feet, fingers, and scalp, extra insulation can be used to keep you warm.
In our next article we will explore the strategies used to stay warm beyond the clothes on your back to include habits that will increase your comfort and prolong your time outdoors during Winter in Maine.
___________________________________________________________________________
Mike Douglas has taught survival since 1983. He’s studied with Paul Rezendes, Tom Brown Jr., Jon Young, and others. After the Marines he began The Maine Primitive Skills School. Mike’s run programs for the military, schools, camps, and businesses. He’s advised for Discovery Channels’ “Dual Survivor” and was featured on National Geographic’s “Doomsday Preppers”, receiving the highest “Survivability Score” of the shows first season. His programs draw people from around the world to participate in Tracking, Survival, Awareness, and more.
Popular Questions
What are the best clothing layers for prepping for winter conditions?
When prepping for winter, it's essential to wear clothing in layers to maintain warmth and dryness. Start with a hydrophobic base layer that wicks moisture away from your skin, such as nylon or merino wool. Next, add an insulation layer, like fiber pile or wool, to trap body heat. Ultimately, a breathable protective shell will shield you from the elements while allowing moisture to escape.
How can I keep my feet warm while prepping for winter outdoor activities?
To keep your feet warm during winter outings, wear thick liners or insulated inserts inside a weather-tight shell. A great technique is to keep an extra pair of wool socks tucked into your waistband, ensuring you have a dry pair ready if your feet get wet. Additionally, consider wearing a nylon dress sock as a wicking layer beneath your wool socks for added moisture management.
What should I consider when choosing outer garments for winter prepping?
When selecting outer garments for winter prepping, prioritize thickness and versatility to adapt to changing weather conditions. A good thick cap under a hood can provide extra warmth, while overmitts and glove liners allow for finger dexterity without sacrificing protection. Ensure your outer layer is breathable or has ventilation features to keep you comfortable during physical activity.
Why is it important to dress in layers for winter survival?
Dressing in layers is crucial for winter survival as it helps regulate body temperature and manage moisture. The base layer keeps sweat away from your skin, while the insulation layer traps heat, and the outer shell protects against wind and precipitation. This system allows you to adjust your clothing based on activity level and changing weather, reducing the risk of hypothermia.
by PREPARE Magazine Editorial Team | Apr 5, 2025 | Blog, Guest Bloggers
Here at PREPARE Magazine, we’re always delighted when another Author who really walks the talk reaches out to share with us and you. Today’s Guest Blogger, Abby Artemisia is exactly the kind of grassroots instructor/teacher that we love introducing to you.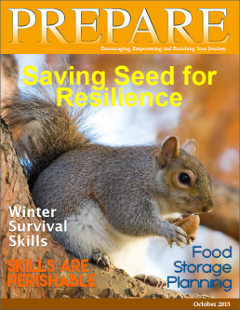
It’s interesting that Abby submitted this article while our most recent issue was in at the design desk. She had no way of knowing, other than that ‘feeling in the air’ what the cover of the most recent issue would be! You can get this exact Issue for FREE if you subscribe before November 15, 2015.
<- Just take a look at how appropriate it is in regards to this topic!
As with all of our Authors, Abby endeavors to live a more self-sustaining lifestyle. Her steps toward this lifestyle have taken her into her area of expertise. We are happy to introduce her to you and hope you will connect with her at the end of reading this article. Look for more from Abby within the upcoming pages of PREPARE Magazine!
_________________________________
Squirrel Syndrome
By Abby Artemisia, http://www.mightyoakfromlittleacorn.com/
 As I write this, it’s mid-October and I’m seriously suffering from Squirrel Syndrome. One of the last times I was in Asheville, my friend pointed to a squirrel, frantically running across the road with a nut in its mouth, and exclaimed, “Look, that’s you!”
We both burst out laughing, but it struck a chord somewhere deep inside of me. Then she said, “But just think, soon it will be winter and you can stop foraging.” Instead of calming me, that remark panicked me.
So what’s “Squirrel Syndrome” you ask. It’s when I feel like one of those squirrels who tries to run under your tires. I imagine their mouths are full of high-protein, health-supporting, oil-rich nuts, going to the equivalent of their root cellar. I start to believe they’re so hyper-focused on getting in the last of the available wild food, they barely (on a good day) stay alive.
That’s what I feel like this time of year. I have a list of at least twenty species of wild edibles and 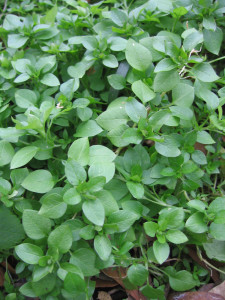 medicinals I want to harvest and preserve before it’s too late. I’ve been trying to get to the wild greens before they’re frost damaged, including things like sochan (the Cherokee word for cut-leaf coneflower) and raspberry leaf for tea. Luckily some greens like chickweed are hardier and will stick around most of the winter.
 This is the perfect time of year for digging roots. My friend and I have been teaching about roots lately, like dandelion, burdock, chicory, and sun chokes (aka Jerusalem artichoke [neither from Jerusalem or an artichoke]). They’re all in the Aster family, and all have inulin, shown to help balance blood sugar, and prebiotics, the food for probiotics in our body.

And, of course, who can forget: nuts! Around here, there don’t seem to be many acorns this year. It changes from year to year. How about where you are? They can be a lot of work, but I think they’re worth it. I wish I would have harvested more chestnuts, but there still seem to be plenty of hickory nuts and black walnuts.
Instead of succumbing to the panic of Squirrel Syndrome, I’ve decided to remember about Thanksgiving, my favorite holiday. I love this holiday because:
1) you aren’t expected to buy gifts for anyone, and
2) it’s all about gratitude for everything, but especially the abundance of nourishing, fresh food.
In that vein, I’m grateful that I got chestnuts at all this year. I’m grateful that the hickory and walnuts can wait to be processed until squirrel (syndrome) season is over. I’m grateful for the elderberries, pawpaws, and persimmons I harvested when I went home to Ohio to visit. I’m grateful to live in such an incredibly biodiverse region with so much wild food and medicine. I’m grateful, that though foraging is a lot of work, I get to do it in beautiful locations. Most importantly, I’m grateful to the plants for giving parts of themselves or even their whole lives so freely for my nourishment. Now off to gather the last of the nettles! Happy foraging!
_________________________________
Abby Artemisia is a botanist, herbalist, professional forager and mom living in a small community in the Blue Ridge Mountains. She received her botany degree in Ohio, worked on organic farms across the country, and learned about plant medicine and spirituality from Native Americans. Abby teaches about edible and medicinal plants and mushrooms, while foraging as much as possible. Her mission is to inspire nature (re)connection and health empowerment.
Visit Abbey’s Website: http://www.mightyoakfromlittleacorn.com/
Instagram: https://instagram.com/abbyfrolickingintheforest/
Facebook Page: https://www.facebook.com/AbbyBotanistHerbalist/
Popular Questions
What is the fastest way to improve It’s “Squirrel Syndrome” Time of Year without making beginner mistakes?
The fastest way to improve It’s “Squirrel Syndrome” Time of Year is to simplify the process and control one variable at a time. Start with the most important baseline: define the goal, identify the main failure point, and test one change before making another. Keep short notes so you can connect the outcome to the adjustment you made. This prevents guesswork and helps you build a repeatable method instead of chasing random fixes.
What should you check first when It’s “Squirrel Syndrome” Time of Year is not working well?
Check the most immediate bottlenecks first: setup errors, missing inputs, bad timing, or inconsistent follow-through. Before buying anything new or changing the whole system, confirm that the basics are being done correctly and consistently. A small diagnostic checklist usually reveals the real problem faster than broad trial and error. Once the weak point is clear, make one correction and watch the result before adjusting anything else.
What common mistakes make It’s “Squirrel Syndrome” Time of Year harder than it needs to be?
The most common mistakes are changing too many variables at once, skipping the basics, and judging results too quickly. Many people also copy generic advice without adapting it to their exact situation, which leads to weak results and confusion. A better approach is to work from a simple baseline, make measured changes, and give each change enough time to show whether it helped. That makes progress easier to track and repeat.
by PREPARE Magazine Editorial Team | Apr 5, 2025 | Guest Bloggers, Preparedness planning
It may seem odd that on a preparedness blog we are talking about the Winter Weather Treat of Snow Cream. To be sure, preparedness is our main goal, but making good use of time and resources also applies to living with what life hands you and making the best out of a potentially uncomfortable situation.
When live gives you lemons, make lemonade – when winter gives you an abundance of snow, make snow cream!
As winter weather continues to keep spring at bay, it may seem as if there is nothing to do, especially on those days when new snow drifts keep you inside the house. Here is a fun, old-fashioned and delicious way to beat boredom as well as a unique way to prepare candy.
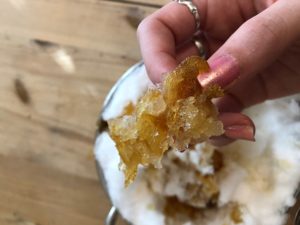
Making maple snow candy is perhaps most famous from it’s description in the Little House on the Prairie series. Here’s what you’ll need for your own maple snow candy:

- A large cooking container. I used a soup pot but you can use any bowl or pot large enough to pour your syrup into.
- A medium saucepan for melting the syrup in
- Mixing spoon
- Maple syrup, the darker the syrup the more maple flavor the candy will have.
- Of course, the most important ingredient of all, snow!
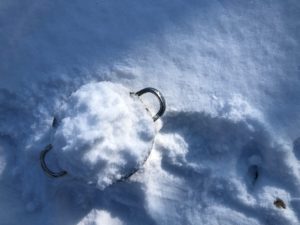
First, go outside and find a clean patch of snow. The further away from a city you live the easier this will be. Fill your pot up to the very top and leave it just outside your door. This allows you to work quickly once the syrup is heated but also keeps it from getting too frozen as it would if you put it in the freezer.
Next, take your maple syrup and pour it into a medium saucepan. Make sure you cover the bottom of your saucepan with syrup. Place the saucepan onto the stove on medium. Stirring constantly, wait until the syrup bubbles and fluffs up to twice its original size, so that it looks more like honeycomb candy than syrup. It should also lighten to a pale brown taffy color.

Then, go grab your snow container. Working quickly, pour the syrup on top of the snow. You can make patterns and shapes or just simply drizzle it.

Let it set for about 45 seconds to a minute. At this point the boiling hot syrup will be barely warm to the touch and firm enough to pick up and eat.
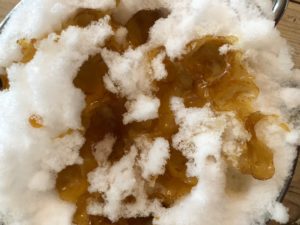
Enjoy the delicious maple candy, which is as much fun to eat as it is to make.
Kathleen-June G. Horne is a survival enthusiast and amateur outdoors-woman. She graduated from Western Kentucky University in 2015 with a degree in business and has written two books, a historical young adult novel entitled “The Sparrow’s Call” and a Christmas devotional, “24 Days of Devotion“. She was homeschooled until college, and used her free time to learn all she could about all the things people used to know. She runs the blog Miniskirts & Margins which is about fashion, her Southern Baptist faith and the adventures she runs into.
Listen to this podcast to get to know Kathleen-June G. Horne a bit better!
Popular Questions
How can I make snow cream during winter?
To make snow cream, start by gathering fresh, clean snow in a large container. Then, mix in ingredients like milk, sugar, and vanilla extract to create a creamy texture. Stir until well combined and enjoy this delightful winter treat right away, as it’s best served fresh. This simple recipe is a fun way to make the most of snowy days!
What ingredients do I need for making maple snow candy?
For maple snow candy, you will need maple syrup and a clean patch of snow. Heat the syrup in a saucepan until it bubbles and thickens, then quickly pour it over the snow to create candy shapes. Let it set for a minute before enjoying this sweet treat. It's a nostalgic way to enjoy winter while being resourceful!
Is snow cream safe to eat?
Yes, snow cream can be safe to eat as long as you use clean, fresh snow and avoid areas that may be contaminated. Make sure to gather snow away from roads and other potential pollutants. By following these precautions, you can enjoy this winter weather treat without worry. Just remember to consume it shortly after making it for the best taste and texture!
What are some variations of snow cream I can try?
You can experiment with different flavors in your snow cream by adding ingredients like cocoa powder, fruit purees, or flavored extracts. For a richer taste, consider using sweetened condensed milk instead of regular milk. These variations can make your snow cream unique and cater to different taste preferences. Enjoy getting creative with this winter treat!
by PREPARE Magazine Editorial Team | Apr 5, 2025 | Blog, Guest Bloggers
Before the festivities begin and the calendar turns over to a new year, many people are preparing for their holiday tradition of trimming the tree. We’d like to share with you, another thought about this topic. It is a more sustainable thought with hints of long-term heirloom memories for years to come.
One of our friends and authors, Desere, who is the Office Manager (and more) at Turtle Island Preserve, sent in this timely article that we thought would be good to share right away. We hope you’ll pass this on to your friends and family this year. And we hope you’ll use some of the inspiration Desere has to offer to sustain the memory of the season from generation to generation.
The Off-Road Girl’s Guide to: Holiday Trees – Digging up vs. Cutting Down
Regardless of religious persuasions, cultural heritage patterns, or particular holiday traditions, throughout North America there’s an undeniable mass harvesting of evergreen trees each winter. Here in southern Appalachia, Christmas trees are big business. According to the national Christmas Tree Association, approx. 26 million live conifers were harvested and sold in our nation in 2014. On average, consumers pay from $35 – 50 for freshly cut firs, spruces and pines. And each year from late December into January, our neighborhood curbsides are scattered with a surplus of discarded trees.
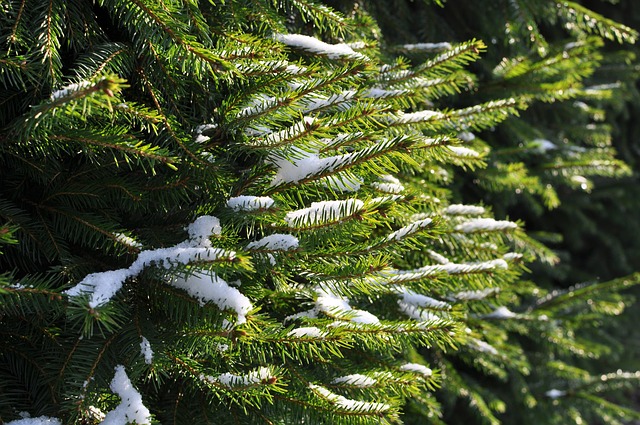 Some municipalities provide composting sites where trees can be taken and chipped, and some even offer neighborhood pick-ups for compost/mulch operations, but a good majority of our fallen tannenbaums become landfill-bound. There are green alternatives from recycled-plastic reusable trees to stringing up lights on potted plants, but if your halls simply cannot be decked without the age-old tradition of harvesting a lush verdant evergreen tree – consider planting a live tree that you dug up, rather than cut down. Planting your annual investment can beautify your yard, create privacy and windbreaks and reduce future landscaping costs. You can design and enhance your homestead with the boughs of Christmas past.
It’s easy and here’s how:
Evaluate your yard and select an ideal location for an evergreen tree or trees. Think long-term gain. Consider permaculture concepts in choosing the right site for a tree or a row of trees to commemorate each season. Evergreens in favorable conditions grow quickly to create boundaries, provide shade, attract birds and an intentionally planted row creates a windbreak to shelter your home from north winds.
Depending on your location’s fall temperatures, dig your receiving hole well before the ground freezes. Once the earth is removed, you can lightly fill with compost or fallen leaves and cover with an old piece of plywood. Be mindful if you have livestock or small children that may be attracted to or susceptible to hazards in the yard like a new giant hole.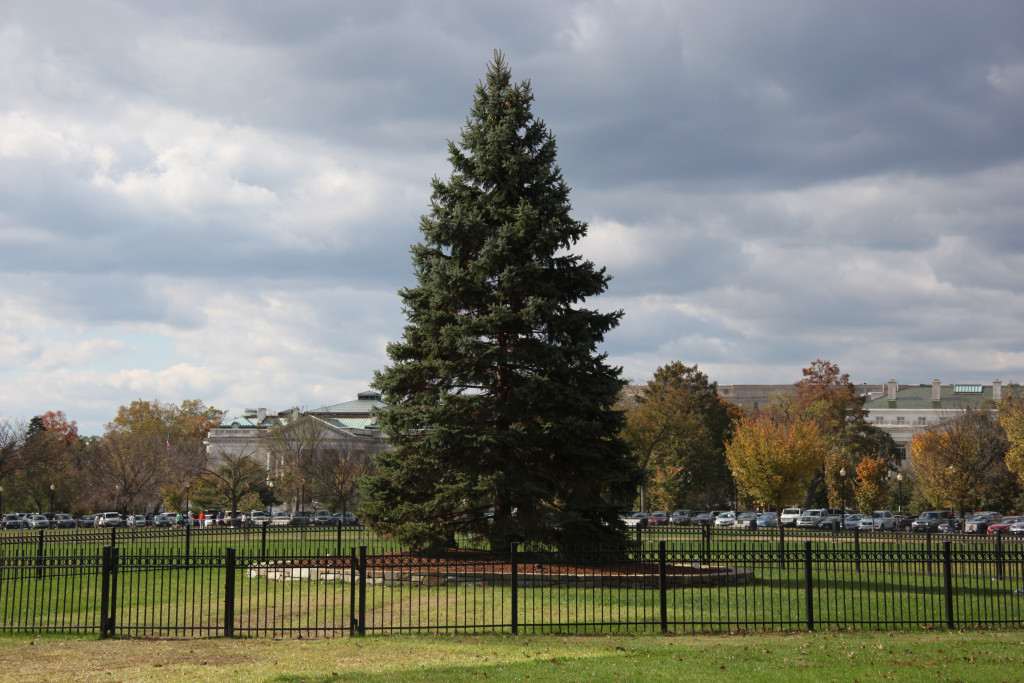
Some tree farms allow you to come out to dig instead of saw, but plenty of nurseries and home-centers have them already pre-balled and bundled for the convenience-oriented types too. If you’ve never dug up a tree by yourself, there are countless video tutorials online that describe the process in great detail but here are a few tips: Bring plenty of rope (I like mule-tape the best), burlap, a square-point shovel and a wheel barrel. Before you begin, bind the limbs and branches up and out of the way so you have plenty of room to work the tree from the earth.
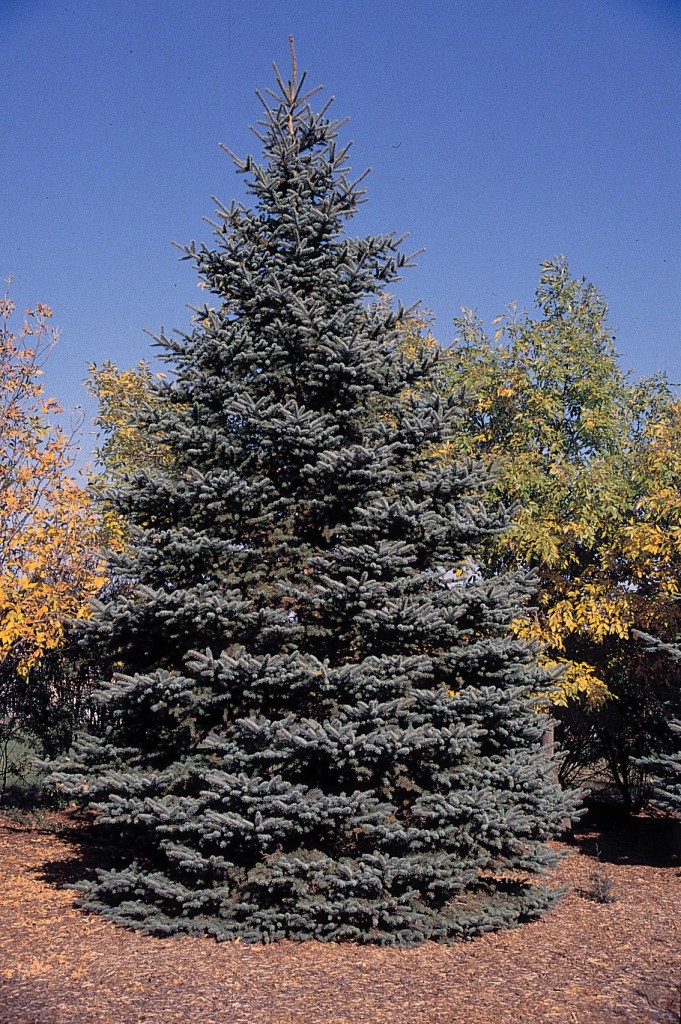 If your ground freezes early, you can do the digging in October, flag your tree, leave it bound in its original hole and return closer to the holiday to pick up your tree. If you bring it home right away, have a 30-50 gallon galvanized wash tub ready to serve as your tree’s temporary “pot”; it helps to have a dolly beneath the tree’s tub so you can roll it from here to there. Loosen the burlap, secure the tree in the tub, adding earth if needed. Water it well and unbind the rope to reduce stress on the branches. Leave it in a shed or garage to acclimate your new little green friend from the cold outdoors to the heated indoors. Once you roll the tree into your warm and cozy home, choose a spot that is as far away from heat sources and near a window if possible. Your potted tree won’t mind having its branches misted. Decorate as desired and enjoy much less needle loss than from a sawn-down tree.
As soon as the season has passed, roll your tree back into the shed or garage for re-acclimation to the outdoors. On a fair weather day, return to your yard’s receiving hole with the potted tree and plant it, making sure not to go too deep.
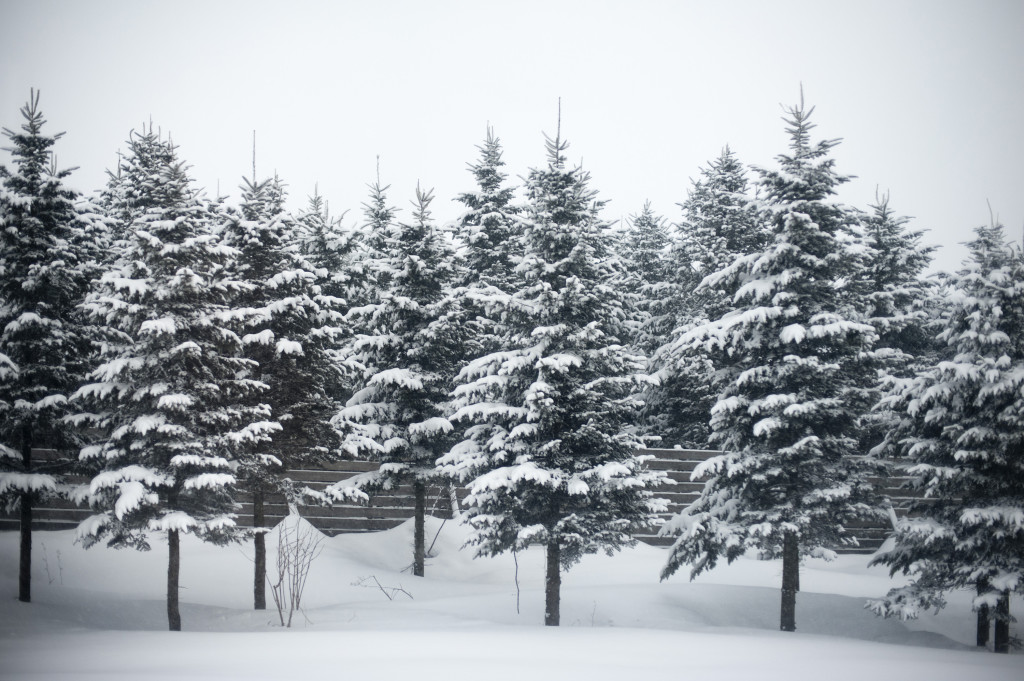
It’s been said that “The best time to plant a tree is 20 years ago, but the second-best time is today.” With a little extra thought and effort you can increase the value of your property and leave your family a lasting legacy of trees. In a few years your homestead can sparkle with a living commemoration for each year of holiday cheer. Traditions like this have a lasting positive impact not just on your wallet and the environment, but across the generations who will have both the memories you created inside the home, but also a meaningful personal connection to what’s planted just outside.
—————————————————-

Since 2006, Desere has lived and taught at Turtle Island Preserve. As office manager and Co-Director of Girls Camp and Young Boys Camp, she brings 10 years of experience as an outdoor educator having worked at various camps and educational institutions throughout the Nation. She has a wide and adventurous background in travel, art, and woodworking. She received a Bachelor’s Degree in fine art from The Rochester Institute of Technology and Associates in Visual Communications at the Art Institute of Pittsburgh.
LIMITED SPECIAL!

ONLY RUNS THRU DEC & JAN
Popular Questions
What are the benefits of digging up a holiday tree instead of cutting it down?
Digging up a holiday tree allows you to enjoy a living tree that can be replanted after the season, creating a lasting memory for your family. This sustainable practice not only reduces waste but also enhances your yard with greenery that can provide shade and attract wildlife. Additionally, it can save you money on landscaping in the long run as the tree matures and becomes part of your home’s natural beauty.
How can I prepare to dig up a holiday tree for the season?
Before digging up a holiday tree, evaluate your yard to find an ideal location that will support its growth. Dig the receiving hole well in advance, ideally before the ground freezes, and fill it with compost or leaves to enrich the soil. Gather necessary tools like a square-point shovel, burlap, and rope to secure the tree’s branches during the digging process.
What steps should I follow after bringing my dug-up holiday tree indoors?
Once you bring your dug-up holiday tree indoors, place it in a cool area away from heat sources to help it acclimate to the indoor environment. Water the tree well and consider misting the branches to maintain humidity. After the holiday season, gradually re-acclimate the tree back to outdoor conditions before planting it in your yard.
Can I dig up a holiday tree from a local nursery?
Yes, many local nurseries offer pre-balled and bundled trees that are ready for digging. Some tree farms even allow you to dig up your own tree, which can be a fun and engaging experience. Be sure to check with the nursery about their policies and the best practices for digging to ensure the health of the tree.
What should I do with my holiday tree after the season ends?
After the holiday season, it's important to replant your dug-up tree in your yard as soon as conditions allow. Choose a day with favorable weather to ensure a smooth transition for the tree. By planting it back in the ground, you not only preserve the tree but also create a living legacy that can be enjoyed for generations to come.
by PREPARE Magazine Editorial Team | Apr 5, 2025 | Blog, Guest Bloggers
Home On Wheels
Guest Blog Post by:
PREPARE Magazine Distinguished Author – Ken Youngquist, of Survivaltek
There is a saying that “less is more”. This has many applications: Less parts to a device means that there are less chances of failure; less estate and physical assets means less effort and funds required to maintain them. This often translates to 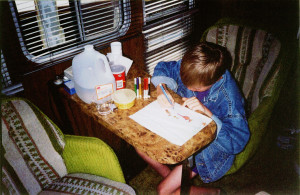 “more” time and money for other interests or needs.
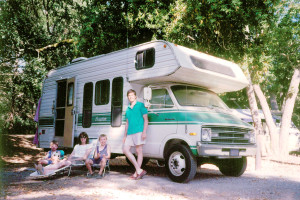
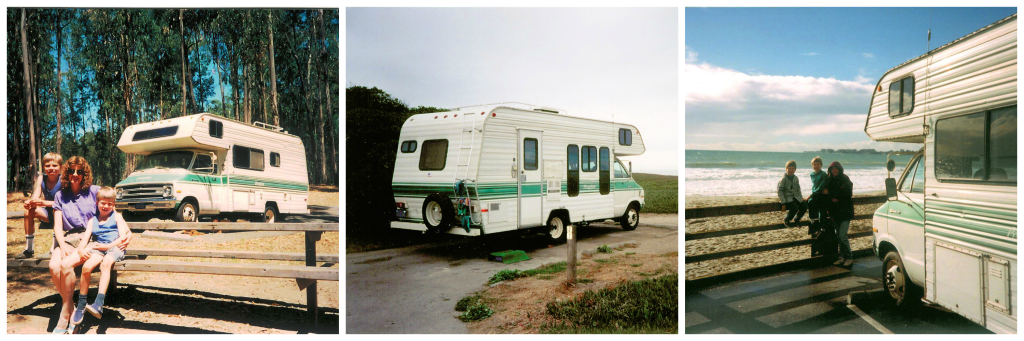
I have often reflected on the early days of raising a family. My wife and I were blessed with two sons. When they were old enough we enrolled them in our “home school”. As part of our desire to enrich their education and life experiences we purchased a “class C” motorhome. We were able to take many weekend trips to various locations that enabled us to enjoy the great outdoors while camping.
On one such occasion we went to a county park where it rained almost all weekend. It was prudent to take cover inside the RV where we stayed warm and dry. We played many board games, ate meals, watched a little TV, and did some reading. When there were breaks in the weather we would go outside to explore the surrounding area. When we returned to our 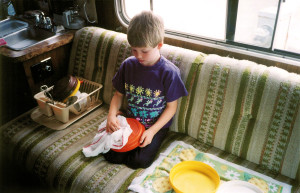 residence I was struck with the contrast in square footage of our two habitations. The house seemed huge in comparison to our motorhome (or RV) that had provided all the essentials for simple living that weekend.
As a matter of definition, recreational vehicles (RVs), (sometimes called a “motorhome” or “camper”) refers to a motor vehicle or trailer that is equipped with living space and amenities found in a home. Most RVs are self-contained providing a warm, dry, shelter with plenty of light, a galley for cooking, water storage, sleeping quarters, and often a toilet and shower. The RV experience is not limited to just indoor living space but also includes outdoor living with features like awnings to protect you from the sun and rain, and storage space for folding camping chairs, portable grills, and other camping equipment. It’s a delight to sit by a campfire and enjoy the wonderful views.
There are expenses to RV ownership like financing for purchase, insurance, propane, gasoline, storage and camping fees, but with careful planning they can be minimal compared to residential expenses. For us, our RV provided recreational and educational benefits but it also provided a shelter in the event of power outages or potential structural house damage in the event of unforeseen natural disasters.

CLICK IMAGE ABOVE to Subscribe by 2/15/16 to receive this FREE Digital Issue! After 2/15/16 – Only Premium Members have Access to Previous Issues so CLICK IMAGE BELOW.

——————————

Ken Youngquist is the creator of Survivaltek, a website dedicated to teaching the ways and means to survive. Ken shares his experiences of performing both primitive and modern day skills. It is his desire to pass on the mantle of preparedness to others. He is also the author of the recently released e-book “Fifty ways to make survival tools from trash and household items”. You can visit his website and learn more at: http://survivaltek.com/
Popular Questions
How can adopting a less is more approach enhance life in a home on wheels?
Embracing a less is more philosophy in a home on wheels allows for a more streamlined lifestyle. By minimizing possessions, you can focus on experiences rather than material items, which is especially beneficial during travels. This approach not only reduces clutter but also makes it easier to maintain your RV, allowing for more time spent enjoying nature and family activities.
What are the benefits of living simply in a home on wheels?
Living simply in a home on wheels can lead to significant financial savings and reduced stress. With fewer items to manage, you can allocate resources towards experiences like camping trips or educational outings. This simplicity fosters a deeper connection with nature and your family, enhancing the overall quality of life.
How does a home on wheels support a less is more lifestyle?
A home on wheels naturally encourages a less is more lifestyle by providing only essential amenities for comfortable living. This compact space requires you to prioritize what truly matters, leading to thoughtful choices about what to bring along. The RV experience promotes outdoor living and adventure, reinforcing the idea that happiness often comes from experiences rather than possessions.
What should I consider when downsizing for a home on wheels?
When downsizing for a home on wheels, it's important to evaluate your needs and eliminate non-essential items. Focus on multi-functional gear and durable essentials that enhance your travel experience. This process not only simplifies your living space but also aligns with the less is more philosophy, making your RV life more enjoyable and manageable.
by PREPARE Magazine Editorial Team | Apr 5, 2025 | Blog, Guest Bloggers
The Zika Virus, Natural Mosquito Repellent & Bite Remedies
Mosquitoes and Mankind

Click by 3/21/2016 for this FREE Digital Issue!
Guest Blog Post by: PREPARE Magazine Author – Snake Blocker of Blocker Academy
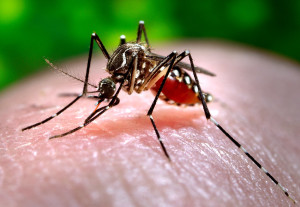
Mosquitoes, they are not going away. You either live in an area where mosquitoes live like kings and queens in humid environments, or you have visited a place such as this. These mosquitoes, like vampires, suck! An old Apache legend states they were not indigenous to the Turtle Island (the Americas) until the last Great Bear died and reincarnated into millions of mosquitoes that when combined, formed the shape of the Sacred Great Bear. The Great Bear was killed by a disrespectful Apache youth, so in revenge, the next season the bear formed massive swarms of mosquitoes to suck the life blood out of the entire tribe, bite by bite.
So what do we do without playing around with chemicals? The answer my friend is blowing in the wind (or in this article). Mosquitoes usually like non-locals over locals, just like I like an occasional Asian or Mexican dish. They also tend to prefer excessive-fat people over lean-fit people.
Recommendations for repelling mosquitoes:
- Cover up any and all exposed skin
- Rub cinnamon oil on your skin and drink cinnamon tea and/or eat ground cinnamon
- Rub lemon grass oil on your skin and/or spray it on your clothes
- Drink vanilla mixed with olive oil
- Eat Garlic and/or rub garlic on your clothes
Recommendations for mosquito bites to prevent and minimize itching:
- Rub tea tree oil on all exposed areas where itching is occurring
- Bathe in water mixed with lavender oil (warm water) and/or rub on affected areas
- Place spit and urine (hopefully your own) on affected areas to give some temporary comfort, if nothing else is available
- Rub peppermint oil on affected areas
- Place paste of baking soda mixed with a little purified water on affected area to draw out the irritants
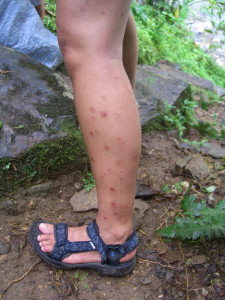
Remember, thousands of people die each year from mosquitoes as they can transmit disease and cause many illnesses, which can be fatal to unfit people and fit people alike. When things go from bad to worst with climate changes and worse case scenarios, mosquitoes will increase in number and deadliness.
Be prepared my friend, be prepared!
CLICK IMAGE ABOVE to Subscribe by 3/21/16 to receive this FREE Digital Issue! After 3/21/16 – Only Premium Members have Access to Previous Issues so CLICK IMAGE BELOW.
——————————
Snake Blocker is a member of the Lipan Apache Tribe of Texas, is an accomplished martial artists and Apache Historian. He has served in the U.S. Navy since June 2001 and did tours in Kuwait, Iraq and Afghanistan. He is the featured instructor in several videos and promotes his signature line of survival products and knives. Snake has been featured on Deadliest Warrior “Apaches versus Gladiators” and Doomsday Preppers “In the Hurt Locker”. He hosts “Snake Blocker Survival” on Preparedness Radio Network.
Popular Questions
What are effective natural mosquito repellents to protect against the Zika virus?
To protect yourself from the Zika virus, consider using natural mosquito repellents like cinnamon oil and lemongrass oil. Applying these oils to your skin or clothing can help deter mosquitoes. Additionally, consuming cinnamon in tea or as a spice may enhance your body’s natural defenses against bites. Garlic is another option; eating it or applying it to your clothes can further reduce your attractiveness to these pests.
How can I relieve itching from mosquito bites naturally?
For natural relief from mosquito bite itching, try applying tea tree oil directly to the affected areas. Another effective remedy is to bathe in warm water mixed with lavender oil, which can soothe irritation. If you’re in a pinch, creating a paste from baking soda and water can help draw out irritants and reduce discomfort. Peppermint oil is also beneficial for its cooling effect on itchy skin.
What precautions should I take to avoid mosquito bites in Zika-prone areas?
When in areas where the Zika virus is prevalent, it’s crucial to cover exposed skin with long sleeves and pants. Using natural repellents like lemongrass or cinnamon oil can provide additional protection. Staying indoors during peak mosquito activity times, such as dawn and dusk, can also minimize your risk. Make sure to eliminate standing water around your living area to reduce mosquito breeding sites.
Are there any home remedies for preventing mosquito bites?
Yes, several home remedies can help prevent mosquito bites. Rubbing garlic on your skin or consuming it can make you less appealing to mosquitoes. Additionally, mixing vanilla with olive oil and applying it can act as a natural repellent. Keeping your environment clean and free of stagnant water is also essential in reducing mosquito populations.
What should I do if I suspect I’ve contracted the Zika virus?
If you suspect you’ve contracted the Zika virus, it’s important to seek medical attention promptly. Symptoms can include fever, rash, joint pain, and conjunctivitis, which may require professional evaluation. In the meantime, focus on staying hydrated and resting. Avoid mosquito bites to prevent further transmission, especially if you are in a Zika-prone area.