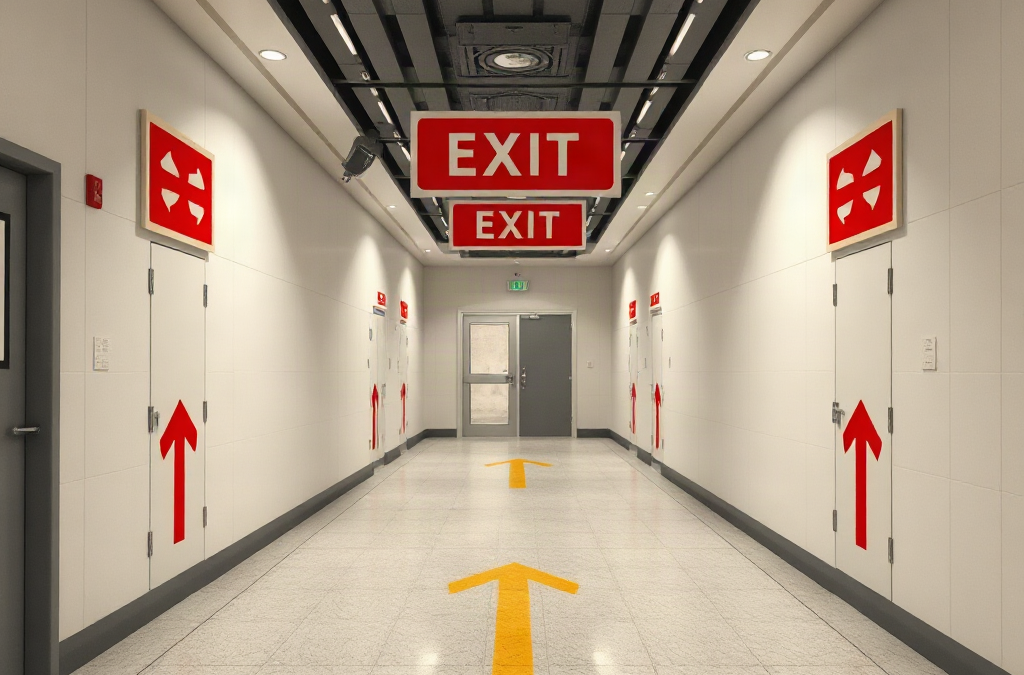
A useful evacuation image presents the building as occupants actually experience it, not merely as an architectural drawing. The viewer needs to recognize the immediate area, find the nearest usable exit, identify an alternative path, and understand where to go after leaving. Fine construction details, furniture inventories, and decorative graphics can obscure those decisions. Simplifying the floor plan is valuable, but removing doors, corridor turns, stair enclosures, or other navigational landmarks can make the image misleading.
The location marker deserves special attention. A prominent “You Are Here” symbol should correspond to the exact wall and orientation where the image is posted. If the plan is mounted beside an elevator facing south, the displayed layout should be understandable from that position. A technically accurate north-up plan may still confuse a person who must mentally rotate it during an alarm. Where practical, orient the image so the top represents the direction the viewer faces.
Routes should be drawn as continuous paths from the location marker to an exterior exit. Directional arrows need to remain visible at corridor turns and junctions, where the wrong choice is most likely. Mark exit doors distinctly from ordinary doors, and show stairs when they form part of the route. Elevators may appear as landmarks, but the image should not imply they are approved evacuation routes during a fire unless the building’s procedures specifically provide for that use.
Include only safety features that help someone act or report useful information. Depending on the site, those may include manual fire-alarm stations, fire extinguishers, first-aid equipment, refuge or assistance areas, emergency phones, and outdoor assembly locations. Symbols should be paired with a short legend because colors and icons are not interpreted uniformly by every viewer.
A compact content check is more reliable than adding visual detail without a purpose:
Orientation: floor or area name, location marker, and recognizable landmarks.
Movement: primary route, alternate route, exits, stairs, and restricted passages.
Destination: designated assembly area or the direction leading to it.
Support: alarms, communication points, assistance areas, and relevant equipment.
The common failure is treating a floor plan as an evacuation plan. A floor plan describes space; an evacuation image supports decisions while time, visibility, and attention may be limited. Review Emergency plan images showing evacuation routes from the perspective of a visitor who does not know room names or staff-only shortcuts.
How to Draw Routes That Remain Clear Under Stress
Visual hierarchy determines whether a route can be understood in seconds. The route lines, location marker, exits, and assembly direction should attract attention before room labels and background geometry. Use a restrained palette with strong contrast between the path and floor plan. Color can reinforce meaning, but shape, labels, and line styles should carry the same information for people with color-vision differences and for copies printed in grayscale.
Primary and alternate routes must look different without creating a puzzle. A solid line can indicate the primary path while a dashed line identifies the alternate, provided the legend states that meaning. Two similarly colored lines crossing several rooms create ambiguity. Keep paths centered through corridors and terminate them clearly at exit doors rather than allowing them to fade into the edge of the image.
Scale and viewing distance also change the design decision. A detailed plan that works on a desktop monitor may become unreadable on letter-size paper. Test the smallest version that will actually be posted. Room names should be large enough to read from a natural standing distance, while arrows should remain recognizable under dimmer corridor lighting. If a large facility cannot fit legibly on one sheet, use a local floor image with enough surrounding context to reach exits instead of shrinking the entire campus into an indecipherable diagram.
Consider a hotel corridor with guest rooms on both sides and stairs at opposite ends. An image posted inside each room may show the room position, the nearest stair, the opposite stair, corridor turns, alarms, and a route beyond the exterior discharge. A lobby image, by contrast, may need a broader view because occupants can approach from several directions. Reusing the room image in the lobby saves design time but may give viewers the wrong orientation.
Plain language should support the graphics. Labels such as “Exit Stair A,” “Outside Assembly Area,” and “Do Not Use Elevator During Fire” are more actionable than unexplained abbreviations. Multilingual sites may need translated instructions, but crowding several translations around every symbol can reduce readability. A practical compromise is a largely symbolic map with a concise multilingual legend and separate written procedures nearby.
Signs that the design is working include quick route identification, correct interpretation without coaching, and consistent answers from people viewing the image from its installed position. Signs of failure include tracing the route with a finger, mistaking a normal door for an exit, overlooking the alternate path, or asking which direction the image faces. Those observations are more informative than approving the design solely because it looks polished.
Primary Routes, Alternate Exits, and Accessibility
An alternate route must be physically independent enough to remain useful when the primary route is unavailable. Drawing a second line that follows the same corridor before splitting near the exit provides little protection if smoke, debris, or a locked door blocks the shared segment. Where the layout permits, alternatives should separate at a meaningful decision point and lead to another suitable exit.
Route selection should reflect actual hazards and operating conditions. A shortest path through a kitchen, workshop, chemical storage area, or frequently locked courtyard may be less dependable than a slightly longer route through a protected corridor. Likewise, a door shown as an exit may require a badge after hours or lead into an enclosed yard. The image cannot correct those physical problems; they need to be resolved through access controls, operating procedures, or a different marked path.
Mobility needs require more than adding a wheelchair symbol. Stairs, narrow doors, steep ramps, heavy hardware, and uneven outdoor surfaces can make a marked route unusable. Images should identify accessible exits, designated assistance or refuge locations where applicable, and the assembly destination reached by that route. The details must align with the site’s emergency procedures rather than suggesting that a symbol alone guarantees independent evacuation.
For example, an employee using a mobility device may normally enter through an accessible ground-floor door that is farther from the work area than the nearest stair. The posted image should distinguish that usable route and show what happens if the ground-floor corridor is blocked. A personal assistance arrangement may also be needed, but it should not exist only on the diagram. Staffing, communication, backup responsibility, and the individual’s preferences all affect whether it can work during an actual event.
Different emergencies may also change the correct action. A route suitable for a fire may lead toward an outdoor hazard, while severe weather or a hazardous release may call for sheltering rather than evacuation. Avoid drawing multiple hazard-specific paths on one image if they become visually tangled. A clear evacuation map can be paired with separate shelter instructions, or separate images can be used where the actions materially differ.
When reviewing Emergency plan images showing evacuation routes, ask what would make each marked path unusable. Check locked or alarmed doors, construction barriers, storage in corridors, seasonal gates, poor lighting, and access to the assembly point. The strongest route is not necessarily the shortest one on paper; it is the path that remains recognizable, passable, and compatible with the people expected to use it.
How to Verify, Place, and Maintain Each Image
Every route should be walked before an image is approved. Begin at the exact posting location, follow the primary path, open each required door, continue to the assembly area, and repeat the process using the alternate route. Conduct the check under normal operating conditions and, where relevant, after-hours conditions. A path that works when reception is staffed may fail when access-controlled doors change state.
Verification should compare the image with the physical environment at each decision point. Confirm that arrows match corridor turns, stair labels match signs, exit doors lead where expected, and the outdoor path does not stop at a fence or loading area. Check whether the assembly point creates conflicts with emergency vehicle access, traffic, overhead hazards, or building discharge. Local fire officials, building safety professionals, or other authorities having jurisdiction may need to review plans depending on the occupancy and applicable requirements.
Placement affects usefulness as much as graphic quality. Install images where occupants naturally pause or make route decisions: near room exits, corridor intersections, elevator lobbies, reception points, shared work areas, and guest accommodations. Mounting an image behind an open door, above eye level, or inside a staff-only cabinet defeats its purpose. Lighting, glare, and protective covers should also be evaluated from the normal viewing position.
A practical review sequence keeps the check focused:
Stand where the finished image will be viewed and confirm its orientation.
Trace both marked routes without relying on local knowledge.
Walk the paths and test every door or gate involved.
Verify symbols, labels, assistance points, and the assembly destination.
Ask an unfamiliar user to interpret the image without prompting.
Record the approval date and the event that will trigger the next review.
Images become outdated when walls move, departments change, doors receive new access controls, construction closes a corridor, or assembly areas are relocated. A scheduled review catches gradual changes, while a change-triggered review addresses modifications immediately. The source file should have a named owner so outdated copies can be replaced consistently across printed signs, digital handbooks, and mobile resources.
Drills provide a final reality check, but a fast evacuation alone does not prove the image worked; regular occupants may simply know the building. Observe visitors, new employees, contractors, and people starting from less familiar areas. Wrong turns, crowding at one exit, ignored alternate routes, or uncertainty outside indicate that the image, posted signs, training, or physical route needs correction. Use the same observations when updating Emergency plan images showing evacuation routes across the facility.
Frequently Asked Questions
Should an evacuation image always be oriented north?
No. A viewer-oriented image is often easier to interpret because its top corresponds to the direction the person faces. If north is operationally relevant, include a north arrow without sacrificing intuitive orientation.
How many evacuation routes should an image show?
Show a primary route and a genuinely usable alternate whenever the layout and approved procedures provide both. Avoid extra lines that add complexity without leading to distinct, available exits.
Can a building floor plan be used as an evacuation image?
It can serve as the base, but it should be simplified and supplemented with a location marker, route arrows, exits, stairs, a legend, relevant safety features, and the assembly destination.
Where should evacuation route images be posted?
Place them at occupied rooms, corridor junctions, reception areas, elevator lobbies, and other decision points. Each image must match its exact installed position and remain visible under expected lighting conditions.
How often should evacuation images be updated?
Review them on a regular schedule and immediately after layout, door-control, route, occupancy, construction, or assembly-area changes. Replace every affected printed and digital copy together.
Conclusion
Effective route images are operational tools, not decorative floor plans. Prioritize accurate orientation, readable paths, distinct exits, a viable alternative, accessible movement, and a clearly identified destination outside the building. Then confirm those elements by walking each route from the image’s installed position and asking an unfamiliar person to interpret it without assistance.
The next step is a physical audit. Carry the current image through the building, test doors and gates, inspect corridor obstructions, and compare every symbol with what occupants will encounter. Assign ownership for revisions and connect updates to renovations, access-control changes, and drill observations. If the drawing conflicts with the building, correct the route or the image before relying on either during an emergency.
Build a Reliable Core Before Adding Scenario-Specific Supplies
A useful medical kit begins with the injuries and health problems a household can reasonably manage while professional help is being contacted or reached. The core should address external bleeding, minor wounds, burns, sprains, exposure to bodily fluids, and essential personal medical needs. Specialized additions then reflect where the kit will be stored, how far it may travel, and how long outside assistance could take.
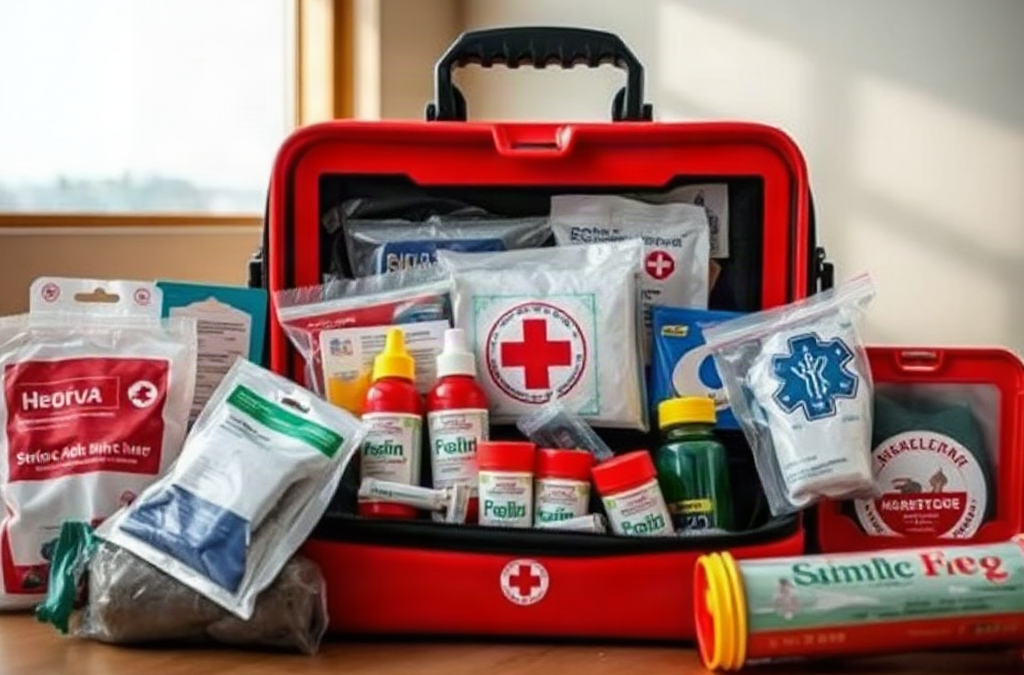
For bleeding and wound care, stock assorted adhesive bandages, sterile gauze pads, rolled gauze, medical tape, and at least one absorbent trauma dressing. Include disposable nitrile gloves in multiple pairs so a helper can replace contaminated or torn gloves. Antiseptic wipes can clean intact surrounding skin, while clean water or commercially packaged wound-wash solution is more appropriate for flushing debris from many minor wounds. Trauma shears, tweezers, and a disposable cold pack add practical capability without requiring complex interpretation.
A compact baseline should also contain a CPR face shield, an elastic wrap, triangular bandage, burn dressing or sterile non-adherent pads, hand sanitizer, and a simple first-aid reference. A digital thermometer may be useful at home, although it is less valuable in a small evacuation pouch where weight and battery condition matter. A tourniquet can be appropriate for life-threatening extremity bleeding when the user has received suitable instruction; an unfamiliar tourniquet buried beneath routine supplies is not a complete bleeding plan.
Personal needs often matter more than another generic bandage. Add prescribed rescue medicines, allergy supplies, glucose sources or testing items when applicable, spare eyeglasses, and a written list of medicines, allergies, diagnoses, clinicians, and emergency contacts. Prescription products should remain in properly labeled containers and be rotated according to storage instructions. Access to replacement prescriptions may be limited by local rules, insurance practices, and clinician authorization.
Use a short priority test before adding an item:
Likely problem: Does it address an injury or condition plausible in this setting?
Usable skill: Can a household member identify when and how to use it?
Storage fit: Will heat, freezing, moisture, or crushing damage it?
Replacement plan: Can it be inspected and replaced before failure?
The common mistake is counting pieces instead of capabilities. A large preassembled kit may contain dozens of tiny adhesive bandages but too little gauze for sustained pressure. Reviewing Medical emergency kit contents by scenario as a capability problem produces a smaller, clearer, and more usable loadout.
Home and Shelter-in-Place Kit Contents
A home medical kit can carry more depth because it does not need to be worn or moved quickly. Use that capacity for extra consumables, organized personal medicines, and supplies that support several people rather than filling the container with advanced devices. Keep the primary kit accessible to responsible adults but secured from young children.
Home wound-care depth should include several sizes of sterile gauze, non-adherent pads, rolled gauze, tape that adheres reliably, adhesive closures intended for minor superficial wounds, and multiple glove pairs. Add a basin or another practical way to access clean running water for irrigation; a kit does not need to contain all the water if a dependable household supply exists. Soap, clean towels, and waste bags should be nearby because infection control depends as much on clean hands and disposal as on the dressing itself.
Households managing asthma, severe allergies, diabetes, seizures, or other known conditions need a personalized module placed within or beside the general kit. That module might contain prescribed rescue medicine, administration accessories, monitoring supplies, and a concise action plan provided by the treating clinician. Do not pool prescription medicines or assume that one person’s device or dose is suitable for another. A current medication list is especially useful when stress, an evacuation, or an unfamiliar responder makes verbal recall unreliable.
Consider how a prolonged power or water interruption changes the kit. Battery-dependent medical devices need a manufacturer-compatible power plan. Refrigerated medicine requires condition-specific advice from a pharmacist or manufacturer rather than an improvised assumption that it remains safe after warming. People who use mobility, hearing, or vision aids may need spare batteries, communication cards, or backup accessories stored with their medical information.
For example, a family sheltering after a severe storm may face glass cuts, minor burns from cooking, missed routine doses, and difficulty reaching a pharmacy. Extra dressings and a documented medication plan are more useful in that situation than a surgical instrument set. A home kit is still not a substitute for calling emergency services when there is severe bleeding, breathing difficulty, chest pressure, altered consciousness, suspected stroke, major burns, or another time-critical condition.
Separate supplies into labeled pouches such as bleeding, minor wounds, medications, and protective equipment. The failure signal is simple: if a helper must empty the entire container to find gloves or gauze, the organization is not working. Place instructions and emergency information where they can be seen before any zipper compartments are opened.
Vehicle and Evacuation Kit Contents
Vehicle and evacuation kits serve different movement problems, even when they share supplies. A vehicle kit can be somewhat larger and should emphasize roadside trauma, visibility, and environmental exposure. An evacuation kit must remain light enough to carry with water, documents, clothing, and other necessities; excessive weight makes abandonment more likely.
For a vehicle, prioritize gloves, substantial gauze, a trauma dressing, medical tape, a trained-user tourniquet, a CPR barrier, a triangular bandage, an elastic wrap, and trauma shears. A reflective vest, flashlight, and emergency signaling equipment belong nearby even though they are not medical supplies. Scene visibility and traffic awareness can prevent a helper from becoming another casualty. Keep the medical pouch reachable without unloading the trunk, and avoid placing it under heavy tools that may crush sterile packaging.
Cabin and trunk temperatures create a major constraint. Adhesives may deteriorate, ointments may separate, batteries may discharge, and some medicines can be damaged by heat or freezing. The glove compartment is convenient but often unsuitable for temperature-sensitive prescriptions. Follow each product’s labeled storage limits, carry essential medicines with the person when appropriate, and replace compromised products rather than judging them solely by appearance.
An evacuation kit should retain the core bleeding and wound supplies but reduce bulky duplicates. A practical personal pouch might hold two glove pairs, compressed or folded gauze, tape, several sterile pads, adhesive bandages, a triangular bandage, a compact elastic wrap, trauma shears, a CPR shield, personal medicines, and a waterproof medical-information card. Pack enough supplies for the expected group, but divide critical items between capable adults so one lost bag does not remove every medicine or dressing.
Imagine leaving home on foot after roads close. A rigid, oversized medical case that occupies half a backpack competes directly with drinking water and weather protection. A compact modular pouch is the better choice unless the group has unusual medical requirements or trained responders carrying group equipment. Conversely, a tiny pocket kit may be inadequate for a multi-person road trip far from immediate services.
Compare and revise both setups using the Medical emergency kit contents by scenario approach rather than duplicating the home cabinet. A vehicle kit is succeeding when it remains accessible, intact, and understandable after months of travel. Faded labels, melted adhesive, missing gloves, or medicines left beyond approved storage conditions indicate that the system has failed before an incident occurs.
Remote Travel and Delayed-Help Kit Contents
A remote-care kit needs enough capacity to stabilize common injuries and protect a patient while help is delayed, but distance does not justify carrying equipment beyond the group’s competence. Route difficulty, weather, party size, communication coverage, evacuation time, and individual medical conditions should drive the contents. A day hike near a busy trailhead does not call for the same load as a multi-day trip without reliable cellular service.
Increase supplies that are consumed quickly: gloves, gauze, tape, non-adherent pads, blister care, elastic wraps, and irrigation capability. Add an emergency blanket or other exposure protection, because an injured person may cool rapidly while stationary. A headlamp leaves both hands available for care. A pencil and waterproof paper can record symptoms, medicine use, allergies, injury time, and changes in condition for rescuers.
Remote groups also need communication and extraction tools outside the medical pouch. A satellite communicator or personal locator beacon may do more to improve access to definitive care than another advanced medical device, provided it is registered, charged, tested, and understood. Navigation tools, shelter, water treatment, and insulation affect medical outcomes by reducing exposure and preventing a manageable delay from becoming a second emergency.
Consider an ankle injury several miles from a trailhead. An elastic wrap may provide support, but it does not determine whether walking is safe. Severe deformity, loss of sensation, worsening swelling, inability to bear weight, or impaired circulation calls for a more cautious evacuation decision. Improvised splinting may be useful when trained users can protect circulation and check sensation, yet a rigid splint applied badly can increase pressure or hide deterioration.
Medicines require equally careful judgment. Pack only products suitable for the individual, clearly labeled, and understood by the user. Avoid creating an informal pharmacy for a group without considering allergies, interactions, health conditions, dosing, and legal constraints. Prescription drugs should be managed with the relevant clinician or pharmacist before departure.
The most common remote-kit mistake is substituting inventory for planning. No collection of dressings fixes a missing turnaround time, an unshared itinerary, or an uncharged communicator. Review Medical emergency kit contents by scenario alongside the trip plan, then remove items with no credible use and add supplies tied to specific route hazards. The final kit should be light enough to carry all day and organized so essential bleeding or exposure supplies can be reached immediately.
Storage, Inspection, and Safe Use
A medical kit remains dependable only when inspection is treated as part of ownership. Check it on a regular household schedule and after every use, trip, vehicle season change, or major change in a family member’s health. Inventory lists should record quantities and, where relevant, expiration dates or replacement dates without implying that every non-drug item fails on the printed date.
Inspect sealed packages for tears, water damage, discoloration, broken seals, or crushed contents. Test flashlights and other powered equipment, replace leaking batteries, and verify that scissors and zippers operate. Adhesive products deserve special attention because heat and age can make them unreliable before the wrapper looks damaged. Follow manufacturer directions for medicines, sterile products, diagnostic supplies, and devices rather than applying one blanket rule.
Organization should match urgency. Gloves and major bleeding supplies belong at the top or in a clearly marked external compartment. Routine bandages can sit deeper. Personal medicines need labels identifying the intended person, while emergency information should be readable without unlocking a phone. If privacy is a concern, use a sealed envelope that responders can locate quickly rather than hiding the information.
Practice reveals failures that visual inspection misses. Without opening sterile products, have household members locate gloves, gauze, tape, and the first-aid reference. Confirm that they know how to call for help, state the location, and recognize problems beyond basic first aid. Formal first-aid, CPR, and bleeding-control instruction gives context that an equipment list cannot provide.
More equipment is not automatically safer. Advanced airways, suturing materials, injectable drugs, and diagnostic devices can create false confidence or cause harm when used without appropriate qualifications. A well-maintained basic kit paired with prompt emergency activation is generally more practical for a household than a poorly understood clinical-style bag. Working contents are accessible, current, clearly labeled, and matched to actual users; failing contents are expired, heat-damaged, incomplete, or impossible to identify under pressure.
Frequently Asked Questions
Should every medical emergency kit contain the same supplies?
No. Keep a common core for bleeding, minor wounds, gloves, and personal needs, then adjust quantities and additions for home storage, vehicle temperatures, evacuation weight, or delayed rescue.
Where should prescription medicines be kept?
Keep them in properly labeled containers under the stated storage conditions and where the intended person can access them. Ask a clinician or pharmacist about emergency refills, refrigeration, and travel constraints.
Does a first-aid kit need a tourniquet?
A recognized commercial tourniquet may be appropriate for life-threatening extremity bleeding when users have suitable training. It does not replace emergency activation, direct-pressure supplies, or hands-on instruction.
How often should a medical kit be inspected?
Inspect it on a recurring schedule, after each use, before major trips, and after severe heat, freezing, moisture, or physical damage. Replace used, compromised, or improperly stored contents promptly.
What should not be placed in a household medical kit?
Avoid unlabeled pills, damaged sterile products, unfamiliar advanced devices, and medicines intended for someone else. Equipment that exceeds the users’ training can distract from calling for appropriate help.
Further Reading
Authoritative Sources
American Red Cross: Anatomy of a First Aid Kit redcross.org
Provides a recognized baseline list that can be adapted for household size and medical needs
Ready.gov: Build a Kit ready.gov
Places first-aid and personal medical supplies within a broader emergency supply plan
CDC: Emergency Supplies cdc.gov
Explains health-related supplies and personal considerations for emergency readiness
FDA: Safe Use and Disposal of Expired Medicines fda.gov
Clarifies why medicine dates and labeled storage conditions require careful attention
Conclusion
Build each kit around its operating environment rather than buying one oversized collection for every location. The home setup can hold deeper reserves and personalized care modules; the vehicle version must survive temperature swings and remain reachable; the evacuation pouch must earn its weight; and the remote kit must account for exposure, communication, and delayed rescue. Start by organizing gloves, bleeding-control materials, wound dressings, medical information, and essential personal medicines. Then test whether household members can find and use those items without emptying the bag. Review labeled storage requirements, replace compromised supplies, and arrange appropriate first-aid training. The next practical step is to inspect one existing kit against its actual scenario, remove unusable clutter, and document the specific gaps that need replacement.
Identify the Emergencies Your Household Must Handle
A checklist becomes useful only after it reflects the hazards, people, and physical conditions at a specific address. A coastal household may need to prepare for evacuation and extended power loss, while an apartment resident in a cold climate may be more concerned about heating failure, blocked stairways, and limited storage. Begin by reviewing local emergency-management information, flood or wildfire exposure, typical weather disruptions, and the reliability of nearby roads and utilities.
Separate situations that require staying home from those that require leaving. A short water interruption may be manageable with stored water and sanitation supplies. A wildfire warning, gas leak, or official evacuation order may make departure the safer choice. Preparing only a large collection of household supplies creates a blind spot if those items cannot travel. Conversely, placing everything in a small evacuation bag can leave a household poorly equipped for several days at home.
Next, record the needs that cannot be replaced by a generic kit. These may include prescription medication, mobility equipment, infant formula, refrigerated medical products, pet carriers, hearing-aid batteries, eyeglasses, or electrically powered health devices. Note how long each essential item normally lasts and whether it depends on electricity, clean water, or a caregiver. Discuss medical contingencies with the appropriate clinician or equipment provider rather than improvising during an outage.
Use three planning questions for every likely event: What could become unsafe first? Which service might be unavailable? What decision would the household need to make? During a winter outage, for example, indoor temperature and carbon-monoxide risks may matter before food does. Fuel-burning grills, camp stoves, and generators must not be brought into a home, garage, or other enclosed area; equipment instructions and local safety guidance should govern placement and use.
A common first-time mistake is planning around dramatic disasters while ignoring ordinary disruptions. A broken water main, localized evacuation, prolonged outage, or road closure can expose the same weaknesses: no drinking water, phones with depleted batteries, inaccessible medication, or family members who do not know where to meet. The risk review behind an Emergency preparedness checklist for first-time planners should therefore prioritize consequences the household can address, not an exhaustive catalog of possible events.
Build the Core Supply Kit in Priority Order
Core supplies should preserve safe hydration, necessary medical routines, visibility, communication, sanitation, and protection from the local climate. Buying specialized equipment before covering those functions often produces an expensive kit with basic gaps. Build in layers: items needed during the first hours, resources for several days, and optional equipment that depends on skill, space, or a particular hazard.
Water deserves early attention because utility failure can affect drinking, cooking, hand hygiene, and medication use at the same time. Store commercially bottled water or appropriate containers intended for water storage, follow container and public-health guidance, and protect the supply from chemicals, heat, and contamination. Household requirements vary with climate, health, activity, and pets, so official guidance should be treated as a baseline rather than a perfect calculation for every person. Include a manual method for opening any sealed containers.
Food should be shelf-stable, familiar, and practical without normal cooking. Ready-to-eat canned foods, nut or seed butters, crackers, dried fruit, shelf-stable milk, and meals that match household dietary needs are generally more useful than unfamiliar emergency rations. Check whether foods require water, a can opener, refrigeration after opening, or more fuel than the household can safely use. Rotate emergency food into normal meals before quality declines instead of storing it indefinitely.
A compact first-pass checklist includes:
Water and food: stored water, ready-to-eat foods, a manual can opener, and basic utensils.
Health: first-aid materials, necessary medications, copies of prescriptions, hygiene products, and spare corrective lenses where applicable.
Light and information: flashlights, suitable spare batteries, charging banks, and a battery-powered or hand-crank radio.
Sanitation and protection: soap, waste bags, toilet paper, weather-appropriate clothing, sturdy footwear, work gloves, and appropriate face coverings for local hazards.
Practical access: cash in modest denominations, keys, maps, pet supplies, and copies of essential documents.
Choose battery equipment carefully. Devices that share a battery size simplify replacement, but rechargeable equipment is useful only if a dependable charging method exists. Candles introduce an avoidable fire risk compared with flashlights and lanterns. A large generator may support selected appliances, yet it adds fuel storage, maintenance, noise, carbon-monoxide, and electrical-connection concerns. First-time planners are usually better served by reliable lighting and small-device charging before considering complex backup power.
Do not keep every item in one oversized container. Place immediate-use supplies such as shoes, flashlights, and glasses near sleeping areas; keep a portable departure kit near the normal exit; and store reserve food and water where temperature and weight are manageable. A kit is failing if household members cannot lift it, locate it in darkness, or reach it after one room becomes inaccessible.
Create Communication, Shelter, and Evacuation Plans
A household plan converts stored items into coordinated action. Write down how members will receive warnings, contact one another, shelter safely, leave the property, and reunite if normal routes or mobile networks are unavailable. Each person should understand the plan without relying on the individual who created it.
Select an out-of-area contact who can receive updates from separated household members. Local calls may be difficult during heavy network demand, and text messages may sometimes be easier to send than voice calls, although neither should be assumed to work. Put contact numbers, addresses, medical details, school information, and insurance contacts on paper. A phone that is lost, damaged, locked, or out of power should not contain the household’s only copy.
Set two meeting places: one close to home for a sudden building evacuation and another outside the immediate neighborhood if returning is unsafe. Map more than one route and identify how people without a vehicle would leave. Families with children should compare their plan with school or childcare release procedures. Pet owners should identify carriers, leashes, records, food, medication, and destinations that can accept animals rather than assuming every public shelter will do so.
Shelter decisions require the same specificity. Identify the safest available location for the hazards common to the area, but follow official instructions during an actual event. A room suitable for severe weather may not be appropriate during a chemical release, fire, or flood. Smoke alarms and carbon-monoxide alarms should be maintained according to their manufacturer instructions, and every resident should recognize their signals. People who rent should know the building exits and avoid depending on elevators during a fire or power failure.
Assign responsibilities with backups. One adult might collect medication while another secures pets, but the plan should still work when either person is absent. Children can carry a contact card or retrieve shoes, but they should not be assigned hazardous tasks. The same principle applies to neighbors who may need assistance: ask what support they want and agree on a method rather than making assumptions about disability, age, or medical needs.
Keep the written plan short enough to use under pressure. A practical Emergency preparedness checklist for first-time planners may include a one-page contact sheet, two route maps, departure triggers, and named responsibilities. Detailed background notes can remain elsewhere. If no one can quickly state where to go, whom to call, and what to carry, the plan is too complicated or has not been practiced.
Test, Store, and Maintain the Plan
Testing reveals whether a plan works under the conditions that disrupt normal routines. Begin with a low-risk exercise: turn off household lights for an evening without disabling safety systems, retrieve the kit, use stored lighting, locate contact information, and prepare a meal without the stove. A separate evacuation drill can test how long it takes to gather people, medication, mobility aids, and pets and reach the nearby meeting place.
Watch for friction rather than trying to stage a dramatic simulation. A flashlight may have corroded batteries. A pet may resist the carrier. A bag may be too heavy for its intended user. A power bank may not have the right cable. An emergency contact may have moved. Each failure provides a specific correction. The exercise is working when everyone can perform assigned tasks, critical items are accessible, and the household can make decisions without waiting for a single organizer.
Storage conditions affect reliability. Water containers, food, medication, batteries, and electronic equipment may have different temperature and moisture limits. Follow product labels, avoid areas exposed to fuel or household chemicals, and keep supplies protected from pests. Heavy water should be stored on stable shelving or at floor level where leakage is less likely to damage vital records. Secure equipment in earthquake-prone areas where falling shelves could create another hazard.
Create a recurring review tied to events the household already remembers, such as seasonal clock changes, school-term transitions, or insurance renewals. Check dates, packaging, battery condition, clothing sizes, medication arrangements, phone numbers, pet records, cash, and route changes. Replace consumed items immediately after an outage or drill. Also revisit the plan after a move, birth, new diagnosis, vehicle change, or shift in caregiving responsibilities.
A paper inventory reduces unnecessary buying. Mark each item as present, missing, expired, or needing practice. Keep notes about where supplies are stored and which family member can use specialized equipment. Skill-dependent tools do not add much resilience when no one can operate them safely. A basic radio that everyone understands can be more useful than sophisticated communications equipment that has never been charged or tested.
Maintenance should improve weak points rather than expand the collection endlessly. If the last drill showed that departure took too long, reorganize medication, documents, and pet equipment before buying more food. If stored water is inadequate, address that before adding comfort items. Revisit the Emergency preparedness checklist for first-time planners after every exercise so the document reflects observed conditions rather than assumptions.
Frequently Asked Questions
What should a first-time planner put in an emergency kit first?
Prioritize safe water, necessary medication, ready-to-eat food, flashlights, communication tools, sanitation supplies, suitable clothing, and paper contact information. Add specialized equipment only after these functions are covered.
How many days should household supplies cover?
Follow guidance from local emergency authorities and build toward several days of self-sufficiency. Increase capacity where outages, isolation, medical needs, severe weather, or delayed access to stores could extend disruption.
Should supplies go in one large bag?
No. Keep a portable evacuation kit, place immediate-use items near sleeping or living areas, and store heavier reserves securely. One oversized bag may be impossible to carry or inaccessible during an emergency.
How often should an emergency plan be reviewed?
Review it on a recurring schedule and whenever household circumstances change. Check contacts, routes, medications, food, water, batteries, clothing sizes, pet needs, and document copies after every drill or actual use.
What is the best way to test a new preparedness plan?
Run a short power-outage exercise and a separate evacuation drill. Confirm that everyone can find supplies, contact information, exits, meeting places, medication, mobility equipment, and pet gear without depending on one planner.
Further Reading
Authoritative Sources
Build a Kit ready.gov
Federal preparedness guidance outlines common household supplies and considerations for individual needs
Make a Plan ready.gov
This resource covers alerts, shelter decisions, evacuation routes, communication, and household responsibilities
Water, Sanitation, and Hygiene Emergencies cdc.gov
CDC information helps households evaluate safe water and sanitation needs during emergencies
How to Prepare for Emergencies redcross.org
The American Red Cross provides practical planning information for kits, household plans, and common hazards
Conclusion
First-time planning works best when it addresses likely local disruptions before adding specialized equipment. Assess whether the household may need to shelter or leave, then protect the functions that become critical fastest: water, health needs, safe food, lighting, communication, sanitation, temperature protection, and mobility. Keep departure supplies portable, store heavier reserves safely, and give every household member clear responsibilities with a backup.
The next step is not another purchase. Conduct a simple drill, note what cannot be found or used, and correct those weaknesses in priority order. Repeat the review when seasons, addresses, health needs, pets, schools, or contact information change. A smaller plan that has been tested and maintained offers more practical value than an elaborate collection that nobody can locate, carry, or operate safely.
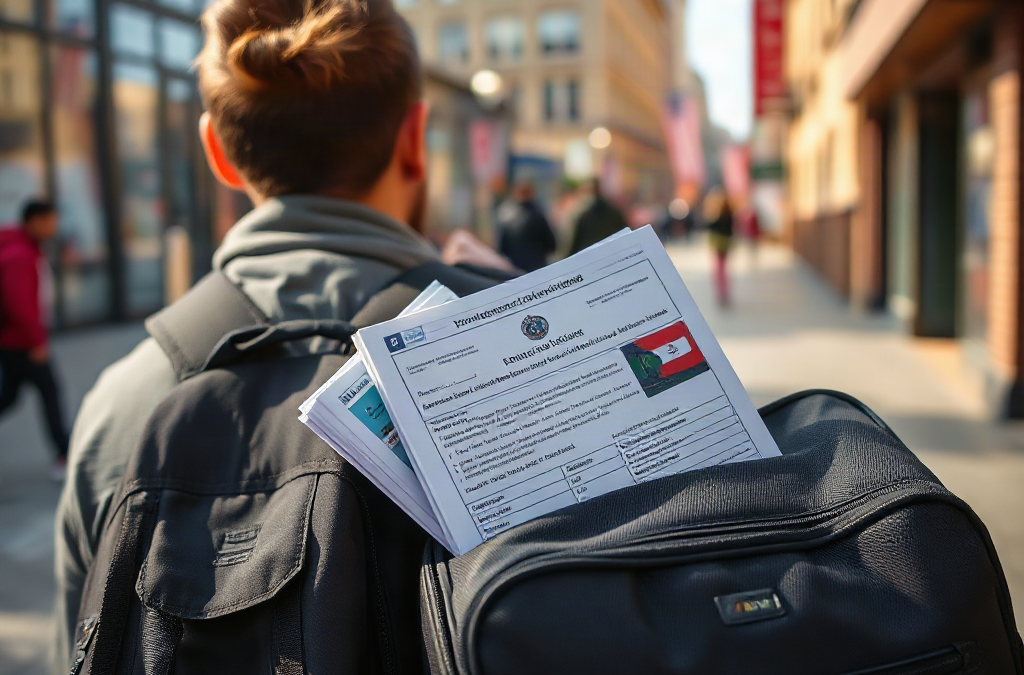
A useful travel emergency record connects the traveler to a verified identity, a reachable person, and a known destination. It should show the traveler’s full legal name, date of birth, nationality, primary home contact details, emergency contacts, accommodation addresses, transportation reservations, and planned route. International travelers should also record their passport number, issuing country, issue and expiration dates, and the location of a securely stored copy.
These details serve different purposes. Identity information can help authorities distinguish between people with similar names. An itinerary narrows the search area when a traveler misses a check-in or fails to arrive. Accommodation details tell family members, insurers, or officials which local organization to contact first. A flight number alone is not an itinerary; include dates, transfer points, lodging, and any independent travel between booked segments.
Choose emergency contacts by availability rather than relationship alone. A spouse traveling on the same trip is a poor sole contact because both people may lose communications at once. Name at least one person who remains outside the travel area, knows the planned route, and has permission to speak with an insurer or provide requested records. Write the contact’s full name, relationship, telephone number with international dialing code, and email address. If family circumstances are sensitive, specify whom responders should and should not notify.
Consider a traveler who leaves a guided tour for a two-day hiking detour. The original booking confirmation no longer shows where that person is expected to be. An updated route, trailhead location, vehicle description, overnight stop, and scheduled check-in time give the home contact something actionable. Without those details, a delayed return may look identical to an ordinary loss of phone coverage.
A compact identity and itinerary record should cover:
Who: legal name, date of birth, nationality, and a recent identifying photograph.
Who to call: an at-home contact and a backup who understand the itinerary.
What was issued: passport or identification details and securely stored copies.
Do not place every sensitive document in an exposed luggage tag or wallet sleeve. The visible card should contain enough information to summon help, while passport copies and detailed records belong in protected storage. A fuller Emergency response information that must accompany travelers record can then be released by the traveler or trusted contact when it is actually needed.
Medical Information Responders Can Use
Medical information should emphasize facts that could change immediate care. Record serious allergies and the reaction they cause, essential prescription medicines, major diagnoses relevant to urgent treatment, implanted devices, blood-thinning medication, and communication or mobility needs. Use generic drug names where known because brand names vary between countries. Include usual dose and schedule, but keep the original pharmacy label with the medicine whenever possible.
A long medical history is less useful at the scene than a short, current summary. A responder needs to know that a traveler has a severe penicillin allergy, uses insulin, takes an anticoagulant, or has an implanted cardiac device before learning about a resolved childhood injury. List the treating clinician or pharmacy as a verification contact, not as a substitute for the actual facts. Office numbers may be unanswered across time zones, and privacy rules may limit what staff can disclose.
Medication continuity deserves separate attention. Travelers should carry enough prescribed medicine for the planned trip plus a reasonable delay when permitted, along with copies of prescriptions or a clinician’s letter when destination rules call for documentation. Medicine should generally remain in carry-on baggage rather than checked luggage so it stays available during diversions or baggage delays. Entry rules for controlled medicines differ by destination, so travelers must verify requirements with the appropriate embassy or health authority before departure.
Suppose an unconscious traveler arrives at a clinic with only a pill organizer. Staff may not know what the tablets are, whether they are current, or which dose was taken. A dated medication list with generic names, strengths, schedules, allergies, and prescriber details supplies much better context. It does not replace clinical assessment, and a blood type printed on a personal card should not be assumed to replace testing required by a medical facility.
Language can create another failure point. For a destination where the traveler does not speak the local language, add a professionally translated or carefully verified statement for a severe allergy, a condition such as diabetes or epilepsy, and any critical communication need. Translation applications may assist with conversation, but they can fail offline or misstate clinical terms. A short prewritten statement is more dependable for a known high-risk issue.
Review the medical page after any prescription, diagnosis, pregnancy status, accessibility need, or emergency contact changes. Mark the review date clearly. Outdated information is not merely untidy: an old dose, discontinued medicine, or obsolete contact can misdirect care. The goal is a concise clinical snapshot that supports responders without pretending to be a medical chart or treatment instruction.
Insurance, Consular, and Local Assistance Details
Assistance records should show whom to call, what service was purchased, and what authorization may be required. Carry the travel or health insurance company’s emergency number, policy number, covered traveler names, claims contact, and any instructions for preauthorization. Distinguish medical treatment coverage from medical evacuation, trip interruption, vehicle assistance, and personal-property coverage; they may be handled by different providers or excluded entirely.
An insurance card by itself can create false confidence. Domestic health coverage may have limited application abroad, while some travel policies reimburse expenses only after the traveler pays. Evacuation coverage may arrange transport to an appropriate facility rather than to the traveler’s preferred hospital at home. Read the policy terms before departure and note the procedure for emergencies, including whether the assistance center should be contacted before non-urgent treatment or transport.
International travelers should record the nearest embassy or consulate contact information and the destination’s local emergency numbers. Police, ambulance, and fire services do not use the same number everywhere. Consular personnel may help replace a lost passport, communicate with family, provide lists of local medical or legal services, and assist during a major crisis. They generally cannot provide medical care, guarantee safety, pay private bills, or override local law.
For example, after a scooter collision, a traveler may need local ambulance services first, the insurer’s assistance line once immediate danger is controlled, and consular help if identification was lost. Calling the embassy instead of the local emergency number can waste critical time. The record should therefore separate contacts by function rather than presenting an undifferentiated page of telephone numbers.
Add destination-specific information that changes the response: lodging reception, tour operator, local host, rental vehicle provider, roadside assistance, and a reliable translation contact if available. Travelers visiting remote areas should note the nearest practical clinic and how local rescue requests are initiated, but they should verify those details locally rather than relying on an old online post. Satellite communicators and locator beacons may add a contact path where cellular coverage is absent, yet they work only when activated, registered, charged, and used within service limitations.
The most useful Emergency response information that must accompany travelers assigns each contact a job: immediate rescue, medical coordination, document replacement, transportation support, or family notification. Test international dialing formats and save policy documents for offline access. A number that appears complete at home may fail abroad if the country code or required dialing prefix is missing.
How to Store, Share, and Update the Information
Redundant storage protects access without exposing every record unnecessarily. Keep a compact paper card on the traveler, a protected paper copy separate from the original documents, and an encrypted or password-protected digital copy available offline. A phone contact labeled for emergencies can help, but it should not be the only method: the device may be damaged, discharged, locked, stolen, or unable to connect.
Separate immediate-response facts from high-risk identity records. A wallet card can display the traveler’s name, urgent allergies, essential conditions, and two contact numbers. Passport scans, insurance documents, prescription letters, and the detailed itinerary belong behind authentication or with a trusted contact. Avoid storing unencrypted scans in ordinary email drafts or publicly shared folders. Convenience matters, but unrestricted access can turn a lost device into an identity and privacy problem.
Sharing should be deliberate. Give the complete itinerary and check-in schedule to one dependable person, then explain what action to take after a missed contact. A vague request to “call someone if I disappear” leaves the contact guessing about normal delays. Specify the expected check-in time, a grace period suitable for the route, whom to call first, and which information may be released. For remote travel, the trigger may be a missed evening satellite message; for urban business travel, it may be failure to arrive for a scheduled flight with no other contact.
A practical predeparture check can be completed in this order:
Confirm that names, passport dates, policy numbers, medicine details, and telephone codes are accurate.
Save local emergency, insurer, lodging, transport, and consular contacts for offline use.
Place the short response card where responders can reasonably find it.
Secure detailed copies separately and send the itinerary to the designated home contact.
Agree on check-in times and the point at which a delay should be escalated.
Signs that the arrangement works are straightforward: the traveler can retrieve essential details without internet access, the home contact can describe the route and next check-in, and both understand which organization handles each problem. Signs of failure include a spouse on the same trip being the only contact, unlabeled medication, a password no trusted person can access, expired insurance details, and an itinerary that stops at the arrival airport.
Recheck the packet immediately before departure rather than relying on a permanent template. Destination addresses, transport segments, medication lists, and assistance providers change. Families can maintain a standard form, but each journey requires its own verified copy. For groups, every adult should carry personal information; one group leader’s folder may become inaccessible if the party separates.
Frequently Asked Questions
What emergency information should a traveler carry in a wallet?
Carry a short card with the traveler’s full name, two emergency contacts, severe allergies, essential medical conditions, critical medicines, and insurer assistance number. Keep passport scans and detailed financial information in protected storage instead.
Should emergency travel records be printed or digital?
Use both. Paper remains available when a phone is dead or damaged, while a protected offline digital file can hold fuller records and replacement-document copies.
Who should receive a copy of the itinerary?
Choose a reliable person who is not traveling with the group, can be reached during the trip, understands the check-in schedule, and knows which insurer, operator, or authority to contact after a genuine missed check-in.
Is a passport copy enough if the original is lost?
No. A copy is not a valid travel document, but its identifying details may support the replacement process. Contact the appropriate embassy or consulate and follow its instructions.
How often should travelers update emergency information?
Review it before every trip and after any change to medication, health needs, contacts, identification, insurance, lodging, transportation, or route. Add a review date so recipients can judge whether the record is current.
Further Reading
Authoritative Sources
U.S. Department of State: Before You Go travel.state.gov
Provides official preparation information for identification, destination conditions, insurance, documents, and assistance during international travel
CDC Travelers’ Health: Pack Smart wwwnc.cdc.gov
cdc.govExplains how travelers can prepare medicines, health documents, and destination-appropriate supplies before departure
Ready.gov: Travel Preparedness ready.gov
Offers government guidance for monitoring hazards, maintaining communications, and preparing for disruptions away from home
American Red Cross: How to Prepare for Emergencies redcross.org
Provides practical planning principles for contacts, communications, supplies, and household emergency readiness that can be adapted for travel
Conclusion
A strong travel emergency record is short enough to use under pressure but detailed enough to connect the traveler with appropriate help. Prioritize current identity and itinerary data, reachable contacts outside the travel party, treatment-relevant medical facts, and clearly labeled insurance, local emergency, and consular numbers. Store immediate-response facts where they can be found, while protecting passport copies and fuller records from casual access.
Before leaving, test the arrangement rather than merely assembling documents. Retrieve the files without internet service, check international dialing formats, confirm that medicines are accurately labeled, and ask the designated contact to describe the escalation plan. Update the packet for the specific destination and route. That final review exposes expired policies, obsolete prescriptions, missing lodging addresses, and unclear check-in expectations before they become obstacles during a disruption.
A useful preparedness review begins with the disruptions a household could plausibly face, not with a universal shopping list. A winter power outage, fast-moving wildfire, contaminated-water notice, and extended heat emergency create different demands. Listing local hazards alongside their likely effects reveals whether the household may need to remain indoors, leave quickly, operate without utilities, or support someone with limited mobility.
Rank each gap by consequence and time sensitivity. A missing entertainment option is inconvenient; an unavailable rescue inhaler, inaccessible mobility device, or unsafe source of drinking water can become urgent. The same logic applies to location. Apartment residents may have little storage and no safe way to operate fuel-burning equipment, while rural households may face delayed responders, private-well failure, or blocked roads. Effective Emergency preparedness solutions for common gaps must reflect those constraints rather than conceal them behind a long inventory.
Use a seven-point review covering hazards, water, food, medical needs, power, communication, and evacuation. For every category, record what is available, how long it should remain usable, who depends on it, and what could disable it. A battery radio stored without suitable batteries is not operational. A vehicle evacuation kit offers limited value if the vehicle routinely has little fuel or the driver cannot reach it during working hours.
A practical test is to walk through one ordinary day without assuming electricity, tap water, mobile data, or an open grocery store. Note where routine tasks stop: preparing infant formula, refrigerating medicine, charging a hearing device, opening an electric garage door, receiving a warning, or contacting a family member. This exercise exposes dependencies that product-focused planning tends to miss.
The common mistake is treating ownership as readiness. Supplies may be expired, buried behind other storage, unfamiliar to household members, or unsuitable for the actual hazard. Close the highest-consequence gaps first, then address comfort and duration. Signs of progress include named backups for essential functions and household members who can locate and use them. A plan is still failing if one absent person holds all the knowledge or if success depends on uninterrupted cellular service.
Secure Water, Food, and Medical Continuity
Water deserves early attention because loss of safe supply affects drinking, food preparation, hygiene, and some medical care at the same time. Store potable water in containers intended for that purpose, protect it from contamination and damaging temperatures, and follow the container manufacturer’s storage guidance. Keep a method for treating additional water, but distinguish filtration from disinfection: a device that improves taste or removes sediment should not automatically be assumed to address microorganisms or chemical contamination.
Plan food around what household members already eat and can prepare during the expected disruption. Shelf-stable meals that require large amounts of water or prolonged cooking may be a poor fit during a utility outage. Ready-to-eat foods, a manual can opener, familiar snacks, and foods suitable for allergies or texture restrictions may be more usable than an inexpensive bulk supply nobody has tested. If using a camp stove or grill, follow its instructions and keep combustion appliances outdoors and away from openings; moving them into a garage or home creates a carbon monoxide hazard.
Medical continuity requires more than a first-aid kit. Record current medicines, doses, allergies, prescribers, pharmacy details, insurance information, and relevant device requirements. Discuss refill timing and emergency options with the prescribing clinician or pharmacist rather than changing medication use independently. Consider spare eyeglasses, hearing-aid batteries, mobility supplies, sanitation items, and a temperature plan for products that require controlled storage. A cooler is only a partial answer unless the household knows the safe temperature range, has a way to monitor it, and can obtain replacement cold packs.
For example, a household may have canned food for several days yet lack safe water to drink alongside salty meals, or it may own a first-aid kit while depending on an electrically powered medical device. The stronger option pairs each critical need with a workable backup: stored water plus an appropriate treatment method, ready-to-eat food plus utensils, and device power plus a clinician-informed contingency.
Rotation prevents a quiet decline in readiness. Mark review dates, use older food and water as appropriate, inspect containers, replace depleted supplies, and update medical records whenever treatment changes. A compact checklist should verify:
Quantity: enough for household members, pets, and likely disruption length.
Suitability: safe for dietary, medical, age, and preparation needs.
Access: reachable without power, special tools, or one particular person.
Condition: sealed, legible, within applicable dates, and free from damage.
Frequent spoilage, unknown storage dates, and meals that cannot be prepared with backup utilities are signs the system needs revision.
Build Resilient Power and Communication Options
Backup power should be assigned to specific loads rather than purchased around an optimistic claim about capacity. Identify what must operate, its power demand, how long it needs to run, and whether it has a high startup requirement. Lighting and phone charging are relatively modest needs; refrigerators, pumps, heaters, cooking appliances, and medical equipment can require much more. Manufacturer specifications and qualified electrical guidance are safer planning inputs than guessing from outlet count.
Different tools serve different roles. Power banks are convenient for phones and small electronics but eventually require recharging. Portable power stations can support selected devices quietly, although capacity, charging time, battery condition, and temperature affect usefulness. Fuel-powered generators may run larger loads, but they introduce fuel storage, noise, maintenance, connection, and lethal carbon monoxide risks. They must be operated outdoors at a safe distance from doors, windows, and vents according to manufacturer instructions, never inside a home, basement, shed, or garage.
Communication plans need similar redundancy. Mobile networks may become congested, batteries may drain, and household members may be separated. Enable local emergency alerts, keep a battery-powered or hand-crank radio where appropriate, write down essential numbers, and select an out-of-area contact who can receive status updates. Text messages may sometimes succeed when calls do not, but they remain network-dependent. Paper contact cards are low-cost backups for children, older adults, or anyone unlikely to remember numbers under stress.
Consider a weekday outage that begins while adults are at work and children are at school. A home-only plan does not answer who may pick up the children, where the household will reunite, or how everyone will report their status if local calls fail. Set a nearby meeting place for a localized incident and another outside the immediate area for a wider evacuation. Include caregivers and authorized pickup arrangements where applicable.
The weak assumption is that more equipment automatically creates resilience. Uncharged batteries, stale generator fuel, missing cables, and unfamiliar controls routinely undermine that approach. Label cables, store instructions with devices, recharge on a schedule, and perform a short test using only the equipment intended for an outage. The system is working when another household member can power priority devices and receive information without verbal coaching. It is failing when loads exceed capacity, the radio cannot tune to a useful station, or every contact route depends on one phone.
Make Evacuation and Shelter Plans Usable
Evacuation and sheltering are different operating modes, and a household needs triggers for both. Some hazards are safer to escape early, while others may require staying indoors and following official instructions. The decision should be informed by local alerts, public-safety directions, visible conditions, household mobility, and route status—not by a rigid rule that leaving or staying is always preferable.
Map at least two ways out of the neighborhood and identify destinations in different directions. A destination should be more specific than “a hotel” or “a relative’s house.” Confirm the address, contact method, pet policy, accessibility, expected travel route, and an alternative if that location is affected. Households without vehicles should investigate local transportation arrangements before an event and coordinate with trusted contacts rather than assuming public transit will operate normally.
Keep essential departure items together without creating a bag too heavy to carry. Identification copies, medicines, water, weather-appropriate clothing, chargers, cash in practical denominations, hygiene supplies, a flashlight, and pet necessities often matter more than specialized gadgets. Original documents may need secure protection elsewhere; portable copies should be handled with attention to privacy. Seasonal clothing and children’s sizes also need periodic review.
Sheltering has its own gaps. Choose suitable interior locations for relevant hazards, know how to receive instructions, and account for ventilation, sanitation, temperature, and utility shutoffs. Do not shut off gas or restore it without appropriate direction and knowledge. Smoke alarms and carbon monoxide alarms should remain functional according to manufacturer instructions, especially when outages encourage unsafe heating or cooking improvisations.
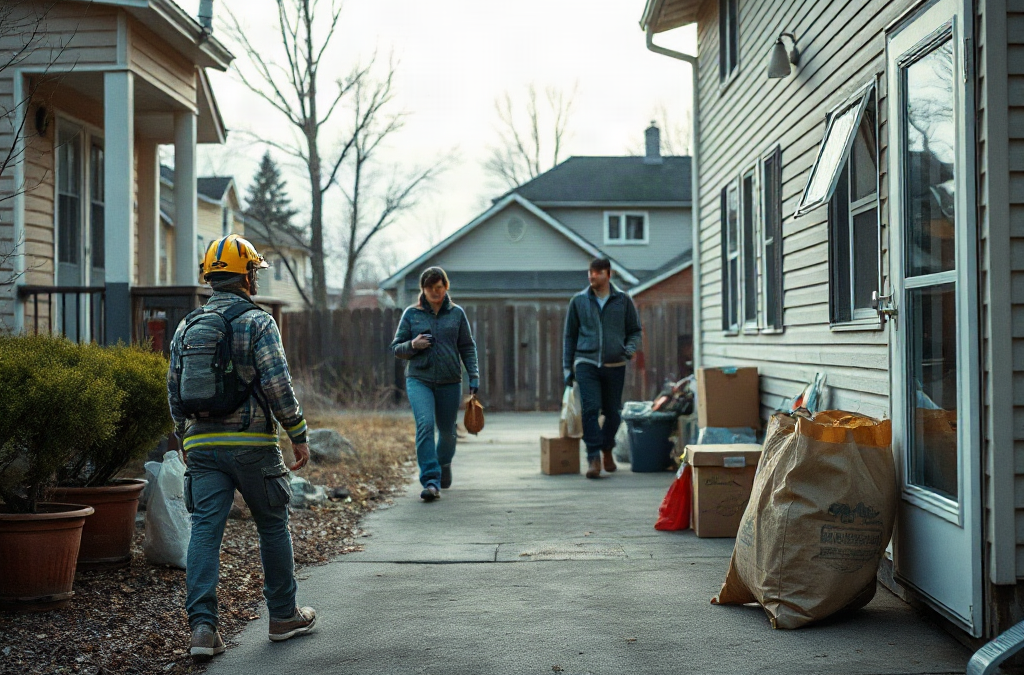
A short drill gives the plan operational value. Ask everyone to gather departure items, send a status message, locate the meeting point, and explain what they would do if the main exit or route were unavailable. Time pressure should remain controlled; the purpose is to find friction, not frighten participants. Pets hiding, keys being misplaced, a garage door lacking manual access, or a mobility aid not fitting in the vehicle are actionable discoveries.
Review Emergency preparedness solutions for common gaps after moves, medication changes, new pets, changes in mobility, or shifts in work and school locations. A drill is succeeding when people make the same key decisions independently and necessary items are accessible. Repeated confusion about destinations, pickup authority, alerts, or departure triggers means the written plan needs simplification rather than more pages.
Frequently Asked Questions
What preparedness gap should a household fix first?
Fix the gap with the fastest and most serious consequence, such as unsafe drinking water, unavailable essential medicine, missing alarms, or no way to receive hazard warnings. Comfort supplies should follow life-safety needs.
How often should emergency supplies be reviewed?
Use a recurring schedule and review supplies after they are used or household needs change. Check dates, container condition, batteries, clothing sizes, contact details, medicines, and whether every item remains accessible.
Is buying an emergency kit enough?
No. A premade kit may provide a starting point, but it rarely accounts for local hazards, prescriptions, dietary restrictions, pets, mobility needs, communication failures, or the household’s evacuation arrangements.
How can a household prepare with limited storage space?
Prioritize compact, high-consequence needs and distribute supplies in safe, accessible locations. Choose stackable water containers where appropriate, rotate shelf-stable foods through normal meals, and avoid bulky equipment without a defined use.
What is the best way to test an emergency plan?
Run a short scenario that removes one normal service, such as power or mobile data. Practice finding supplies, contacting an out-of-area person, reaching a meeting point, and handling an unavailable route.
Conclusion
Preparedness becomes reliable when every critical need has a realistic backup and someone besides the planner knows how to use it. Begin with a hazard-based review, then correct the gaps that could quickly threaten health or safety: water, medicine, warnings, safe power, and a workable departure or shelter decision. Match food and equipment to actual household needs instead of accumulating supplies without a defined role.
Set a date to inspect storage conditions, update contacts, charge batteries, and run one short scenario. Record every point where the process slows or depends on an unavailable person, device, route, or utility. Correct those failures before adding lower-priority gear. Repeating this cycle after household changes will produce a smaller, clearer, and more dependable system than a kit that is purchased once and never tested.
Preparedness priorities become clearer when a household ranks hazards by likelihood, warning time, duration, and consequences rather than collecting unrelated gear. A short power outage, a nearby wildfire, a winter storm, and a flood can all disrupt normal routines, but they do not create the same decisions. A family in a flood-prone area may need waterproof document protection and an evacuation route, while a rural household facing winter isolation may need heating alternatives, animal provisions, and a longer food reserve.
Use a simple risk screen for each credible hazard. Ask how quickly conditions could become dangerous, whether leaving is safer than sheltering, which utilities may fail, and which household member needs special support. A hazard with little warning deserves a ready-to-carry kit and practiced actions. A slow-building event may justify monitoring official alerts, moving vehicles, protecting outdoor equipment, or arranging transportation before roads become unsafe.
Likelihood alone should not control the ranking. A rare event with severe consequences can deserve attention if the preparation is inexpensive and useful elsewhere. Smoke masks suitable for the occupants, for instance, may have a place in a wildfire plan, but working smoke alarms, medication access, and a reliable way to receive warnings usually deserve attention first because they affect several emergencies.
A practical priority order is:
Immediate survival: water, essential medication, first aid, safe shelter, and a way to detect or receive warnings.
Short-term independence: lighting, charging, sanitation, food, cash, and basic tools.
The common mistake is treating a large supply inventory as proof of readiness. Supplies do not solve an unknown meeting place, an inaccessible medication, or a route that becomes unusable. A short household discussion can reveal more urgent gaps than another online purchase. Record the risks that apply locally, identify the first action for each, and link every purchase to a specific problem.
Build the Universal Household Base
Every home benefits from a basic layer that works across multiple hazards. Drinking water, prescription access, basic first aid, sanitation, lighting, communication, and ready-to-eat food support both sheltering and evacuation. The goal is not to predict the exact disaster; it is to keep a household functional while instructions, utilities, transportation, or commercial services are disrupted.
Water should be easy to locate, protected from contamination, and managed with attention to storage conditions and replacement dates. Food should match the household’s actual diet and equipment. Shelf-stable items that require a can opener, refrigeration, or lengthy cooking are less useful during a power failure unless the needed tools and fuel are also available. Include foods that children will eat, allergy-safe choices where necessary, and a manual can opener if canned goods are part of the reserve.
Medical planning requires more than a first-aid box. Keep a current medication list, copies of prescriptions or treatment instructions, and a practical method for carrying temperature-sensitive or mobility-related supplies. Ask a clinician or pharmacist about continuity options rather than improvising with medication changes during a crisis. The same principle applies to vision aids, hearing devices, oxygen equipment, and durable medical equipment: a plan should account for charging, transport, maintenance, and backup access.
Lighting and communication often determine whether a household can act safely after dark. Store flashlights or lanterns where people can reach them without crossing a dark room, and keep spare batteries matched to the devices. A battery or hand-crank radio may provide useful official information when internet service fails, but it should complement—not replace—local alert enrollment and a charged mobile phone. A portable charger is useful only if it is maintained and compatible with the household’s devices.
Keep one compact bag for rapid departure and a separate home reserve for sheltering. This avoids the false choice between carrying every supply and leaving essential items behind. Label the bags, check them on a schedule, and rotate food, batteries, and personal items. Readers comparing broader Household emergency preparedness priorities by risk should judge each item by its failure mode: what happens if it is missing, inaccessible, expired, or impossible to use without electricity?
Match Supplies to Specific Hazards
Hazard-specific preparation changes the balance between staying and leaving. Wildfire planning emphasizes warning awareness, quick evacuation, clean-air decisions, and protection from smoke. Flood planning emphasizes moving to safer ground, avoiding contaminated water, protecting records, and never assuming a familiar road remains passable. Winter weather shifts attention toward warmth, safe indoor lighting, food, water, and transportation limits during prolonged outages.
For wildfire or fast-moving smoke, keep shoes, identification, medications, chargers, and pet carriers near an exit. Know at least two routes if local geography permits, but do not treat a printed route as a guarantee; closures and changing conditions can invalidate it. Follow official evacuation instructions and avoid delaying departure to gather possessions. Smoke-related equipment should be selected carefully, fit the user, and never be treated as permission to remain in an unsafe area.
Flood preparation is often weakened by an assumption that a vehicle provides a safe escape. Water can conceal road damage, debris, or electrical hazards, and a route that looks clear may become dangerous quickly. Store important records in waterproof protection, identify higher ground, and plan for household members who cannot move quickly. Do not rely on a basement as a default shelter when rising water is a concern. Water storage and sanitation also deserve special attention because municipal service may be interrupted or unsafe.
For winter storms and extended outages, warmth is the central constraint. Extra blankets, layered clothing, safe lighting, and food that needs little cooking may matter more than a large collection of general tools. Never use outdoor combustion equipment indoors or in an enclosed space because of carbon monoxide risk. If a medical device, furnace, or well pump depends on electricity, determine its backup requirement before the storm rather than discovering it after the outage begins.
Earthquakes and severe wind events create a different problem: supplies may be available but difficult to reach because shelves, glass, or debris block access. Secure heavy objects, keep sturdy footwear and gloves accessible, and avoid storing the emergency kit where it could be buried. A household that shelters in place needs water, sanitation, first aid, and communication; a household ordered to evacuate needs identification, medication, transportation, and a destination. Generic advice fails when it ignores that difference.
Turn Supplies Into a Working Household Plan
A preparedness plan works when each person knows what to do without waiting for one organizer to make every decision. Assign practical roles, but keep backups because the usual caregiver may be away, injured, or unable to communicate. Decide how household members will receive alerts, where they will meet if separated, who collects children or pets, and which out-of-area contact can relay information.
Practice the decisions that are hardest under stress. A brief drill might involve leaving through an alternate exit, locating medications in low light, turning off a utility only when it is safe and appropriate, or contacting a family member without relying on one phone number. The purpose is not theatrical repetition. It is to expose friction: a carrier does not fit the pet, a child cannot open the food container, a charger is missing its cable, or a meeting location is inside a likely evacuation zone.
Review the plan seasonally and after household changes. New prescriptions, a vehicle change, a move, a new pet, pregnancy, disability, or an aging relative can alter priorities. Check official local emergency management information for evacuation zones, alert systems, shelter rules, and hazard-specific instructions. A national checklist can provide a useful foundation, but local geography and building conditions determine which details require emphasis. The American Red Cross guidance linked below is a useful starting point for household supply and safety checks; local authorities should control event-specific instructions.
Budget constraints make prioritization especially valuable. Buy or assemble the universal base first, then direct remaining money toward the most consequential local hazard. A hand tool with several plausible uses may be more useful than a specialized device that depends on training, fuel, or maintenance. On the other hand, a household with a generator, oxygen concentrator, well pump, or refrigerated medicine may need specialized backup planning earlier than another family. The right comparison is not cheap versus expensive; it is essential failure versus optional convenience.
Use this review question for every major item: can the household identify it, operate it, maintain it, and transport it when conditions are difficult? If the answer is no, the item belongs in a training or replacement decision, not merely on a shopping list. That approach makes Household emergency preparedness priorities by risk a living system rather than a one-time purchase.
Frequently Asked Questions
Which household supplies should come first?
Prioritize drinking water, essential medications, first aid, lighting, communication, sanitation, and food that can be used without normal utilities. Add hazard-specific supplies after these basics are accessible and maintained.
How should a family prepare for both evacuation and sheltering?
Keep a portable departure bag separate from a home reserve. The bag should support rapid movement, while the reserve should cover water, food, sanitation, lighting, and medical needs during an outage or temporary shelter period.
How often should emergency supplies be checked?
Review them at least seasonally and whenever prescriptions, household members, pets, vehicles, or local risks change. Rotate food, inspect batteries, recharge power banks, and replace clothing or documents that no longer fit the household.
What changes for households with medical or mobility needs?
Plan for medication continuity, device charging, transportation, accessible exits, mobility aids, and backup caregivers. Confirm specialized requirements with the relevant clinician, pharmacist, equipment provider, or local emergency service.
Should households buy a generator before other equipment?
Not automatically. A generator may be valuable when critical equipment depends on electricity, but it requires safe placement, fuel management, maintenance, and proper operation. Basic water, medication, lighting, communication, and sanitation needs generally come first.
Conclusion
Effective household preparedness is a ranking exercise, not a contest to accumulate equipment. Put immediate life-safety needs first, then build the ability to function without power, water service, communications, or easy transportation. Let local hazards determine the next layer: evacuation and smoke decisions for wildfire, higher-ground routes for floods, warmth and safe outage practices for winter weather, and accessible supplies after earthquakes or severe wind. Keep departure bags separate from home reserves, include the needs of pets and medically vulnerable people, and practice the actions that could fail under pressure. A seasonal review should confirm that supplies are usable, routes remain relevant, and every household member knows the first move for the risks most likely to affect the home.