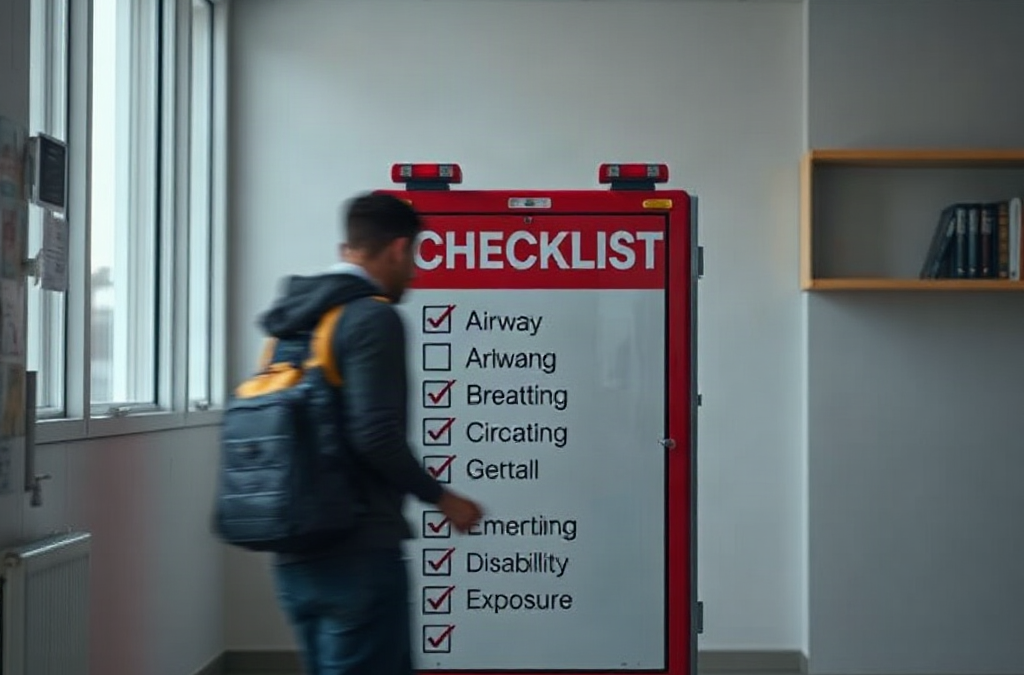
The ABCDE sequence gives an emergency assessment a fixed priority: Airway, Breathing, Circulation, Disability, and Exposure. It is designed for situations in which a person may be seriously ill or injured and the rescuer must identify threats that can become fatal quickly. The order is not a checklist to complete once and forget. It is a repeating cycle of observation, action, and reassessment while professional help is on the way.
Airway and breathing come before a detailed injury survey because oxygen cannot reach the body if air cannot enter the lungs or the lungs are not working effectively. Circulation follows because major bleeding and poor blood flow can cause rapid deterioration even when breathing appears normal. Disability then focuses on responsiveness and neurological warning signs, while Exposure allows the rescuer to find hidden injuries without unnecessarily removing clothing or causing heat loss.
A useful practical distinction is the difference between an assessment and a diagnosis. A bystander may notice noisy breathing, pale skin, confusion, or uncontrolled bleeding, but those observations do not identify the underlying medical condition. Use the findings to choose an immediate protective action and communicate clearly with the dispatcher. If the person is unresponsive, not breathing normally, or has life-threatening bleeding, contact emergency services immediately and follow dispatcher instructions rather than delaying to complete every category.
Keep the ABCDE emergency checklist steps explained in mind as a priority ladder, not a substitute for first-aid training. A trained clinician may use more detailed measurements and interventions; a household responder should concentrate on scene safety, rapid recognition, basic first aid within training, and timely escalation.
Airway and Breathing Checks
The airway check asks whether air can move into and out of the person’s lungs. Look at the person, speak loudly, and assess whether they can answer coherently. A person who can speak in a normal voice is usually moving air at that moment, although this does not rule out serious illness. An unresponsive person requires immediate attention to airway patency and normal breathing.
Signs of airway trouble can include choking, abnormal gurgling, snoring-like sounds in an unconscious person, inability to speak, or visible obstruction. Do not blindly sweep inside the mouth, because a finger can push an object farther back. If a responsive adult or child is choking and cannot cough, speak, or breathe effectively, use the choking response appropriate to your training and local first-aid guidance. If the person becomes unresponsive, lower them safely and begin the emergency response directed by dispatch.
Breathing is more than noticing that the chest moves. Check for normal movement, effort, rate, and sound while avoiding a prolonged examination. Occasional gasps, known as agonal breathing, are not normal breathing and should not be treated as reassuring. Severe wheezing, blue or gray coloration, inability to speak in full phrases, or rapidly increasing effort are warning signs that require urgent emergency help.
A common mistake is spending too long searching for a pulse or trying to identify the exact respiratory cause before calling for help. The safer approach is to recognize abnormal breathing promptly, use the speaker function on the phone if possible, and follow dispatcher instructions. If the person is unconscious but breathing normally, protect the airway according to your training and monitor continuously; if breathing is absent or abnormal, begin the response you have been instructed to perform.
For a person with a possible spinal injury, avoid unnecessary movement, but do not allow fear of moving the neck to prevent airway support or resuscitation when those actions are required. Airway and breathing threats take priority over a perfect position.
Circulation and Immediate Threats
The circulation step looks for life-threatening bleeding, signs of shock, and evidence that blood is not reaching the body effectively. Severe external bleeding may be obvious, but it can also collect beneath clothing or come from an area partly hidden by furniture, equipment, or darkness. Once airway and breathing concerns are addressed, scan quickly for blood loss and apply firm direct pressure with a dressing, clean cloth, or gloved hand when appropriate.
Do not repeatedly lift the dressing to inspect the wound. Interrupting pressure can restart bleeding and remove early clotting. If blood soaks through, add material on top and continue pressure unless trained guidance directs another method. A commercial tourniquet may be appropriate for catastrophic limb bleeding when the responder has been trained to use one; improvised devices and uncertain placement can cause harm, so emergency dispatch guidance is valuable.
Other circulation clues include unusually pale, gray, cool, or clammy skin; weakness; faintness; confusion; and a rapid or weak pulse when a trained responder is checking it. These signs are not specific enough to establish a diagnosis, but they justify urgent professional assessment. Keep the person still, protect them from cold, and do not give food, drink, or medication to someone who may need urgent procedures or who cannot swallow safely.
Consider the tradeoff between a detailed body check and controlling an obvious threat. If a person has a spurting wound, the priority is effective pressure, not a complete history. If no major bleeding is visible, continue with the assessment while monitoring for changes. A frequent failure mode is treating a small-looking wound as harmless because the opening is narrow; bleeding severity depends on the damaged vessel and location, not only on wound size.
When communicating with emergency services, describe what you can observe: amount and location of bleeding, skin changes, responsiveness, breathing quality, and actions already taken. The checklist sequence is most useful when it produces clear information that responders can act on.
Disability, Exposure, and Reassessment
Disability is a focused neurological check rather than a full medical examination. Determine whether the person is alert, responds to speech, responds only to stimulation, or does not respond. Note sudden confusion, slurred speech, one-sided weakness, seizure activity, unequal movement, or a severe change from the person’s normal behavior. If the person has diabetes, prescribed rescue medication, or a known neurological condition, tell emergency services, but do not assume a familiar diagnosis explains every emergency.
Ask simple questions such as their name, location, and what happened if they are awake. Confused answers may indicate reduced oxygen delivery, head injury, stroke-like symptoms, intoxication, low blood sugar, or another problem. The purpose of the check is to identify deterioration and communicate it, not to label the cause. Never give oral food, drink, or medication to a drowsy or poorly coordinated person because swallowing may be unsafe.
Exposure means looking for injuries or illness that were missed during the first scan. Open or cut clothing only as necessary, preserve privacy, and inspect areas hidden by clothing when the situation warrants it. Look for burns, deformity, rash, penetrating injuries, swelling, and bleeding. Then cover the person promptly. A cold surface, wet clothing, or prolonged exposure can worsen distress and heat loss, while excessive covering can be problematic for someone who is overheating.
Reassessment connects every part of the sequence. After controlling bleeding, changing a position, or helping with a prescribed emergency device when trained, return to airway and breathing. A person who was talking may become less responsive; a wound that looked controlled may begin bleeding again. Write down or remember the time of major changes, what was observed, and what was done. This information can improve the handoff to arriving responders.
The practical balance is speed without tunnel vision. A rapid check is better than a slow inspection that delays emergency contact, but a single pass is not enough. Continue watching the person until trained help takes over, and do not leave an unstable person alone to retrieve supplies unless another responsible adult is monitoring them.
Common Mistakes and Practical Use
The ABCDE framework works best when paired with scene safety and early activation of emergency services. Before approaching, check for traffic, fire, electricity, violence, chemicals, unstable structures, or other hazards. A rescuer who becomes injured creates a second emergency. Use gloves or a barrier if available, but do not delay an urgent call because protective equipment is not immediately at hand.
Several weak assumptions make emergency checklists less effective. A conscious person is not necessarily stable, normal-looking skin does not rule out internal injury, and the absence of visible blood does not prove circulation is adequate. Conversely, a dramatic symptom should not prompt unsafe treatment outside the responder’s training. The goal is to identify immediate threats, provide basic aid, and transfer responsibility to professionals.
A compact working sequence is:
Protect: make the scene as safe as reasonably possible and use barriers when available.
Alert: call emergency services early, state the location, and use speakerphone if hands-on care is needed.
Assess: move through Airway, Breathing, Circulation, Disability, and Exposure.
Act: address the most urgent threat within your training and dispatcher guidance.
Recheck: repeat the sequence after every significant change.
Practice matters because stress narrows attention and makes people forget steps they have only read once. A household can keep gloves, dressings, a flashlight, and emergency contact information together, while each adult learns how to call for help and describe a location. Supplies support action but do not replace training; a sophisticated kit is less useful than a responder who recognizes abnormal breathing and summons help promptly.
Use reputable first-aid instruction to learn techniques that require hands-on practice, such as CPR, choking response, bleeding control, and use of an automated external defibrillator. The ABCDE assessment provides structure, but local emergency dispatchers and trained medical personnel should guide decisions beyond basic first aid.
For hands-on skills and current response instructions, consult recognized first-aid and resuscitation organizations, local emergency services, or an accredited training provider. Official instruction is preferable to relying on a checklist alone, particularly for CPR, choking, severe bleeding, and situations involving children.
Frequently Asked Questions
What does ABCDE stand for in an emergency assessment?
It stands for Airway, Breathing, Circulation, Disability, and Exposure. The order helps identify immediate threats before less urgent details.
Should I complete the whole ABCDE sequence before calling emergency services?
No. Call immediately for unresponsiveness, abnormal breathing, severe bleeding, or another obvious emergency. Reassess while following dispatcher instructions.
What counts as abnormal breathing?
Gasping, irregular breaths, severe effort, inability to speak normally, or very poor air movement should be treated as abnormal and reported urgently.
Why is exposure included if the person already has an obvious injury?
Additional bleeding, burns, deformity, or injuries may be hidden by clothing. Expose only as needed, protect privacy, and prevent unnecessary heat loss.
Can the ABCDE checklist diagnose the person’s condition?
No. It organizes urgent observations and first actions; diagnosis and advanced treatment require qualified medical professionals.
Conclusion
ABCDE is most valuable when it keeps attention on threats that can worsen quickly. Make the scene safe, activate emergency services early, check airway and breathing before moving to circulation, then assess responsiveness and hidden injuries. Control severe bleeding, support breathing or resuscitation only within your training and dispatcher guidance, and repeat the assessment whenever the person changes. Avoid common errors such as delaying the call, giving fluids to someone with impaired consciousness, blindly searching the mouth, or leaving a deteriorating person unattended. A printed checklist can support memory, but practical first-aid training remains the better preparation. The next useful step is to learn CPR, choking response, and bleeding control from a recognized provider and to keep essential supplies accessible.
A public-space emergency poster should answer the visitor’s next practical question: What should I do here, right now? The answer depends on the hazard, the building, and the person’s location. A poster near a stairwell may direct people to an exit, while one in a community center may identify shelter rooms, accessible routes, and where updates will be posted. The strongest designs do not attempt to teach every emergency procedure on one page.
Use a clear hierarchy. The first line should state the action, such as Leave Through the Marked Exit, Move Away From Windows, or Call for Assistance at the Service Desk. The next information should explain where to go or what to avoid. A final line can identify the official source for updates. This structure is more useful than a dense list of general safety facts because people scanning a wall poster may have only seconds to interpret it.
Posters should distinguish between universal actions and site-specific instructions. “Stay calm” offers little operational help by itself; “Take the nearest marked stairwell and do not use elevators” gives a person a route decision. Similarly, “Be prepared” is weaker than “Bring medication, mobility aids, and essential documents if they are within reach and doing so does not delay evacuation.” The wording should remain cautious where conditions vary. A building manager should not promise that a particular exit is safe during every incident unless the emergency plan supports that instruction.
A useful way to build a message is to identify four elements: the hazard signal, the immediate behavior, the destination or boundary, and the information source. For example, a severe-weather poster might say to move indoors, choose an interior room away from windows, avoid elevators if directed otherwise, and monitor official alerts. A fire poster needs a different sequence. Linking to Emergency preparedness poster ideas for public spaces can help a facilities team compare messages without copying a one-size-fits-all template.
The common failure is treating the poster as a miniature emergency plan. A plan may contain staff roles, reunification procedures, utility shutoffs, and documentation requirements; a public poster should show only the information visitors need at that location. If a message cannot be understood from several feet away, it belongs in staff materials or a detailed webpage rather than the main wall display.
Poster Concepts for Different Emergency Settings
The most useful poster concept changes with the setting because people face different hazards, entrances, exits, and levels of familiarity. A hospital, school, office lobby, sports venue, transit platform, and public library should not receive identical artwork with only the building name changed. Each poster should reflect the decisions people are likely to make in that place.
High-traffic entrances and lobbies
An entrance poster can show the building’s emergency exits, accessible routes, assembly area, and the location of help desks or emergency phones. Keep the map oriented to the viewer’s position when possible. A “You are here” marker is useful only if it is accurate and easy to locate. A map that includes every corridor, office, and storage room may look thorough but can hide the route that matters.
Transit stations and parking facilities
Transit posters should emphasize platform exits, emergency intercoms, staff locations, and what to do when a route is blocked. In a parking garage, lighting, stairwell identification, vehicle movement, and smoke hazards may matter more than a general evacuation paragraph. A simple diagram can show pedestrians moving toward marked exits rather than toward vehicle ramps. The alternative—posting only a generic “evacuate immediately” notice—leaves visitors without a destination.
Schools, libraries, and community buildings
These spaces often serve children, older adults, visitors with disabilities, and people who may not speak the dominant local language. Posters can use pictures for evacuation, sheltering, reunification, and assistance requests, but symbols should support words rather than replace them when interpretation could be ambiguous. A library might use separate posters for severe weather sheltering, fire evacuation, and power outage procedures instead of combining unrelated instructions into a crowded display.
A practical planning exercise is to walk through the building as a first-time visitor. Note where someone would pause: a confusing hallway, elevator bank, locked door, stairwell entrance, or large open room. Those decision points are better poster locations than a wall selected merely because it has empty space. Avoid placing a poster where crowd flow, equipment, decorations, or glare will cover it.
One misleading assumption is that a poster designed for staff will work for the public. Staff may know alternate exits and internal terminology; visitors do not. Public-facing text should use ordinary words such as “stairs,” “exit,” “assembly area,” and “help desk,” with technical terms added only when the building routinely uses them and explains them clearly.
Designing Instructions People Can Follow Quickly
Good emergency poster design is a decision aid, not a decorative announcement. Readers often encounter a poster while moving, waiting, carrying belongings, assisting another person, or dealing with noise and poor lighting. Large action words, high contrast, generous spacing, and a predictable reading order reduce the effort required to understand the message.
Begin with one primary action. Supporting actions can follow in a short numbered sequence. For example:
Leave: use the nearest marked exit.
Move: go to the posted assembly area.
Report: tell staff about anyone needing assistance.
This format is more effective than placing six equally bold commands on the page. If several actions are equally important, use separate posters or clearly labeled panels. Color can distinguish topics, but color should not carry meaning alone because lighting conditions and color-vision differences may make a red-versus-green distinction unreliable. Pair color with words, icons, borders, or shapes.
Icons should depict familiar actions and be tested with people who were not involved in creating the design. A designer may recognize an abstract symbol that visitors interpret differently. Arrows also need care: an arrow pointing toward a wall, a door that is normally locked, or an unmarked corridor can create dangerous confusion. Use real photographs or simplified site diagrams when they make the destination easier to recognize.
Language access requires more than translating every sentence into smaller type. A bilingual poster with four long paragraphs may be less usable than two well-spaced language panels, each with the same action order. Consider plain-language translations, local community needs, and whether audio, tactile, or digital alternatives are available. A QR code can provide expanded instructions, but it must not replace the visible emergency action because phones may be unavailable, uncharged, or prohibited in the situation.
The common mistake is adding too much explanation to appear authoritative. Background information about hazards belongs in training materials. The public poster should answer what to do, where to go, what not to use, and how to obtain verified updates. A short message that people can remember is generally more useful than a complete policy printed in miniature type.
Placement, Accessibility, and Maintenance
Placement determines whether a well-written poster is seen before or after a person has to make a decision. Install evacuation information near entrances, intersections, stairwell doors, elevators, service counters, and other points where visitors naturally pause. Place shelter instructions near rooms or corridors that lead to the intended shelter area. A poster hidden behind a queue, vending machine, or temporary display is functionally absent.
Visibility should be checked from the actual approach path rather than from directly in front of the wall. Look for glare from windows, dim corridors, competing signs, raised displays, and viewing distances that make body text unreadable. Mounting height should suit the audience and location, while accessible routes should remain clear. A poster that points visitors toward an inaccessible doorway without explaining an alternative can create a second emergency problem.
Accessibility also includes cognitive and sensory considerations. Use plain language, strong contrast, readable type, meaningful headings, and consistent symbols. Provide equivalent information through staff assistance, accessible digital content, or other formats where the setting supports them. Do not assume that a person who cannot see a wall poster can simply scan a QR code; digital content must work with common accessibility tools and remain current.
Maintenance is part of the poster’s safety function. Review signs after renovations, changes to furniture, new construction, altered assembly areas, updated phone numbers, and changes in building access. A monthly visual check may catch a covered arrow or faded print, while a scheduled plan review should confirm that the instruction still matches the facility’s emergency procedures. The sign should be removed or replaced when its route is no longer valid.
A useful compact review checklist includes:
Can a visitor identify the required action within a few seconds?
Does the route shown match the current building layout?
Can people with different language, vision, hearing, mobility, or reading needs use the information?
Are official updates and staff assistance identified without implying that a QR code is the only option?
Is the poster visible at the point where the decision occurs?
The failure to avoid is “install and forget.” A sign may remain physically present while becoming operationally false. Treat each poster as a controlled piece of facility information, not permanent wall decoration.
Testing Posters Before an Emergency
Testing reveals problems that proofreading cannot. Ask people unfamiliar with the building to find the poster, describe the first action, identify the destination, and explain what they would do if the obvious route were blocked. Observe rather than coaching them. If several readers miss the same arrow or interpret a shelter room as an exit, the design needs revision.
Run tests in realistic conditions when safe: from a normal walking path, under evening lighting, during background noise, and with common displays or queues in place. A poster that works in a quiet conference room may fail in a crowded station. Include people with mobility devices, low vision, limited English proficiency, and different levels of familiarity with emergency symbols. Their feedback can expose assumptions that a professional design team shares.
Testing should cover both immediate comprehension and route accuracy. A reader might understand “use the stairs” but still choose a stairwell that leads to a restricted area. Compare the poster with the current building plan and ask staff whether the instructions remain appropriate for different hazards. Fire evacuation, severe-weather sheltering, hazardous-air guidance, and power-loss procedures may require different destinations and different warnings.
Keep a simple change record showing the poster version, location, review date, responsible department, and reason for revision. This makes it easier to identify which signs need replacement after construction or policy changes. If the poster relies on a public alert system, verify that the named source is still used and that visitors can understand how to access it.
The practical sign of success is not that people praise the design. It is that an unfamiliar visitor can identify a sensible next step without asking staff to translate the entire poster. If readers hesitate, argue about the direction, overlook the sign, or depend on a phone link, revise the message before treating it as finished. More ideas for refining Emergency preparedness poster ideas for public spaces should be evaluated against the actual building rather than adopted as generic artwork.
For additional planning context, consult guidance from local emergency management offices, building authorities, accessibility professionals, and recognized fire-safety organizations. Their materials can help confirm evacuation terminology, alert methods, accessible communication practices, and site-specific requirements before a poster is published.
Frequently Asked Questions
What should appear first on an emergency poster?
Put the immediate action first, using a short command such as leave, shelter, move away, or contact staff. Follow it with the destination and any critical restriction.
How many emergency instructions should one poster contain?
Limit the main display to the actions people need at that location. Separate unrelated hazards into distinct posters when combining them would reduce readability or create conflicting directions.
Where should public-space preparedness posters be placed?
Place them at entrances, intersections, stairwell doors, elevators, service desks, shelter routes, and other points where visitors must choose a direction or action.
Should an emergency poster include a QR code?
A QR code can provide expanded information, maps, or translations, but it should supplement—not replace—the visible action, route, and assistance instructions.
How often should emergency posters be reviewed?
Review them after building, route, contact, or procedure changes and include them in routine facility inspections. Check visibility and physical condition more often in busy or exposed locations.
Conclusion
Effective public-space preparedness posters make the next safe decision visible before confusion spreads. Prioritize one immediate action, a recognizable destination, readable design, accessible alternatives, and instructions that match the actual building. Use separate messages when evacuation, sheltering, hazardous-air protection, or assistance procedures differ. Then test each poster with people who do not know the facility, inspect it from normal walking paths, and revise it when routes or contacts change. A polished graphic is not enough if visitors cannot see it, understand it, or follow the route it shows. The strongest poster program treats every sign as operational information: location-specific, routinely checked, and supported by staff procedures and official alerts.
Why Decision-Based Drills Reveal More Than Checklists
A checklist confirms that someone knows an item or task exists; a decision-based drill shows whether the household can use that knowledge when conditions conflict. During a disruption, people may need to choose between leaving immediately and waiting for more information, using stored water now or preserving it, taking one vehicle or splitting up, or helping a neighbor without exposing children to unnecessary risk. Those choices expose weaknesses that a calm review rarely finds.
The most useful exercise has a defined starting condition, a limited objective, and a few facts that change during the session. For example, begin with a nighttime power outage and a text alert suggesting hazardous road conditions. After five minutes, introduce a dead phone battery, a missing household member, or a notice that the usual meeting location is inaccessible. Participants must state what they would do next and what information would change that decision.
That structure is more revealing than asking everyone to recite an evacuation plan. Recitation rewards memory; a changing scenario tests judgment, role clarity, and communication. It also shows whether a plan depends on one person knowing passwords, operating a generator, locating documents, or interpreting alerts. A household that owns useful supplies but cannot agree on who makes a call under pressure has a coordination problem, not merely an inventory problem.
Keep the first exercise narrow. Test one decision chain, such as receiving an evacuation notice, rather than combining fire, medical injury, flooding, and cyber outage in one session. A common failure is making the scenario so dramatic that participants improvise wildly and learn little. Realism comes from plausible constraints and competing priorities, not from maximum chaos.
How to Build a Realistic Household Scenario
A strong scenario mirrors the risks, people, and geography of the household being tested. An apartment resident may need to evaluate stair access, building announcements, elevators, and nearby meeting points. A rural household may face longer travel distances, limited cellular coverage, livestock responsibilities, or a single road that becomes unusable. The exercise should test the decisions that location and household composition make likely.
Write the scenario in three layers: the initial condition, the decision trigger, and the complication. An example might begin with a winter outage lasting several hours. The trigger is an indoor temperature falling while a family member needs refrigerated medication. The complication is that the preferred warming location is full and a relative cannot drive. Participants then identify immediate actions, information they need, and a safe fallback rather than jumping to an idealized answer.
Use decision points that have observable outputs. “What do you do?” is too broad to evaluate. Better prompts ask, “Who checks the official alert, what source do they use, and when do you leave?” or “Which water containers are opened first, and how will use be tracked?” Answers can then be compared with the written plan. If no threshold exists, the absence itself becomes a useful finding.
Include accessibility and family dynamics rather than treating them as afterthoughts. A drill may need to account for a child who cannot walk long distances, an older adult who needs medication, a pet that cannot enter every shelter, or a participant who does not speak the household’s primary language fluently. The alternative to realism is often hidden exclusion: a plan that works only for the fastest, healthiest, or most informed person.
Do not use real danger to create realism. Never block exits, disable safety equipment, handle hazardous materials, or simulate medical treatment beyond basic safe discussion. A tabletop exercise, timed walk-through, or controlled communication test can expose most planning weaknesses without adding physical risk.
Testing Information, Time Pressure, and Limited Supplies
Decision quality depends on what people know, how quickly they can verify it, and what resources remain available. A drill should therefore test information flow as deliberately as evacuation routes or stored food. Give participants a short alert, an unverified social-media claim, and a known official source, then ask them to explain which information they trust and why. The goal is not to reward speed alone; it is to see whether the household can avoid acting on a rumor while still meeting a real deadline.
Time limits should reflect the decision rather than create artificial panic. A five-minute window may be appropriate for gathering essential items before leaving, while a longer period may fit a water-storage or family-contact exercise. Record when a choice was made, but also record whether the choice was reversible. Waiting for confirmation may be sensible when conditions are unclear, yet dangerous when an evacuation order or rapidly changing hazard leaves little margin.
Resource constraints make the exercise meaningful. Remove one expected phone charger, assume the car has less fuel than usual, or limit participants to the supplies stored in their designated location. Do not secretly create impossible conditions; announce the constraint when it becomes relevant. This reveals whether the plan has substitutes. For instance, if the only printed contact list is in a locked office, the household may need a second copy in an accessible place.
Information: Can someone distinguish an official instruction from an unconfirmed report?
Time: Does the household know which action cannot safely wait?
Supplies: Are essential items usable without searching through several rooms?
Roles: Can another person take over if the usual coordinator is unavailable?
A useful comparison is a timed drill versus an untimed tabletop discussion. The untimed format supports complex planning and is less stressful for children or people with disabilities. The timed format exposes delays, search problems, and unclear authority. Use both, but do not treat a fast result as automatically good. A hurried decision based on a false alert is a failure even if the household moved quickly.
Signs that the exercise is working include participants naming assumptions, asking for specific missing information, and identifying a safe fallback. Signs it is failing include arguing over hypothetical details, waiting for one expert to give every answer, or treating a written plan as proof that an action is possible.
Debriefing the Exercise and Correcting Weak Points
The debrief converts a stressful rehearsal into a better plan. Hold it soon after the exercise, while participants remember what they saw, assumed, and attempted. Ask each person to describe the first point of uncertainty, the information they wanted, and the action they would change. Avoid turning the discussion into a search for blame; embarrassment encourages people to hide hesitation in future drills.
Separate observations from interpretations. “The flashlight was not found for four minutes” is an observation. “The storage system is poor” is an interpretation that may be correct, but it should be tested. Perhaps the flashlight was labeled incorrectly, the responsible person was absent, or the route to the storage area was blocked. Identifying the mechanism matters because each cause requires a different fix.
Rank findings by consequence, frequency, and ease of correction. A missing emergency contact may deserve immediate attention because it affects every scenario. Replacing a complicated binder with a one-page contact sheet may be a quick improvement. By contrast, changing a meeting location may require coordination with relatives or property managers. Record an owner and a deadline for each correction; otherwise the debrief becomes a conversation that produces no operational change.
Run a short retest after corrections. If the first exercise showed that nobody knew when to leave, revise the threshold and ask the same question in a later scenario. If the problem was a dead phone, test the backup charging method rather than merely buying another cable. The retest should measure behavior, not whether participants remember the lesson verbally.
A frequent mistake is treating every disagreement as a planning failure. Some decisions legitimately depend on changing conditions, and a rigid rule may be less safe than a clear decision process. The aim is to define who checks which source, who has authority for a time-sensitive action, and what conditions trigger a change. Flexibility works when the household shares the same boundaries.
A Practical Rotation for Ongoing Readiness
Readiness improves when drills are short, varied, and repeated often enough to reflect changes in people, equipment, and routines. A household does not need a dramatic exercise every month. A rotating schedule can test one decision pathway at a time: communication, sheltering, evacuation, water management, power loss, or support for a dependent person.
Begin with a low-stress tabletop discussion. Next, conduct a walk-through that locates supplies and confirms access routes. Later, add a time limit or a missing resource. All in all, test the revised plan with the usual coordinator absent. This progression is more useful than starting with a complex scenario that overwhelms participants and produces conclusions too broad to act on.
Keep a simple drill record containing the date, scenario, decisions tested, delays, equipment problems, and assigned corrections. Note conditions that affect the result, such as a sleeping child, bad weather, or a participant being away. Those details help distinguish a one-time inconvenience from a recurring design flaw.
Use internal planning references as living documents, including Emergency preparedness drills that test real decisions when reviewing scenario ideas and follow-up notes. A household plan should also connect to its Emergency preparedness drills that test real decisions record so that changes to contact information, transportation, medications, or storage locations are reflected in future exercises.
The best next drill is usually the one that tests the last unresolved high-consequence problem. If nobody can verify an alert, test verification. If supplies are available but inaccessible, test retrieval. If family members disagree about leaving, test the threshold and authority. That approach keeps effort focused on actual failure points rather than producing a polished but untested plan.
For scenario design and local protective-action decisions, consult official emergency management agencies, local public safety offices, and recognized organizations such as Ready.gov or the American Red Cross. Their guidance can help households align drills with local hazards, alert systems, shelter options, and accessibility needs.
Frequently Asked Questions
What makes a preparedness drill test a real decision?
It presents a changing condition, limited information, or a resource constraint and asks participants to choose a specific action with a stated reason and threshold.
How long should a household drill last?
A focused exercise may take 15 to 30 minutes, followed by a debrief. Longer sessions are useful for complex planning but should not replace short retests of specific weaknesses.
Should drills use surprise events?
Moderate surprise can reveal dependence on one person or one resource, but participants should know the exercise is occurring and all physical activities must remain safe.
What should be recorded during a drill?
Record decisions, delays, missing information, inaccessible supplies, communication failures, and the person responsible for each corrective action.
How often should emergency drills be repeated?
Repeat a focused test after a major change or correction, and rotate different scenarios throughout the year so communication, evacuation, sheltering, and supply access are not practiced only once.
Conclusion
A useful preparedness drill does not reward the household for reciting a flawless plan. It reveals what happens when information is incomplete, time is limited, a key person is absent, or an expected resource cannot be used. Choose one realistic decision chain, define observable actions, introduce a controlled complication, and protect participants from unnecessary physical risk. Then debrief the causes of hesitation rather than blaming the people who experienced it. Give each correction an owner, retest the highest-consequence weakness, and update contact details, thresholds, storage locations, and transportation assumptions as circumstances change. Repeated, focused exercises build practical reliability because they turn plans into decisions that household members can actually make under pressure.
A four-level emergency operations plan gives an organization a shared way to scale coordination when an incident outgrows routine procedures. The levels are not universal legal classifications, and one agency’s Level One may represent a different workload from another agency’s Level One. Their value comes from defining what changes at each stage: who is notified, which functions are staffed, how often leaders receive updates, and when outside assistance is requested.
The level should measure the organization’s coordination demand, not merely the dramatic appearance of an event. A small chemical spill may require a higher activation than a larger storm if it creates complex public information, evacuation, environmental, and medical coordination problems. Conversely, a wide power outage may remain at a lower level when impacts are limited, resources are available, and normal departments can manage assignments.
Most systems move through four broad stages:
Level One: routine monitoring, limited notification, and management through normal departmental authority.
Level Two: partial activation, expanded coordination, and additional personnel or specialist support.
Level Three: substantial activation for a serious incident affecting multiple functions, locations, or jurisdictions.
Level Four: full or near-full activation for a complex, prolonged, or high-consequence emergency.
These labels should connect to an incident action process rather than stand alone. A plan that names four levels but does not identify decision-makers, reporting intervals, resource procedures, and handoff rules will create uncertainty precisely when staff have the least time to interpret it. A useful Emergency operations plan levels one through four matrix therefore describes actions, not just descriptions.
For example, a facility may remain at Level One while its maintenance supervisor handles a localized water leak. If the leak closes a critical building, affects occupants with access needs, and requires temporary relocation, the event may move to Level Two even though the physical hazard is contained. The operational burden—not the label attached to the hazard—drives the escalation.
Level One and Level Two Operational Differences
Level One is generally a monitored or limited-response condition managed with existing staff, established procedures, and normal supervisory authority. The incident commander or responsible department may document actions, notify selected leaders, and request a small amount of support without opening the full emergency operations center. This level is appropriate when the event is geographically limited, the consequences are understood, and essential services remain within the organization’s normal capacity.
Level One does not mean “no plan.” Staff should still record the time of notification, decisions made, resource use, safety concerns, and conditions that would require escalation. A minor road closure, isolated utility failure, or contained building incident can become harder to manage if early information is lost. The practical test is whether the assigned team can maintain a reliable operating picture while continuing ordinary responsibilities.
Level Two adds coordination capacity. The organization may activate selected emergency operations functions, assign a planning or logistics role, increase leadership notifications, and establish scheduled situation reports. This stage fits incidents that remain manageable but affect more than one department, continue beyond a normal shift, create public messaging needs, or require resources that are not immediately available through routine channels.
Consider a winter storm that initially blocks a few access roads. Public works may handle the first response at Level One. If blocked routes begin affecting a shelter, fuel deliveries, home-care visits, and staff transportation, Level Two becomes more useful because the challenge is now coordination across functions. The mistake would be waiting for widespread damage before expanding the information flow.
The choice between Level One and Level Two should reflect workload and uncertainty. Keeping activation low conserves staff and reduces disruption, but under-activation can leave departments working from different assumptions. Activating too broadly consumes personnel, creates unnecessary reporting, and may obscure the people handling the immediate task. A practical decision rule is to raise the level when routine supervision can no longer maintain a common operating picture or when the incident is likely to cross another operational period.
Level Three and Level Four Escalation
Level Three is designed for a serious incident that requires substantial coordination, sustained staffing, or multi-agency involvement. The emergency operations center may activate several or all core functions, while field command continues managing tactical work. Leadership attention increases, resource requests become more formal, and situation reports may be issued on a set schedule. The central distinction from Level Two is not simply greater damage; it is the number and difficulty of competing decisions.
A major transportation collision, extended communications outage, large public health disruption, or severe weather event could reach Level Three when it affects essential services and requires outside support. One department may still lead the field response, but emergency management, public information, finance, infrastructure, sheltering, and partner agencies need a coordinated structure. Without that structure, scarce equipment may be assigned twice, public messages may conflict, and urgent requests may bypass established priorities.
Level Four is the highest activation in a four-level framework. It usually signals a complex, high-consequence, or prolonged emergency requiring full leadership engagement, continuous coordination, mutual aid, and management across multiple operational periods. The label should not be used casually. Full activation can fatigue staff, expose gaps in relief coverage, and generate a large volume of information that must be verified before distribution.
At Level Four, the plan should address executive decision authority, succession, shift rotations, redundant communications, public information approval, procurement, volunteer or donation management, continuity of essential services, and eventual demobilization. A long event may require separate teams for immediate response, restoration, documentation, and community support. Treating Level Four as a larger version of Level Three without adding endurance and relief arrangements is a common failure.
The tradeoff is speed versus control. A high activation can bring specialists and decision-makers together quickly, but it can also pull people away from field operations and routine services. Escalation should therefore be paired with a written mission for each activated function. If the mission is unclear, staffing expands faster than useful work.
Setting Triggers, Staffing, and Resource Priorities
Activation triggers should combine impact, duration, uncertainty, and coordination demand. A single threshold—such as a number of affected people—rarely captures operational reality. A better plan explains what conditions justify each level and who has authority to activate, raise, lower, or maintain it.
Useful trigger categories include:
Loss or threatened loss of an essential service.
Need for resources beyond normal departmental capacity.
Impacts that cross departmental, geographic, or jurisdictional boundaries.
Expected duration beyond one shift or one operational period.
High uncertainty involving public safety, infrastructure, or rapidly changing conditions.
Need for coordinated public information or formal mutual aid.
Staffing should match functions rather than titles alone. At a lower level, one supervisor may combine several duties. At higher levels, planning, logistics, operations, finance, communications, and liaison responsibilities may need separate owners. Combining roles can conserve personnel during a short event, but it becomes risky when the same person must track resources, write situation reports, answer leadership questions, and coordinate field requests.
Resource prioritization also changes by level. A Level One response may use immediately available equipment. Level Two may require staged supplies, additional transportation, or specialist support. Level Three and Level Four should include a documented request path, approval authority, delivery tracking, and replacement planning. A request is not complete when it is submitted; the organization must know whether the resource arrived, where it went, and whether it solved the operational problem.
For practical use, build a one-page activation matrix with five columns: trigger, authorized decision-maker, minimum staffing, required notifications, and next review time. Test it against a localized incident, a multi-site disruption, and a prolonged regional emergency. If two reasonable planners would select different levels from the same scenario, the trigger language needs refinement.
The Emergency operations plan levels one through four should also identify conditions for de-escalation. Lowering activation too early can strand unresolved resource requests and interrupt public messaging. Maintaining the highest level after essential coordination has stabilized can exhaust personnel and slow recovery work.
Common Planning Errors and Review Practices
The most damaging error is treating the level number as a severity ranking that automatically determines every action. Activation levels are management tools. Their meaning depends on the organization’s size, capabilities, geography, available partners, and responsibilities. A small district may need broad coordination for an incident that a large metropolitan agency handles through routine structures.
Another weakness is writing thresholds that describe conditions but not actions. “Major disruption” is difficult to apply unless the plan states who is notified, which center opens, what reports are required, and which resources are pre-positioned. Vague wording encourages hesitation at the lower levels and overreaction at the higher ones.
Plans also fail when they assume communication will remain available. Staff should identify alternate contact methods, maintain current call-down information, and decide which messages require confirmation. A public information team needs a process for reconciling field reports, leadership decisions, and safety warnings before release. Speed matters, but an unverified message can create additional operational work.
Review the levels through exercises that expose different constraints. A tabletop discussion can test authority and notifications. A functional exercise can test requests, situation reports, and shift changes. After each exercise or actual incident, compare the planned level with the workload that actually occurred. Ask whether staffing was sufficient, whether the trigger was recognized promptly, whether requests were tracked, and whether demobilization was orderly.
A compact review checklist should confirm that each level has:
A named activation authority and backup.
Specific operational triggers and escalation indicators.
Minimum staffing and relief expectations.
Notification, reporting, and public information procedures.
Resource request, tracking, and documentation methods.
De-escalation and demobilization criteria.
Use the resulting findings to revise procedures, contact lists, maps, forms, and training—not merely the narrative plan. The strongest plan is one staff can apply under pressure without searching through several unrelated documents.
For additional planning detail, consult current emergency management doctrine and local jurisdictional procedures, including guidance from the Federal Emergency Management Agency on emergency operations centers, incident coordination, continuity, and operational planning. Local laws, mutual-aid agreements, and agency-specific activation policies should control where they differ from general planning concepts.
Frequently Asked Questions
Are emergency operations plan levels one through four standardized?
No. The four-level concept is commonly used, but labels, triggers, and staffing requirements differ by organization. Always use the definitions in the applicable agency plan.
Does Level Four always mean the largest disaster?
No. It means the organization needs its highest coordination capacity. A smaller event with prolonged uncertainty or complex dependencies may require Level Four activation.
Who should be allowed to change the activation level?
The plan should name a primary authority and backup, while allowing field or departmental leaders to recommend escalation when conditions exceed routine capacity.
When should an organization move from Level One to Level Two?
Escalate when multiple departments, extended duration, public messaging, outside resources, or an unreliable operating picture make normal supervision insufficient.
How often should activation levels be reviewed?
Review them after exercises, real incidents, organizational changes, and major updates to hazards, facilities, communications, staffing, or mutual-aid arrangements.
Conclusion
A four-level emergency operations plan works when every level changes behavior in a clearly documented way. Define the coordination problem each level is designed to solve, then connect it to authority, staffing, notifications, resource tracking, reporting, and relief coverage. Use impact and workload—not the apparent drama of an incident—as the basis for escalation. Test the matrix with both short, localized events and prolonged multi-agency scenarios, because the staffing demands are different. Review de-escalation as carefully as activation so recovery work is not abandoned and personnel are not exhausted. The next practical step is to compare your current plan with the six-part checklist above and resolve any trigger that a reasonable supervisor could interpret in two different ways.
What the Red Cross Checklist Is Designed to Accomplish
The Red Cross emergency preparedness checklist is not simply a shopping list. Its purpose is to help a household continue basic functions when normal services, travel, communication, or outside assistance are interrupted. That means the list needs to connect supplies with decisions: who receives alerts, where people meet, how an evacuation happens, and what happens if a household member is away at work or school.
Preparedness begins with identifying hazards that are plausible in the household’s location. A coastal home may need to emphasize evacuation routes and flood protection, while a rural household may place more weight on extended power loss, road access, or limited local services. The Red Cross provides broad household guidance, but local emergency management offices should supply location-specific evacuation zones, warning systems, and shelter information.
A practical plan normally includes an emergency contact outside the immediate area, two meeting places, an evacuation route, and a method for receiving official updates. Writing this information down matters because a damaged phone, weak signal, depleted battery, or stress can make stored contacts inaccessible. A printed copy in a go-bag and another at home provides a low-technology backup.
Consider a family separated when a severe storm warning arrives. A plan that says “call each other” is weaker than one that identifies the school pickup authorization, the meeting location, the out-of-area contact, and the person responsible for a pet. The Red Cross emergency preparedness checklist explained in practical terms is a coordination tool, not a promise that every emergency will follow a predictable script.
The Supply Categories That Deserve Priority
Emergency supplies should preserve hydration, nutrition, medical needs, information access, and personal safety before adding convenience items. Water is a first-order concern, but storage must match the household’s size, available space, and ability to move containers. Commercially packaged water is convenient; properly stored household containers may be more flexible, but they require attention to cleanliness and replacement guidance.
Food should require little or no cooking when fuel, electricity, or water are limited. Shelf-stable foods such as canned goods, nut or seed products, crackers, ready-to-eat grains, and familiar items for children can be useful. Include a manual can opener and account for allergies, diabetes-related dietary needs, infant feeding, or other restrictions. A stockpile that technically contains calories may still fail if nobody can eat the food safely or prepare it.
Medication and medical equipment deserve separate attention from a general first-aid kit. A first-aid kit may address minor injuries, but it does not replace prescription planning, backup batteries for essential devices, mobility aids, glasses, hearing-aid supplies, or written medication information. Ask a clinician or pharmacist about safe continuity options rather than assuming every prescription can simply be stored indefinitely.
A compact household checklist can be grouped this way:
Water and food: drinking water, shelf-stable meals, special diets, and an opener or utensils.
Light and communication: flashlights, spare batteries, chargers, a battery or hand-crank radio, and written contacts.
Health and sanitation: first aid, prescriptions, hygiene supplies, masks if appropriate, and waste bags.
Documents and protection: identification copies, insurance information, cash in small denominations, sturdy shoes, and basic tools.
Household-specific items: infant supplies, pet food and carriers, backup power, mobility equipment, and comfort items.
The tradeoff is portability. A large home cache may support a prolonged outage, while a go-bag must be light enough to carry. Keep a small departure kit near an exit and a larger reserve in a secure, accessible location. Storing everything in a basement that may flood or in a locked cabinet whose key is unavailable defeats the checklist’s purpose.
Building a Plan That Works During Disruption
A written plan should convert general advice into assigned actions and fallback choices. Start by recording household members, critical needs, normal destinations, meeting places, emergency contacts, and preferred evacuation routes. Then ask what changes if the primary route is blocked, the household cannot return home, or communications are limited to text messages or radio updates.
Communication plans often fail because they depend on everyone making a calm phone call at the same time. A better arrangement gives each person a short contact card, identifies an out-of-area contact, and establishes when to check in. Texting may work when voice calls do not, but no method is guaranteed. Printed instructions remain useful for children, visitors, and anyone who cannot access a password-protected device.
Evacuation planning also requires practical detail. Identify more than one route, confirm where household members and pets can go, and keep the vehicle fueled according to local circumstances. Do not assume a public shelter will accept every animal or provide specialized medical equipment. Call ahead when possible and maintain a carrier, leash, food, records, and medications for pets.
People with disabilities, older adults, young children, or medical dependencies may need a different plan rather than merely extra supplies. A person who uses a powered wheelchair needs charging and transportation contingencies; a child may need an adult authorized for pickup; someone with a hearing impairment may need visual alerts. Include neighbors or caregivers only after confirming their willingness and capacity. A plan built around one unavailable helper has a fragile single point of failure.
Use the preparedness checklist as a prompt for a short household exercise. Pretend the power is out and the primary road is closed. Can everyone find the flashlight, contact card, shoes, medications, and keys? If not, the problem is not a missing category on paper; it is placement, access, or unclear responsibility.
Common Checklist Mistakes and Practical Improvements
The most common mistake is treating preparedness as a one-time purchase. Batteries expire, children outgrow clothing, medications change, contact information becomes outdated, and household members move. A checklist only remains useful when someone owns the review process and records the date of the last check.
Another weak assumption is that official assistance will arrive immediately or that every emergency will allow people to stay home. Emergency services may be focused on urgent rescues, roads may be impassable, and stores or fuel stations may be closed. That does not mean a household must attempt unsafe self-rescue. It means supplies and decisions should cover a reasonable interruption while residents follow official evacuation or shelter instructions.
Buying specialized equipment can also create false confidence. A generator, for example, requires safe placement, fuel management, maintenance, and careful attention to carbon monoxide hazards. A radio is useful only if someone knows how to power it and where to find local alert information. More equipment is not automatically better than a smaller set of accessible, maintained items.
Review the checklist for these failure points:
Food is present but cannot be opened, cooked, or tolerated by household members.
Water is stored where flooding, heat, or building access can compromise it.
Important records exist only on a phone that may be lost or uncharged.
Go-bags are too heavy, hidden, or missing shoes and weather-appropriate clothing.
Pets, caregivers, renters, and household members with access needs were not included.
The right improvement is usually targeted rather than expensive. Move supplies to a reachable location, add a manual opener, print contact details, label medication information, or replace dead batteries. These small corrections often address the actual failure mechanism more effectively than adding another general-purpose gadget.
How to Review and Practice the Checklist
Review the list after a household change, before a season with elevated local hazards, and at a recurring interval that fits the supplies being stored. Check expiration dates, water containers, batteries, phone numbers, clothing sizes, pet needs, and the condition of tools. Rotate food into normal use when appropriate, replacing it with fresh stock so the reserve does not become forgotten waste.
Practice should be brief and realistic. Run a power-outage drill, locate the evacuation kit, test the radio, and identify the first two actions each person would take. A separate exercise can test leaving the home in poor weather or meeting at the backup location. Children can practice contact information without being exposed to frightening detail, while older adults or people with disabilities should help shape the procedure rather than being treated as passive recipients.
After each exercise, record what slowed the household down. A missing key, confusing label, dead charger, inaccessible stairway, or heavy bag points to a specific correction. The sign that a plan is improving is not that the drill feels smooth; it is that problems are discovered before a real emergency makes them harder to fix.
Use official local alerts and Red Cross guidance as living references, then adapt the general checklist to the home, neighborhood, climate, transportation options, and health needs. The Red Cross guidance supplies a strong starting structure, but local evacuation orders and emergency officials take priority during an active incident.
Frequently Asked Questions
How should emergency food be selected?
Choose familiar shelf-stable foods that fit allergies, medical needs, and available cooking options. Include an opener and utensils, and replace items before quality declines.
Should emergency supplies be stored in one place?
Keep a portable go-bag near an exit and a larger reserve in a secure, accessible location. Separate storage may be wiser if one area could flood or become blocked.
How often should a preparedness checklist be reviewed?
Review it after household changes, before relevant hazard seasons, and regularly enough to catch expired food, dead batteries, outdated contacts, medication changes, and children’s clothing needs.
Conclusion
A useful Red Cross emergency preparedness checklist links household supplies to decisions made under pressure. Prioritize water, food, medications, communication, lighting, documents, and the needs of children, pets, older adults, and people with disabilities. Store a portable kit where it can be reached, maintain a larger reserve, and keep printed contacts and instructions available if devices fail.
Next, tailor the general list to local hazards and run a short household drill. Check whether everyone can locate the supplies, identify the meeting places, contact the designated person, and leave safely if the main route is unavailable. Correct the specific failures you find, then review the plan as household needs change. A maintained, practiced checklist is more dependable than a larger collection of forgotten equipment.
Find the gaps most families don’t notice until something goes wrong.
Free. Practical. No fear-mongering.
By requesting this resource, you agree to receive practical PREPARE Magazine guides, tools, and email updates. You can unsubscribe anytime. Privacy Policy