Filtering water using household items is a practical solution in situations where clean drinking water is unavailable. You can effectively remove impurities and contaminants by utilizing common materials found around the house, such as coffee filters, charcoal, and sand. These items work together to create a simple yet effective filtration system.
It’s important to understand the limitations of household filtration methods. While they can significantly reduce particulate matter and some contaminants, they may not eliminate all harmful pathogens or chemicals. Prioritizing the use of clean and safe materials is essential, as using contaminated items can worsen the situation. Always collect water from the cleanest source available, and consider additional purification methods when possible.
Materials Needed for Water Filtration
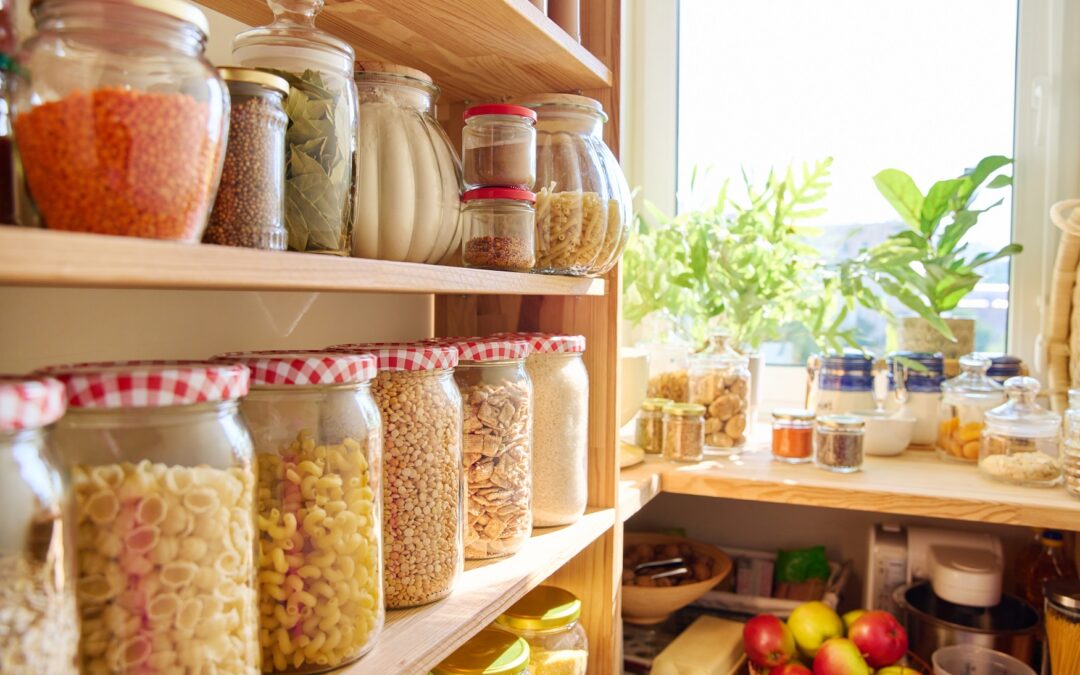
To filter water effectively, gather the following household items: coffee filters or a clean cloth, activated charcoal (from pet stores or health food stores), sand, gravel, and a clean container for collecting filtered water. Each material plays a crucial role in the filtration process, contributing to the removal of different types of contaminants.
When selecting materials, ensure they are clean and free from any chemicals or residues. Coffee filters are excellent for catching larger particles, while activated charcoal absorbs impurities and odors. Sand and gravel help with the initial filtration by trapping larger debris before the water reaches the finer layers.
Step-by-Step Filtration Process
To filter water using household items, follow these steps: First, prepare your filtration container by placing a coffee filter or clean cloth at the bottom. Next, layer activated charcoal, followed by sand, and then gravel. In closing, pour the water slowly into the container, allowing it to pass through each layer.
This method works by progressively filtering out larger particles and impurities. The gravel traps larger debris, the sand catches smaller particles, and the activated charcoal absorbs chemicals and odors. Collect the filtered water in a clean container, and remember that this method does not guarantee complete purification.
Common Mistakes to Avoid
One common mistake is using contaminated materials, which can introduce more harmful substances into the water. Always ensure that the items used for filtration are clean and rinsed before use. Additionally, rushing the filtration process can lead to incomplete filtering; allow the water to flow through each layer slowly for better results.
Another pitfall is relying solely on this method for drinking water, especially in emergencies. Household filtration should be seen as a temporary solution, and it is advisable to boil or chemically treat the filtered water to ensure safety.
When to Use Household Filtration
Household filtration methods are best utilized in emergency situations where clean water sources are scarce, such as during natural disasters or when traveling in remote areas. This method can also be beneficial for pre-filtering water from questionable sources before further treatment.
However, it should not replace proper water purification methods. Always aim to boil water or use water purification tablets after filtering to eliminate potential pathogens. Understanding the limitations of household filtration is crucial for ensuring safe drinking water.
Frequently Asked Questions
Can I use regular sand for filtration?
Yes, regular sand can be used, but ensure it’s clean and free from contaminants.
How effective is charcoal in removing contaminants?
Activated charcoal is effective at absorbing many chemicals and odors but may not eliminate all pathogens.
Is boiling necessary after filtering?
Yes, boiling is recommended to kill any remaining bacteria or viruses after filtration.
Can I use a cloth instead of coffee filters?
Yes, a clean cloth can be used as an alternative to coffee filters for catching larger particles.
How often should I change the filtration materials?
Change the materials whenever they become clogged or after filtering a significant amount of water.
Conclusion
Filtering water using household items is a practical skill that can help ensure access to cleaner water in emergencies. By understanding the materials and methods involved, you can effectively reduce contaminants. However, always prioritize boiling or further purification to ensure safety. Remember that while these techniques can aid in obtaining potable water, they should not replace professional purification methods.
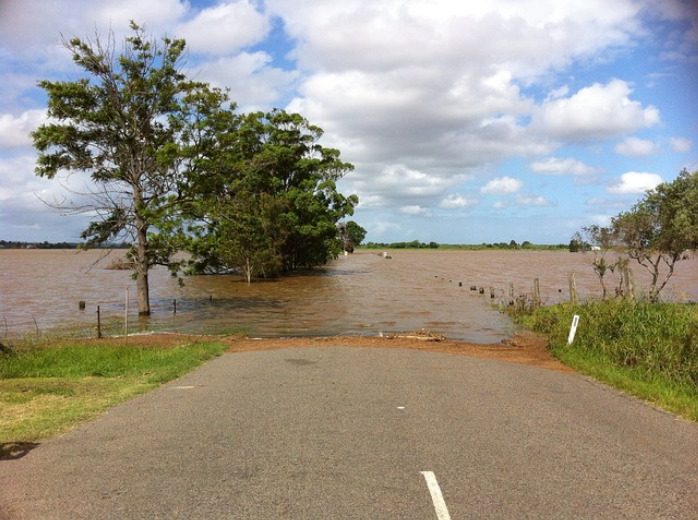
If roads are blocked, the immediate response involves assessing your transportation options and identifying alternative routes. Blockages can occur due to various reasons, including natural disasters, traffic accidents, or construction work. Understanding the cause of the blockage is crucial, as it determines your next steps. For instance, if inclement weather is the cause, it may be safer to wait until conditions improve rather than attempting to navigate hazardous roads.
In practical terms, staying informed is essential. Utilize navigation apps like Google Maps or Waze, which provide real-time updates on traffic conditions and suggest alternate routes. Additionally, local news outlets often report on significant road closures, which can help you make informed decisions. If you find yourself stuck in traffic due to a blockage, remain patient and avoid aggressive driving behaviors that could exacerbate the situation.
Assessing the Situation
To effectively respond to blocked roads, begin by assessing the situation. Determine the cause of the blockage and how long it might last. This can involve checking traffic reports or using navigation apps that provide updates on road conditions. Understanding the severity of the blockage allows you to decide whether to wait it out or seek an alternative route.
Additionally, consider the traffic levels in your area. In some cases, a blockage may cause significant delays, while in others, it might be a temporary issue that clears up quickly. If you decide to wait, ensure your vehicle is in a safe location and that you have access to essentials like food, water, and communication devices.
Finding Alternative Routes
Once you have assessed the situation, explore alternative routes. This may involve using side streets, back roads, or even public transportation options if available. Navigation apps can be invaluable in this regard, as they often suggest the fastest and safest alternatives based on current traffic data.
When selecting an alternate route, consider factors such as road conditions, traffic levels, and safety. Some routes may be longer but offer less congestion, while others might be shorter but more hazardous. Always prioritize your safety and the safety of others when navigating around blocked roads.
Communicating with Others
Effective communication is vital when dealing with blocked roads, especially if you are traveling with others. Keep passengers informed about the situation and any changes in your route. If you are expected at a destination, notify the relevant parties about potential delays. This can help manage expectations and reduce anxiety.
In addition, if you are driving in an area with blocked roads, consider sharing updates with others on social media or through messaging apps. This can assist fellow travelers who may also be affected by the same blockages and promote a sense of community during challenging situations.
Safety Precautions
When navigating blocked roads, safety should always be your top priority. If you are stuck in traffic, remain calm and avoid aggressive driving behaviors that could lead to accidents. Ensure your vehicle is in good working condition, with enough fuel and operational lights. If you are forced to park due to a blockage, do so in a safe location and use hazard lights to alert other drivers.
Additionally, be prepared for emergencies. Carry essential supplies in your vehicle, such as water, snacks, a first aid kit, and blankets. In case of severe weather or other emergencies, these supplies can be crucial in ensuring your safety and comfort.
Popular Questions
What is the fastest way to improve Table of Contents without making beginner mistakes?
The fastest way to improve Table of Contents is to simplify the process and control one variable at a time. Start with the most important baseline: define the goal, identify the main failure point, and test one change before making another. Keep short notes so you can connect the outcome to the adjustment you made. This prevents guesswork and helps you build a repeatable method instead of chasing random fixes.
What should you check first when Table of Contents is not working well?
Check the most immediate bottlenecks first: setup errors, missing inputs, bad timing, or inconsistent follow-through. Before buying anything new or changing the whole system, confirm that the basics are being done correctly and consistently. A small diagnostic checklist usually reveals the real problem faster than broad trial and error. Once the weak point is clear, make one correction and watch the result before adjusting anything else.
What common mistakes make Table of Contents harder than it needs to be?
The most common mistakes are changing too many variables at once, skipping the basics, and judging results too quickly. Many people also copy generic advice without adapting it to their exact situation, which leads to weak results and confusion. A better approach is to work from a simple baseline, make measured changes, and give each change enough time to show whether it helped. That makes progress easier to track and repeat.
Conclusion
Dealing with blocked roads requires a strategic approach that prioritizes safety and adaptability. Assess the situation, utilize technology for real-time updates, and communicate effectively with others impacted by the blockage. By staying informed and prepared, you can navigate road challenges more effectively. Always remember that safety should be your primary concern, and do not hesitate to wait for conditions to improve if necessary.
Quick Answer: The best first steps for disaster preparedness include creating an emergency plan and assembling a disaster supply kit. For example, the Federal Emergency Management Agency (FEMA) recommends having at least three days' worth of food and water for each person in your household.
Why This Happens: Disasters can strike unexpectedly, and being unprepared can lead to panic and confusion. Having a plan and supplies ready helps ensure safety and quick recovery.
How To Fix It:
Develop a family emergency plan that includes meeting places and communication methods.
Create a disaster supply kit with essentials like water, non-perishable food, a flashlight, and a first aid kit.
Regularly review and update your plan and supplies, especially before storm seasons.
Educate all family members about the plan and conduct practice drills.
Stay informed about local hazards and emergency alerts through reliable sources.
In a world where natural disasters can strike without warning, the importance of disaster preparedness cannot be overstated. Crafting a comprehensive emergency plan and assembling a well-stocked supply kit are essential steps that can mean the difference between chaos and calm in the face of adversity. Imagine the peace of mind that comes from knowing your family has a clear plan for communication and safe meeting points, along with essential supplies like food, water, and medical items readily available. Regularly reviewing and practicing this plan not only reinforces its importance but also empowers every family member to act decisively when it matters most. As we navigate the unpredictability of our environment, being prepared transforms fear into confidence, allowing us to face challenges head-on.
Understanding the Risks
The first step in disaster preparedness is understanding the specific risks that your area faces. For example, if you live in a coastal region, hurricanes and flooding may be your primary concerns. In contrast, those in the Midwest might need to prepare for tornadoes or severe winter storms. Research local hazards by visiting your state’s emergency management website or the Ready.gov site, which offers resources tailored to your location.
Creating a Family Emergency Plan
Once you understand the risks, the next step is to create a family emergency plan. This plan should include:
Communication Plan: Designate a point of contact outside your area who can help coordinate communication if local lines are down. Make sure everyone in your family knows how to reach this person.
Evacuation Routes: Identify multiple routes out of your neighborhood and practice them. Ensure everyone knows where to meet if you get separated.
Emergency Contacts: Compile a list of important phone numbers, including family members, friends, and local emergency services.
Building Your Emergency Kit
An emergency kit is essential for any disaster preparedness plan. Here’s what to include:
Water: Store at least one gallon of water per person per day for at least three days. Consider adding water purification tablets for longer-term needs.
Food: Pack non-perishable food items such as canned goods, granola bars, and dried fruits. Aim for a three-day supply.
First Aid Supplies: Include bandages, antiseptic wipes, pain relievers, and any necessary prescription medications.
Tools and Supplies: A flashlight, batteries, multi-tool, and a whistle can be invaluable in emergencies. Don’t forget a manual can opener for food items!
Personal Items: Include items like a change of clothes, sturdy shoes, and hygiene products. If you have pets, ensure you have supplies for them as well.
Staying Informed
In a disaster situation, staying informed is crucial. Sign up for local alerts and warnings through your city or county’s emergency management office. Many areas also offer mobile apps that provide real-time updates. Additionally, consider purchasing a NOAA weather radio to receive alerts even when your phone is unavailable.
Practice Makes Perfect
Having a plan is only effective if everyone knows it. Schedule regular drills with your family to practice your emergency plan. This could include fire drills, evacuation drills, or even simulated scenarios for different types of disasters. The more familiar everyone is with the plan, the more effectively you can respond in a real situation.
Community Preparedness
Disaster preparedness isn’t just an individual effort; it’s a community one. Get involved in local preparedness initiatives. Many communities offer training sessions on first aid, CPR, and disaster response. Participating in these programs not only enhances your skills but also helps build a network of support within your community.
Review and Update Your Plan
As your family grows and changes, so should your disaster preparedness plan. Review your plan at least once a year and update it as necessary. This includes checking the expiration dates on food and medications in your emergency kit, as well as ensuring that contact information is current.
Conclusion
Disaster preparedness is an ongoing process that requires attention and commitment. By taking these initial steps, you can significantly increase your readiness for any emergency. Remember, the goal is to ensure the safety and well-being of you and your loved ones. Start today, and you’ll be better prepared for whatever challenges may come your way.
How to Apply Disaster Preparedness Without Guesswork
Strong results with disaster preparedness come from matching the method to the actual goal, checking the most important conditions first, and adjusting one part of the process at a time. The reliable pattern is simple: define the result, choose a repeatable starting method, measure what changes, and correct the weakest point before adding more complexity.
Match the method to the goal
Before choosing a more advanced approach, compare setup time, cost, maintenance needs, and the most likely failure point. A beginner-friendly method that can be repeated consistently is usually more valuable than a complicated method that is difficult to monitor or troubleshoot.
Common Mistakes to Avoid
The most common mistake is changing too many variables at once. That makes it hard to know what actually improved the result. Keep notes, adjust one factor at a time, and confirm the outcome before moving to the next change.
Practical Next Steps
Choose the simplest method that fits the goal behind disaster preparedness.
Track one or two measurable results so progress is clear.
Correct the most obvious weak point before adding tools or complexity.
Review the outcome after a short test period and refine the process.
Top Questions Answered
What are practical ways to start disaster preparedness?
disaster preparedness is a specific approach or topic with practical steps you can learn and apply. Start by understanding the core definition, then practice one small technique at a time so you can measure results and improve quickly.
What are practical ways to start disaster preparedness?
Common mistakes include skipping the basics, changing too many variables at once, and not measuring results. Make one change at a time and give it enough time to see what actually helped.
Quick Answer: To get started with disaster preparedness, create an emergency kit that includes essentials like water, non-perishable food, a flashlight, and a first aid kit. The Ready.gov website offers comprehensive guidelines for building your kit and planning for emergencies.
Why This Happens: Many people underestimate the likelihood of disasters, leading to a lack of preparation. Natural disasters, such as hurricanes or earthquakes, can strike unexpectedly, making it crucial to be ready.
How To Fix It:
Assess your specific risks based on your location and climate.
Gather supplies for a basic emergency kit, including food, water, and medical supplies.
Develop a family communication plan to ensure everyone knows what to do during a disaster.
Stay informed about local emergency services and evacuation routes.
Regularly review and update your preparedness plan and supplies.
A Simple, Repeatable Plan for Disaster Preparedness
In an unpredictable world where natural disasters can strike with little warning, the importance of being prepared cannot be overstated. Many individuals overlook the potential risks that lurk in their own backyards, whether it’s the threat of a sudden hurricane or an unexpected earthquake. Establishing a simple, repeatable plan for disaster preparedness is essential, starting with the creation of an emergency kit stocked with vital supplies like water, non-perishable food, and a first aid kit. By assessing local risks and formulating a family communication strategy, you can ensure that everyone is equipped to respond effectively when the unexpected occurs. Regularly updating your preparedness plan not only reinforces your readiness but also fosters a sense of security in the face of uncertainty.
1. Assess Your Risks
The first step in disaster preparedness is to understand the specific risks in your area. Research the types of disasters that are most likely to occur where you live. For example, if you live in a coastal region, hurricanes and flooding may be a significant concern. In contrast, those in the Midwest might be more at risk for tornadoes. To assess your risks, consider the following:
Local History: Look into past disasters in your area. How often do they occur, and what were their impacts?
Geographic Features: Are you near a fault line, river, or coastline?
Community Resources: What resources does your community have in place for disaster response?
2. Create a Family Emergency Plan
Once you understand your risks, the next step is to create a family emergency plan. This plan should outline how your family will respond to different types of emergencies. Here are key components to include:
Communication Plan: Establish how family members will communicate during a disaster. Designate a meeting place and a contact person outside of your area who can help relay information.
Evacuation Routes: Identify multiple routes out of your neighborhood and community. Practice these routes with your family to ensure everyone knows where to go.
Emergency Contacts: Compile a list of important phone numbers, including local emergency services, family members, and friends.
3. Build an Emergency Kit
An emergency kit is essential for any disaster preparedness plan. It should contain supplies that can sustain you and your family for at least 72 hours. Here’s a list of items to include:
Water: Store at least one gallon of water per person per day for at least three days.
Non-Perishable Food: Include items like canned goods, granola bars, and dried fruits. Make sure to have a manual can opener.
First Aid Kit: Stock a comprehensive first aid kit that includes bandages, antiseptic wipes, and any necessary prescription medications.
Flashlight and Batteries: A reliable flashlight is crucial, along with extra batteries to keep it operational.
Multi-tool or Swiss Army Knife: This can be invaluable for a variety of tasks in an emergency situation.
Personal Hygiene Items: Include items like hand sanitizer, wet wipes, and toilet paper.
Important Documents: Keep copies of critical documents such as insurance policies, identification, and medical records in a waterproof container.
4. Stay Informed
Knowledge is power when it comes to disaster preparedness. Stay informed about potential threats and local emergency plans. Here are some ways to keep yourself updated:
Weather Alerts: Sign up for local weather alerts through your phone or email. Many communities offer services that send alerts about severe weather.
Community Meetings: Attend local emergency preparedness meetings to learn about resources and plans in your area.
Social Media: Follow local emergency management agencies on social media for real-time updates and information.
5. Practice Your Plan
Having a plan is only effective if everyone knows how to execute it. Regularly practice your emergency plan with your family. This can include:
Drills: Conduct fire drills, earthquake drills, or evacuation drills to ensure everyone knows what to do in an emergency.
Reviewing the Kit: Check your emergency kit every six months to replace expired items and ensure it’s fully stocked.
Role Assignments: Assign roles to family members during drills, such as who will grab the emergency kit or who will check on pets.
6. Involve Your Community
Disaster preparedness is not just an individual effort; it’s a community endeavor. Engage with your neighbors and local organizations to enhance your preparedness:
Neighborhood Watch: Form or join a neighborhood watch group that can help keep everyone informed and safe during emergencies.
Community Preparedness Programs: Participate in local workshops or training sessions on disaster response and first aid.
Resource Sharing: Share resources and information with neighbors, such as tools, supplies, or knowledge about local hazards.
7. Review and Update Your Plan Regularly
Your disaster preparedness plan should be a living document. As your family grows or your circumstances change, be sure to review and update your plan regularly. Consider the following:
Changes in Family Dynamics: If you have a new baby, elderly family members, or pets, adjust your plan to accommodate their needs.
New Risks: Stay informed about new risks that may arise in your area, such as changes in climate or infrastructure.
Feedback from Drills: After practicing your plan, discuss what worked well and what could be improved.
By following these steps, you can create a comprehensive disaster preparedness plan that will help protect you and your loved ones in times of crisis. Remember, the key to effective preparedness is planning, practicing, and staying informed. Start today, and you’ll be better equipped to face whatever challenges may come your way.
How to Apply Disaster Preparedness Without Guesswork
Strong results with disaster preparedness come from matching the method to the actual goal, checking the most important conditions first, and adjusting one part of the process at a time. The reliable pattern is simple: define the result, choose a repeatable starting method, measure what changes, and correct the weakest point before adding more complexity.
Match the method to the goal
Before choosing a more advanced approach, compare setup time, cost, maintenance needs, and the most likely failure point. A beginner-friendly method that can be repeated consistently is usually more valuable than a complicated method that is difficult to monitor or troubleshoot.
Common Mistakes to Avoid
The most common mistake is changing too many variables at once. That makes it hard to know what actually improved the result. Keep notes, adjust one factor at a time, and confirm the outcome before moving to the next change.
Practical Next Steps
Choose the simplest method that fits the goal behind disaster preparedness.
Track one or two measurable results so progress is clear.
Correct the most obvious weak point before adding tools or complexity.
Review the outcome after a short test period and refine the process.
People Also Ask
What is disaster preparedness and why does it matter?
disaster preparedness is a specific approach or topic with practical steps you can learn and apply. Start by understanding the core definition, then practice one small technique at a time so you can measure results and improve quickly.
How do you get started with disaster preparedness?
Start with a small beginner setup, follow a proven checklist, and keep simple notes as you learn. Once you can repeat your results consistently, expand your system or add more advanced techniques.
What are common mistakes with disaster preparedness?
Common mistakes include skipping the basics, changing too many variables at once, and not measuring results. Make one change at a time and give it enough time to see what actually helped.
In many climates, relying solely on air conditioning can be costly and energy-intensive, leading to the need for alternative cooling strategies. Implementing these methods can create a more comfortable indoor environment while also being environmentally friendly.
One common mistake people make is underestimating the power of airflow. Properly utilizing windows, doors, and fans can significantly reduce indoor temperatures. For instance, opening windows during cooler parts of the day and using fans to circulate air can create a refreshing cross-breeze. Additionally, shading windows with curtains or reflective materials prevents sunlight from heating the indoor space.
Effective Ventilation Techniques
One of the most effective ways to cool your home without air conditioning is through proper ventilation. Opening windows to create a cross-breeze can significantly lower indoor temperatures. This method works best when outside temperatures are cooler than indoors, typically during the evening or early morning. Additionally, using exhaust fans in kitchens and bathrooms can help push out hot air.
Common pitfalls include failing to utilize all available windows or only opening them during the hottest parts of the day. To maximize airflow, open windows on opposite sides of your home and use fans to direct the air. This can enhance the cooling effect and make your living space more comfortable.
Utilizing Fans for Cooling
Fans can be a powerful ally in staying cool without air conditioning. Ceiling fans, box fans, and oscillating fans can create a wind-chill effect that lowers perceived temperatures. When using fans, it’s essential to ensure they are set to rotate counterclockwise in the summer to push cool air downwards.
Many people make the mistake of relying solely on fans without considering their placement. Positioning fans near windows can help draw in cooler air from outside. Additionally, using fans in combination with ice or cold water can further enhance cooling. For example, placing a bowl of ice in front of a fan can create a makeshift air conditioner.
Shading and Insulation Strategies
Shading your home effectively can prevent heat from entering your living space. This can be achieved through outdoor shading devices like awnings, pergolas, or strategically placed trees. Using reflective window film or heavy curtains can also block out sunlight and keep your home cooler.
It’s crucial to understand the importance of insulation in maintaining a comfortable temperature. Poorly insulated homes can lead to significant heat gain. Ensuring your home is well-insulated can help keep cool air in and hot air out, reducing the overall temperature inside.
Hydration and Clothing Choices
Staying hydrated is vital for regulating body temperature. Drinking plenty of water helps your body cool down, especially in hot weather. Additionally, wearing light, breathable fabrics can help keep you comfortable by allowing your body to maintain a lower temperature.
People often overlook the impact of clothing on comfort. Loose-fitting clothes made from natural fibers like cotton can enhance airflow and wick moisture away from the skin. Choosing the right clothing can make a significant difference in how cool you feel throughout the day.
Frequently Asked Questions
What are some natural ways to cool down my home?
Natural ventilation, using fans for airflow, and shading windows are effective ways to cool your home without air conditioning.
How can I improve airflow in my home?
Open windows on opposite sides of your home to create a cross-breeze and use fans to enhance air circulation.
What materials can help keep my home cooler?
Reflective window films, heavy curtains, and outdoor shading devices like awnings can help block heat from entering your home.
Is it important to stay hydrated in hot weather?
Yes, staying hydrated is crucial for regulating body temperature and preventing heat-related illnesses.
What type of clothing is best for staying cool?
Light, breathable fabrics such as cotton are ideal for keeping your body cool in hot weather.