by PREPARE | Apr 5, 2025 | Blog, Guest Bloggers
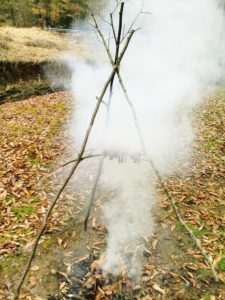 Before there was refrigeration, meat was cured by various methods to preserve it for future consumption. When supplies were available, meats were soaked in brine consisting of heavily salted water and could also have included other seasonings to add a variety of flavors. Today, if you were out in the field without conventional supplies you can still preserve meat by drying it using smoke and sun. An emergency scenario might go something like this: you’re lost or abandoned in the woods and you have received a windfall of meat, perhaps from trapping, hunting or by natural circumstances. The quantity is more than you can eat now and you need food for a longer stay or for a journey to civilization. It would be prudent to capitalize on this supply for your situation.
There are several benefits to the smoking process:
- It helps to keep away flies and other bugs from the wet meat as it forms an initial thin dry surface.
- Smoke chemically inhibits the growth of molds and yeasts on the meat’s surface, thus contributing
to its preservation.
- It also imparts taste and varies with intensity based on length of exposure. Various hardwoods
such as hickory, apple and maple are preferred for smoking meats. Conifers are not
recommended.
Associated with smoke is heat and the heat is the main element of 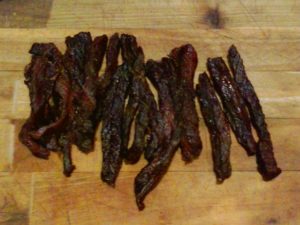 preservation because it removes moisture from the meat thus removing the foundation for bacterial growth. The smoke and drying times will vary based on the humidity and temperature of the local climate. Some folks will smoke the meat for 2 to 6 hours and then let the sun dry it out for 2-3 days, but you can keep a low smoldering fire for the whole process. Although moist pliable meat is preferred for consumption, the drier and stiffer piece will last longer. In regard to types of meat, red meat tends to last the longest; fish on the other hand has a very short shelf-life.
A traditional primitive smoking method is to make a 6 foot tripod with horizontal cross-bars tied 4 feet off the ground. Additional sticks can be placed upon these cross-bars in order to hang additional meat. This approach can be expanded to handle a larger volume of meat. Meat strips should be no thicker than 1/4 inch and approximately 1 inch wide although lengths of meat may vary. Just hang the pieces over the horizontal sticks without touching each other to allow for better smoke coverage. A small smoldering fire from dry wood works best, and the cooler and slower the process, the better because you want to dry the meat without cooking it. If you have a tarp, you can wrap the tripod stand like a teepee thus capturing the smoke, but you can also use bark or leafy branches to create an enclosure as well. You don’t need to have an enclosure but it is more difficult to focus the smoke to be effective.
Preserving meat takes time but the rewards can be great. As usual, I always encourage folks to try it now so that you will be prepared when a real emergency happens.
By: Ken Youngquist
 Ken Youngquist is the creator of Survivaltek, a website dedicated to teaching the ways and means to survive. From his youth, Ken was captivated by primitive living skills, and in his adulthood was intrigued by the television Series MacGyver. The result has been the study and practice of survival skills and the desire to pass on the mantle of preparedness to others. You can visit and learn more at: Survivaltek.com.
by PREPARE | Apr 5, 2025 | Blog
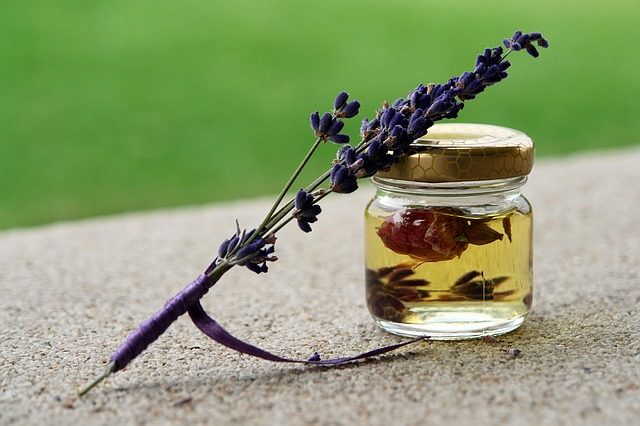 Many people who are in preparedness look for alternative health remedies and solutions. Often, people consider herbs, supplements, and essential oils for their health care. A great skill you might want to consider is How to Make Your Own Essential Oils for Preparedness.
Essential oils are homeopathic ways to help mental issues, fatigue, stress, or even physical conditions. Essential oils are extracts from certain plants or fruits that are distilled and placed in a container. Packaged essential oils are highly potent and very concentrated. Below are basic instructions on how to extract, distill, and cultivate your own essential oils.
Buy a Distiller
The first important item you will need to make your own essential oils is to purchase a distiller. Distillers cost a few hundred dollars, so make sure the one you choose is durable and will do the job well. Distillers have several components to consider. The heater is important to properly steam and heat the plants so that you can extract the oils. The holding tank will decide how much water you will be able to use. Smaller holding tanks will mean less steam. The condenser collects the steamed mixture. The condenser collects the steam and holds it for cooling. To wrap up, the separator is used to separate the water from the oil.
Decide what plant you would like to use. You can also buy the harvested plants or you can choose to grow them yourself. Some expensive essential oils are only available from other countries such as France. Africa is also a host of several essential oil plants. Make sure to research which essential oil is most useful for the illness that you need to alleviate.
When you receive the plant, you need to dry the plant for the distiller. Drying the plant will dry some of the oil, but it will yield a higher extract product. Drying is a slow process and it should never be done via sunlight. Sunlight can damage the oils and render the plant useless. The distill process should be done immediately after drying is complete.
Add the water to your distiller, and pack the plant material in the container. You don’t need to cut or break the plants since the distiller will extract from whole plant material. You can pack the plant matter thickly to make sure you receive enough extract.
Boil the water so that steam starts to form. Keep an eye on the distiller to make sure it does not overflow. It is also important to make sure that the water does not run out. The heat without the water can break your distiller.
You can optionally filter the solutions. By pouring the solution through a cloth fabric, you can catch some of the small imperfections and contaminates that can cause allergies. It will also remove dirt from the solution making it more pure.
Store the oil in a container. The container for essential oils should be dark glass or stainless steel. Never use clear glass or your product can spoil more quickly. The essential oils should be kept in a cool, dark place away from contaminates. Most essential oils have an approximate shelf life of 2 years.
The remaining part of the distillation process that is not the oil is the hydrosol. It contains some of the oil and fragrance material that also has therapeutic effects. You can use the water for other uses such as bath water or a light scent. For others, they prefer not to keep the hydrosol and it is thrown away.
There are even MORE great resources for Preparedness available to PREPARE Premium Members.
* Disclosure: Link to the distiller is an Amazon Associate Link.
Popular Questions
What are the steps to make essential oils at home for preparedness?
To make essential oils at home, start by purchasing a distiller, which is essential for extracting the oils from plants. Choose the plant you want to use, ensuring it is dried properly before distillation. Once the plant is ready, add water to the distiller, pack the plant material, and heat it to produce steam. After the distillation process, store the extracted oil in a dark glass container to maintain its potency.
How can I choose the right plants for making essential oils for my preparedness kit?
Selecting the right plants is crucial for effective essential oil production. Research which plants are known for their therapeutic benefits related to the health issues you want to address. You can either grow these plants yourself or purchase them from reliable sources. Ensure that the plants are suitable for distillation and have a good yield of essential oil.
What type of distiller should I buy for making essential oils at home?
When choosing a distiller for making essential oils, look for one that is durable and has a good heating element to properly steam the plants. Consider the size of the holding tank, as a larger tank allows for more water and steam, which can enhance the extraction process. Ensure the distiller includes a condenser and separator to effectively collect and separate the oil from the water. Investing in a quality distiller will yield better results in your essential oil production.
How should I store my homemade essential oils for long-term use?
To ensure the longevity of your homemade essential oils, store them in dark glass or stainless steel containers, as clear glass can lead to quicker spoilage. Keep the oils in a cool, dark place away from direct sunlight and contaminants. Most essential oils have a shelf life of about two years, so label your containers with the date of extraction. Proper storage will help maintain the potency and effectiveness of your essential oils.
by PREPARE | Apr 5, 2025 | Blog, Guest Bloggers
 We have all made mistakes that we regret. But what matters is that we learn from them and ensure that they are never repeated again. This approach applies to bartering as well. However, the repercussions of making a mistake in this sector can affect an investor pretty badly. Therefore, you must ensure that you avoid such errors at all costs. Listed below are some things that you must NOT do at any point of this business.
Bartering with Retail Stores
The success of your bartering heavily relies on the individual you are negotiating with. Therefore, you must ensure that you choose the most suitable person. Do not try to barter with retail stores since they always offer non-negotiable prices. This will not help since bartering is all about flexible price tags. Thus, you must try out your luck amongst street vendors and small convenient stores.
Guessing the Value of the Item
There is nothing worse than being uninformed about your own product. In order to exchange the item, you need to know it like the back of your hand. For instance, before you purchase gold for bartering purposes, you need to learn all about the metal. Research about the market price, target audience and alternative options. This will enable you to become more confident during the bartering and thereby will make you look more credible.
Looking for More than What Your Came for
When bartering with another person, do not keep negotiating even after you get a reasonable deal. If you think that the price is appropriate for the item, then take the deal immediately. If you keep pushing the seller to lower the price, you might tip them off and ruin the entire deal.
Using Anger/Force as a Business Tactic
You cannot threaten/force someone to buy your item or accept your price if they are not interested. This is both unethical and illegal. Despite what you may think, your personality can influence the bargain to a great extent. Politely welcoming the customers with a smile and thanking them for their time can make a positive impact on the customer.
Using Help from a Local
When you barter in unfamiliar destinations, do not use the help of locals. Although an extra hand wouldn’t hurt, these people can be agents working for commissions. Thus, they might steer you to stores that are beneficial to them instead of taking you to stores that might benefit you. Therefore, if a local offers to help you out, politely decline their help and handle your business on your own.
Bartering All Alone
There is nothing wrong with dragging a friend along – especially if it is your first time. This will enable you to play the good cop/bad cop. This will give you the opportunity to make a wise and sensible decision. Moreover, a friend can voice his/her opinions on the matter and thereby prevent you from making an impulse purchase.
These mistakes can affect the productiveness of the battering more than you can imagine. By avoiding these potential pitfalls, you can make your barter a successful and profitable one.
by PREPARE | Apr 5, 2025 | Blog, Coming Issue Updates
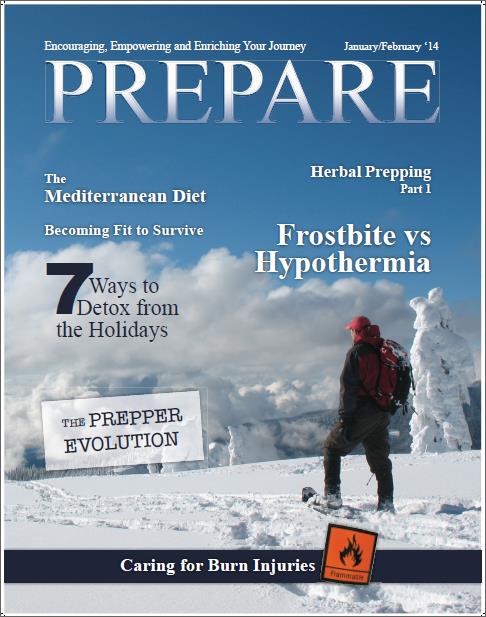 The next print issue of PREPARE Magazine has completed all final edits and is at the printers. This excellent publication will be sent to our print subscribers as soon as the printing is complete.
The Print publication of PREPARE Magazine is a full-color glossy bi-monthly publication that has unique and different content from the monthly digital version of PREPARE. It is mailed directly to our subscribers by the USPS.
We are so very thankful for the tremendous support from our readers, authors, subscribers, and advertisers. Because of you, we continue to grow and have the wonderful honor of serving. We are extremely pleased with the growth of our readership, and grateful for the patience as we worked through the growing pains and challenges of publishing a full-color print publication.
PREPARE Magazine was launched to provide support, training and encouragement for families and individuals who are in preparedness planning. We live in uncertain times, and with the potential difficulties ahead, we wanted to offer a quality publication to bring people together and offer help in getting prepared.
If you have not subscribed to the beautiful PREPARE Magazine print publication, we invite you to subscribe today. You will enjoy having this glossy and full-color resource in print.
Popular Questions
When will the next print issue of PREPARE Magazine be released?
The upcoming print issue of PREPARE Magazine is scheduled for release in the next quarter. Subscribers can expect to receive their copies shortly after the official launch date. Keep an eye on our website for specific announcements regarding the exact release date and any special features included in this issue.
What topics will be covered in the next print issue of PREPARE Magazine?
The next print issue of PREPARE Magazine will delve into essential preparedness strategies, including emergency planning and survival skills. Additionally, it will feature expert interviews and practical tips for readers looking to enhance their readiness. Stay tuned for sneak peeks of the articles and topics that will be highlighted.
How can I subscribe to receive the next print issue of PREPARE Magazine?
To subscribe and ensure you receive the next print issue of PREPARE Magazine, visit our subscription page on the website. You can choose from various subscription options, including digital and print formats. Once subscribed, you will receive updates about upcoming issues and exclusive content.
Will there be any special features in the next print issue of PREPARE Magazine?
Yes, the next print issue of PREPARE Magazine will include special features such as expert advice columns and in-depth articles on current preparedness trends. Readers can look forward to unique insights and practical resources that will be beneficial for their preparedness journey. Be sure to check the magazine for these exciting additions.
Can I find past issues of PREPARE Magazine before the next print issue is released?
Absolutely! Past issues of PREPARE Magazine are available for purchase on our website. You can browse through previous editions to catch up on essential topics and insights that have been covered. This is a great way to prepare for the upcoming issue and enhance your knowledge in the meantime.
by PREPARE | Apr 5, 2025 | Premium Membership Updates
 Many people are considering the purchase of firearms as part of their preparedness planning. Whether you are looking to get a firearm for hunting or self-defense, purchasing a gun can raise many questions – especially if this is your first time in making a firearm purchase.
We have recently released a new guide to purchasing, storing, and taking care of firearms. There are a lot of considerations when you begin looking for a firearm. This guide is an excellent resource to help answer some of the questions you may have on how to get started with purchasing a gun, and exactly what steps you should consider.
With the growing concerns people are having regarding new regulations, potential difficulties ahead, and the need for good a good preparedness plan, this guide will be a helpful support. This resource is now available as part of the PREPARE Premium Membership, and is ready for download in the membership area. It is also available for purchase through Amazon.
Click here to find out more information
If it is your goal is to protect your family, to provide food for your family, or perhaps both, a firearm can be an incredible addition to your disaster preparedness cache. But you do need to understand what it means to be a firearm owner, to evaluate which firearm might be right for you, and be aware of other important factors, such as the law and safety concerns, before you make your purchase.
Here are some areas that will be covered in the book:
- The case for being prepared
- Before you buy, educate yourself about Gun Ownership
- Making your firearm purchase decision
- Info on Handguns, shotguns, and Rifles
- Suggestions on where to purchase your firearms
- Firearm safety and maintenance
- Importance of proper cleaning and maintenance of your firearms
- Importance of proper training and practice
- Things to avoid with your weapons
- Changes coming on the horizon




