Understanding the specific needs of plants, such as water, sunlight, and nutrient requirements, is crucial. Many first-time gardeners plant too densely or neglect to rotate crops, which can lead to disease and nutrient depletion. Additionally, failing to account for local wildlife, such as deer and rabbits, can result in significant losses. These common pitfalls can be avoided with careful planning and education.
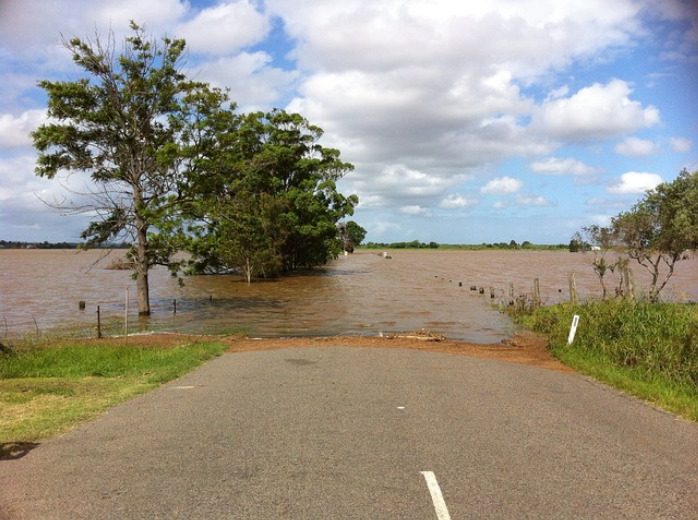
Another frequent mistake is the lack of a contingency plan for adverse weather conditions. New gardeners often do not prepare for droughts, heavy rains, or unexpected frosts, which can devastate young plants. Prioritizing resilience in garden design—such as incorporating mulching, companion planting, and season extension techniques—can mitigate these risks and improve overall success.
Soil Preparation: The Foundation of a Successful Garden
Soil preparation is critical for the success of any garden, especially survival gardens. Proper soil management ensures that plants receive the necessary nutrients and support for growth. Many beginners overlook soil testing, which can reveal pH levels and nutrient deficiencies. Without this knowledge, gardeners may apply inappropriate fertilizers or amendments, leading to poor plant health.
Amending soil with organic matter such as compost can significantly improve its structure and fertility. Beginners should focus on building a healthy soil ecosystem by incorporating compost, well-rotted manure, or other organic materials. This not only enhances nutrient availability but also encourages beneficial microorganisms that contribute to plant health.
A common mistake is planting directly into compacted or poor-quality soil without proper amendments. This can lead to stunted growth and low yields. Gardeners should prioritize soil health by regularly testing and amending their soil with appropriate nutrients and organic matter, ensuring a strong foundation for their survival garden.
Crop Selection: Choosing the Right Plants for Your Region
Selecting the right crops is essential for a successful survival garden. Different plants have varying requirements for sunlight, water, and soil type. New gardeners often make the mistake of choosing crops based on popularity rather than suitability for their local climate and soil conditions.
Researching which plants thrive in your region can lead to better yields and less frustration. For example, certain vegetables may grow well in cooler climates, while others are better suited for warmer areas. Utilizing local agricultural extensions or gardening clubs can provide valuable insights into crop selection based on regional conditions.
Additionally, understanding the growing season is critical. Many survival gardeners fail to consider frost dates, which can lead to planting too early or too late. By selecting crops that fit within their growing season and local environmental conditions, gardeners can significantly improve their chances of success.
Watering Practices: Essential Techniques for Survival Gardens
Watering is a crucial aspect of gardening that can greatly influence plant health and yield. Many beginners either overwater or underwater their crops, both of which can lead to plant stress and failure. Understanding the specific water needs of different plants is vital for sustaining growth.
Implementing efficient watering techniques, such as drip irrigation or soaker hoses, can help conserve water while providing consistent moisture to plants. Additionally, mulching around plants can help retain soil moisture and reduce weed competition. This practice not only supports plant health but also mitigates the risk of water stress during dry spells.
It’s important to monitor weather conditions and adjust watering practices accordingly. New gardeners often neglect to consider rainfall, leading to either waterlogged soil or drought stress. By adopting a flexible watering strategy tailored to current weather patterns, gardeners can enhance their plants’ resilience and overall success.
Pest Management: Protecting Your Garden from Threats
Pest management is a significant challenge for survival gardeners. Many beginners underestimate the impact of pests and diseases, often leading to substantial crop losses. Understanding common pests in your area and their life cycles can help gardeners implement effective prevention strategies.
Utilizing integrated pest management (IPM) techniques can greatly reduce pest pressure. This approach combines biological controls, cultural practices, and minimal chemical interventions to manage pests sustainably. For instance, introducing beneficial insects, such as ladybugs, can naturally control aphid populations without resorting to chemicals.
Moreover, regular monitoring of plants for signs of pests or diseases is crucial. Early detection can make a significant difference in managing infestations before they escalate. By staying vigilant and employing a combination of preventive strategies, gardeners can protect their crops and improve their chances of a successful harvest.
Further Reading
Authoritative Sources
eXtension: Gardening Resources extension.org
This resource provides comprehensive information on gardening practices, including soil health and pest management tailored for different regions
GardenWeb: Community Gardening Forum gardenweb.com
A valuable community for gardeners to share experiences, ask questions, and learn from each other's successes and failures
Rodale's Organic Life rodalesorganiclife.com
Offers expert advice on organic gardening practices, including crop selection and soil preparation
Frequently Asked Questions
What are the main reasons survival gardens fail?
Survival gardens often fail due to poor planning, inadequate soil preparation, and unrealistic expectations about crop yields and maintenance.
How can I improve my soil for a survival garden?
Improving soil involves testing for pH and nutrient levels, amending with organic matter like compost, and ensuring proper drainage.
What crops are best for beginners in survival gardening?
Beginner-friendly crops include tomatoes, peppers, and leafy greens, as they are generally easy to grow and well-suited for various climates.
How often should I water my survival garden?
Watering frequency depends on plant type and weather conditions, but generally, plants should receive about an inch of water per week.
What are effective pest control methods for survival gardens?
Effective pest control methods include using beneficial insects, crop rotation, and organic repellents to manage pest populations sustainably.
Conclusion
In summary, the initial failures of survival gardens often stem from inadequate planning and understanding of essential gardening principles. By prioritizing soil health, selecting appropriate crops, implementing effective watering techniques, and managing pests proactively, gardeners can significantly enhance their chances of success. Moving forward, focus on continuous learning and adaptation to local conditions, ensuring that your survival garden thrives in the long run.
Understanding the implications of a refrigeration failure is critical. Food safety is a primary concern, as perishable items can quickly reach unsafe temperatures. Monitoring the internal temperature of the refrigerator and freezer is vital; food should be discarded if it has been above 40°F for more than two hours. Prioritize the use of perishable items, and consider cooking or consuming them to prevent waste.
Another common mistake is to underestimate the impact of a malfunctioning refrigerator on food safety. It is essential to keep a food thermometer handy to check temperatures accurately. Foods that are particularly sensitive include dairy products, meat, and seafood. If you notice any unusual odors or changes in texture, it’s best to err on the side of caution and dispose of the item. Always remember that when in doubt, throw it out.
Assessing the Situation: Causes of Refrigeration Failure
Identifying the cause of refrigeration failure is the first step in addressing the issue. Common causes include power outages, mechanical failures, or door seals that are not functioning properly. the refrigerator may have simply unplugged or tripped a circuit breaker. If the outage is due to a power failure, you can check with your local power company for an estimated restoration time.
Understanding these causes can help you take proactive measures. For instance, if it’s a power outage, knowing how long the power will be out can help you decide what foods to prioritize for use. If the issue is mechanical, such as a faulty compressor, it’s crucial to contact a professional technician immediately to prevent further damage and food spoilage.
Another important aspect is to regularly inspect your refrigerator for maintenance issues. Keeping vents clear, checking door seals, and ensuring the appliance is level can prevent many common failures. If you notice unusual noises or if the appliance is not cooling properly, address these issues promptly.
Food Safety Guidelines During Outages
When refrigeration stops working, adhering to food safety guidelines is paramount to prevent foodborne illnesses. The USDA advises that perishable foods, including meat, poultry, fish, eggs, and dairy, should be kept at temperatures below 40°F. If the temperature rises above this threshold for more than two hours, these items should be discarded to ensure safety.
During a refrigeration failure, it’s also wise to create a list of food items and their storage times. Foods like hard cheeses, butter, and some condiments can often be safe beyond the two-hour guideline, while items such as raw meat and dairy are more sensitive.
Common mistakes include not checking the temperature of food before consumption. Always use a food thermometer to ensure that food is safe to eat. Additionally, ensure that any food that appears spoiled, even if it was within the safe temperature range, should be discarded. It’s better to be safe than sorry.
Steps to Take After Power Restoration
Once power is restored, it’s crucial to assess the condition of your food. Start by checking the temperature of the refrigerator and freezer; food should be discarded if it has been above 40°F for more than two hours. If items are still frozen but have thawed slightly, you can refreeze them if they contain ice crystals.
Examine each food item carefully. Look for any signs of spoilage, such as off smells or unusual textures. Any perishable food that has been at unsafe temperatures should not be consumed, even if it looks fine. It’s important to ensure that your food safety practices are robust to prevent any health risks.
Additionally, take this opportunity to clean your refrigerator and freezer. Remove any spoiled items, and sanitize surfaces to eliminate bacteria that may have developed during the outage. This will help maintain a safe environment for your food moving forward.
Preventive Measures for Future Failures
To avoid issues with refrigeration in the future, consider implementing a few preventive measures. Regular maintenance checks can help identify potential problems before they lead to failures. This includes cleaning coils, checking door seals, and ensuring your appliance is level.
Investing in a backup power source, such as a generator, can also provide peace of mind during extended outages. This can help maintain refrigeration and prevent spoilage during power failures. Additionally, keeping a thermometer in your refrigerator and freezer will allow you to monitor temperatures easily.
Educating yourself on food safety and storage guidelines will also enhance your preparedness. Familiarize yourself with the types of food that can last longer without refrigeration and plan accordingly. This knowledge can be invaluable during unforeseen outages.
Further Reading
Authoritative Sources
USDA Food Safety and Inspection Service fsis.usda.gov
This resource provides comprehensive guidelines on food safety during power outages and refrigeration failures
CDC Food Safety cdc.gov
The CDC offers essential tips on maintaining food safety and preventing foodborne illnesses
EPA Food Waste epa.gov
Learn about the environmental impacts of food waste and strategies to reduce it
Frequently Asked Questions
What should I do first when my refrigerator stops working?
Keep the doors closed to retain cold air and check if the power is out or if there’s a mechanical issue.
How long can food stay safe in a non-working refrigerator?
Generally, food can remain safe for up to four hours if the door remains closed. After that, perishable items should be discarded if above 40°F for more than two hours.
Can I eat food that has been above 40°F for a short time?
It depends on how long it has been above 40°F. If it has been less than two hours, it is generally safe, but use caution with perishable items.
What are some signs that food has spoiled?
Signs of spoilage include off smells, changes in texture, or discoloration. If in doubt, it’s best to discard the item.
How can I prevent future refrigeration failures?
Regular maintenance, investing in a backup power source, and monitoring temperatures can help prevent future issues.
Conclusion
All in all, knowing what to do when refrigeration stops working is crucial for food safety and minimizing waste. Start by assessing the situation and maintaining the internal temperature of your refrigerator and freezer. Pay close attention to food safety guidelines, and don’t hesitate to discard items that may pose a health risk. Implement preventive measures to avoid future failures, ensuring your refrigeration system remains reliable. By being proactive and informed, you can protect your food and health during unexpected outages.
Understanding the specific types of pests that threaten food storage can help you tailor your protection methods. For instance, certain pests are attracted to specific food types, while others may invade due to environmental factors such as moisture and temperature. Regular cleaning and organization of your food storage area are essential to minimize attractants. Additionally, common mistakes include neglecting to seal food properly or overlooking potential entry points for pests.
Many individuals underestimate the importance of routine inspections and maintenance. Failing to regularly check for signs of pests can lead to larger infestations and greater damage. It is also critical to educate yourself about the most effective natural repellents and how to implement them in your storage areas. By staying proactive and informed, you can effectively protect your food storage from pests.
Using Airtight Containers
Airtight containers are one of the most effective ways to protect food storage from pests. These containers not only keep food fresh but also prevent pests from accessing the food inside. When selecting containers, ensure they are made of durable materials and have secure seals.
Choosing the right type of container depends on the food you are storing. For example, dry goods like grains and cereals should be stored in rigid plastic or glass containers, while items like flour may benefit from vacuum-sealed bags. Remember, even small openings can attract pests, so always ensure that containers are completely sealed.
Common mistakes include reusing old food packaging or using containers that are not designed for long-term storage. Always opt for containers specifically made for food storage, as they provide better protection against pests. Prioritize investing in high-quality containers to ensure long-term safety.
Maintaining Cleanliness
Maintaining cleanliness in food storage areas is essential for pest prevention. Pests are often attracted to crumbs, spills, and food residues, making regular cleaning crucial. Schedule routine cleanings and ensure that all surfaces are wiped down and free from debris.
When cleaning, pay special attention to corners, under shelves, and any hidden areas where food particles may accumulate. Additionally, be mindful of how you store items; avoid stacking food items in a way that traps dust or creates hidden spaces where pests can thrive.
Many people overlook the importance of cleanliness in preventing pest infestations. A cluttered storage area can lead to increased risks, so prioritize keeping your food storage organized and tidy. Regularly check for expired items and dispose of them promptly.
Regular Inspections
Conducting regular inspections of your food storage is vital to catch potential pest issues early. Look for signs of infestation, such as droppings, gnaw marks, or damaged packaging. Early detection can save you from significant food waste and costly pest control measures.
Set a schedule to inspect your storage areas every few weeks. During these inspections, check not only for pests but also for the condition of your food containers. If you notice any breaches in packaging or signs of wear, take immediate action to replace or reseal items as needed.
Many individuals underestimate the value of proactive inspections. Ignoring small signs can lead to larger infestations, making early detection critical. Make inspections a regular part of your food storage routine to maintain a pest-free environment.
Natural Repellents
Utilizing natural repellents can effectively deter pests from invading your food storage. Ingredients such as bay leaves, peppermint oil, and vinegar have been shown to repel various pests without harmful chemicals. Incorporating these into your storage routine can enhance your pest prevention strategy.
To use natural repellents, consider placing bay leaves in containers or using cotton balls soaked in peppermint oil around your storage area. Vinegar can be used as a cleaning solution to deter pests while sanitizing surfaces. These methods not only keep pests away but also contribute to a healthier storage environment.
Common mistakes include relying solely on natural repellents without combining them with other protective measures. While these can be effective, they should not replace proper cleaning and sealing practices. Always use a holistic approach to pest prevention that includes multiple strategies for the best results.
Further Reading
For more in-depth information on pest prevention methods and food storage best practices, consider exploring resources from reputable organizations such as the USDA or local extension services. These organizations provide guidelines and research-backed strategies for maintaining effective food storage.
Further Reading
Authoritative Sources
MedlinePlus medlineplus.gov
Consumer-friendly medical and health information from the U.S. National Library of Medicine.
National Institutes of Health nih.gov
Research-based health information and links to authoritative medical resources.
Centers for Disease Control and Prevention cdc.gov
Official public health guidance, prevention resources, and topic-specific recommendations.
Mayo Clinic mayoclinic.org
Trusted clinical guidance, symptom explainers, and treatment overviews.
World Health Organization who.int
Global health guidance, fact sheets, and evidence-based public health information.
Frequently Asked Questions
What are the best containers for food storage?
The best containers for food storage are airtight glass or plastic containers that prevent pests from accessing the food. Ensure they have secure seals.
How often should I clean my food storage areas?
Clean your food storage areas at least once a month, or more frequently if you notice spills or crumbs.
What natural repellents can I use for pest prevention?
Natural repellents such as bay leaves, peppermint oil, and vinegar can be effective in deterring pests from food storage.
How can I tell if I have a pest infestation?
Signs of a pest infestation include droppings, gnaw marks, and damaged packaging. Regular inspections can help catch these early.
Why is it important to use airtight containers?
Airtight containers prevent pests from accessing food and help maintain freshness by reducing exposure to air and moisture.
Conclusion
Protecting your food storage from pests requires a comprehensive approach that includes using airtight containers, maintaining cleanliness, conducting regular inspections, and utilizing natural repellents. By implementing these strategies, you can significantly reduce the risk of infestations and ensure your food remains safe and uncontaminated. Prioritize these methods to create a pest-free environment that supports your food storage needs.
Understanding the implications of a supply chain failure is crucial. The immediate aftermath may see businesses struggling to obtain raw materials or products, leading to production halts and inventory shortages. Consumers may experience empty shelves in stores, particularly for essential items like food and medical supplies. Organizations must recognize the importance of developing robust contingency plans to mitigate these risks and ensure continuity.
Moreover, a common mistake during such crises is underestimating the ripple effects of supply chain disruptions. Many businesses focus solely on their immediate supply needs without considering how their suppliers and logistics partners are affected. This oversight can lead to prolonged recovery times and exacerbated shortages. Prioritizing a comprehensive risk assessment and establishing diversified supply sources can help organizations better navigate potential collapses.
Understanding Supply Chain Vulnerabilities
Supply chains are complex networks that rely on numerous interdependent factors, making them susceptible to various vulnerabilities. A collapse can occur due to a single point of failure, such as a factory shutdown or transportation disruption. Understanding these vulnerabilities is essential for businesses to identify potential risks and develop mitigation strategies.
For instance, reliance on a limited number of suppliers or geographical regions can greatly increase the risk of collapse. If a natural disaster strikes a region that supplies critical components, companies may find themselves unable to fulfill orders. By diversifying suppliers and investing in local production, businesses can create more resilient supply chains capable of withstanding shocks.
Another critical aspect is the need for real-time data and analytics. Companies that lack visibility into their supply chains may fail to anticipate disruptions until it’s too late. Investing in technology that provides insights into inventory levels, supplier performance, and market trends can help organizations react swiftly to emerging threats.
Immediate Effects of Supply Chain Collapse
The immediate effects of a supply chain collapse manifest in various ways, significantly impacting consumers and businesses alike. The most apparent consequence is the shortage of goods, particularly essentials like food, medicine, and hygiene products. This scarcity can lead to panic buying, further exacerbating the situation.
Additionally, companies may face increased operational costs as they scramble to source alternative suppliers or expedite shipping. This reaction can strain financial resources and lead to price hikes that affect consumers. Businesses must prioritize communication during these times, keeping stakeholders informed about shortages and expected recovery timelines.
Moreover, the psychological impact on consumers cannot be overlooked. Fear of scarcity can lead to irrational purchasing behavior, creating a cycle of shortages and increased demand. Companies should consider implementing measures to manage consumer expectations and promote calm during crises.
Long-term Economic Implications
The long-term economic implications of a supply chain collapse can be profound and far-reaching. Industries reliant on just-in-time inventory systems may find their business models unsustainable in the face of persistent disruptions. This reality can lead to significant restructuring within sectors, as businesses adapt to new operational challenges.
Furthermore, regions heavily dependent on specific industries may suffer economically, leading to job losses and declining local economies. Companies may also face reputational damage if they are unable to meet customer expectations during crises, resulting in a loss of consumer trust.
To mitigate these risks, businesses should prioritize building flexibility into their supply chains. This approach may involve investing in alternative logistics solutions, exploring local sourcing options, and fostering partnerships with multiple suppliers to enhance resilience.
Strategies for Recovery and Resilience
Recovery from a supply chain collapse requires strategic planning and execution. Organizations must assess their operations, identify vulnerabilities, and develop comprehensive recovery plans. Establishing a crisis management team can facilitate a coordinated response to disruptions, ensuring that all stakeholders are aligned in their recovery efforts.
Moreover, businesses should consider investing in technology that enhances supply chain visibility and agility. Tools such as predictive analytics can help organizations anticipate disruptions and make informed decisions about sourcing and production. Additionally, fostering relationships with suppliers and logistics partners can create a collaborative environment for addressing challenges.
Ultimately, companies should prioritize employee training and engagement during recovery. Ensuring that staff are equipped with the knowledge and skills to navigate supply chain disruptions can enhance overall organizational resilience. By fostering a culture of preparedness, businesses can better position themselves to withstand future shocks.
Further Reading
Authoritative Sources
Global Logistics and Supply Chain Report worldbank.org
This report provides insights into global supply chain dynamics and their impact on economies
The Need for a New Supply Chain Approach mckinsey.com
McKinsey discusses innovative strategies for building resilient supply chains in the face of disruption
Securing Supply Chain Resilience nist.gov
This article outlines key steps organizations can take to enhance supply chain resilience
Understanding the Impacts of Supply Chain Disruptions brookings.edu
Brookings provides an analysis of the economic impacts caused by supply chain disruptions
Frequently Asked Questions
What are the main causes of supply chain collapse?
Main causes include natural disasters, geopolitical tensions, economic downturns, and systemic vulnerabilities within the supply chain.
How does a supply chain collapse affect consumers?
Consumers face shortages of essential goods, increased prices, and potential panic buying behaviors during a collapse.
What strategies can businesses implement to prevent supply chain disruptions?
Businesses can diversify suppliers, invest in technology for better visibility, and establish contingency plans to enhance resilience.
How long does it take for a supply chain to recover after a collapse?
The recovery duration varies depending on the severity of the collapse, the industry involved, and the effectiveness of the recovery strategies implemented.
What role does technology play in supply chain resilience?
Technology enhances supply chain resilience by providing real-time data, predictive analytics, and improved communication among stakeholders.
Conclusion
In summary, a complete collapse of supply chains can have severe implications for economies and individuals alike. Understanding the causes and immediate effects is crucial for businesses to navigate such crises effectively. By prioritizing resilience through diversification, technology investment, and strategic planning, organizations can better position themselves to withstand future disruptions. Taking proactive measures now will not only mitigate risks but also foster a more sustainable and stable supply chain environment moving forward.
One of the most significant distinctions lies in resource management. Urban preppers must navigate a landscape where resources are often limited and competition for them can be fierce. This means that urban preppers need to prioritize their resource allocation and develop strategies to secure supplies that may become scarce during emergencies. In contrast, rural preppers typically have access to land for growing food and raising livestock, which can provide a more stable resource base.
Moreover, the environmental risks differ greatly between urban and rural settings. Urban areas are more prone to issues such as civil unrest, infrastructure failure, and higher crime rates in disaster scenarios. Rural areas, on the other hand, may face challenges like isolation during natural disasters or agricultural failures. These context-specific risks necessitate tailored strategies that align with the unique characteristics of each environment.
Resource Management Strategies
Effective resource management is critical for urban preppers. With limited space and resources, urban dwellers must focus on efficient storage solutions and sourcing supplies from multiple vendors. Techniques such as vertical gardening, using community gardens, and investing in multi-purpose tools can help maximize available resources. It’s essential to establish a network of reliable suppliers and alternative sources for food, water, and medical supplies.
Urban preppers often face the challenge of competing for resources with a larger population. This competition can lead to panic buying and hoarding behavior during emergencies, which can further deplete available supplies. Therefore, having a proactive approach to stockpiling essential items over time, as well as building relationships with local suppliers, can create a buffer against scarcity.
Additionally, urban preppers should consider the logistics of transport and accessibility when planning their resource management. In a crisis, mobility can be compromised, so it’s important to have a clear plan for acquiring resources and moving them safely. This may involve securing transportation methods or identifying local community hubs where supplies can be accessed.
Environmental Risks and Preparedness
Urban environments are susceptible to different environmental risks compared to rural areas. Issues like flooding, power outages, and civil unrest can escalate quickly in densely populated areas. Urban preppers must be aware of these risks and develop contingency plans that address potential emergencies specific to their location.
For example, understanding local flood zones, earthquake risks, or potential for civil disturbances can inform the preparation process. Urban preppers should invest in emergency kits that include items specific to these risks, such as portable water filters, first aid supplies, and communication devices. Having a well-defined emergency plan that includes escape routes and safe locations can also mitigate risks associated with urban life.
Furthermore, urban areas often have limited access to natural resources, which means preppers must rely more on community resources and public infrastructure. This reliance creates a need for urban preppers to stay informed about local government emergency plans, available shelters, and community support networks that could assist during a crisis.
Security Considerations in Urban Areas
Security is a significant concern for urban preppers, particularly during times of crisis when societal norms may break down. High population density can lead to increased crime rates, making personal safety and property security paramount. Urban preppers should consider investing in home security systems, situational awareness training, and self-defense skills.
Establishing a neighborhood watch or community preparedness group can also enhance security. By working together, urban preppers can share resources, information, and support during emergencies, creating a stronger defense against potential threats. It’s essential to foster relationships with neighbors to build a community that can rely on each other in times of need.
Moreover, urban preppers should evaluate their personal security plans, including how to secure their homes and belongings against theft or vandalism. This might involve reinforcing doors and windows, securing outdoor equipment, and developing a plan for safe transportation during emergencies.
Community Support Networks
Community plays a vital role in urban prepping. Building a network of like-minded individuals can provide emotional support, resource sharing, and practical assistance during emergencies. Urban preppers should actively seek out local groups focused on preparedness, survival skills, or self-sufficiency.
Community gardens, skill-sharing workshops, and local meetups can foster connections among urban preppers. These networks can facilitate the sharing of knowledge and resources, which is particularly important in urban settings where isolation can be common. By engaging with the community, preppers can also stay informed about local risks and emergency plans.
Additionally, urban preppers should consider how they can contribute to their communities. Volunteering time or resources can not only help others but also strengthen community ties, making it easier to rely on one another during a crisis. Building these relationships before an emergency occurs can be crucial for effective response and recovery.
Further Reading
Authoritative Sources
Ready.gov ready.gov
A comprehensive resource for emergency preparedness information and guidelines
American Red Cross redcross.org
Offers training, resources, and support for disaster preparedness and response
Frequently Asked Questions
What are the main challenges of urban prepping?
Main challenges include limited storage space, resource competition, and security risks.
How can urban preppers secure resources effectively?
By developing relationships with local suppliers and utilizing community resources.
What environmental risks should urban preppers consider?
Flooding, power outages, and civil unrest are significant risks in urban areas.
What role does community play in urban prepping?
Community networks provide support, resource sharing, and collective security during emergencies.
How can urban preppers enhance their personal security?
Investing in home security systems and participating in neighborhood watch programs can help.