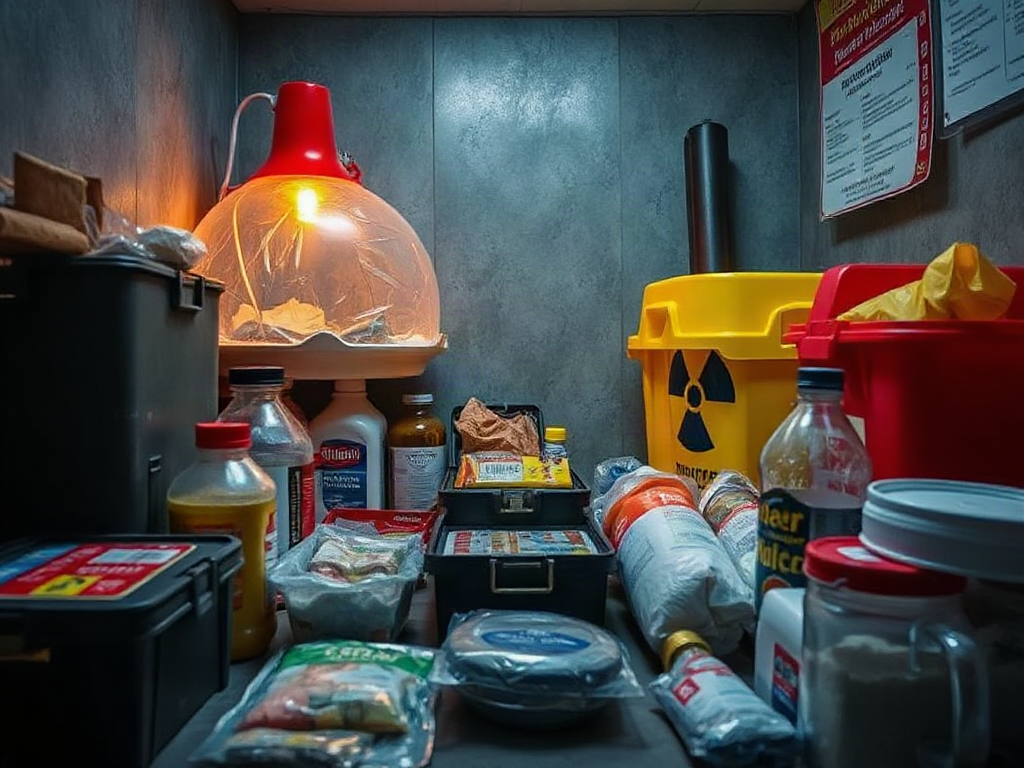
Overnight aftershock planning begins with the bed because darkness, fatigue, and limited visibility make ordinary room hazards harder to judge. A bed positioned beneath a heavy frame, near a window, or beside a tall bookcase can expose someone to falling glass or objects during renewed movement. The safest arrangement is not always the center of the room; it is the location with the fewest overhead, tipping, and shattering hazards while still allowing access to a usable exit.
Walk around the bedroom at eye level from the mattress. Look for mirrors, framed glass, lamps, shelves, televisions, and unsecured storage that could strike someone or block the doorway. Move the bed away from windows where possible, and relocate heavy objects from above it. A small bedside table is usually less concerning than a tall cabinet, but it should not narrow the route out. If furniture cannot be moved, sleep in the least exposed position and keep your head away from windows and hanging items.
Do not confuse an apparently intact room with a safe one. After an earthquake, loosened furniture, cracked plaster, damaged ceilings, and displaced glass may fail during another jolt. Avoid rooms showing major structural damage, strong gas odors, sparking wires, or new water leaks. Renters and people in crowded housing may have fewer choices, so prioritize removing breakable and heavy items from the immediate sleeping zone rather than attempting a complete room reorganization overnight.
A useful companion resource is How to prepare for aftershocks overnight, especially when the household needs a repeatable nighttime check. The practical test is simple: if shaking starts while you are lying down, can you protect your head without reaching across the room, and can you identify a safe route without stepping on glass?
Keep Nighttime Essentials Within Reach
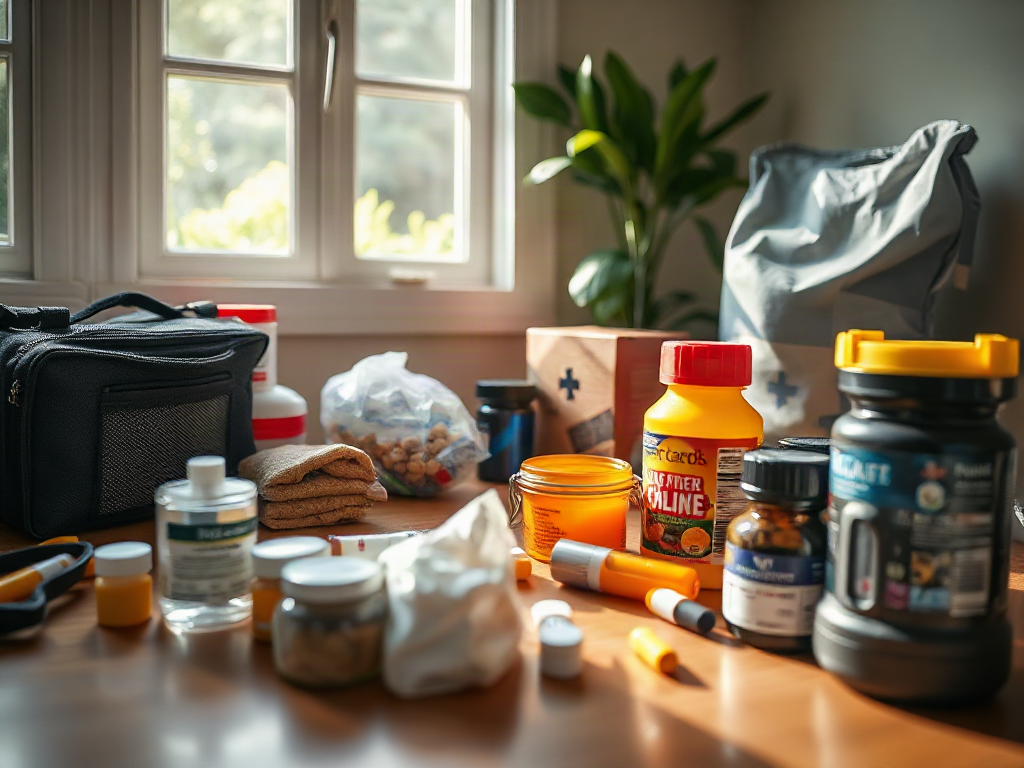
Place a compact set of essentials beside the sleeping position rather than across the room. The first minutes after an aftershock may involve darkness, broken objects, alarms, or uncertainty about whether utilities are working. A flashlight, sturdy shoes, a phone, water, and essential medication address different problems: visibility, foot protection, communication, hydration, and immediate health needs. Store them where they will not slide away during shaking, such as in a small open-top container secured to the bedside furniture.
Shoes should have soles that offer meaningful protection from glass and debris. Slippers and bare feet are poor choices if the floor has broken objects. Keep a flashlight that can be operated without searching for a switch in darkness, and check its batteries periodically. A phone may provide light and alerts, but it should not be the only light source because it can lose charge or be damaged. If medication is needed at night, keep only a reasonable short-term amount accessible and store it according to its labeling.
Water should be in a sealed, stable container rather than an open glass. A whistle can help attract attention if a doorway becomes blocked, while eyeglasses should be protected from being crushed. People who use mobility aids should keep them close enough to reach from bed without crawling through an obstructed path. For children, comfort items may reduce panic, but they should not replace shoes, light, or adult assistance.
A bedside kit is not a substitute for a household emergency supply location. Larger equipment may be useful later, but bulky bags beside the bed can become trip hazards or block the exit. Choose the smallest arrangement that solves the immediate nighttime problems, then keep larger supplies where they can be reached after the building and route have been checked. Signs the setup is failing include a flashlight that is dead, shoes buried under furniture, or supplies that roll beneath the bed after a small vibration.
Use a Clear Response Plan During Shaking
During an aftershock, the safest immediate action is generally to protect yourself from falling and flying objects rather than run outside while the ground is moving. If you are in bed, stay there if the surrounding area is reasonably free of hazards, turn face-down or cover your head and neck with a pillow, and hold on if possible. If the bed is beneath falling objects or glass, move only far enough to reach a safer nearby position, protecting your head as you go.
People often assume that leaving immediately is safer because the outdoors appears open. Moving through a doorway, stairwell, or room with broken glass during shaking can create additional exposure, and exterior walls may shed material. The better choice depends on the building’s condition and the hazards around you. Once movement stops, pause before standing. Put on shoes, take the light and phone, and assess the immediate route rather than rushing into a dark hallway.
Agree on a short household sequence while everyone is calm: protect during shaking, wait for movement to stop, check for immediate danger, then move to the predetermined safer location if necessary. Do not gather possessions first. If a person is injured, trapped, or exposed to fire, gas, or electrical danger, contact emergency services when possible and follow local instructions. Avoid elevators and do not re-enter a visibly damaged building merely to retrieve supplies.
Practice the sequence without staging a dramatic drill. Each person should know where shoes and lights are, which exit is usable, and where to meet if separation occurs. A plan that relies on everyone hearing a shouted instruction may fail if alarms, darkness, or damaged communications interfere. The strongest plan is short enough to remember and flexible enough to change when a blocked corridor, fallen object, or structural warning makes the original route unsafe.
Check for Hazards Before Moving Around
After the shaking ends, hazard inspection should come before ordinary nighttime routines. Use a flashlight instead of an open flame because damaged gas lines or spilled combustibles can make candles and lighters dangerous. Look for broken glass, fallen ceiling material, exposed wiring, unusual sounds, water leaks, and strong gas or chemical odors. Do not touch switches, appliances, or electrical equipment if wiring may be damaged.
A quiet room can still contain delayed hazards. Cabinets may open after a later jolt, water heaters or shelves may have shifted, and cracked masonry can release material without warning. Keep away from visibly damaged areas and do not attempt improvised structural repairs. If the building appears unsafe, leave by the safest available route once movement has stopped, taking only the compact items already beside you. Follow instructions from emergency officials, building management, or utility providers rather than relying on guesswork.
Do not use a phone call for every household update when networks are congested; text messages may be more practical if service permits. Keep communication brief and share your location and condition with an agreed contact. Do not spread unverified reports about building safety or utility restoration. Official alerts and local emergency information are more useful than assumptions based on how strong the aftershock felt.
The main tradeoff is speed versus information. Waiting to inspect every room wastes time if there is an obvious fire or gas danger, while rushing through a damaged space creates avoidable injury risk. Use a threshold approach: immediate life threats justify prompt evacuation; visible damage without an immediate threat calls for cautious movement and official guidance; no obvious hazards still requires shoes, light, and awareness of additional aftershocks.
Adjust the Plan for Children, Pets, and Damage
Households with children, older adults, pets, or disability-related needs need more than a generic bedside kit. Assign one adult to communication and another to assistance when possible, but do not depend on fixed assignments if someone is injured or absent. A child should know to stay away from windows and not run toward a parent during shaking. Simple instructions such as “stay low, cover your head, and wait” are easier to follow than a long explanation at midnight.
Pets may hide, bolt through an open door, or react defensively when frightened. Keep a leash or carrier accessible, but do not chase an animal through broken glass during movement. Afterward, secure pets before opening exterior doors if evacuation is needed. Older adults and people with mobility limitations may need a clear transfer path, glasses, hearing devices, mobility aids, and a way to summon assistance. Test the route in daylight and remove small obstacles that become dangerous when visibility is poor.
Damage changes the plan from sheltering in place to evacuation. A small fallen object in an otherwise stable room is different from a widening structural crack, leaning wall, damaged stairway, fire, or gas odor. No household checklist can certify that a building is safe; qualified inspectors and local authorities may be needed. If you are unsure, move to a safer location outside the hazard area without entering restricted or damaged zones.
Review the arrangement the next morning. Replace used batteries, refill water, restore medication access, and reposition anything displaced by shaking. Then update the plan based on what actually went wrong: perhaps the flashlight was unreachable, the pet carrier was buried, or the exit was blocked by a fallen object. That review makes overnight aftershock readiness more reliable than buying more equipment without correcting the room’s specific weaknesses.
Frequently Asked Questions
Should I get out of bed during an aftershock?
Not while the ground is moving unless the bed area has an immediate danger such as falling glass, fire, or severe structural damage. Protect your head and neck first, then move cautiously after shaking stops.
What belongs beside the bed?
Keep sturdy shoes, a flashlight, a charged phone, water, needed medication, and eyeglasses within reach. A whistle may help if a route becomes blocked.
Is a doorway the safest place during an aftershock?
Not necessarily. Modern doorways are not automatically safer, and moving toward one during shaking can expose you to falling objects. Use the safest nearby position based on the room's actual hazards.
Can I use candles if the power fails?
A flashlight is preferable. Candles and lighters may ignite gas or spilled fuel after earthquake damage, so avoid open flames until utilities and the area are known to be safe.
When should I leave the building?
Leave when there is fire, a strong gas odor, serious visible damage, electrical danger, flooding, or official direction to evacuate. Use a safe route after shaking stops and avoid elevators.
Further Reading
Authoritative Sources
Academy of Nutrition and Dietetics eatright.org
Professional nutrition guidance, healthy eating resources, and practical dietitian-reviewed advice.
U.S. Department of Agriculture usda.gov
Official food, nutrition, agriculture, and consumer guidance from the USDA.
NIH Office of Dietary Supplements ods.od.nih.gov
Research-based fact sheets on nutrients, supplements, dietary intake, and safety considerations.
International Society of Sports Nutrition sportsnutritionsociety.org
Evidence-informed sports nutrition resources and position stands for active people and athletes.
Conclusion
Overnight aftershock readiness depends more on room arrangement and practiced decisions than on a large collection of gear. Clear the area around the bed, remove heavy or breakable objects from above and beside it, and place shoes, light, phone, water, medication, and glasses where they can be reached without crossing the room. During movement, protect your head and neck and avoid rushing into hallways or outside. Afterward, use light rather than flame, inspect for glass, leaks, exposed wiring, and structural damage, and leave if immediate hazards make the building unsafe. Adapt the setup for children, pets, mobility needs, and the actual damage observed. A brief daylight rehearsal and a next-morning review can expose weaknesses before the next night.
Earthquake preparation does not begin with construction work. In a rental, older home, dormitory, or room where drilling is not allowed, the first useful task is to identify objects that could fall, slide, shatter, spill, or block movement. A tall bookcase beside a bed creates a more immediate personal hazard than a neatly stored box on the floor because shaking can turn stored weight into falling debris while a person is still lying down.
Walk through each room at eye level and then look upward. Mark heavy objects above shoulder height, glass near sleeping areas, unsecured televisions, freestanding shelving, hanging plants, and cabinets containing bottles or dishes. Lowering an object is often more reliable than trying to make a temporary restraint work. A compact television on a low, stable stand is generally a better arrangement than one balanced on a tall cabinet, even if the cabinet appears sturdy.
Use non-permanent measures where they match the hazard. Museum putty may help keep small decorative objects from sliding, non-slip shelf liner can reduce movement of dishes, and child-resistant latches can limit cabinet doors opening. These products have limits: adhesive may fail on dusty surfaces, putty is not a substitute for restraining a large appliance, and a latch will not stop a cabinet from tipping. Treat each measure as a way to address a specific movement, not as universal earthquake protection.
Common mistakes include placing emergency supplies on high shelves, storing canned goods above a doorway, and assuming that a heavy object will remain in place because it has never moved before. Test low-cost changes by gently pushing furniture and checking whether contents shift. For a more detailed household review, use this earthquake preparation checklist as a room-by-room reference rather than waiting for a major cleaning day.
Rearrange Rooms for Better Earthquake Protection
Room layout determines what a person can reach, where debris may land, and whether an exit remains usable after shaking. Keep beds, sofas, and desks away from windows, mirrors, tall cabinets, and wall-mounted items that could fall toward occupants. If moving a bed is impossible, remove heavy objects from the area above it and place sturdy shoes, a flashlight, and glasses within reach rather than across the room.
A practical layout has two goals that can conflict: creating a safer position during shaking and preserving a clear route afterward. Pushing every piece of furniture against a wall may free the center of a room, but it can also concentrate unstable items near sleeping spaces or narrow the path to a door. Compare both routes. Stand beside the bed or desk and identify where glass, shelves, and hanging objects could land; then trace the route to the exit while imagining that one item has fallen.
Prioritize changes in this order:
Move people away from windows and heavy overhead objects.
Clear doorways, stair access, and the space beside beds.
Place heavy storage low and secure cabinet contents with suitable latches.
Keep shoes, a light, communication devices, and essential medication accessible.
Separate water, chemicals, and breakable containers so one spill does not create several hazards.
Consider a kitchen where glassware sits in an upper cabinet beside the main exit. Moving it to a lower cabinet may reduce falling-glass exposure and keep the exit area safer, but heavy cookware should not be stacked above lightweight dishes. In a garage, storing tools at floor level can reduce falling hazards while creating a trip risk; use stable bins and preserve a walkway instead of simply moving everything downward.
Do not mistake an open room for a structurally safe room. Furniture placement cannot correct a damaged foundation, weak masonry, or an appliance that needs professional restraint. It can, however, make the immediate environment less hostile and give occupants a better chance of following protective actions.
Build Household Actions That Work Under Stress
Earthquake instructions are most useful when every household member can perform them without searching for words or equipment. During shaking, the standard protective action is Drop, Cover, and Hold On: get low, protect the head and neck under sturdy furniture when available, and hold onto it. If no suitable cover is close, stay away from windows and objects that may fall, protect the head and neck with the arms, and remain in place until the movement stops.
Practice the movement in the actual rooms where people sleep, work, and spend time. A drill should answer specific questions: Can a child reach the underside of a desk? Does a wheelchair user have enough clearance to protect the head? Can a person using a cane get away from a window without crossing loose furniture? A plan that works for one adult may fail for a child, older person, pet, or person with limited mobility.
Waiting in a doorway is a common misconception. Modern doorways are not automatically safer, and moving during strong shaking exposes people to broken glass and falling objects. Running outside can be especially hazardous near facades, power lines, and falling masonry. The better choice depends on location, but the immediate priority is protection from nearby hazards, not reaching an imagined safe zone.
Assign simple responsibilities after the shaking stops. One person can check on household members, another can collect the communication kit, and another can look for obvious fire, water, or gas problems from a safe position. Do not use elevators, light matches near a suspected gas leak, or re-enter a visibly damaged building. Keep an out-of-area contact and an agreed meeting location because local networks may be congested.
Practice should reveal failure, not merely confirm confidence. If a flashlight is buried in a drawer, relocate it. If a route crosses shattered glass, add footwear beside the bed. If pets hide under furniture, keep carriers and leashes accessible without forcing anyone to search through a closet during aftershocks. The household earthquake plan should reflect these observed constraints.
Check Utilities, Exits, and Post-Shaking Risks
Earthquake preparation continues after the first movement because broken lines, fires, contaminated water, and unstable objects may create later danger. Learn where the main electrical panel, water shutoff, and gas meter are located, but do not operate equipment you cannot identify safely. Gas shutoff procedures vary by installation, and a valve that has been closed may require the utility or a qualified professional before service is restored.
Inspect flexible connections to water heaters, appliances, and gas equipment when accessible, looking for corrosion, damage, or obvious movement. This visual check is not a substitute for seismic retrofitting or an inspection. A renter can report concerns to the landlord and ask what emergency access arrangements exist. A homeowner may need a licensed contractor for appliance restraint, gas work, or structural evaluation.
Keep exits usable without assuming that every door will open normally. Store no bicycles, boxes, or cleaning products in a route that must remain clear. Identify a second way out where possible, and decide how household members will gather without standing beside a damaged exterior wall. After shaking, expect aftershocks and avoid lifting unstable debris alone. Look for smoke, fire, sparking wires, flooding, strong gas odor, and major structural damage; leave and contact emergency services when immediate danger exists.
Water storage and communication supplies matter because utilities may be interrupted, but placement matters just as much. Keep water containers low and stable, away from electrical equipment, and distribute supplies so one fallen shelf does not remove the entire reserve. Store a battery radio, power banks, first-aid materials, and essential prescriptions where they can be reached without opening a damaged cabinet.
The weak assumption is that a home is safe because no object fell during a small tremor. Earthquake intensity, distance, building design, and room arrangement vary. A quiet result from one event does not validate a risky setup. Use each inspection to remove one credible hazard and escalate concerns that require technical judgment.
Turn the Checklist Into a Maintainable Plan
A no-drill approach works best as a maintenance system, not a one-time shopping project. Begin with the three places where people spend the night, then inspect the kitchen, living area, work area, and entry route. Photograph problem spots if that helps track changes, and write down which items were moved, latched, lowered, or removed. The record is useful when furniture shifts back during redecorating or seasonal storage.
Choose measures according to hazard and household constraints. Rearranging is inexpensive but may reduce storage capacity. Latches protect contents but require regular use. Non-slip materials are convenient but may degrade or lose grip. Professional restraint or structural work costs more and may be the only sensible option for heavy appliances, masonry concerns, or high-risk buildings. Do not let a low-cost method create false confidence about a high-consequence hazard.
Review the setup whenever a new television, shelf, appliance, mattress, or storage container enters the home. Recheck after moving furniture, changing a child’s room, adopting a pet, or beginning a renovation. A quarterly walkthrough can focus on five questions:
Could anything heavy fall toward a sleeping or seated person?
Could glass, chemicals, or hot liquids spill into a path?
Can each person reach head protection and light?
Are two routes out identifiable and reasonably clear?
Does any hazard exceed what temporary measures can safely address?
Use official guidance from Ready.gov and local emergency management agencies to supplement, not replace, the room inspection. The best outcome is not a perfect-looking home; it is a layout and routine that still function when the floor moves, the lights fail, and ordinary assumptions stop being reliable.
Frequently Asked Questions
Can earthquake preparation work without drilling into walls?
Yes. Lowering heavy items, moving beds away from windows, using suitable cabinet latches, clearing exits, and practicing Drop, Cover, and Hold On can reduce nonstructural hazards. These actions do not replace professional work for structural or major appliance risks.
Where should a bed be placed during earthquake preparation?
Keep it away from windows, mirrors, tall furniture, and heavy objects overhead. Place sturdy shoes, a flashlight, and needed glasses within reach so broken glass or darkness does not make the first response harder.
Are doorways safer during an earthquake?
Not automatically. Doorways are not universally safer in modern homes, and moving toward one during strong shaking may expose you to falling objects. Drop, Cover, and Hold On near a safer available position instead.
Should emergency water be stored on the floor?
Store containers low and stable, but keep them out of walkways and away from electrical equipment. Distributing water across more than one stable location can prevent one fallen shelf from eliminating the entire supply.
When is professional earthquake work still necessary?
Seek qualified advice for suspected structural damage, unstable masonry, heavy appliances, gas connections, or water heaters that need restraint. Temporary household measures should not be treated as a safe substitute for technical evaluation.
Further Reading
Authoritative Sources
Academy of Nutrition and Dietetics eatright.org
Professional nutrition guidance, healthy eating resources, and practical dietitian-reviewed advice.
U.S. Department of Agriculture usda.gov
Official food, nutrition, agriculture, and consumer guidance from the USDA.
NIH Office of Dietary Supplements ods.od.nih.gov
Research-based fact sheets on nutrients, supplements, dietary intake, and safety considerations.
International Society of Sports Nutrition sportsnutritionsociety.org
Evidence-informed sports nutrition resources and position stands for active people and athletes.
Conclusion
Preparing for an earthquake without securing walls is a matter of reducing exposure to falling and sliding hazards, preserving movement routes, and rehearsing decisions before shaking begins. Start with sleeping and seating areas, where people may have little warning and limited ability to move. Lower heavy storage, relocate breakables, clear exits, latch cabinets, and place essential footwear and lighting within reach. Then practice protective actions with every household member, including anyone with mobility needs or pets. Inspect utility access and know which conditions require leaving the building or calling for professional help. Recheck the arrangement after furniture changes and treat temporary products according to their limits. A modest, well-maintained layout can address many preventable hazards even when permanent wall work is unavailable.
A heating-failure plan is strongest when it begins before the furnace, boiler, heat pump, or electrical service fails. Identify the equipment type, its energy source, and the conditions that could stop it. A gas furnace may lose operation during a power outage even when gas service remains available, while an electric heat pump may stop because of a tripped breaker, damaged outdoor unit, or wider utility interruption. These distinctions determine which backup measures are useful.
Record the location of the main electrical panel, fuel shutoffs, thermostat, water shutoff, and any reset controls described in the manufacturer’s documentation. Do not experiment with unfamiliar gas appliances or repeatedly reset equipment that smells of fuel, shows scorch marks, or makes unusual noises. A qualified technician is the appropriate choice for combustion, wiring, refrigerant, and flue problems. A homeowner’s visual check should identify obvious issues, not replace maintenance or repair.
Before the heating season, arrange routine service and replace filters according to the equipment instructions. Test carbon monoxide alarms on every level and near sleeping areas, and replace batteries or the entire alarm when its manufacturer specifies. Keep vents, intake openings, and exhaust outlets clear of snow, leaves, stored items, and vehicles. A common mistake is treating a portable heater as the main plan while ignoring a blocked vent or failing alarm that could turn a minor outage into a life-threatening event.
Write down the heating contractor, utility, landlord, property manager, and local warming-center or emergency-information contacts. Store the list on paper because an outage may remove internet access or drain a phone. Add a note identifying anyone who depends on electrically powered medical equipment, refrigerated medication, mobility devices, or temperature-sensitive care. The useful question is not merely whether the home has heat; it is how quickly each resident would lose a safe alternative if the system stopped.
Create a Warm-Zone Plan for the First Hours
When central heat fails, concentrate available warmth instead of trying to keep the entire house comfortable. Select a small room with few windows, limited exterior walls, and enough space for everyone to sit or sleep safely. Close doors to unused rooms, draw curtains after daylight fades, place rolled towels at noticeable drafts, and keep interior doors open only when they improve access or supervision. Do not block required ventilation or exits.
The room should contain blankets, warm clothing, drinking water, snacks, medication, a phone charger, lighting, and a working carbon monoxide alarm. Layered clothing generally works better than relying on a single heavy garment because layers trap air and can be adjusted as activity changes. Hats, dry socks, and insulated footwear matter when floors are cold. Wet clothing should be changed promptly; damp fabric conducts heat away from the body and makes a mildly cool room feel far more dangerous.
Use the first few minutes to establish whether the problem is local or widespread. Check the thermostat setting, breaker position, and visible power status only when doing so presents no electrical or fire risk. If neighbors also lack heat, utility alerts may clarify the outage. If only one appliance has stopped, a service call may be faster than activating a generator. A weak assumption is that every heating failure needs an improvised heat source; sometimes the safest solution is conserving warmth briefly while arranging repair or relocation.
Set decision points rather than waiting until everyone is uncomfortable. If the indoor temperature continues falling, a resident becomes confused or unusually drowsy, or a vulnerable person cannot remain warm, move to a heated location. A home may remain tolerable for healthy adults wearing layers but unsafe for infants, older adults, or people with certain medical conditions. The winter heating failure plan should name who drives, who needs assistance, and what supplies leave with them.
Choose Backup Heat Without Creating New Hazards
Backup heat should be selected by fuel, ventilation requirement, electrical demand, and fire clearance—not by heat output alone. Electric space heaters avoid indoor combustion but require a dependable power source and can overload circuits or ignite nearby materials. A generator can support selected equipment, but it must remain outdoors, far from doors, windows, and vents, with exhaust directed away from the building. It must never be operated in a garage, basement, shed, porch, or enclosed vehicle area.
Never heat a room with a kitchen oven, stovetop, charcoal grill, camp stove, patio heater, or fuel-burning appliance that is not specifically approved for indoor use. Carbon monoxide is odorless, and opening a window does not make an unsuitable device safe. A generator connected to household wiring without a properly installed transfer arrangement can energize lines and endanger utility workers. Follow the appliance manual and local fire-safety guidance rather than adapting outdoor equipment to indoor conditions.
For a portable electric heater, choose a model with intact cords, place it on a stable noncombustible surface, keep it away from bedding and curtains, and plug it directly into a wall outlet unless the manufacturer explicitly permits another arrangement. Do not run a cord under rugs or use a damaged extension cord. Turn the unit off when leaving the room or sleeping unless its instructions and local safety guidance specifically support unattended operation.
There is a practical tradeoff between buying backup equipment and planning relocation. A generator may preserve a furnace blower, refrigerator, sump pump, or medical device, but it brings fuel storage, noise, maintenance, and carbon monoxide risks. A small heater may be simpler for a short, localized outage but useless during a grid failure. Test equipment before winter, maintain fuel as directed, and confirm that the chosen device matches the circuit capacity and the people who will operate it. The heating-failure checklist should include carbon monoxide alarms, not just batteries and fuel.
Protect People, Pipes, and Household Operations
Cold homes create several problems at once: residents lose body heat, plumbing may freeze, food storage may become unreliable, and darkness makes unsafe decisions more likely. Put human safety ahead of property. Check on people who live alone, older relatives, infants, and neighbors with disabilities. Keep phones charged, use flashlights rather than candles where possible, and avoid alcohol as a warming strategy because it can impair judgment and increase heat loss.
Pipe protection depends on the building, outdoor temperature, insulation, and outage duration. Open cabinet doors beneath sinks on exterior walls when appropriate, allow vulnerable faucets to drip only when local plumbing guidance supports it, and know where the main water shutoff is located. If a pipe freezes, do not use an open flame or attempt a high-temperature repair. A sudden return of water can reveal a split pipe, so inspect carefully and shut off water if leakage appears.
Food and medication deserve separate planning. Keep refrigerator and freezer doors closed as much as possible, follow current food-safety guidance when power returns, and maintain a cooler plan for medicines that require temperature control. Do not place medication outdoors simply because the air feels cold; freezing can damage some products. Contact a pharmacist or clinician for product-specific instructions. This is where a written household plan outperforms improvisation: it identifies which items need a person, a vehicle, or a heated destination first.
A compact priority list can keep decisions orderly:
Call for emergency help if there is fire, suspected carbon monoxide, a fuel leak, or a medical crisis.
Move vulnerable residents to a heated location before the home becomes difficult to leave.
Conserve warmth in the selected room and monitor safe use of any approved heater.
Protect pipes and essential equipment only after people are secure.
Document the failure and arrange professional repair rather than repeatedly restarting unsafe equipment.
Common mistakes include closing all vents in an attempt to save heat, running a generator beside the house, and assuming a carbon monoxide alarm detects every combustion problem. Alarms are a backup, not permission to use an unsafe appliance. If an alarm sounds, everyone should leave the building and contact emergency services from outside. The home heating plan is complete only when it covers both staying safely and leaving promptly.
Frequently Asked Questions
What should I do first when the heat stops?
Check for immediate danger, then verify the thermostat and breaker only if safe. Gather residents in the selected warm zone and contact the utility, landlord, or technician.
Can I use a gas oven to heat my home?
No. An oven or stovetop can produce carbon monoxide, fire, or burns. Use only equipment approved for indoor heating and follow its instructions.
Where should a generator operate?
Operate it outdoors in a well-ventilated location far from doors, windows, and vents, following the manufacturer’s clearance instructions. Never use it inside a garage or other enclosed space.
How can I keep pipes from freezing?
Conserve heat around vulnerable plumbing, open suitable sink cabinets, and know the main water shutoff. Do not thaw frozen pipes with an open flame.
When should I leave the house?
Leave before conditions become unsafe for anyone in the household, especially infants, older adults, or people with medical needs. Leave immediately for suspected carbon monoxide, fire, or a fuel leak.
Further Reading
Authoritative Sources
Academy of Nutrition and Dietetics eatright.org
Professional nutrition guidance, healthy eating resources, and practical dietitian-reviewed advice.
U.S. Department of Agriculture usda.gov
Official food, nutrition, agriculture, and consumer guidance from the USDA.
NIH Office of Dietary Supplements ods.od.nih.gov
Research-based fact sheets on nutrients, supplements, dietary intake, and safety considerations.
International Society of Sports Nutrition sportsnutritionsociety.org
Evidence-informed sports nutrition resources and position stands for active people and athletes.
Conclusion
Preparing for a winter heating failure means planning for both lost warmth and the hazards created by desperate shortcuts. Service the heating system, test carbon monoxide alarms, identify shutoffs, and assemble a warm-zone kit before the first severe cold arrives. Decide in advance whether your household can safely use an approved electric heater or generator, and know when relocation is the better option. During an outage, protect people before pipes or food, keep combustion equipment outside unless specifically approved for indoor use, and treat alarms, fuel odors, and unusual symptoms as reasons to leave. A written plan with contacts, transportation, medications, and equipment instructions turns a confusing failure into a sequence of manageable decisions.
The Sanitation Priorities Created by a Water Shutdown
A water outage changes sanitation from a routine household task into a containment problem. Toilets may still flush once or twice using stored water, but repeated flushing can quickly exhaust a limited supply. Sinks, showers, laundry machines, and dishwashers also become less useful, while hands and frequently touched surfaces accumulate contamination more readily.
The first priority is human waste, followed by hand hygiene, surface cleaning, and general trash control. That order matters because waste can contaminate floors, footwear, hands, and nearby supplies. A household with plenty of disinfectant but no reliable toilet substitute is less prepared than one with a simple lined bucket, gloves, and a way to seal used bags.
Think in terms of separate stations rather than one oversized supply box. A toilet station needs bags, liners, toilet paper, absorbent material, and a lid or cover. A hand-cleaning station needs soap and water when available, alcohol-based hand sanitizer for compatible situations, paper towels, and a waste container. A cleaning station needs gloves, disinfectant, cloths or disposable towels, and a way to isolate dirty materials.
For example, a short outage in a small apartment may require compact supplies and careful odor control, while a multi-day outage affecting several people requires more bags, more hand-cleaning capacity, and a disposal decision. The mistake is treating sanitation as a single product category. It is a sequence: collect waste without leakage, prevent hand transfer, clean contamination promptly, and store used materials safely.
A useful related reference is What sanitation supplies matter when water service stops, especially when comparing sanitation needs with broader household water storage.
Toileting and Waste-Containment Supplies
The most useful toilet substitute is one that can remain stable, be lined, and be closed or covered between uses. A portable camping toilet offers convenience and a purpose-built container, but a sturdy five-gallon bucket with a secure seat can work for short-term household use when handled carefully. A regular open bucket is a poor choice because it is unstable, difficult to cover, and more likely to spill.
Use two heavy-duty bags as liners when the container design allows it. The inner bag catches waste; the outer bag provides backup if the first bag leaks or tears. Add a modest amount of absorbent material after use, such as sawdust, shredded paper, or commercially made absorbent. The goal is to reduce liquid movement and odor, not to fill the container with bulky material. Cat litter can absorb moisture, but scented products may be unpleasant in a poorly ventilated room.
Toilet paper, pre-moistened wipes, and disposable gloves belong at the station, not in a distant closet. Wipes should generally go into the waste bag rather than the toilet substitute unless the product and system specifically permit flushing. Keep a separate container for personal-care waste, because mixing loose items with the toilet liner can make handling harder and increase the chance of punctures.
A portable chemical toilet and a lined bucket involve different tradeoffs. The portable unit may control liquid and odor better but can require specific chemicals, replacement parts, and manufacturer directions. The bucket is inexpensive and adaptable, yet it demands disciplined bag changes and better odor management. Neither option eliminates the need to follow local public-health or waste-disposal instructions.
Replace a liner before it becomes too heavy to lift safely. A common failure is waiting until the bag is full, especially when it contains liquid. Heavy bags are harder to tie, more likely to rupture, and more difficult for one person to move. Tie or close each bag securely, place it inside a second container or bag when appropriate, and keep it away from food, children, pets, heat, and direct contact with living areas.
Hand Hygiene and Surface Cleaning
Hand hygiene supplies interrupt the transfer of contamination from waste stations to food, phones, door handles, and faces. Soap and a dependable water supply remain the preferred combination when water is safe and available. If water is scarce, alcohol-based hand sanitizer can serve as a practical alternative for visibly clean hands, but it is less useful when hands are greasy or visibly dirty.
Keep sanitizer near the toilet area and at the entrance to the food-preparation space. A pump bottle is easier to use with gloved or dirty hands than a small screw-cap bottle. Provide paper towels or clean reusable towels that can be laundered later. Bar soap is workable, but it should be kept on a draining dish rather than sitting in pooled water.
Cleaning and disinfecting are different actions. Cleaning removes soil; disinfecting applies a product intended to reduce microorganisms on a cleaned surface. If a surface has visible waste, first remove it with disposable towels while wearing gloves, then clean and disinfect according to the product label. Do not mix bleach with ammonia, acids, or other cleaners, and do not assume that stronger concentration is safer or more effective.
Prioritize toilet seats, bucket handles, faucet handles, light switches, doorknobs, and counters used for food. A household may have only a small amount of disinfectant, so using it on every floor is less sensible than reserving it for high-touch areas and visible contamination. Disposable gloves reduce direct contact, but they do not replace hand cleaning; contaminated gloves can spread waste just as readily as contaminated hands.
Consider disposable aprons or washable work clothing if repeated handling is expected. A useful comparison is paper towels versus cloth rags: paper creates more waste but can be sealed immediately, while cloth saves supplies but requires a safe way to store and wash it. The best choice depends on water availability, laundry access, and the number of people using the station. The linked sanitation supply checklist should be adapted to those constraints rather than copied unchanged.
Building a Workable Sanitation Station
A sanitation station works when every action can be completed without crossing the clean and dirty sides of the household. Place the toilet substitute in a private, ventilated location with a stable floor, nearby lighting, and enough room to tie or replace bags. Do not position it beside food, drinking-water containers, medication, or clean clothing.
Arrange supplies in the order they are used: fresh liners and toilet paper first, absorbent material within reach, gloves beside the container, and a lidded receptacle for used towels. Keep hand sanitizer outside the immediate waste container area so users can clean their hands without touching contaminated equipment. If children, older adults, or someone with limited mobility will use the station, stability and access may matter more than compact storage.
A compact priority list can prevent spending money on low-value extras:
First: a stable toilet container, heavy-duty liners, absorbent material, toilet paper, and a method for sealing waste.
Next: soap, stored handwashing water, hand sanitizer, paper towels, and a hands-free or easy-clean waste bin.
Then: disposable gloves, disinfectant, cleaning cloths, and protective clothing.
All in all: odor-control products, spare containers, and convenience items that fit the available storage space.
Test the arrangement before an outage. Sit on the toilet substitute to check stability, practice changing a liner with gloves, and confirm that the selected bags fit without stretching over sharp edges. A dry run often reveals that the container is too low, the bag opening is too narrow, or the cleaning supplies are stored too far away.
For a household with several people, assign a routine for checking the bag, wiping touch points, and replenishing the hand station. For one person, a smaller container may reduce storage demands but require more frequent changes. Overbuilding the station can waste space; underbuilding it can force unsafe improvisation when water service is already out.
Storage, Disposal, and Common Mistakes
Store sanitation supplies in a dry, accessible place and keep them separate from food and drinking water. Bags, toilet paper, and paper towels should remain dry. Disinfectants should stay in their original labeled containers, away from children and heat. Rotate products with expiration or degradation concerns according to label directions, and check gloves for brittleness or tears.
Disposal is the least predictable part of a water outage because local rules, collection schedules, weather, and the cause of the interruption can differ. Do not bury, burn, or place human waste into ordinary systems unless local authorities or the relevant waste service specifically permits that method. Follow public-health instructions if an outage affects a broad area, and contact the local utility or health department when the correct disposal route is unclear.
Several assumptions create avoidable problems. Flushing with untreated water may be inappropriate for some plumbing situations, and pouring large amounts into a drain can move contamination rather than solve it. Ordinary kitchen trash bags may split under wet waste. Scented sprays can mask odor without controlling the source. Disposable wipes labeled flushable can still create plumbing problems, particularly when water service or wastewater operations are disrupted.
Inspect the setup for signs of failure: leaks, torn liners, persistent odor, overflowing receptacles, contaminated handles, or sanitizer that is empty or inaccessible. A leaking bag should be isolated without squeezing it, placed into a second sturdy container, and cleaned up with gloves and appropriate disinfectant. If waste has spread beyond a manageable household spill, seek guidance rather than improvising with mixed chemicals or unprotected cleanup.
Sanitation planning belongs beside, not behind, water storage. The broader household sanitation plan should identify who will monitor supplies, where used bags will remain temporarily, and which official source will provide disposal instructions. That preparation reduces rushed decisions while preserving limited clean water for drinking, cooking, and handwashing.
Frequently Asked Questions
Can a five-gallon bucket replace a toilet during a water outage?
A sturdy bucket can serve as a short-term toilet substitute when lined with heavy-duty bags, kept stable, covered between uses, and emptied according to local guidance.
How many bags should be used for human waste?
Double-bagging provides a useful backup against leaks, but bag strength and container design matter. Replace bags before they become too heavy to lift safely.
Is hand sanitizer enough when water service stops?
Sanitizer is useful for hands that are not visibly dirty, but soap and safe water are preferred when available. Remove visible soil before relying on sanitizer.
What disinfectant should be kept for sanitation?
Choose a labeled household disinfectant and follow its directions, including contact time and ventilation. Never mix bleach with ammonia, acids, or other cleaners.
Where should used sanitation bags be stored?
Keep securely closed bags in a designated, shaded area away from food, water, children, pets, and living spaces until local disposal instructions are available.
Further Reading
Authoritative Sources
Academy of Nutrition and Dietetics eatright.org
Professional nutrition guidance, healthy eating resources, and practical dietitian-reviewed advice.
U.S. Department of Agriculture usda.gov
Official food, nutrition, agriculture, and consumer guidance from the USDA.
NIH Office of Dietary Supplements ods.od.nih.gov
Research-based fact sheets on nutrients, supplements, dietary intake, and safety considerations.
International Society of Sports Nutrition sportsnutritionsociety.org
Evidence-informed sports nutrition resources and position stands for active people and athletes.
Conclusion
A water-service interruption calls for a sanitation system, not a random collection of cleaning products. Give first priority to a stable lined toilet substitute, leak-resistant bags, absorbent material, toilet paper, and a safe way to close and isolate waste. Add handwashing or sanitizer stations, gloves, paper towels, and correctly used disinfectant so contamination does not travel from the toilet area to food and household touch points.
Before an outage, test the setup, check that bags fit, identify a temporary storage location, and find the local source for disposal instructions. Keep sanitation supplies dry, labeled, and separate from drinking water. These modest checks make the difference between a controlled household routine and unsafe improvisation when plumbing is unavailable.
Professional instruction is warranted when a household’s emergency decisions depend on guesswork, conflicting assumptions, or skills that have never been observed by a qualified instructor. Reading a checklist can identify supplies and telephone numbers, but it cannot show whether everyone knows who moves a child, who retrieves medication, how an evacuation route works at night, or when an injury exceeds home care.
A useful test is to run a short, unannounced exercise without opening a binder or searching online. Ask a household member to describe the first action after smoke is detected, loss of power, a severe weather alert, or a suspected medical emergency. If answers differ, people freeze, or the designated action depends on one highly trained person being present, the household has a training gap rather than a documentation problem.
Outside instruction is particularly valuable when the consequences of a mistake are immediate. Fire behavior, bleeding control, cardiopulmonary resuscitation, emergency medication procedures, and evacuation from a mobility-limited home all involve details that are difficult to learn accurately from text alone. A trainer can correct hand position, communication habits, route selection, and unsafe improvisation before a real incident exposes them.
Self-study still has a place. It is efficient for learning local alert systems, reviewing family contacts, labeling shutoffs, and keeping plans current. The common mistake is treating information acquisition as performance. A household that owns a first-aid kit but cannot locate it in darkness, or has an evacuation map that ignores a blocked stairway, has invested in objects without validating the process. When a household needs professional emergency training is therefore a performance question, not a measure of how many supplies are stored.
Situations That Change a Household’s Training Needs
Professional training becomes more appropriate when the people, hazards, or physical conditions in a home change. A household may have managed adequately with informal knowledge for years, then face a new risk after an older relative moves in, a baby arrives, someone develops a disability, or a family member begins using oxygen, insulin, seizure medication, or another medically significant device. The change is not merely demographic; it alters timing, movement, communication, and supervision.
Recent incidents are another strong signal. A kitchen fire that was contained, a missed evacuation warning, a fall during a storm, or a prolonged outage can reveal weaknesses that seemed theoretical. Review what actually happened: who noticed the problem, who made the decision, which equipment was available, and where confusion occurred. If the same failure could recur under worse conditions, targeted instruction may be more useful than purchasing additional gear.
Local exposure should shape the choice of course. A coastal household may need storm evacuation and generator safety instruction, while a rural home may need wildfire behavior, remote communication, and extended access planning. A city apartment presents different constraints, including shared exits, elevators that may be unavailable, smoke movement, and limited storage. National guidance from Ready.gov and local emergency management offices can identify hazards, but an instructor can help translate them into actions for a particular building and household.
Specialized circumstances deserve more than a generic family seminar. A person who uses a wheelchair may need a realistic exit and transfer discussion; a caregiver may need supervised practice with a child-specific emergency routine; a household with pets must account for carriers, leashes, medication, and transport timing. The mistake is assuming that one adult’s competence covers everyone. If that person is injured, away, asleep, or overwhelmed, the plan may fail at its most important moment.
Choosing Instruction That Fits the Actual Risk
The strongest course is not necessarily the longest or most expensive. It should match the household’s likely hazards and teach observable actions rather than only presenting slides. Before enrolling, ask whether the class includes hands-on practice, instructor feedback, scenario work, accessibility adaptations, and clear boundaries about when to call emergency services. A course designed for workplace compliance may not address children, pets, apartment exits, or household communication.
Credentials and subject expertise matter, but they should be connected to the lesson being purchased. A first-aid or CPR class is different from wildfire evacuation training, defensive driving, amateur radio instruction, or home fire-safety education. A medically focused course may not teach building evacuation, and a disaster-planning seminar may not provide clinical skills. Selecting a provider by reputation alone can leave a major gap between the advertised subject and the household’s actual need.
Compare instruction by asking practical questions:
Will participants practice the skill with appropriate equipment rather than only watch a demonstration?
Can the instructor adapt scenarios for children, older adults, disabilities, language needs, or pets?
Does the class explain what an untrained person should not attempt?
Will participants leave with a way to test the skill at home?
Are course materials consistent with current guidance from recognized emergency, medical, or public-safety organizations?
Budget and scheduling create real tradeoffs. A private household session may expose layout problems that a public class cannot, but a group course may offer broader scenario practice at a lower cost. Online learning can work for communication plans and hazard awareness; it is weaker for skills requiring physical positioning, timing, equipment handling, or instructor correction. A sensible approach may combine formats: use official online resources for background, then pay for hands-on teaching where a mistake could cause serious harm.
Be cautious of providers who promise mastery in a single short session, sell unnecessary equipment as the centerpiece, or blur the line between preparedness education and licensed medical or rescue work. A trustworthy instructor explains uncertainty, encourages emergency calls when appropriate, and does not claim that household training replaces firefighters, paramedics, clinicians, or public authorities.
Turning a Course Into Reliable Household Capability
Training has value only when the household can reproduce the action after the class ends. Within a few days, convert the lesson into a brief household exercise using the actual rooms, exits, communication devices, medications, and transport options. Practice at the time and conditions that expose weaknesses: low light, a sleeping adult, a dead phone battery, a blocked front door, or a family member who communicates differently under stress.
Assign responsibilities by function rather than by vague promises. One person may call for help, another may guide children, and another may bring a go-bag or unlock an exterior gate. Every essential task needs a backup. Write the assignments in plain language and place them where people will see them, but avoid creating a plan so detailed that nobody can remember the first three actions.
A compact household drill can follow this sequence:
Announce one realistic scenario and identify the immediate danger.
Have each person state or perform the first safe action.
Check whether exits, contacts, supplies, and mobility needs are actually accessible.
Stop the exercise if anyone is placed at risk, then record confusion or delay.
Repeat only the weak portion after correcting the plan or seeking further instruction.
For example, a family may discover that its designated meeting place is across a road that becomes unsafe during evacuation, or that a caregiver cannot carry both a child and a medical bag. Those findings are more useful than a drill that simply ends with everyone standing outside. The goal is not theatrical realism; it is finding a manageable correction before an emergency.
Use different review methods for different skills. A contact plan can be read aloud quarterly, while CPR or bleeding-control skills may require periodic supervised refreshers because physical technique and confidence can fade. A household should not assume that a completion card proves lasting ability. Look for signs that training is working: people use the same terminology, identify limits quickly, locate equipment without searching, and can explain what happens if the primary person is unavailable.
Limits, Safety Boundaries, and Review Timing
Professional emergency training reduces uncertainty; it does not make a household self-sufficient in every crisis. Home responders still face smoke, structural damage, contaminated water, severe weather, emotional stress, and incomplete information. The safest training emphasizes early warning, rapid communication, evacuation when directed, and appropriate handoff to emergency professionals rather than encouraging risky rescues.
Households should define stop points before practicing or responding. Do not re-enter a burning or damaged structure, delay an emergency call while attempting a complicated intervention, or use equipment without understanding its hazards. Generator placement, medication changes, structural repairs, and treatment decisions may require qualified professionals. Training can improve recognition and first actions, but it should not be interpreted as permission to exceed a person’s competence.
Review timing should follow change and exposure, not a convenient calendar alone. Reassess after moving, remodeling, acquiring a vehicle, changing caregivers, adding medical equipment, adopting a pet, or experiencing a local incident. Seasonal reviews are useful for weather-specific risks, while skills that depend on hands-on technique deserve refreshers based on the provider’s guidance and the household’s confidence.
One weak assumption is that the most dramatic hazard deserves all the attention. A household may spend heavily on rare-event equipment while failing to teach how to unlock an exit, share an address with dispatch, or respond to a fall. Prioritize the events that are plausible, time-sensitive, and difficult to improvise safely. A focused class followed by repeated short drills usually offers more practical value than an impressive but unused collection of supplies.
For households comparing options, the decision can be framed simply: use self-study for information, choose hands-on professional instruction for skills that require correction, and seek specialized providers when a disability, medical condition, building feature, or local hazard changes the response. That distinction keeps training proportionate without minimizing genuine risk.
Frequently Asked Questions
Can a household learn emergency skills without paying for a course?
Yes, official guides can support planning, contacts, alerts, and evacuation information. Hands-on instruction is more appropriate when technique, timing, equipment handling, or accessibility needs affect safety.
Which household members should attend professional training?
Every adult and capable older child who may be present during an emergency should learn the relevant first actions. Include caregivers and backup adults when they share responsibility for children, older adults, or people with disabilities.
Is CPR training enough for household emergency readiness?
No. CPR addresses one medical response. A household may also need fire evacuation, emergency communication, severe-weather sheltering, medication continuity, and safe utility or generator practices.
How can a household tell whether training worked?
Run a short drill without notes and observe whether people identify the hazard, choose a safe first action, locate equipment, communicate clearly, and know when to contact emergency services.
When should emergency training be repeated?
Repeat or refresh it after household changes, a move, a new hazard, a failed drill, or a long gap since hands-on practice. Review seasonal risks before the period when they are most likely.
Further Reading
Authoritative Sources
Academy of Nutrition and Dietetics eatright.org
Professional nutrition guidance, healthy eating resources, and practical dietitian-reviewed advice.
U.S. Department of Agriculture usda.gov
Official food, nutrition, agriculture, and consumer guidance from the USDA.
NIH Office of Dietary Supplements ods.od.nih.gov
Research-based fact sheets on nutrients, supplements, dietary intake, and safety considerations.
International Society of Sports Nutrition sportsnutritionsociety.org
Evidence-informed sports nutrition resources and position stands for active people and athletes.
Conclusion
Professional emergency training makes sense when a household must perform time-sensitive actions that reading and equipment ownership cannot validate. The clearest triggers are a failed drill, a recent incident, a change in mobility or medical needs, a new home or vehicle, and exposure to hazards that require specialized decisions. Match instruction to the actual risk, favor supervised practice for physical skills, and ask providers to explain both capabilities and limits. After the course, test the plan in the real home with backup assignments and accessible equipment. Review what caused delay or confusion, correct one weakness at a time, and involve every person who may need to act. A modest, rehearsed response is more dependable than an elaborate plan that only one household member understands.