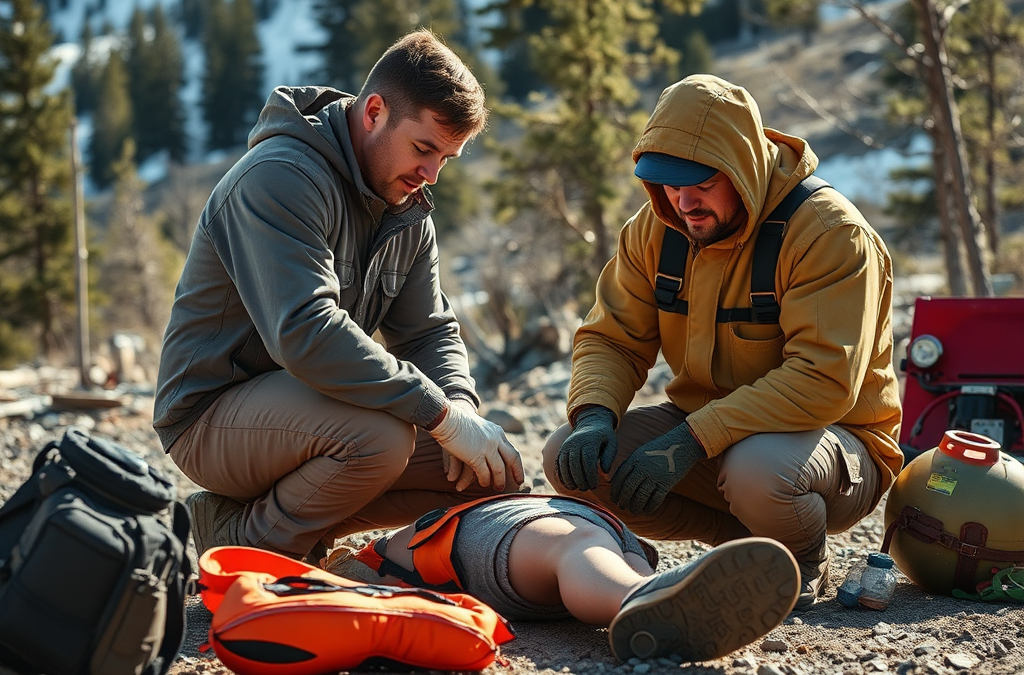
When faced with injuries in remote areas during emergencies, the first step is to conduct an immediate assessment of the situation. This involves checking the injured person’s responsiveness, airway, breathing, and circulation (the ABCs of first aid). Stabilization is crucial; for instance, if there are visible wounds, apply pressure to control bleeding. If the person is unconscious, ensure they are positioned safely to maintain an open airway.
Common mistakes include rushing to move the injured person without assessing their condition first. This can exacerbate injuries, especially spinal injuries. Prioritize stabilization techniques, such as keeping the person warm and comfortable, while you prepare for further action.
Utilizing Available Resources
In remote locations, resources may be limited, making it essential to know how to utilize what is available effectively. First aid kits should be stocked with essential items such as bandages, antiseptics, and splints. Knowing how to improvise with available materials can also be beneficial; for example, using clothing to create a makeshift bandage or splint can provide temporary support.
It’s important to regularly check and restock your first aid supplies before heading into remote areas. Understanding the capabilities and limitations of your equipment is vital; for instance, a tourniquet can be lifesaving but should only be used when necessary to avoid complications. Always familiarize yourself with basic first aid techniques that correspond to the items in your kit.
Effective Communication in Emergencies
Effective communication is a critical component of handling injuries in remote areas. If you are in a location with limited cell service, consider carrying a satellite phone or a personal locator beacon (PLB) to send distress signals. Knowing how to communicate your location clearly can expedite rescue efforts.
When communicating with emergency services, provide specific details about the injury, the location, and any other relevant information. This can help responders prepare adequately for the situation. It’s also wise to have a plan for relaying messages to others in your party, ensuring everyone is aware of the situation and can assist as needed.
Evacuation Planning and Medical Access
Planning for evacuation is essential when dealing with injuries in remote areas. Familiarize yourself with the nearest medical facilities and the best routes to reach them. Understanding the terrain and any obstacles can help you devise a more effective evacuation strategy.
When planning an evacuation, consider the severity of the injury. For minor injuries, it may be feasible to walk the injured person to safety, while severe injuries may require a more careful approach, such as using a stretcher or calling for air evacuation if available. Always prioritize the safety of the injured person and those assisting in the evacuation.
Frequently Asked Questions
What should I include in a first aid kit for remote areas?
Your first aid kit should include bandages, antiseptic wipes, gauze, adhesive tape, scissors, tweezers, and a first aid manual.
How can I signal for help in a remote area?
You can signal for help using a whistle, mirrors, or by creating large ground signals visible from the air.
What are the signs of a serious injury?
Signs of a serious injury include severe bleeding, unconsciousness, difficulty breathing, or a compound fracture.
How can I prevent injuries while in remote areas?
To prevent injuries, ensure you are well-prepared with proper equipment, knowledge of the terrain, and by practicing safety measures during activities.
What should I do if someone has a head injury?
If someone has a head injury, keep them still and monitor their condition, while seeking medical help as soon as possible.
Further Reading
Authoritative Sources
Library of Congress Research Guides guides.loc.gov
Research guides that help readers locate reliable background sources on a wide range of subjects
USA.gov Official Information and Services usa.gov
Official U.S. government information and public resources for practical reference
Google Scholar scholar.google.com
Academic search resource for finding research literature and source material
Conclusion
Handling injuries in remote areas during emergencies requires decisive action, effective resource management, and clear communication. Prioritize immediate assessment and stabilization, utilize available resources wisely, and maintain a robust evacuation plan. Being prepared can make a significant difference in the outcome of an emergency situation.
Civil unrest can arise from various factors, including political tensions, economic disparities, and social injustices. Recognizing these underlying causes is essential for understanding the potential for unrest in your area. For instance, communities experiencing high unemployment rates or governmental corruption may be more susceptible to protests and riots. Understanding these dynamics helps individuals assess their risk and prepare accordingly.
Common misconceptions include the belief that unrest is always violent or that it only occurs in specific regions. In reality, civil unrest can manifest in various forms, from peaceful demonstrations to violent outbreaks. An informed citizen should monitor local news, social media, and community discussions to gauge the current climate and potential triggers for unrest.
Creating an Emergency Preparedness Plan
Having a well-thought-out emergency preparedness plan is crucial for ensuring safety during civil unrest. This plan should outline escape routes, safe locations, and communication strategies with family and friends. A practical approach is to identify multiple routes to safety, considering potential roadblocks or areas of conflict.
In addition to physical routes, consider digital communication strategies. Establish a group chat or a designated contact person who can relay information if mobile networks become congested. Regularly review and practice this plan with family members to ensure everyone knows their role and responsibilities in case of unrest.
Essential Supplies for Civil Unrest
When preparing for civil unrest, assembling a comprehensive supply kit is vital. Your kit should include non-perishable food, water, first-aid supplies, and essential medications. The general guideline is to have at least three days’ worth of supplies for each family member, but extending this to two weeks is advisable for added security.
In addition to food and medical supplies, consider items that enhance your safety and communication capabilities. Flashlights, batteries, portable chargers, and a battery-operated radio can be invaluable during times of unrest. Be sure to regularly check expiration dates and replenish supplies as needed.
Staying Informed During Unrest
Staying informed is critical during civil unrest. Reliable information can help you make safe decisions and avoid dangerous situations. Utilize a variety of sources, including local news, government alerts, and social media. However, be cautious of misinformation on social platforms; always cross-check information with reputable news outlets.
Establishing a routine for checking updates can help you stay informed without becoming overwhelmed. Set specific times during the day to review news and alerts, and consider following local authorities or community organizations on social media for real-time updates.
Frequently Asked Questions
What should I include in my emergency supply kit?
Your emergency supply kit should include non-perishable food, water, first-aid supplies, essential medications, a flashlight, batteries, and a battery-operated radio.
How can I stay safe during civil unrest?
Stay informed about local situations, have an emergency plan, avoid areas of conflict, and keep essential supplies ready.
What are some signs of potential civil unrest?
Signs may include heightened tensions in the community, protests being organized, or significant political changes that could trigger public response.
How can I prepare my family for civil unrest?
Develop a family emergency plan, conduct drills, and ensure all members understand their roles and responsibilities during a crisis.
Where can I find reliable information during civil unrest?
Check local news outlets, government alerts, and follow trusted community organizations on social media for real-time updates.
Further Reading
Authoritative Sources
Library of Congress Research Guides guides.loc.gov
Research guides that help readers locate reliable background sources on a wide range of subjects
USA.gov Official Information and Services usa.gov
Official U.S. government information and public resources for practical reference
Google Scholar scholar.google.com
Academic search resource for finding research literature and source material
Conclusion
Preparing for potential civil unrest requires a proactive approach, including understanding the factors that contribute to unrest, creating a comprehensive emergency plan, assembling essential supplies, and staying informed. By assessing your situation and taking these steps, you can enhance your safety and security during uncertain times. Regularly review your preparedness plans and adapt them based on changing circumstances to ensure you are always ready for potential unrest.
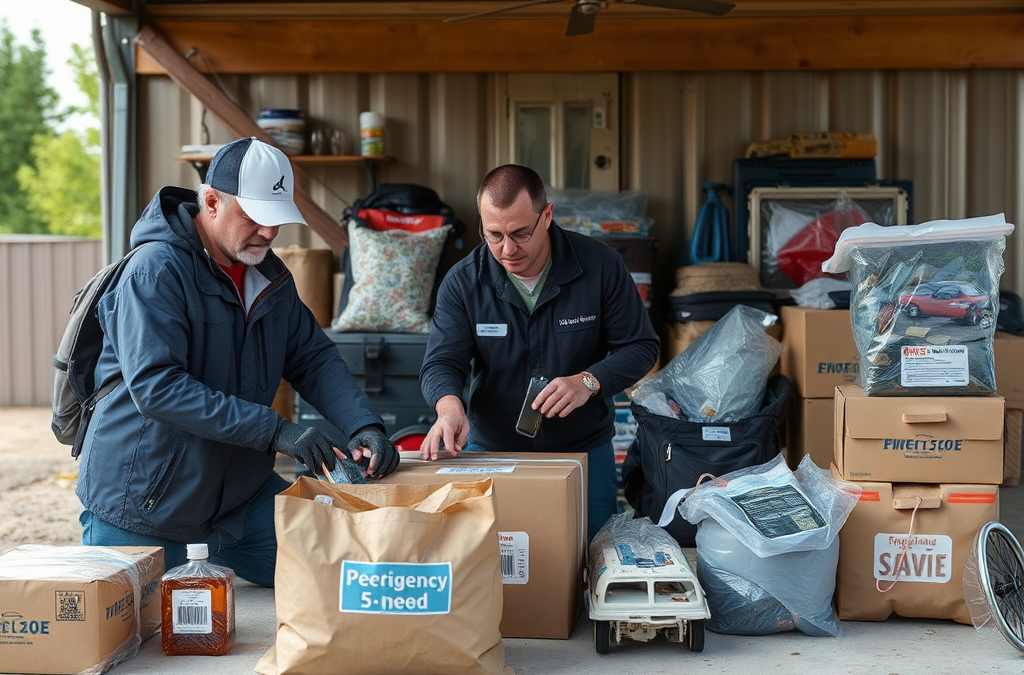
Emergency supplies are essential items that individuals or families prepare to use in crisis situations, such as natural disasters or other emergencies. These supplies can include food, water, medical kits, tools, and personal hygiene items. Understanding the role of these supplies is crucial for ensuring safety and preparedness during unforeseen events. Quality evaluation ensures that the supplies will function effectively when needed, reducing risks and enhancing survival chances.
Key Criteria for Quality Evaluation
When evaluating the quality of emergency supplies, certain criteria stand out as essential:
Durability: Supplies should be made from high-quality materials that can withstand harsh conditions. For instance, water containers should be BPA-free and resistant to cracking.
Functionality: Each item must serve its intended purpose effectively. A multi-tool should have reliable mechanisms for various functions, while a first aid kit should include necessary medical items.
Expiration Dates: Check expiration dates on food and medical supplies. Regularly updating these items is crucial as expired supplies can compromise safety and effectiveness.
Certifications: Look for products with safety certifications, such as FDA approval for medical supplies or USDA organic labels for food items, which indicate that they meet specific safety and quality standards.
By focusing on these criteria, individuals can make informed decisions about which supplies to include in their emergency kits, ensuring reliability and safety in critical situations.
Common Pitfalls in Supply Evaluation
Even with a clear understanding of what to look for, there are common pitfalls that can lead to poor evaluations of emergency supplies:
Overlooking User Reviews: Many consumers fail to check user reviews or ratings, which can provide insight into the real-world performance of a product. A high rating does not guarantee quality, but consistent feedback can highlight potential issues.
Ignoring Storage Conditions: Some supplies may degrade if not stored properly. For instance, batteries can lose their charge or become hazardous if exposed to extreme temperatures.
Assuming All Brands Are Equal: Brand reputation can play a significant role in quality. Lesser-known brands may not adhere to the same quality standards as established manufacturers.
Avoiding these pitfalls requires diligence and thorough research to ensure that the supplies chosen are genuinely suitable for emergency situations.
Practical Steps for Evaluation
To effectively evaluate emergency supplies, follow these practical steps:
Conduct Research: Start by researching products online, focusing on reputable sites that provide detailed information, including specifications and user experiences.
Inspect Products Physically: If possible, inspect items in person. Check for build quality, packaging integrity, and any visible damage.
Compare Alternatives: Don’t settle for the first product you find. Compare multiple brands and models to assess which offers the best quality for your needs.
Consult Expert Resources: Utilize resources from emergency management agencies or survival experts that provide guidelines on quality supplies.
By implementing these steps, individuals can systematically evaluate the quality of their emergency supplies, ensuring they are prepared for any situation.
Frequently Asked Questions
What should I include in my emergency supply kit?
Your emergency supply kit should include water, non-perishable food, a first aid kit, flashlights, batteries, a multi-tool, and any necessary medications.
How often should I check my emergency supplies?
It's advisable to check your emergency supplies every six months to ensure items are still usable and not expired.
Are there specific brands I should look for?
Look for reputable brands known for their quality in emergency supplies, such as Coleman for camping gear or Adventure Medical Kits for first aid supplies.
What are some common mistakes when preparing emergency supplies?
Common mistakes include not considering dietary restrictions, failing to update supplies regularly, and underestimating the quantity needed for each person.
How can I ensure my supplies are safe from damage?
Store supplies in a cool, dry place away from direct sunlight, and use waterproof containers to protect them from moisture and pests.
Further Reading
Authoritative Sources
Ready.gov Preparedness Guidance ready.gov
Federal preparedness guidance for household planning, alerts, supplies, and emergencies
American Red Cross Emergency Preparedness redcross.org
Emergency preparedness resources for families, disasters, and practical safety planning
FEMA Preparedness Resources fema.gov
National preparedness resources for planning, mitigation, and response readiness
Conclusion
Evaluating the quality of emergency supplies is crucial to ensure readiness during crises. Focus on critical criteria such as durability, functionality, and expiration dates to make informed choices. Regularly updating and inspecting your supplies can help avoid common pitfalls and ensure that you are truly prepared when emergencies arise. Taking these steps will enhance your safety and confidence in your emergency preparedness efforts.
Recognizing your unique needs is the first step in setting realistic goals for emergency preparedness. Every household has different requirements based on factors like the number of occupants, ages, health conditions, and geographical location. For instance, families with young children may need to prioritize items like baby supplies, while those with elderly members might focus on medical needs. Additionally, understanding local risks such as natural disasters or civil unrest can guide your preparedness planning.
To effectively assess your needs, consider conducting a family meeting or survey to discuss potential emergencies. This inclusive approach ensures that everyone’s concerns are addressed and can help identify specific items or plans that may be overlooked. A common mistake is to assume that one size fits all; tailoring your goals to your family’s unique situation is crucial for effective preparedness.
Assessing Available Resources
Once you’ve identified your specific needs, the next step is to assess the resources available to you. This includes evaluating both financial resources and physical supplies. Take inventory of what you already have, such as food, water, first aid kits, and emergency tools. Understanding what you possess will help you avoid unnecessary purchases and allow you to focus on filling in the gaps.
Consider your budget when planning for emergency preparedness. It’s important to set financial goals that align with your preparedness objectives. For example, if you plan to build a food supply, calculate how much you can realistically spend each month on non-perishable items. A common pitfall here is overspending on fancy gadgets or supplies that may not be essential, diverting funds from more pressing needs.
Establishing Emergency Scenarios
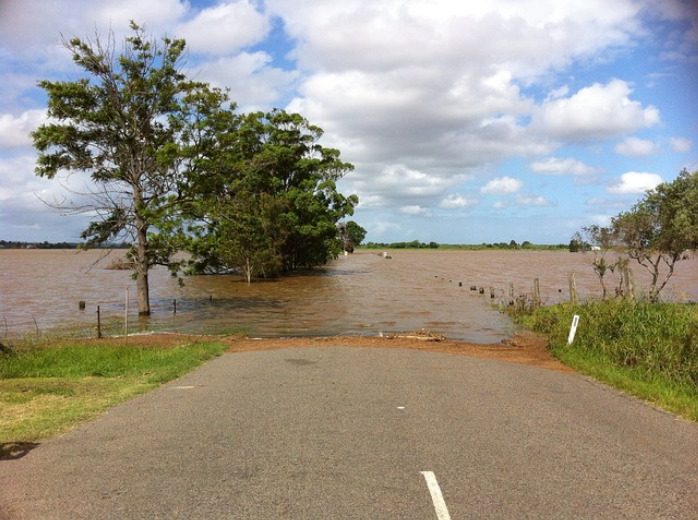
Creating realistic emergency scenarios can help you visualize what you need to prepare for and how to respond effectively. This involves brainstorming potential emergencies that could impact your household, like earthquakes, floods, or power outages. By understanding these scenarios, you can set specific goals tailored to each situation, such as creating an evacuation plan or assembling a go-bag.
Use real-life examples or past experiences to inform your planning. If your area has previously faced flooding, make sure to prioritize water-proofing your supplies or identifying safe evacuation routes. It’s important to remember that every scenario requires different preparations; failing to account for this can lead to incomplete emergency plans. Engage your family in these discussions to ensure everyone understands their role in each scenario.
Setting Achievable Goals
setting goals, it’s crucial to ensure they are attainable and measurable. Break down larger goals into smaller, manageable tasks. For instance, if your goal is to create a comprehensive emergency kit, start by gathering a few essential items each week rather than attempting to buy everything at once. This not only makes the process less overwhelming but also allows you to adapt your goals based on what you learn along the way.
Regularly review and adjust your goals as necessary. Life circumstances can change, and so can your preparedness needs. Keep communication open with your family about progress and any challenges faced. One common mistake is to set overly ambitious goals that lead to frustration and ultimately abandonment of the preparedness plan. By setting realistic and flexible goals, you can maintain motivation and ensure your preparedness remains effective.
Frequently Asked Questions
What are the first steps in emergency preparedness?
Begin by assessing your specific needs based on your family structure and local risks, then take inventory of your available resources.
How can I involve my family in preparedness planning?
Hold family meetings to discuss potential emergencies and assign roles and responsibilities for each family member.
What common mistakes should I avoid in emergency preparedness?
Avoid overspending on unnecessary supplies and failing to tailor your plans to your family's unique needs.
How often should I review my emergency preparedness plan?
Review your plan at least once a year or whenever significant changes occur in your family or living situation.
Further Reading
Authoritative Sources
Ready.gov Preparedness Guidance ready.gov
Federal preparedness guidance for household planning, alerts, supplies, and emergencies
American Red Cross Emergency Preparedness redcross.org
Emergency preparedness resources for families, disasters, and practical safety planning
FEMA Preparedness Resources fema.gov
National preparedness resources for planning, mitigation, and response readiness
Conclusion
Setting realistic goals for emergency preparedness is essential for ensuring your family’s safety and resilience. By understanding your specific needs, assessing available resources, and establishing practical scenarios, you can create an effective preparedness plan. Prioritize achievable goals and regularly review them to adapt to changing circumstances. Engaging your family in this process will foster a sense of teamwork and readiness, making your emergency plans more effective.
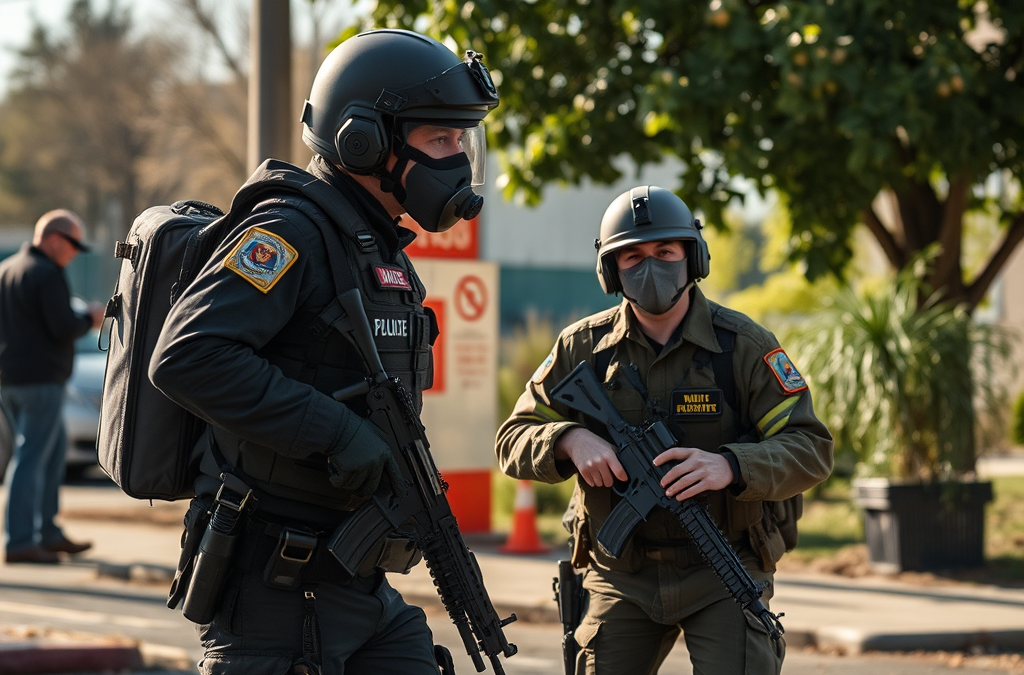
Hostile situations can arise unexpectedly during emergencies, whether due to natural disasters, civil unrest, or personal threats. Recognizing the nature of hostility is crucial for effective response. It often manifests as aggressive behavior, threats, or violence, which can escalate quickly. Understanding the context—such as whether the hostility is targeted or random—helps in formulating an appropriate response. Situational awareness is key; being mindful of your surroundings and the behavior of others can provide critical insights into potential dangers.
For instance, during a natural disaster like a hurricane, there may be reports of looting or violence in the aftermath. In such cases, it’s essential to assess the level of threat before deciding on your next steps. One common misconception is underestimating the danger; always err on the side of caution and prioritize your safety.
Immediate Response Protocols
When faced with a hostile situation, the first response should be to ensure your immediate safety. This involves a quick assessment of the surroundings and identifying potential escape routes. If you are in a public space, look for exits and determine if it’s safer to stay put or leave. In some cases, hiding may be the best option, especially if the threat is nearby.
Stay calm and avoid escalating the situation. Aggressive responses can provoke further hostility. Instead, maintain a composed demeanor and communicate clearly with others who may be involved. If you are with a group, establish a plan for action. For example, if a threat is imminent, a pre-arranged signal can alert everyone to move to safety.
It’s also important to have a means of communication ready. If the situation allows, contact local authorities or emergency services to report the incident. When doing so, provide clear and concise information about the location, nature of the threat, and any other pertinent details that may assist responders.
Long-Term Safety Strategies
Preparing for hostile situations involves more than just immediate response; it requires long-term strategies to enhance personal safety. One effective approach is to develop an emergency plan that includes protocols for various scenarios. This plan should cover communication methods, designated meeting points, and safety supplies to have on hand.
Training in self-defense or conflict de-escalation can also empower individuals to handle hostile situations more effectively. Understanding body language and verbal cues can help in assessing whether a situation is likely to escalate. For instance, recognizing signs of aggression early can allow individuals to remove themselves from potentially dangerous encounters.
Additionally, staying informed about local safety issues and community resources can enhance preparedness. Engaging with local law enforcement or community safety programs can provide valuable insights into the types of threats prevalent in your area and how to mitigate them.
Communication During Emergencies
Effective communication is vital during emergencies, especially in hostile situations. Establishing clear lines of communication with family, friends, and authorities can significantly improve safety. Use group messaging apps or social media platforms to keep in touch during crises, ensuring that everyone knows where to find help or how to evacuate safely.
When communicating with authorities, be direct and informative. Provide your location, the nature of the emergency, and any specific threats you are facing. If possible, remain on the line until help arrives, as they may need further information to assist you effectively.
Moreover, practice active listening and remain aware of announcements or alerts from local emergency services. These communications often contain critical information about safety measures, evacuation routes, or shelter locations that can help you navigate hostile situations more effectively.
Frequently Asked Questions
What should I do first in a hostile situation?
Assess your surroundings for safety, identify escape routes, and remain calm to avoid escalating the situation.
How can I prepare for potential hostile situations?
Develop an emergency plan, engage in self-defense training, and stay informed about local safety issues to enhance your preparedness.
What role does communication play in emergencies?
Clear communication helps coordinate actions, report incidents to authorities, and keep loved ones informed about safety measures.
How can I stay calm during a crisis?
Focus on controlled breathing, assess the situation logically, and prioritize your immediate safety to maintain composure.
What are common mistakes to avoid in hostile situations?
Common mistakes include underestimating threats, escalating confrontations, and failing to have a clear escape plan.
Further Reading
Authoritative Sources
Library of Congress Research Guides guides.loc.gov
Research guides that help readers locate reliable background sources on a wide range of subjects
USA.gov Official Information and Services usa.gov
Official U.S. government information and public resources for practical reference
Google Scholar scholar.google.com
Academic search resource for finding research literature and source material
Conclusion
Encountering hostile situations during emergencies demands quick thinking and a clear strategy. By prioritizing personal safety, maintaining calm, and preparing in advance, you can navigate these challenges more effectively. Remember to communicate clearly with others and stay informed about your environment to enhance your safety during crises. Developing a proactive mindset and preparedness plan can significantly improve your ability to respond to threats and protect yourself and those around you.