In an age where headlines are dominated by a relentless barrage of crises, from natural disasters to economic upheavals and global pandemics, the concept of preparedness has taken center stage. However, as the public is bombarded with a constant stream of doomsday scenarios and survival conspiracies, a new and insidious threat has emerged: preparedness complacency. This phenomenon, characterized by a growing apathy towards genuine threats and a dismissive attitude towards the importance of readiness, is quietly eroding our collective resilience and leaving us vulnerable to the very disasters we seek to mitigate.
At the heart of this issue lies the over-saturation of crisis mode thinking. With each passing day, we are inundated with a cacophony of alarming headlines, dire predictions, and sensationalized accounts of impending doom. From climate change and economic collapses to asteroid impacts and zombie apocalypses, the sheer volume and variety of potential catastrophes have become overwhelming. As a result, many individuals have become desensitized to the genuine risks that threaten our communities, dismissing them as just another doomsday scenario in an endless sea of speculation.
The Allure of Survival Conspiracies
This desensitization is further compounded by the proliferation of survival conspiracies and fringe theories that have gained traction in recent years. Fueled by social media echo chambers and a mistrust of traditional institutions, these conspiracies often paint a picture of hidden agendas, government cover-ups, and nefarious plots that aim to control or deceive the masses. While some of these theories may contain grains of truth, they are often distorted, exaggerated, and divorced from reality, leading to a distorted perception of the true nature of the threats we face.
The danger of this over-saturation and conspiracy-driven narrative is that it breeds a sense of helplessness and resignation among the public. When faced with an unrelenting barrage of doomsday scenarios, many individuals begin to feel that preparedness is a futile endeavor, that no matter what steps they take, they will ultimately be powerless in the face of an inevitable catastrophe. This defeatist mentality can lead to a dangerous apathy, where individuals abandon even the most basic preparedness measures, leaving themselves and their communities vulnerable to the very disasters they fear.
The Pitfalls of Complacency: Lessons from the Pandemic
A stark example of the consequences of preparedness complacency can be seen in the recent global pandemic. Despite years of warnings from public health experts and the existence of extensive preparedness plans, many communities found themselves woefully unprepared when the crisis struck. Grocery store shelves were stripped bare, essential supplies like toilet paper became scarce, and families were left scrambling to secure basic necessities.
This lack of readiness, even in the face of an impending crisis, highlights the insidious nature of preparedness complacency. The over-saturation of crisis mode thinking and the proliferation of survival conspiracies had created a false sense of security, leading many to believe that they were adequately prepared for any eventuality. However, when the reality of the pandemic hit, it became clear that our collective complacency had left us vulnerable and exposed.
Cultivating a Balanced Approach to Preparedness
To combat this dangerous trend of preparedness complacency, it is essential that we adopt a more balanced and measured approach to crisis readiness. Rather than succumbing to the allure of sensationalized doomsday scenarios and fringe conspiracies, we must focus on evidence-based risk assessments and practical preparedness strategies. This requires a concerted effort to cut through the noise and disinformation, seeking out reliable sources of information and expert guidance.
One key aspect of this balanced approach is the cultivation of a resilient mindset. Rather than viewing preparedness as a one-time event or a response to a specific threat, we must recognize it as an ongoing process of adaptation and self-reliance. By fostering a culture of preparedness that emphasizes personal responsibility, community collaboration, and mental fortitude, we can inoculate ourselves against the apathy and resignation that threaten to undermine our collective resilience.
At the individual level, this means taking proactive steps to educate ourselves about the genuine risks we face and developing practical skills and knowledge to mitigate them. This can include learning basic first aid, familiarizing ourselves with local emergency response plans, and maintaining a well-stocked emergency kit. By taking ownership of our own preparedness, we can regain a sense of control and empowerment, even in the face of uncertain times.
Refocusing Our Efforts: Building Community Resilience
To truly overcome the perils of preparedness complacency, we must refocus our efforts on building community resilience. This involves fostering a sense of solidarity and mutual support, where individuals and communities work together to pool resources, share knowledge, and develop robust systems that can withstand the impacts of crises.
By organizing community preparedness workshops, participating in local emergency response drills, and advocating for policies that prioritize disaster risk reduction, we can create a culture of readiness that extends beyond individual households. This collaborative approach not only enhances our collective capacity to respond to disasters but also helps to combat the sense of isolation and helplessness that can fuel complacency.
Furthermore, it is crucial that we approach preparedness with a critical eye, questioning the validity of the information we encounter and seeking out diverse perspectives. By cultivating a healthy skepticism towards sensationalized claims and conspiracy theories, we can avoid falling prey to the fear and paranoia that undermine effective preparedness efforts. Instead, we must rely on evidence-based practices and the expertise of credible sources, such as scientific institutions, emergency management agencies, and reputable media outlets.
Conclusion: Embracing a New Era of Preparedness
In a world where crises are an inevitable part of the human experience, preparedness is not a luxury, but a necessity. The recent pandemic has served as a powerful reminder of the dangers of complacency and the importance of proactive, community-oriented readiness. By recognizing the pitfalls of over-saturation and conspiracy-driven narratives, and refocusing our efforts on practical skills, mental resilience, and collaborative action, we can build a culture of preparedness that is grounded in reality and empowers us to face the challenges ahead with confidence and resolve.
As we move forward, let us embrace a new era of preparedness – one that is characterized by a balanced, evidence-based approach, a strong sense of community, and an unwavering commitment to building a more resilient future. Only by working together, staying vigilant, and continually adapting to the evolving landscape of risks, can we truly safeguard ourselves, our families, and our communities from the perils of complacency and ensure that we are ready to weather any storm that comes our way.
Build Closeness While You Get Your Family Prepared
In an era marked by unpredictable challenges and unforeseen disruptions, the importance of practicing preparedness with your family has never been more evident. From natural disasters to economic upheavals, the ability to navigate through turbulent times has become an essential skill for every household. As we have witnessed during the recent pandemic, the sudden scarcity of essential items on store shelves has underscored the need for proactive measures. By dedicating a night each week to preparedness activities, families can cultivate resilience, strengthen bonds, and ensure they are equipped to face any crisis that may arise.
The concept of preparedness extends far beyond stockpiling supplies and creating emergency kits. It encompasses a holistic approach to readiness that includes mental, emotional, and practical aspects. By engaging in regular preparedness nights, families can foster a mindset of adaptability and resourcefulness. These dedicated evenings provide an opportunity to discuss potential scenarios, develop contingency plans, and equip each family member with the knowledge and skills needed to respond effectively in the face of adversity.
Food Security: A Cornerstone of Preparedness
One of the most crucial areas of preparedness is food security. The pandemic-induced empty store shelves served as a stark reminder of how quickly access to essential goods can be disrupted. By incorporating food storage and preservation techniques into your preparedness nights, you can ensure that your family has a reliable supply of nourishment during times of scarcity.
Consider learning how to:
Can fruits and vegetables
Dehydrate meats
Create a well-organized pantry stocked with non-perishable items
Engaging in these activities together not only builds practical skills but also instills a sense of self-sufficiency and confidence in your family’s ability to weather any storm.
Another critical aspect of preparedness is energy independence. In the event of a power outage or grid failure, having alternative energy sources can make all the difference in maintaining a sense of normalcy and safety. Dedicate a preparedness night to exploring off-grid solutions such as solar panels, wind turbines, or generators. Learn how to properly maintain and operate these systems, and practice using them to power essential appliances and devices. By familiarizing yourselves with energy alternatives, you can reduce your reliance on the grid and ensure that your family remains connected and comfortable even during prolonged outages.
Water is another fundamental resource that is often taken for granted until it becomes scarce. During your preparedness nights, focus on water conservation, purification, and storage techniques. Learn how to collect and store rainwater, purify water using various methods such as boiling, filtering, or using chemical treatments, and create a rotating stock of stored water. Engage in discussions about the importance of hydration and hygiene, and practice rationing water supplies to simulate emergency situations. By developing a comprehensive water preparedness plan, your family can ensure access to clean, safe water even in the face of disruptions.
Strengthening Family Bonds Through Preparedness
In addition to practical skills, preparedness nights offer an invaluable opportunity to strengthen family bonds and foster a sense of unity. Engaging in activities together, such as creating emergency kits, practicing first aid, or learning survival skills, promotes teamwork and communication. These shared experiences create a foundation of trust and mutual support that can prove invaluable during times of crisis.
Encourage open discussions about:
Fears
Concerns
Hopes
Create a safe space for family members to express themselves and find comfort in one another’s presence. It is crucial to address the mental and emotional aspects of preparedness, as being mentally and emotionally prepared is just as important as having physical supplies. Discuss potential challenges and how they might affect each family member, and brainstorm coping strategies and ways to support one another during difficult times.
To make preparedness nights effective and enjoyable, it is essential to tailor activities to your family’s unique needs and interests. Consider assigning roles and responsibilities based on each member’s strengths and abilities. Encourage creativity and innovation, allowing family members to contribute their ideas and solutions. Incorporate age-appropriate games, challenges, and rewards to keep everyone engaged and motivated. By making preparedness a fun and interactive experience, you can foster a culture of readiness that becomes second nature to your family.
One powerful way to reinforce the importance of preparedness is by studying real-life events and learning from the experiences of others. Analyze case studies of families who have successfully navigated through crises, and discuss the strategies they employed. Invite local experts or emergency responders to share their insights and advice during your preparedness nights. By connecting with the wider community and learning from their collective wisdom, you can expand your knowledge base and build a network of support.
As you embark on this journey of preparedness, it is crucial to approach it with a positive and proactive mindset. Rather than dwelling on worst-case scenarios, focus on the empowering nature of readiness. Emphasize the sense of security and peace of mind that comes from knowing you have taken steps to safeguard your family’s well-being. Celebrate the progress you make together, and acknowledge the growth and resilience you are fostering within each family member.
Ultimately, the goal of preparedness nights is not to live in fear or anticipation of disaster, but rather to cultivate a mindset of adaptability and self-reliance. By dedicating time each week to practice preparedness skills, discuss potential challenges, and strengthen family bonds, you are investing in your family’s future. You are equipping them with the tools and knowledge needed to navigate any obstacle that may come their way, whether it be a natural disaster, economic upheaval, or personal crisis.
In a world where uncertainty is a constant, the importance of practicing preparedness with your family cannot be overstated. By embracing readiness as a way of life, you are not only ensuring your family’s physical safety but also nurturing their mental and emotional resilience. Through dedication, creativity, and a spirit of unity, your family can face any challenge with confidence and emerge stronger than ever before. So gather your loved ones, set aside a night each week, and embark on a journey of preparedness that will safeguard your future and bring you closer together. Remember, the best time to prepare is before the storm hits – and with each preparedness night, you are building a foundation of resilience that will serve your family for generations to come.
The Ticking Time Bomb: FDA’s Alarming Avian Flu Findings and Why You Must Prepare Now
The Chilling Reality: HPAI in Our Food Supply
The U.S. Food and Drug Administration’s (FDA) recent report has revealed a chilling reality: highly pathogenic avian influenza (HPAI) has infiltrated our food supply. The study found that a staggering 1 in 5 retail milk samples tested positive for HPAI viral fragments across multiple states. While the FDA assures that proper pasteurization and handling should mitigate immediate consumer risks, the presence of this deadly virus in our dairy cattle population is a ticking time bomb that we cannot ignore.
The Looming Specter of an H5N1 Pandemic
The H5N1 strain of avian flu detected in these samples is a particularly alarming threat. In past outbreaks worldwide, this virus has demonstrated a jaw-dropping human mortality rate exceeding 50%. To put that into perspective, the COVID-19 pandemic, which claimed millions of lives and brought global society to its knees, has an estimated mortality rate of less than 1%. Even the infamous 1918 flu pandemic had a mortality rate of just 2.5%. If H5N1 were to adapt to efficient human-to-human spread, we could face a catastrophe that would make COVID look like a mere dress rehearsal.
The Urgent Need for Action: Both Personal and Societal
The FDA’s findings demand swift and decisive action on all fronts. While government agencies work to contain HPAI in cattle populations and monitor for human transmission, individuals and families must take proactive steps to prepare for the worst. This means developing comprehensive pandemic preparedness plans covering essential needs like food, water, medicine, hygiene, and mental resilience. It means stockpiling supplies, strengthening community ties, and advocating for bolstered public health infrastructure. We cannot afford to be caught off guard again.
Stockpiling Essentials: Food, Water, Medicine
Every household should immediately begin stockpiling a three-month supply of non-perishable food and at least one gallon of water per person per day. Build a robust first-aid kit with prescription medications, over-the-counter flu and cold remedies, and supplies for treating severe respiratory illnesses like pneumonia. Don’t forget essential items like soap, disinfectants, toiletries, and personal protective equipment. The time to shore up your supplies is now before panic buying sets in.
Sanitation and Isolation: Protecting Your Household
In a pandemic scenario, hygiene and sanitation will be critical to slowing the spread. Start practicing rigorous disinfection protocols in your home and workplace. Have a plan for isolating sick family members to minimize household transmission. Stock up on cleaning supplies, disposable gloves, and masks. Remember, in a severe pandemic, you may need to be self-sufficient for an extended period.
Mental Resilience and Social Cohesion: Keys to Weathering the Storm
Preparing for a pandemic isn’t just about physical supplies – it’s also about bolstering mental and emotional resilience. Start cultivating coping strategies, stress-management techniques, and social support networks. Engage with your local community to build solidarity and pool resources. In a crisis, our greatest strength will be our ability to lean on and care for one another.
A Catalyst for Change: Seizing the Opportunity for Greater Readiness
The FDA’s report is a wake-up call we dare not ignore. It’s a reminder of the existential threat posed by emerging zoonotic diseases in our interconnected world. But it’s also an opportunity – a chance to reimagine and strengthen our collective readiness and resilience. By taking decisive action now, we can build a future that is better equipped to weather even the gravest of threats. Let this be the catalyst that propels us into a new era of proactive preparation and unity in the face of adversity.
The Clock Is Ticking: The Time to Prepare Is Now
We cannot afford to wait until a crisis is upon us to start preparing. Every day that we delay, we increase the risk of catastrophic loss. The H5N1 threat is not a matter of if, but when. The clock is ticking, and the time to act is now. Let us heed the FDA’s alarming findings and seize this critical window of opportunity. Our lives, our loved ones, and the future of our world hang in the balance. In the face of a looming pandemic, preparedness is not just a choice – it’s a moral imperative. Let us rise to this challenge with courage, compassion, and unwavering determination.
Preparing for the Inevitable: Understanding and Mitigating the Risks of a Power Grid Collapse
In today’s interconnected and technologically dependent society, the stability of our power grid is more critical than ever. However, the same complexity that provides our modern conveniences also makes the grid highly vulnerable to multiple threats, ranging from natural disasters to sophisticated cyber-attacks. Among the most concerning are electromagnetic pulses (EMP), cyber-terrorism, geomagnetic storms, physical terror attacks, and severe natural catastrophes. Each of these threats can potentially cause a long-term power outage, disrupting everything from basic home heating to global economic systems. This article explores the plausible scenarios leading to a power grid collapse and emphasizes the essential steps needed to prepare for such an eventuality.
Growing Threats to the Power Grid
Electromagnetic Pulses (EMP): An EMP, whether from a nuclear explosion in the atmosphere or a naturally occurring event, can have devastating effects on the electrical grid. The high-intensity burst of electromagnetic energy can instantly damage or destroy electrical circuits and communications infrastructure, leading to widespread and prolonged blackouts.
Cyber Attacks: As geopolitical tensions rise, so does the risk of cyber attacks on critical infrastructure. Nations or organized cybercriminals can target power grid systems, manipulating control systems or shutting down key operational networks, which can cause cascading failures across vast areas.
Geomagnetic Storms: Solar activity, such as solar flares and coronal mass ejections, can produce geomagnetic storms that induce ground currents capable of frying transformers and other critical grid components. These storms are natural phenomena but can have impacts similar to an EMP in their ability to disrupt electrical infrastructure.
Terrorism: Physical attacks on key infrastructure elements like substations or power lines can also lead to significant disruptions. Such terror attacks aim to cause immediate damage and long-term economic and social impacts.
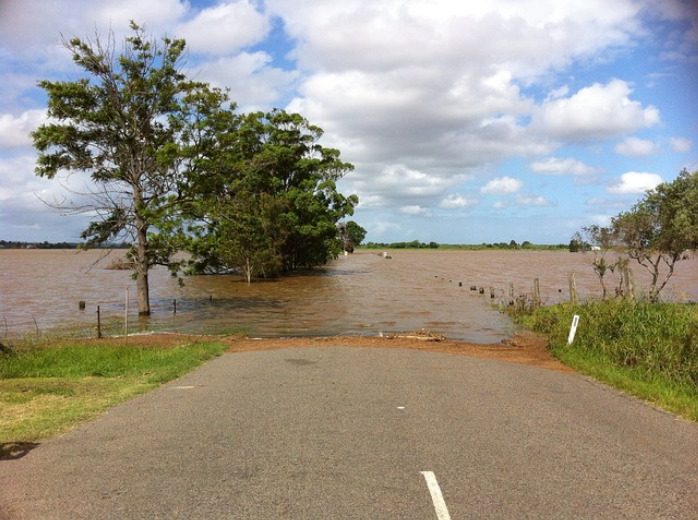
Natural Disasters: Earthquakes, hurricanes, and other severe weather events regularly challenge the resilience of the power grid. The physical damage inflicted by these disasters can take weeks or even months to repair, particularly if they strike critical nodes or components.
The scenarios outlined above are not just possibilities; they are eventualities that could occur with little to no warning. Given the catastrophic potential of a power grid failure, preparedness is not merely advisable; it is essential. The following are the top five preparatory steps every household and community should take to mitigate the risks associated with a power grid collapse:
Establish Alternative Power Sources: Investing in alternative energy sources such as solar panels, wind turbines, or generators is crucial. These can provide critical power to essential devices and systems, from medical equipment to heating and refrigeration, during an outage.
Stockpile Essentials: Having a supply of non-perishable food, water, and medical supplies is fundamental. Each household should aim to have at least a three-week supply, as recovery from a severe grid collapse could take much longer.
Develop an Emergency Plan: Knowing what to do when a disaster strikes is vital. This plan should include evacuation routes, communication methods, and a meeting point for family members. Regularly review and practice the emergency plan to ensure everyone knows their role.
Secure and Harden Home Infrastructure: Protecting your home from EMP effects with Faraday cages or other shielding methods for electronic devices can prevent damage. Additionally, reinforcing structures against potential physical threats and ensuring that your home can sustain long periods without external power are crucial steps.
Stay Informed and Educated: Understanding the nature of the threats and staying informed about current geopolitical and environmental issues can provide crucial time to react before a disaster strikes. Regular updates from trusted news sources and government alerts can keep you ahead of the situation.
Conclusion
While the thought of a power grid collapse is daunting, the reality is that the potential for such an event is increasingly likely in our complex, high-tech world. By understanding the threats and taking proactive measures to prepare, individuals and communities can enhance their resilience against this modern-day vulnerability. Preparing for a power grid collapse is not just about surviving an initial disaster but ensuring the long-term sustainability and safety of our way of life.
In an era where uncertainty looms large and the allure of a simpler, more connected way of life beckons, the concept of self-sustaining living in rural areas has captured the imagination of many. This article delves into the intricacies of rural self-sufficiency, exploring the key principles and practices that empower individuals to cultivate resilience, reduce their ecological footprint, and forge a harmonious relationship with the natural world.
The Pursuit of Autonomy
At the heart of self-sustaining living lies the pursuit of autonomy and the ability to meet one’s basic needs independently. This encompasses a wide range of aspects, from food production and energy generation to water management and waste disposal. By embracing a holistic approach to self-sufficiency, individuals can create a robust and resilient lifestyle that not only provides for their immediate needs but also contributes to the long-term well-being of the environment.
Sustainable Agriculture and Permaculture
Subscribe to PREPARE
One of the cornerstones of rural self-sufficiency is sustainable agriculture. By cultivating a diverse array of crops and raising livestock, individuals can ensure a reliable supply of nutritious, locally-sourced food. Permaculture, a design philosophy that mimics natural ecosystems, offers a framework for creating productive and resilient landscapes. By integrating principles such as companion planting, crop rotation, and agroforestry, permaculture practitioners can optimize land use, enhance soil fertility, and promote biodiversity. Regenerative farming practices, such as no-till methods and cover cropping, further contribute to the health and vitality of the soil, ensuring long-term agricultural sustainability.
Energy Independence and Renewable Sources
Energy independence is another crucial aspect of self-sustaining living. By harnessing renewable energy sources like solar, wind, and hydropower, individuals can significantly reduce their reliance on traditional utility grids. Solar panels, for example, can generate electricity to power homes and farm equipment, while wind turbines can harness the power of the wind to pump water or generate electricity. Micro-hydro systems, which utilize the energy of moving water, can provide a reliable source of power in areas with streams or rivers. By diversifying energy sources and implementing efficient home design and appliance selection, self-sufficient homesteads can minimize their energy demands and reduce their carbon footprint.
Water Management and Conservation
Water management is a critical component of rural resilience, as access to clean and reliable water sources is essential for both human consumption and agricultural purposes. Rainwater harvesting, through the use of cisterns and catchment systems, can capture and store precipitation for later use. Well construction, when done responsibly and in accordance with local regulations, can tap into groundwater reserves. Greywater recycling systems, which recycle water from sinks, showers, and laundry for irrigation purposes, can significantly reduce water consumption. Additionally, implementing water conservation techniques, such as drip irrigation and mulching, can minimize water loss and promote efficient use of this precious resource.
Waste Management and Composting
Effective waste management is another pillar of self-sustaining living. By adopting practices such as composting and vermicomposting, individuals can transform organic waste into nutrient-rich soil amendments. Composting not only diverts waste from landfills but also enhances soil structure, fertility, and moisture retention. Vermicomposting, which utilizes worms to break down organic matter, produces a highly concentrated and biologically active compost known as worm castings. By closing the loop and recycling waste back into the soil, self-sufficient homesteads can minimize their environmental impact and foster a circular economy.
Preparedness and Emergency Skills
Preparedness is a fundamental aspect of rural self-sufficiency, as it equips individuals with the skills and knowledge necessary to navigate challenges and emergencies. Developing a comprehensive emergency preparedness plan, which includes provisions for food, water, shelter, and medical supplies, is essential. Learning basic first aid and CPR can be lifesaving in remote areas where access to medical facilities may be limited. Additionally, acquiring self-defense skills and establishing a network of like-minded individuals can provide a sense of security and support during uncertain times.
Building Community and Resilience
Building a strong sense of community is integral to the success and resilience of self-sustaining rural living. Engaging with neighbors, participating in local events, and sharing knowledge and resources can foster a sense of belonging and mutual support. Community gardens, seed exchanges, and skill-sharing workshops provide opportunities for individuals to learn from one another and collaborate on projects. By cultivating a spirit of cooperation and interdependence, rural communities can weather challenges and thrive together.
The Rewards and Challenges of Self-Sufficiency
While the path to self-sufficiency is not without its challenges, the rewards are immeasurable. Embracing a self-sustaining lifestyle in rural areas offers the opportunity to reconnect with the natural world, cultivate a deeper sense of purpose, and build resilience in the face of uncertainty. It requires a willingness to learn, adapt, and embrace a simpler way of life. By taking responsibility for one’s own needs and working in harmony with the environment, individuals can create a more sustainable and fulfilling existence.
A Call to Action
As we navigate the complexities of the modern world, the call to self-sufficiency grows louder. By embracing the principles and practices outlined in this comprehensive guide, individuals can embark on a transformative journey towards rural resilience. From cultivating the land and harnessing renewable energy to managing water and waste responsibly, each step brings us closer to a more autonomous and environmentally conscious way of life. Through preparedness, community building, and a commitment to ongoing learning, we can create thriving, self-sufficient homesteads that serve as beacons of hope and inspiration for generations to come.
Thriving in Harmony with Nature
In the end, self-sustaining rural living is not just about survival; it is about thriving in harmony with the natural world. It is an invitation to reconnect with the rhythms of the earth, to cultivate a deeper appreciation for the interconnectedness of all things, and to create a legacy of resilience and abundance. By embracing this path, we not only secure our own well-being but also contribute to the healing and regeneration of the planet we call home.

 In addition to practical skills, preparedness nights offer an invaluable opportunity to strengthen family bonds and foster a sense of unity. Engaging in activities together, such as creating emergency kits, practicing first aid, or learning survival skills, promotes teamwork and communication. These shared experiences create a foundation of trust and mutual support that can prove invaluable during times of crisis.
 In a pandemic scenario, hygiene and sanitation will be critical to slowing the spread. Start practicing rigorous disinfection protocols in your home and workplace. Have a plan for isolating sick family members to minimize household transmission. Stock up on cleaning supplies, disposable gloves, and masks. Remember, in a severe pandemic, you may need to be self-sufficient for an extended period.