Establishing a comprehensive emergency plan is crucial for keeping pets safe during disasters. This plan should outline where to go, how to evacuate, and what to do in various emergency scenarios. Begin by identifying safe locations such as pet-friendly shelters or hotels. Make sure to familiarize your pets with these places to reduce their anxiety during an actual emergency.
Your plan should include a communication strategy. Designate a friend or family member who can assist if you cannot reach your pets or evacuate with them. Share your pet’s details and your plan with this person. Additionally, practice your emergency plan regularly to ensure that all family members, including pets, are prepared for various situations.
One common mistake is failing to include pets in family emergency drills. This oversight can lead to confusion and panic during real emergencies. Regularly practice your evacuation procedures with your pets to ensure everyone knows their roles and where to go.
Preparing a Pet Evacuation Kit
A well-stocked pet evacuation kit is essential for ensuring your pet’s safety during disasters. Start by gathering necessary supplies such as food, water, medications, and first aid items. Include at least a week’s worth of food and water to ensure your pet’s needs are met during an emergency.
In addition to food and water, pack a leash, collar, and ID tags for your pet. These items are crucial for keeping your pet secure and easily identifiable. Consider including comfort items such as toys or blankets to help soothe your pet during stressful situations.
One key aspect often overlooked is keeping your pet’s vaccination records and critical documents in the kit. These documents can be vital for boarding or vet visits during emergencies. Ensure that your evacuation kit is easily accessible and that all family members know its location.
Microchipping and Identification
Microchipping your pets is one of the most effective ways to ensure their safe return if they become lost during a disaster. A microchip is a small device implanted under your pet’s skin that contains identification information. This technology significantly increases the chances of reuniting with your pet if they get separated.
In addition to microchipping, ensure that your pets wear collars with ID tags that include your contact information. Regularly check that the information on these tags is up to date, especially if you move or change phone numbers.
While microchipping is a reliable method, it’s crucial to remember that not all shelters or veterinary offices have the capability to scan for chips. Therefore, having visible identification is necessary. Combining both methods provides the best chance of reuniting with your pet after a disaster.
Safe Housing and Shelter Options
In the event of a disaster, finding safe housing for your pets is vital. Research local shelters and hotels that allow pets in advance. Many communities have resources to assist pet owners during emergencies, including pet-friendly evacuation routes and shelters.
When looking for shelter, consider the environment and how it will affect your pet. For example, some animals may be sensitive to loud noises or crowded spaces, which can increase their anxiety. If possible, choose quieter shelters or accommodations where your pets will feel more secure.
It’s also essential to have a backup plan in case your primary shelter option is unavailable. Identify multiple locations and ensure they are all pet-friendly. Communicate these options to your family, so everyone knows where to go in an emergency.
Common Mistakes to Avoid
While preparing for disasters, many pet owners make critical mistakes that can jeopardize their pets’ safety. One common error is underestimating the importance of planning. Many assume they can handle emergencies on the fly, which can lead to chaos and confusion when time is of the essence.
Another mistake is neglecting to practice evacuation drills with pets. Just as humans need to understand the plan, pets must also be familiar with the process to minimize panic. Regular drills help pets become accustomed to the routine, making it easier for everyone during real emergencies.
In summary, failing to update identification tags and microchip information can lead to separation during disasters. Regularly check and update contact information to ensure a swift reunion with your pet.
Frequently Asked Questions
What should I include in a pet evacuation kit?
Your pet evacuation kit should include food, water, medications, a leash, collar, ID tags, first aid supplies, and comfort items like toys or blankets.
How can I ensure my pet is safe during a disaster?
Create an emergency plan, prepare an evacuation kit, and microchip your pet to increase the chances of a safe reunion if separated.
Why is microchipping important for pets?
Microchipping provides a reliable method for identifying pets, increasing the likelihood of reuniting with them if they become lost during a disaster.
What common mistakes do pet owners make during emergencies?
Common mistakes include failing to plan ahead, not practicing evacuation drills, and neglecting to update identification information for pets.
How can I find pet-friendly shelters during a disaster?
Research local resources, such as community websites, or contact animal control for information on pet-friendly shelters and evacuation routes.
Further Reading
Authoritative Sources
Ready.gov Preparedness Guidance ready.gov
Federal preparedness guidance for household planning, alerts, supplies, and emergencies
American Red Cross Emergency Preparedness redcross.org
Emergency preparedness resources for families, disasters, and practical safety planning
FEMA Preparedness Resources fema.gov
National preparedness resources for planning, mitigation, and response readiness
Conclusion
Prioritizing your pet’s safety during disasters requires careful planning and preparation. Start by creating a comprehensive emergency plan that includes evacuation routes and safe shelters. Assemble a pet evacuation kit with essential supplies and ensure your pets are microchipped and have proper identification. Regularly practice your emergency procedures to minimize panic and confusion. By taking these steps, you can significantly enhance your pet’s safety and well-being during any disaster.
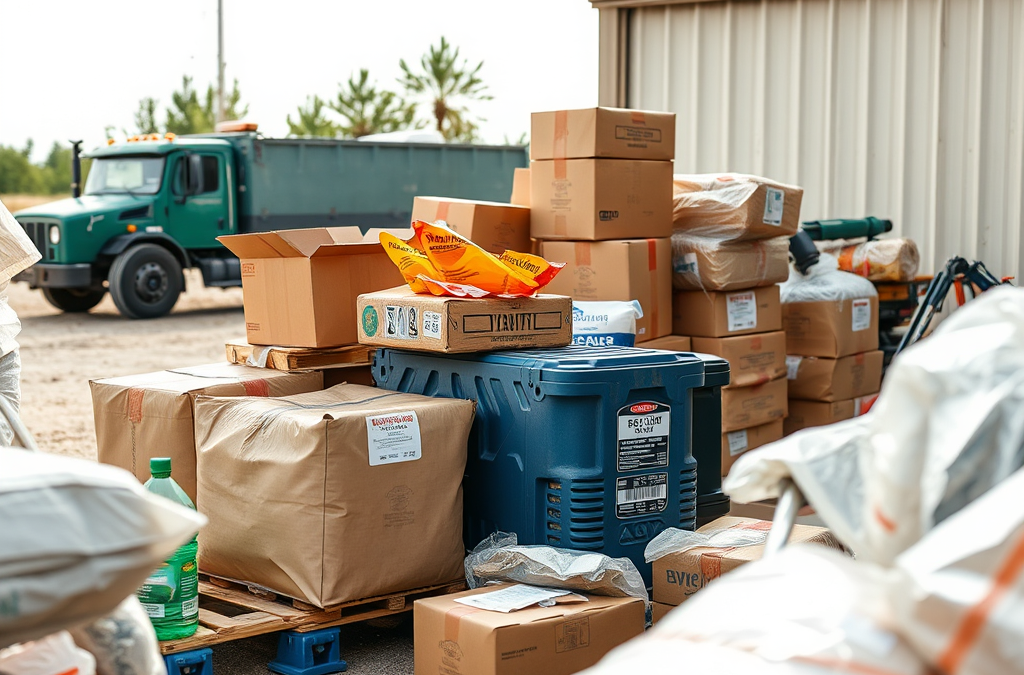
Effective management of supplies during extended crises is crucial for survival and resilience. Without adequate supplies, individuals and communities may face dire consequences, including food scarcity, health risks, and inability to respond to emergencies. The importance of having a well-organized supply system cannot be overstated, as it directly impacts the ability to cope with prolonged disruptions.
During crises, the unpredictability of supply chains can lead to shortages and inflated prices. Understanding the importance of supply management means recognizing that proactive measures can mitigate these risks. A solid supply management strategy allows individuals to maintain access to essential resources, ensuring that they can sustain themselves and their families during challenging times.
Assessing Your Current Inventory
Before you can effectively manage supplies, a thorough assessment of your current inventory is essential. Begin by taking stock of all available resources, including food, water, medical supplies, and any other critical items. This assessment helps identify gaps in your supplies and informs future purchasing decisions.
To conduct an effective inventory assessment, categorize items based on their type and usage frequency. For example, group food items into non-perishables, perishables, and essentials. This categorization allows for better tracking and prioritization. Pay particular attention to expiration dates, as expired items can lead to waste and health risks.
One common mistake is underestimating the quantity needed for an extended period. Always consider the number of individuals relying on these supplies and factor in potential emergencies that may disrupt access to additional resources.
Creating a Sustainable Supply Plan
Once you have assessed your current inventory, the next step is to create a sustainable supply plan. This plan should outline how to acquire, maintain, and utilize supplies effectively over an extended period. Start by determining which items are essential for survival and prioritize them in your planning.
Consider factors such as shelf life, storage requirements, and availability. For example, canned goods and dried foods have long shelf lives and can be stored easily. In contrast, fresh produce requires more immediate consumption and careful management.
Your supply plan should also account for potential shortages and price fluctuations. Establish relationships with local suppliers and consider diversifying sources to reduce dependency on a single provider. This approach can help ensure you have access to necessary supplies even during disruptions in the supply chain.
Implementing Inventory Rotation Systems
Implementing an inventory rotation system is crucial for maintaining the quality and usability of supplies. This system ensures that older items are used before newer ones, reducing waste and maximizing the effectiveness of your supply management strategy. One effective method is the First In, First Out (FIFO) approach, where the first items added to your inventory are the first to be used.
To implement FIFO, organize your storage space so that older items are easily accessible. Label containers with expiration dates to facilitate monitoring. Regularly check your inventory for items nearing their expiration dates and plan meals or uses around these items to prevent waste.
Additionally, consider keeping a log of your supplies to track usage patterns and identify any items that may need replenishing. This proactive approach helps maintain a balanced inventory and ensures you are always prepared for unexpected situations.
Frequently Asked Questions
What types of supplies should I prioritize during a crisis?
Prioritize non-perishable food, clean water, medical supplies, and personal hygiene products, as these are essential for survival.
How often should I check my supplies?
Check your supplies at least quarterly, or more frequently if you anticipate potential emergencies, to ensure everything is up to date and usable.
What is the best way to store supplies long-term?
Store supplies in a cool, dry place away from direct sunlight, using airtight containers for food items to prevent spoilage.
How can I ensure my supplies do not expire?
Implement a FIFO system, regularly monitor expiration dates, and plan meals around items nearing their expiration to minimize waste.
What should I do if I run out of essential supplies?
If you run out of essential supplies, assess local resources, consider bartering with neighbors, and reach out to community support networks for assistance.
Further Reading
Authoritative Sources
Library of Congress Research Guides guides.loc.gov
Research guides that help readers locate reliable background sources on a wide range of subjects
USA.gov Official Information and Services usa.gov
Official U.S. government information and public resources for practical reference
Google Scholar scholar.google.com
Academic search resource for finding research literature and source material
Conclusion
Managing supplies during extended crises requires proactive planning, thorough assessment, and effective inventory practices. Prioritize essential resources, regularly assess your inventory, and implement sustainable supply strategies to ensure preparedness. By taking these steps, you can mitigate risks and ensure that you and your loved ones are well-equipped to navigate challenging situations.
Understanding the Importance of Effective Communication
Effective communication during a disaster is essential for coordinating response efforts, ensuring public safety, and minimizing chaos. Without a solid communication plan, organizations can face significant challenges, including misinformation, panic, and inefficient resource allocation. The key to effective disaster communication lies in understanding its role in both the preparation phase and the response phase. A well-structured communication plan not only disseminates information but also builds trust and credibility among stakeholders.
One common mistake is underestimating the complexity of communication needs during a disaster. Different stakeholders, including first responders, government agencies, and the public, require tailored messaging based on their specific roles and concerns. Failing to address these varied needs can lead to a breakdown in communication, resulting in confusion and delayed responses.
Inadequate Stakeholder Engagement
One of the most critical pitfalls in disaster communication plans is the failure to engage stakeholders adequately. Stakeholders include not just emergency responders but also local organizations, community leaders, and the public. When stakeholders are not involved in the planning process, the resulting communication strategies may not address their needs or concerns effectively.
For example, if a community’s communication plan does not consider the linguistic diversity of its population, critical information may not reach all residents. Engaging stakeholders in the planning stages allows for feedback and input that can shape a more effective communication strategy. This collaboration fosters a sense of ownership and commitment to the plan, which can enhance its execution during an actual disaster.
To avoid this pitfall, organizations should establish a stakeholder engagement process that includes regular meetings, surveys, and feedback mechanisms. This ongoing dialogue ensures that the communication plan remains relevant and effective in addressing the needs of all parties involved.
Unclear or Conflicting Messaging
Another significant pitfall is the issuance of unclear or conflicting messages. During a disaster, timely and accurate information is paramount. However, if messages are ambiguous or contradictory, it can lead to confusion, panic, and a lack of trust in the information being provided.
For instance, if one agency communicates a specific evacuation route while another agency suggests a different path, residents may become unsure of where to go, potentially putting their safety at risk. To mitigate this risk, communication plans should establish clear protocols for message development and dissemination. This includes designating a single point of contact for information and ensuring that all messages are vetted for clarity and consistency.
Additionally, organizations should prioritize training for personnel involved in communication efforts. This training can help ensure that all team members understand the importance of coherent messaging and are equipped to convey information effectively during a crisis.
Overreliance on a Single Communication Channel
Overreliance on a single communication channel can severely limit the effectiveness of a disaster communication plan. While social media, for example, has become a popular tool for disseminating information quickly, not all community members may have access to or trust these platforms. Relying solely on one channel can leave significant gaps in outreach and information sharing.
A comprehensive communication plan should leverage multiple channels, including traditional media (TV, radio), community meetings, text alerts, and social media. By diversifying communication methods, organizations can reach a broader audience and ensure that critical information is accessible to everyone, regardless of their technological capabilities or preferences.
Moreover, organizations should regularly assess the effectiveness of their communication channels. This evaluation can help identify which channels are most effective for reaching different segments of the population and allow for adjustments as needed.
Frequently Asked Questions
What are the main components of a disaster communication plan?
A disaster communication plan typically includes stakeholder engagement strategies, clear messaging protocols, and multiple communication channels to ensure effective outreach.
How can organizations improve stakeholder engagement?
Organizations can improve stakeholder engagement by involving diverse community members in the planning process and establishing regular communication channels for feedback.
What are the risks of unclear messaging during a disaster?
Unclear messaging can lead to confusion, panic, and a lack of trust among the public, ultimately hindering effective disaster response.
Why is it important to use multiple communication channels?
Using multiple communication channels ensures that critical information reaches a broader audience, accommodating different preferences and access levels among community members.
How often should organizations review their communication plans?
Organizations should review their communication plans regularly, ideally at least once a year, to ensure they remain relevant and effective in addressing current needs.
Further Reading
Authoritative Sources
Ready.gov: Communication Plans ready.gov
This resource outlines best practices for creating effective communication plans in emergency situations
FEMA: Emergency Management fema.gov
FEMA provides comprehensive guidance on disaster preparedness and response, including communication strategies
American Red Cross: Preparedness Resources redcross.org
The American Red Cross offers resources and tools for effective disaster communication and community engagement
Conclusion
Addressing common pitfalls in disaster communication plans is essential for ensuring effective responses during emergencies. By prioritizing stakeholder engagement, clarifying messaging, and utilizing multiple communication channels, organizations can enhance their communication strategies significantly. Regularly reviewing and updating these plans further ensures that they remain effective and relevant, ultimately improving public safety and trust during disasters.
Effective food preservation is crucial during emergencies, as it helps maintain nutritional value and prevents food waste. Different methods cater to various types of food and storage conditions, each with unique advantages and limitations. Knowing how to properly preserve food not only ensures that you have access to safe and nutritious options but also extends the usability of perishable items.
Common methods include canning, dehydrating, and freezing. Each technique has its own set of best practices and requires different levels of preparation and equipment. For instance, canning is a great way to store fruits and vegetables for long periods, while dehydrating can significantly reduce the weight and volume of food, making it easier to store and transport. Freezing is often the quickest method, but it requires a consistent power supply and is less effective for long-term storage.
Understanding these methods allows individuals to make informed decisions based on their specific needs, available resources, and potential risks associated with food spoilage. For example, a common mistake is underestimating the importance of sterilization during canning, which can lead to contamination and foodborne illnesses.
Canning: A Time-Tested Technique
Canning is one of the oldest and most reliable methods of food preservation. It involves sealing food in airtight containers and heating them to destroy harmful microorganisms. This process not only preserves the food but also enhances its shelf life, allowing for storage without refrigeration.
There are two primary canning methods: water bath canning and pressure canning. Water bath canning is suitable for high-acid foods like fruits, jams, and pickles, while pressure canning is necessary for low-acid foods such as vegetables and meats to ensure safety. A common misconception is that all canned foods are safe regardless of the method used, which is not true. Using the wrong canning technique can lead to serious health risks, such as botulism.
When canning, it is crucial to follow tested recipes and guidelines to ensure safety. Invest in quality canning equipment, including jars, lids, and a proper canner. Always check for signs of spoilage before consuming canned goods, such as bulging lids or off odors. Properly canned foods can last for years, making this method an excellent choice for long-term food storage during emergencies.
Dehydrating Foods for Long-Term Storage
Dehydrating is an effective method for preserving food by removing moisture, which inhibits bacterial growth and spoilage. This technique is particularly useful for fruits, vegetables, and even meats, allowing for lightweight and compact storage options.
There are several methods for dehydrating food, including air drying, oven drying, and using a food dehydrator. Each method has its own efficiency and effectiveness. For instance, using a food dehydrator often yields the best results in terms of speed and quality, while air drying can be labor-intensive and weather-dependent.
One significant advantage of dehydrated foods is their long shelf life, often exceeding a year when stored in airtight containers in a cool, dark place. However, a common mistake is failing to properly prepare the food prior to dehydration, such as not blanching vegetables, which can affect the final product’s taste and texture. Additionally, ensuring that food is fully dehydrated before sealing is critical to prevent mold growth during storage.
Dehydrated foods are versatile and can be rehydrated for use in soups, stews, and snacks, making them a valuable asset in emergency preparedness.
Freezing: Keeping Food Fresh
Freezing is one of the simplest and fastest methods for preserving food, maintaining its taste and nutritional value. This method works by slowing down enzyme activity that causes spoilage, thus extending the shelf life of various foods.
When freezing food, it is essential to prepare items properly to ensure quality and safety. For instance, blanching vegetables before freezing can help preserve color, flavor, and texture. Additionally, using appropriate packaging materials, such as freezer bags or vacuum-sealed containers, can prevent freezer burn and maintain food quality.
A common error is overcrowding the freezer, which can lead to uneven freezing and potential spoilage. Ensure that air can circulate around the food items for optimal freezing. While most foods can be frozen, some items, like dairy products or certain fruits, may not perform well when thawed.
Freezing is particularly effective for preserving cooked meals, allowing for quick meal options during emergencies. However, it is crucial to have a reliable power source, as prolonged power outages can compromise frozen food safety.
Frequently Asked Questions
What is the best method for preserving food during an emergency?
The best method depends on the type of food; canning, dehydrating, and freezing are all effective strategies for preserving food during emergencies.
How long can canned foods last?
Properly canned foods can last for several years, but it's essential to check for signs of spoilage before consumption.
Is dehydrated food nutritious?
Yes, dehydrated food retains most of its nutrients if prepared and stored correctly, making it a healthy option for emergencies.
Can all foods be frozen?
No, not all foods freeze well; items like dairy and some fruits may not maintain quality after thawing.
What are common mistakes in food preservation?
Common mistakes include improper sterilization during canning, inadequate preparation before dehydrating, and overcrowding the freezer.
Further Reading
For more information on food preservation methods, consider exploring resources from reputable organizations such as the USDA and university extension services that focus on food safety and preservation techniques.
Authoritative Sources
USDA Food Safety and Inspection Service fsis.usda.gov
Provides comprehensive guidelines on food preservation methods, including canning and freezing
National Center for Home Food Preservation nchfp.uga.edu
Offers research-based information on preserving food at home, including techniques and recipes
Conclusion
Food preservation during emergencies is a critical skill that can significantly impact your access to safe and nutritious food. By understanding and employing methods such as canning, dehydrating, and freezing, you can effectively extend the shelf life of various foods. Prioritize proper techniques and equipment to ensure safety and quality, and remain aware of the limitations and common mistakes associated with each method. Taking proactive steps in food preservation not only safeguards your food supply but also prepares you for unexpected situations.
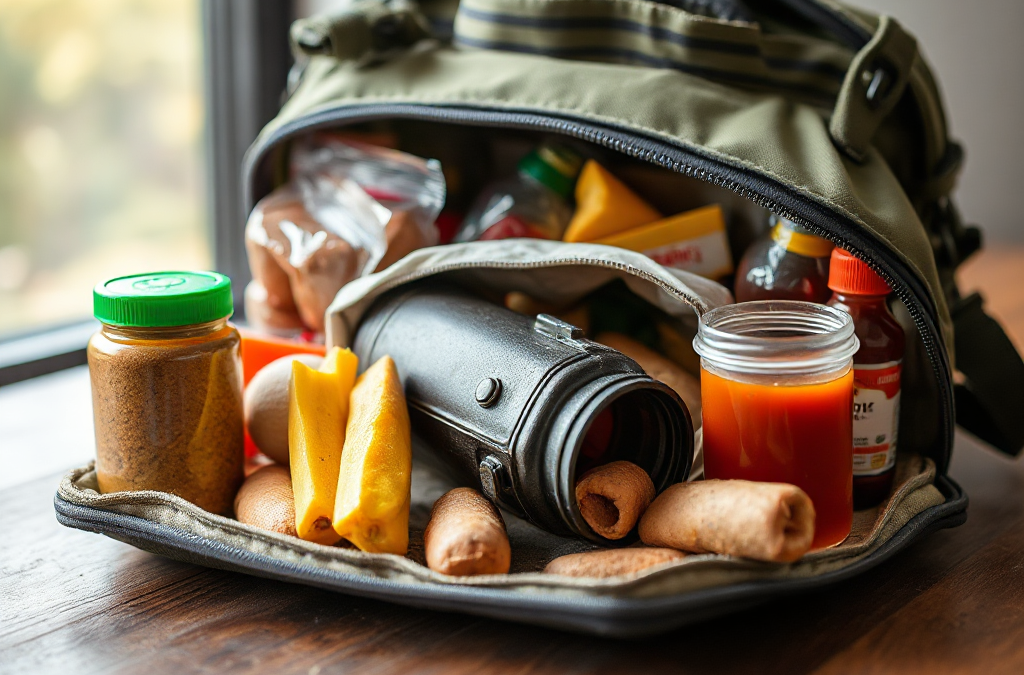
A bug out bag is a portable kit that contains the essential items one would need to survive for at least 72 hours during an emergency. The primary purpose is to ensure that you can evacuate quickly and safely, with necessary supplies readily available. Food is a critical component of these bags, as it provides the energy and nourishment needed to maintain physical and mental performance during stressful situations.
When selecting foods for your bug out bag, consider factors such as shelf life, weight, and preparation requirements. Foods that are lightweight, compact, and can be eaten without extensive cooking or preparation are ideal. This ensures that you can maintain mobility and efficiency in emergency scenarios.
Top Food Choices for Bug Out Bags
the best foods for a bug out bag, several categories stand out:
Freeze-Dried Meals: These meals are lightweight and can be rehydrated with water. They often come in a variety of flavors and are designed to provide balanced nutrition.
Canned Goods: Items like beans, vegetables, and meats are excellent choices due to their long shelf life and high calorie content. Make sure to include a can opener in your bag.
Energy Bars: Packed with carbohydrates and protein, energy bars are easy to carry and require no preparation. They make for a quick snack that can keep your energy up.
Dehydrated Fruits and Vegetables: These provide essential vitamins and can be eaten as snacks or added to meals. They are lightweight and have a long shelf life.
Nuts and Seeds: These are a great source of healthy fats and protein. They are compact and energy-dense, making them ideal for a bug out bag.
Jerky: Beef or turkey jerky is a high-protein option that is also lightweight and shelf-stable, making it a great addition to your supplies.
Choosing a variety of these foods will ensure that you have a balanced diet even when on the move.
Considerations for Food Storage
Proper storage of food in your bug out bag is crucial for ensuring its longevity and safety. Here are some key considerations:
Packaging: Choose foods that are vacuum sealed or in sturdy packaging to protect them from moisture and pests. Avoid items in fragile containers.
Temperature Control: Store your bug out bag in a cool, dry place to extend the shelf life of the food. Heat can degrade nutritional quality and spoilage.
Rotation: Regularly check and rotate the food supplies to ensure you use items before they expire. This practice helps maintain a fresh and effective bug out bag.
By following these guidelines, you can maximize the effectiveness of your food supplies in emergency situations.
Common Mistakes to Avoid
When assembling a bug out bag, it’s easy to make mistakes that can compromise your preparedness. Here are some common pitfalls to avoid:
Ignoring Dietary Restrictions: Always consider any food allergies or dietary restrictions of those who will be using the bag. Stocking foods that everyone can eat is essential.
Overpacking: While it’s important to have enough food, overpacking can lead to unnecessary weight. Prioritize lightweight, nutrient-dense options.
Neglecting Water Needs: Food is only one part of emergency preparedness. Ensure you have a reliable source of water or water purification methods included in your bag.
Avoiding these mistakes will enhance your readiness and ensure you are better equipped to handle an emergency.
Frequently Asked Questions
What types of food should I avoid in a bug out bag?
Avoid perishable foods that require refrigeration, as well as items high in sugar that can lead to energy crashes.
How often should I check my bug out bag supplies?
Check your supplies at least twice a year to ensure everything is still within its expiration date and in good condition.
Can I include homemade food in my bug out bag?
While it’s possible, homemade food typically lacks the shelf stability of commercial options, so it’s best to stick with commercially packaged items.
What is the best way to prepare food in an emergency?
In emergencies, food that requires minimal preparation, such as energy bars or canned goods, is ideal. If cooking is necessary, ensure you have portable cooking gear.
How much food should I pack in my bug out bag?
Aim for at least 1,200 to 2,000 calories per day per person, depending on activity levels and duration of the emergency.
Further Reading
Authoritative Sources
Ready.gov Preparedness Guidance ready.gov
Federal preparedness guidance for household planning, alerts, supplies, and emergencies
American Red Cross Emergency Preparedness redcross.org
Emergency preparedness resources for families, disasters, and practical safety planning
FEMA Preparedness Resources fema.gov
National preparedness resources for planning, mitigation, and response readiness
Conclusion
Having the right foods in your bug out bag is critical for maintaining energy and health during an emergency. Focus on lightweight, non-perishable items that require minimal preparation. Regularly check and rotate your supplies to ensure freshness. By being proactive and strategic about your food choices, you can significantly enhance your emergency preparedness.